Author: admin

  • Are Chick Fil A Fries Halal? Comprehensive Guide & FAQs

    Are Chick Fil A Fries Halal? Comprehensive Guide & FAQs

    of whether Chick-fil-A is renowned for its tasty menu, especially its waffle fries. But for Muslims adhering to halal dietary guidelines, the question arises: Are Chick Fil A fries halal? In this article, we’ll dive deep into the ingredients, cooking methods, and various perspectives to help you make an informed decision. Let’s explore the details step-by-step.

    Introduction to Are Chick Fil A Fries Halal?

    Introduction to Chick-fil-A’s Popularity

    Chick-fil-A is a beloved fast-food chain known for its delicious chicken sandwiches and iconic waffle fries. It’s a favorite among many for its taste and quality. However, for Muslims who follow halal dietary guidelines, a crucial question arises: Are Chick-fil-A fries halal? This article delves into this question, examining the ingredients, preparation methods, and different perspectives to help you make an informed decision.

    Explanation of What “Halal” Means

    Halal is an Arabic term meaning “permissible” and refers to what is allowed under Islamic law. In the context of food, halal signifies that the food is prepared following specific guidelines, including humane slaughtering of animals, the absence of forbidden substances, and preventing cross-contamination with non-halal items. Ensuring food is halal is essential for Muslims adhering to these dietary laws.

    Overview of Halal Certification

    To ensure food meets halal standards, many products undergo a certification process by recognized Islamic authorities. This rigorous process includes verifying the ingredients, preparation methods, and overall handling of the food items. Halal certification guarantees that the food complies with Islamic dietary laws, providing peace of mind for consumers​​.

    Chick-fil-A’s Position on Halal Certification

    Chick-fil-A has not obtained halal certification for its products in the US and Canada. This lack of certification means there is no official guarantee that any of their menu items, including the fries, meet halal standards. While Chick-fil-A strives to satisfy its diverse customer base, it has not tailored its menu to meet all dietary preferences, including halal​.

    Are Chick-fil-A Fries Halal?

    To determine it, it is essential to examine their ingredients and preparation methods. While the fries themselves might not contain any explicitly haram (forbidden) ingredients, the potential for cross-contamination during cooking raises significant concerns for those who strictly follow halal dietary laws. Therefore, understanding the detailed processes involved is crucial to answering the question​.

    Chick-fil-A’s General Halal Status

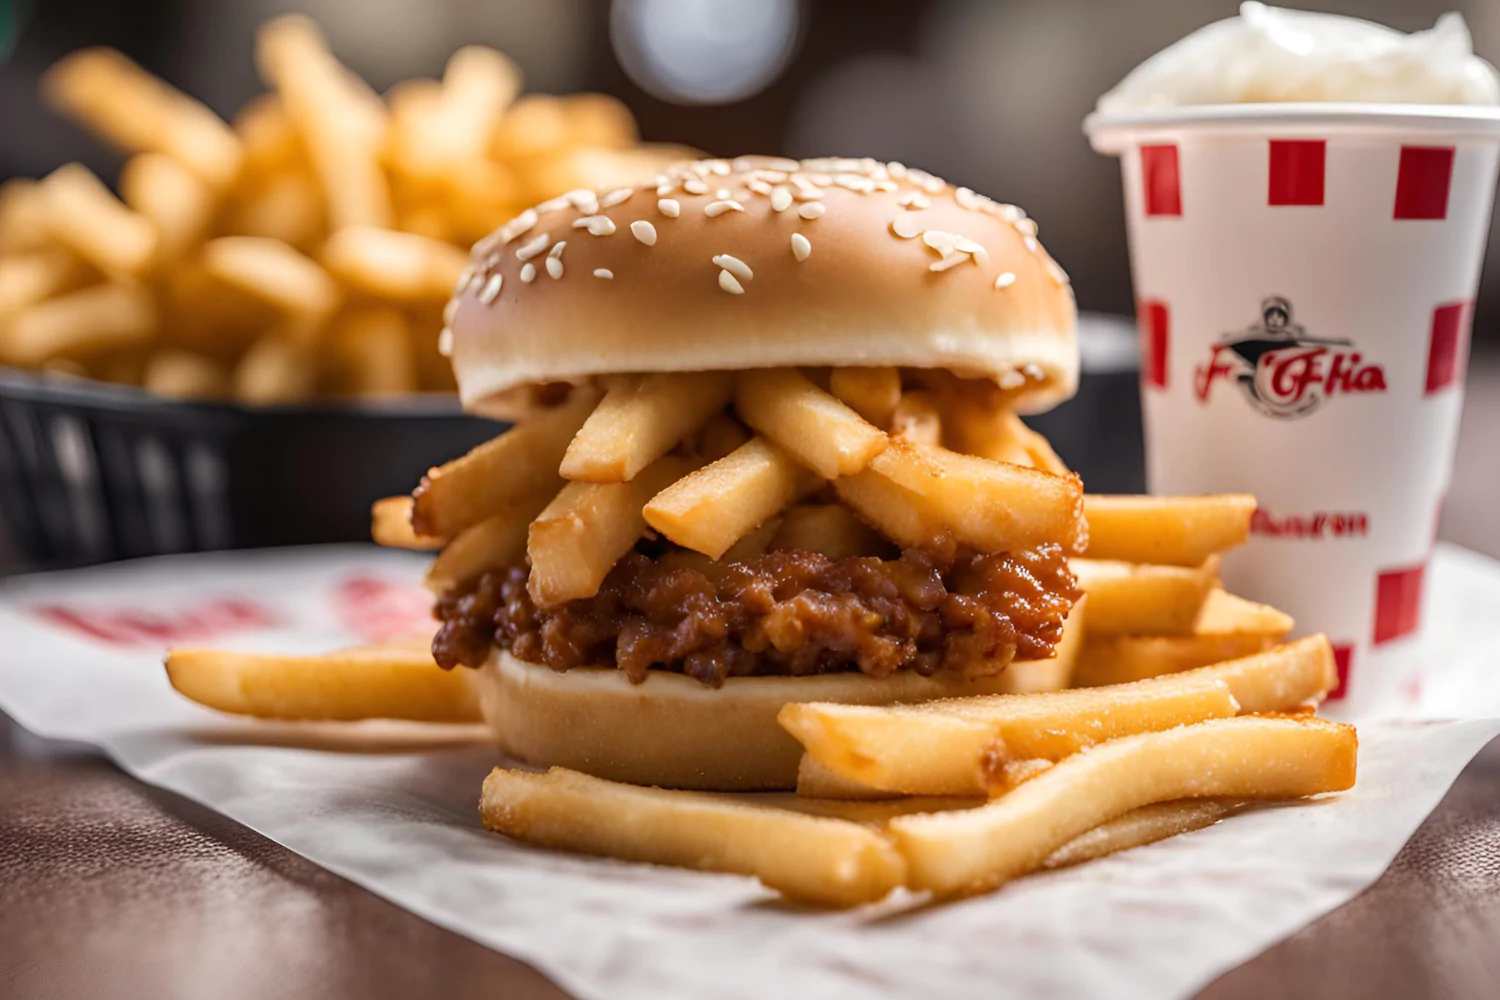
    are chick fil a fries halal

    Overview of Halal Certification

    Halal certification is a meticulous process ensuring that food products comply with Islamic dietary laws. This involves verifying the ingredients, preparation methods, and overall handling of food items. For food to be considered halal, it must be free from haram (forbidden) substances, and animals must be slaughtered according to Islamic guidelines. Certification is typically granted by recognized Islamic authorities who inspect and verify these practices to ensure compliance​.

    Chick-fil-A’s Position on Halal Certification

    Chick-fil-A has not obtained halal certification for its products in the US and Canada. This lack of certification means that there is no official guarantee that any of their menu items, including the fries, adhere to halal standards. Chick-fil-A has expressed their dedication to customer satisfaction but has noted that catering to all dietary preferences is challenging due to their diverse customer base​.

    Focus on Chick-fil-A Fries

    Are Chick-fil-A Fries Halal?

    When considering whether Chick-fil-A fries are halal, it’s important to examine the ingredients and preparation methods. While the fries themselves might not contain any explicitly haram ingredients, the potential for cross-contamination during cooking poses a significant concern for strict halal adherence. Ingredients and cooking practices must align with halal guidelines to ensure compliance​.

    Cooking Methods and Cross-Contamination Concerns

    Chick-fil-A’s fries are cooked in canola oil and seasoned with a unique blend of spices. Although they are cooked separately from breaded chicken products, the use of shared equipment and surfaces can lead to cross-contamination. This means that even if the fries do not directly contain haram ingredients, they may still come into contact with non-halal substances, making them unsuitable for those who strictly follow halal dietary laws​ (Halal In Islam)​.

    Detailed Ingredient Analysis

    Ingredients in Chick-fil-A Fries

    Chick-fil-A fries are made from potatoes and cooked in canola oil. They are then seasoned with a blend of spices that includes salt, dextrose, and natural flavors. However, some additives and flavorings may contain milk derivatives or other non-halal components. For instance, certain flavorings might use animal-derived enzymes, which are not permissible under halal guidelines​ (Halal In Islam)​.

    Alternative Perspectives

    Different Views on Consuming Chick-fil-A Fries

    There are varied opinions among Islamic scholars on the permissibility of consuming Chick-fil-A fries. Some argue that since the primary ingredients are halal, the fries can be considered permissible, especially if there is no direct contamination. Others caution against consuming them due to the lack of explicit halal certification and the potential for cross-contamination. The decision often depends on individual interpretations of halal dietary laws and personal levels of strictness​​.

    Part 6: Halal Alternatives and Recommendations

    Halal Alternatives to Chick-fil-A Fries

    For those seeking halal alternatives, many fast-food chains offer certified halal fries. Restaurants dedicated to halal cuisine ensure their food meets Islamic dietary laws, providing peace of mind for Muslim consumers. Exploring these options can lead to enjoyable and worry-free dining experiences. Here are some helpful resources:

    Understanding Why Chick-fil-A Fries Are Not Halal
    are chick fil a fries halal

    Are Chick-fil-A Fries Halal? Key Factors to Consider

    To determine that, it’s crucial to understand the factors that influence their halal status. This involves looking at both the ingredients and the cooking methods. Despite their simplicity, the preparation of these fries includes several elements that may not align with halal guidelines.

    Key Ingredients in Chick-fil-A Fries

    The ingredients list of Chick-fil-A fries includes potatoes, canola oil, and a special seasoning blend. While potatoes and canola oil are typically halal, the seasoning blend may contain additives that are not. For example, some flavorings might include milk derivatives or other substances that are not permissible under halal dietary laws​​. Thus, the question, of are Chick-fil-A fries are halal, largely depends on these hidden ingredients.

    Cooking Methods and Cross-Contamination Risks

    Chick-fil-A fries are cooked in canola oil, often in fryers that might also be used for non-halal items. The risk of cross-contamination is significant because the same oil could be used for cooking chicken or other products that do not meet halal standards. This shared cooking environment is a major factor in determining if chick-fil-a fries are halal (Halal In Islam)​.

    Perspectives from Islamic Scholars

    Opinions among Islamic scholars vary regarding the consumption of Chick-fil-A fries. Some scholars believe that since the primary ingredients are halal, the fries could be permissible if there is no direct contamination. However, others argue that the lack of explicit halal certification and the potential for cross-contamination make it safer to avoid these fries.

    Consumer Inquiries and Responses

    Are Chick-fil-A Fries Halal? Customer Experiences and Inquiries

    Many customers have raised the question, are Chick-fil-A fries halal, directly to the company. These inquiries typically seek clarity on the ingredients and cooking methods to determine if the fries meet halal standards.

    Responses from Chick-fil-A

    When customers inquire about the halal status of their fries, Chick-fil-A often responds by emphasizing their commitment to quality and customer satisfaction. However, they also note the complexity of catering to all dietary preferences. Chick-fil-A has stated that while they strive to meet diverse needs, their products, including the fries, are not certified halal​​.

    Customer Reviews and Feedback

    Online reviews and forums are filled with discussions about whether are Chick-fil-A fries halal. Many Muslim customers share their experiences and personal decisions regarding the fries. Some choose to consume them based on the primary ingredients being halal, while others avoid them due to the potential for cross-contamination and lack of certification​.

    Company Policies and Transparency

    Are Chick-fil-A Fries Halal? Exploring Company Policies

    When asking are Chick-fil-A fries halal, it’s important to consider the company’s policies and their approach to dietary restrictions. Chick-fil-A is known for its commitment to quality and customer service. However, their policy on halal certification is clear—they do not currently offer halal-certified products in the United States and Canada.

    Transparency in Ingredient Disclosure

    Chick-fil-A provides detailed information about the ingredients in their menu items on their website. This transparency allows customers to make informed decisions about what they eat. Despite this openness, the absence of halal certification and the potential for cross-contamination in shared cooking environments remain significant concerns for those questioning whether Chick-fil-A fries are halal​​.

    Communication with Customers

    Chick-fil-A encourages customers with specific dietary needs to reach out to their local restaurants for more information. Although they do not have a uniform policy for halal food, individual franchises may offer more details about their cooking processes and ingredient sourcing. This communication is crucial for customers seeking to understand whether chick-fil-a fries are halal.

    Conclusion: Evaluating Policies for Halal Compliance

    In conclusion, while Chick-fil-A is transparent about their ingredients, the lack of halal certification and the potential for cross-contamination mean their fries do not meet strict halal guidelines. For those adhering to halal dietary laws, it is best to seek alternative dining options or contact local Islamic authorities for guidance on this matter.

    Impact on Muslim Communities

    Are Chick-fil-A Fries Halal? Community Reactions

    The question, has sparked various reactions within Muslim communities. Many individuals and groups have voiced their concerns and opinions on social media, blogs, and forums, sharing their experiences and decisions regarding Chick-fil-A’s menu items.

    Community Perspectives and Discussions

    In numerous online discussions, community members debate the halal status of Chick-fil-A fries. Some Muslims choose to consume the fries, believing that the primary ingredients are halal, especially if there is no direct evidence of contamination. Others strictly avoid them due to the lack of halal certification and the risk of cross-contamination during cooking​.

    Grassroots Efforts for Halal Options

    Some Muslim communities have initiated grassroots efforts to encourage more fast-food chains, including Chick-fil-A, to offer halal options. These efforts include petitions, social media campaigns, and direct communication with the company’s corporate offices. The goal is to make halal-certified menu items more accessible to the growing Muslim population in North America.

    Conclusion: Understanding Community Impact

    In conclusion, the inquiry are Chick-fil-A fries halal has significant implications for Muslim communities. The varied responses highlight the need for greater transparency and potentially expanded menu options to accommodate diverse dietary needs. Until then, Muslims adhering to halal dietary laws may prefer to choose establishments with verified halal certifications.

    Ethical Considerations and Corporate Responsibility
    are chick fil a fries halal

    Are Chick-fil-A Fries Halal? Ethical Implications

    The question, of are Chick-fil-A fries halal, extends beyond dietary guidelines into the realm of ethics and corporate responsibility. Companies have a duty to consider the diverse needs of their customer base, including religious dietary requirements. This part explores the ethical implications of Chick-fil-A’s current stance on halal certification and the broader impact on its Muslim customers.

    Corporate Responsibility in Catering to Dietary Needs

    In today’s diverse society, many businesses strive to accommodate various dietary needs, including vegetarian, vegan, gluten-free, and halal options. Chick-fil-A’s decision not to pursue halal certification can be seen as a missed opportunity to be more inclusive. Providing halal options would not only expand their customer base but also demonstrate a commitment to serving a broader community​​.

    The Role of Consumer Advocacy

    Consumer advocacy plays a crucial role in encouraging companies to adopt more inclusive practices. For instance, petitions and social media campaigns have successfully prompted other fast-food chains to introduce halal-certified options. These grassroots efforts highlight the power of collective consumer voices in driving change and can be instrumental in addressing the question, are Chick-fil-A fries halal​.

    Conclusion: Balancing Ethics and Business Practices

    In conclusion, the discussion about the main question touches on important ethical considerations. By recognizing the dietary needs of Muslim customers and considering halal certification, Chick-fil-A could take a significant step towards greater inclusivity and corporate responsibility. As consumers continue to advocate for their dietary requirements, it will be interesting to see how companies respond to these demands in the future.

    FAQs

    Frequently Asked Questions

    Q1: Are Chick-fil-A’s waffle-cut fries halal?
    No, due to potential cross-contamination and non-halal ingredients​​.

    Q2: Are Chick-fil-A’s fries cooked separately from non-halal items?
    No, they are cooked in shared fryers​​.

    Q3: Does Chick-fil-A offer any halal alternatives for their fries?
    No, currently there are no halal-certified options available​​.

    Q4: How can I know if a Chick-fil-A restaurant offers halal fries?
    It is best to contact the local franchise for updates​​.

    Q5: What ingredient makes Chick-fil-A fries non-halal?
    The seasoning may contain non-halal ingredients like milk derivatives​.

    Q6: Are there any plans for Chick-fil-A to introduce halal fries in the future?
    There have been no announced plans as of now​.

    Conclusion: Are Chick-fil-A Fries Halal?

    Summary and Final Thoughts

    In conclusion, while Chick-fil-A’s waffle fries are a popular choice, they do not meet halal guidelines due to the risk of cross-contamination and the presence of non-halal ingredients. For those adhering to halal dietary laws, seeking alternatives at halal-certified establishments is advisable.

    This detailed and comprehensive exploration should help you make an informed decision about consuming Chick-fil-A fries. Remember, it’s always best to verify with local Islamic authorities if you have any doubts.
  • How Long to Smoke a Meatloaf at 225? | Complete Guide & Tips

    How Long to Smoke a Meatloaf at 225? | Complete Guide & Tips

    Smoking a meatloaf at 225°F is an enjoyable and rewarding culinary adventure. This guide will answer the crucial question: how long to smoke a meatloaf at 225? We’ll walk you through every step of the process, from selecting ingredients to serving a perfectly smoked meatloaf. Whether you’re a novice or an expert, you’ll find valuable tips, variations, and answers to common questions. Let’s get started with the basics and move through the process part by part.

    Introduction to How Long to Smoke a Meatloaf at 225

    Smoking a meatloaf at 225°F is a delightful way to elevate this classic comfort food. The low and slow cooking process infuses the meat with a smoky flavor that’s hard to beat. Additionally, it is a fantastic method to dazzle your loved ones during your upcoming get-together.

    Why Smoke Meatloaf at 225°F?

    Smoking meatloaf at 225°F ensures even cooking and allows the flavors to meld beautifully. This temperature is ideal for breaking down the fats and proteins in the meat, resulting in a juicy, tender loaf that’s bursting with flavor. It’s also low enough to prevent the meatloaf from drying out, which can be a common issue with higher cooking temperatures.

    Essential Tips for Smoking Meatloaf

    Before we dive into the specifics, here are a few essential tips to keep in mind:

    • Use a Meat Thermometer: Always use a meat thermometer to check the internal temperature of the meatloaf. You’re aiming for an internal temperature of 160°F for safety.
    • Choose Your Wood Wisely: Different woods impart different flavors. Hickory and applewood are popular choices for meatloaf, providing a robust and slightly sweet smoky flavor.
    • Don’t Rush the Process: Smoking is all about patience. Let the meatloaf cook slowly to achieve the best results.

    With these basics in mind, you’re ready to start preparing your ingredients.

    How Long to Smoke a Meatloaf at 225

    Understanding how long to smoke a meatloaf at 225 is crucial for achieving the perfect texture and flavor. The smoking time depends largely on the size of the meatloaf and the consistency of your smoker’s temperature.

    General Smoking Times Based on Size:

    • 1 Pound Meatloaf: Takes about 1.5 hours to smoke at 225°F.
    • 2 Pound Meatloaf: Approximately 3 hours at 225°F.
    • 3 Pound Meatloaf: Requires around 4-4.5 hours at 225°F.
    • 4 Pound Meatloaf: Needs about 6 hours to smoke at 225°F.

    Monitoring Internal Temperature

    While knowing how long to smoke a meatloaf at 225 provides a good guideline, it’s essential to monitor the internal temperature to ensure the meatloaf is cooked safely and to perfection.

    • Use a Meat Thermometer: Insert a meat thermometer into the thickest part of the meatloaf. You’re aiming for an internal temperature of 160°F.
    • Check Periodically: Begin checking the temperature after the recommended time for your meatloaf’s size. Continue to check every 30 minutes until it reaches the desired internal temperature.

    Factors Affecting Smoking Time

    Several factors can influence how long to smoke a meatloaf at 225:

    • Smoker Consistency: If your smoker doesn’t maintain a steady temperature, the cooking time can vary. Always strive to keep the temperature consistent at 225°F.
    • Meatloaf Composition: The ratio of beef to pork, added vegetables, and binders like breadcrumbs or oats can affect the smoking time.
    • Weather Conditions: Smoking on a cold or windy day may increase cooking time, while a calm, warm day can maintain more consistent temperatures.

    Resting the Meatloaf

    After smoking, let the meatloaf rest for about 10-15 minutes before slicing. By allowing the liquids to redistribute throughout this resting period, each slice is guaranteed to be moist and tasty.

    The Smoking Process

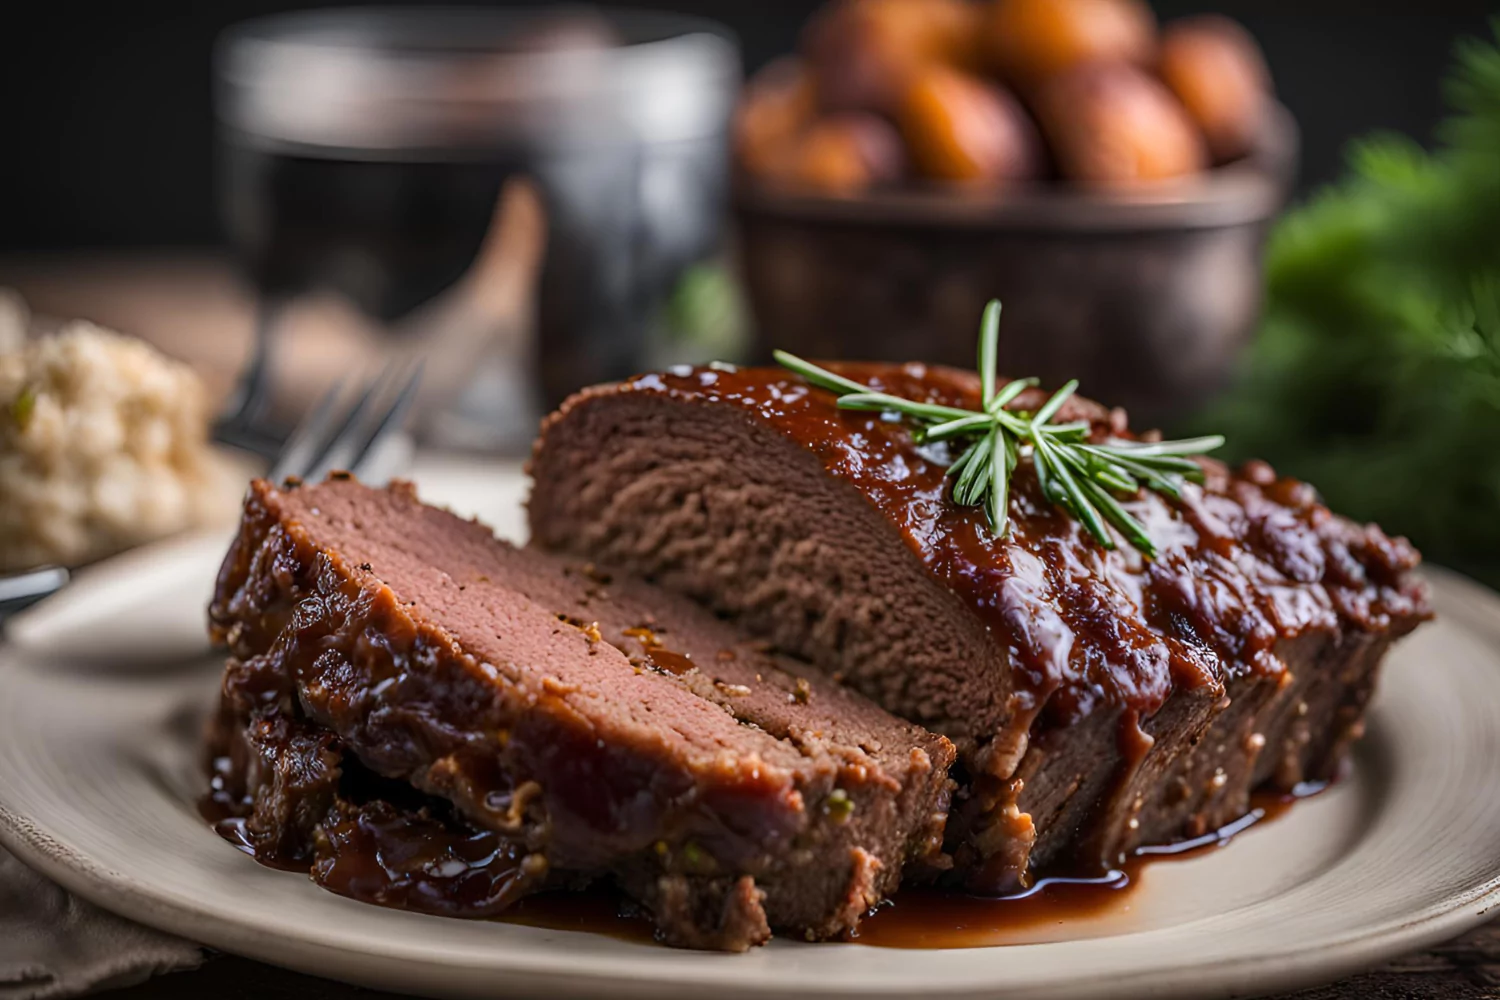
    how long to smoke a meatloaf at 225

    Preheating the Smoker

    Before placing the meatloaf in the smoker, it’s crucial to preheat it to 225°F. This guarantees consistent cooking from the beginning. Preheating your smoker also allows the wood chips or chunks to begin releasing their smoky flavor.

    Steps to Preheat the Smoker:

    1. Select Your Wood: Choose hickory or applewood for a balanced, aromatic flavor. Hickory gives a robust, smoky taste, while applewood adds a sweet, fruity note.
    2. Load the Smoker: Fill the smoker’s wood chip tray or place wood chunks in the smoker box. Ensure there’s enough wood to last the entire smoking process.
    3. Set the Temperature: Adjust the smoker’s settings to 225°F. Allow it to preheat for at least 15-20 minutes. Make sure the smoker maintains a consistent temperature before placing the meatloaf inside.

    Smoking Times and Temperatures

    The smoking time varies depending on the size of your meatloaf. Here’s a breakdown of smoking times for different weights:

    • 1 Pound Meatloaf: Takes about 1.5 hours to smoke at 225°F.
    • 2 Pound Meatloaf: Approximately 3 hours at 225°F.
    • 3 Pound Meatloaf: Requires around 4-4.5 hours at 225°F.
    • 4 Pound Meatloaf: Needs about 6 hours to smoke at 225°F.

    Monitoring Internal Temperature:

    • Use a Meat Thermometer: Insert a thermometer probe into the thickest part of the meatloaf.
    • Target Temperature: Aim for an internal temperature of 160°F. This ensures the meat is safely cooked while remaining juicy.
    • Check Periodically: Monitor the temperature every 30 minutes. Avoid opening the smoker too often to maintain consistent heat and smoke.

    How to Maintain Smoker Temperature

    Maintaining a steady 225°F is essential for a perfectly smoked meatloaf. Here are some tips to keep the temperature consistent:

    • Adjust the Vents: Control the airflow by adjusting the smoker’s vents. More airflow increases the temperature, while less airflow lowers it.
    • Add Wood as Needed: Replenish wood chips or chunks regularly to keep the smoke flowing. Check the wood every hour and add more if necessary.
    • Monitor Fuel Levels: Ensure your fuel source (charcoal, pellets, or propane) is sufficient for the entire smoking duration.

    For a detailed guide on using a meat thermometer, check out this meat thermometer guide.

    Applying the Glaze and Finishing Touches

    how long to smoke a meatloaf at 225

    Applying the Glaze

    Adding a glaze during the final stages of smoking enhances the meatloaf’s flavor and gives it a beautiful, caramelized finish.

    When to Apply the Glaze:

    • Timing: Apply the glaze during the last 30 minutes of smoking. This allows it to set without burning.
    • How to Apply: Use a brush to coat the meatloaf evenly. Be generous with the glaze for a rich, flavorful crust.

    Types of Glazes:

    • Sweet Glaze: Combine ketchup, brown sugar, and apple cider vinegar.
    • Tangy Glaze: Mix ketchup, Worcestershire sauce, and a dash of mustard.
    • Spicy Glaze: Add hot sauce or chili flakes to your favorite glaze recipe.

    Resting and Serving the Meatloaf

    After smoking, let the meatloaf rest to allow the juices to redistribute. This step is crucial for a juicy and flavorful meatloaf.

    Resting Steps:

    1. Remove from Smoker: Carefully take the meatloaf out and place it on a cutting board.
    2. Cover with Foil: Loosely tent the meatloaf with aluminum foil. This helps retain heat without making the crust soggy.
    3. Rest Time: Let it rest for 10-15 minutes. This waiting period ensures every bite is moist and delicious.

    Serving Suggestions:

    • Slicing: Use a sharp knife to cut the meatloaf into even slices. Aim for about 1-inch thick pieces for the best texture.
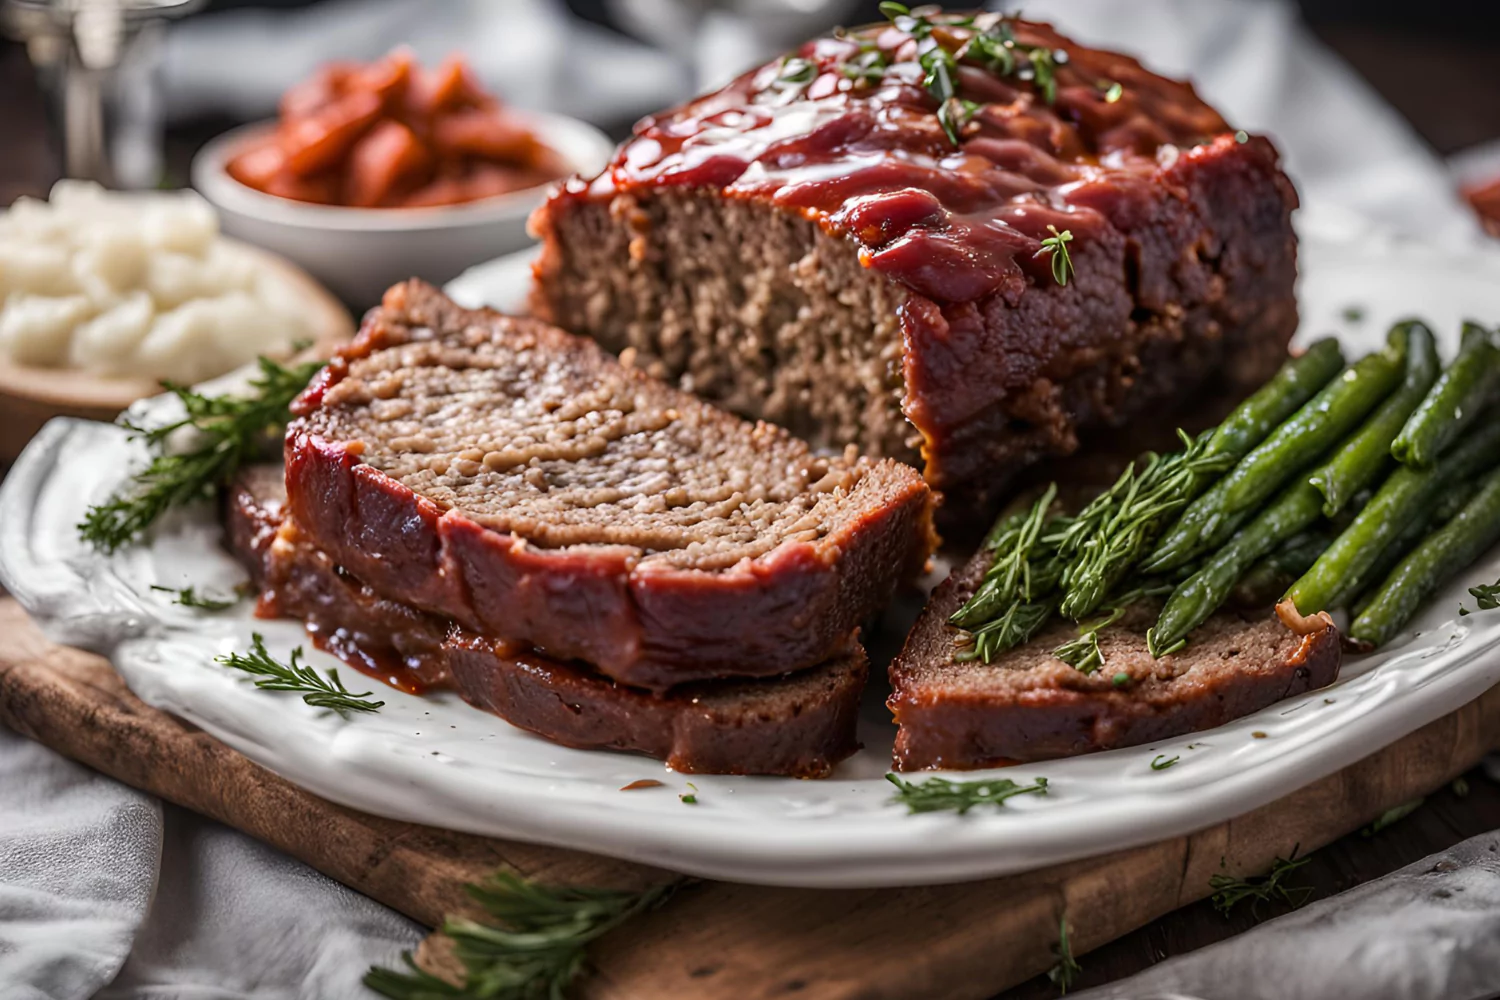
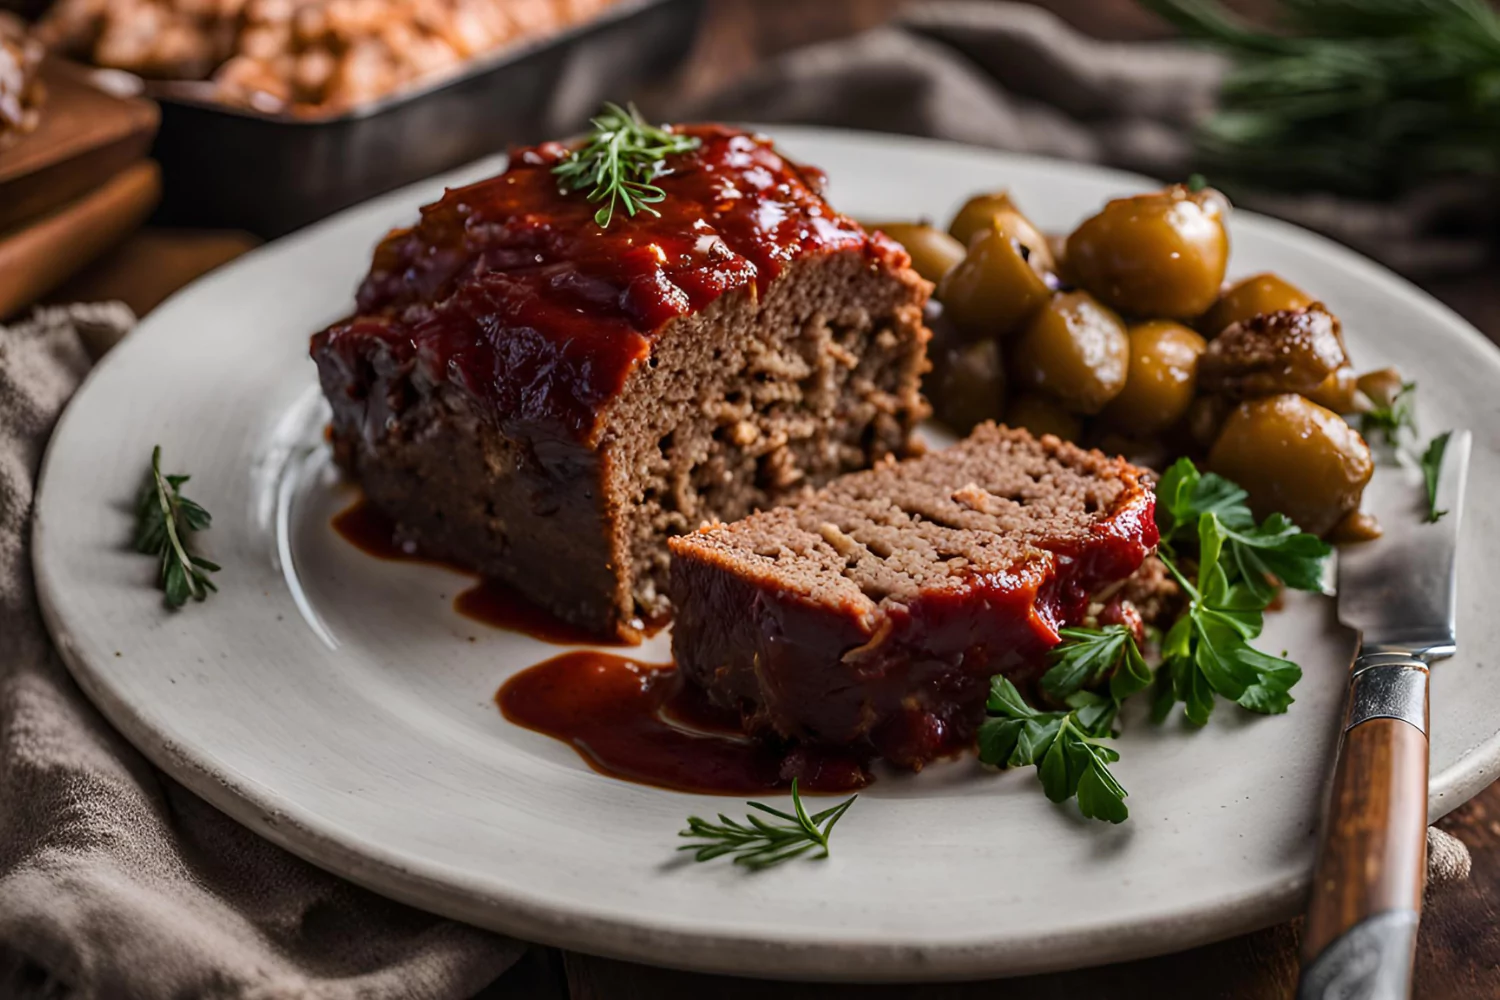
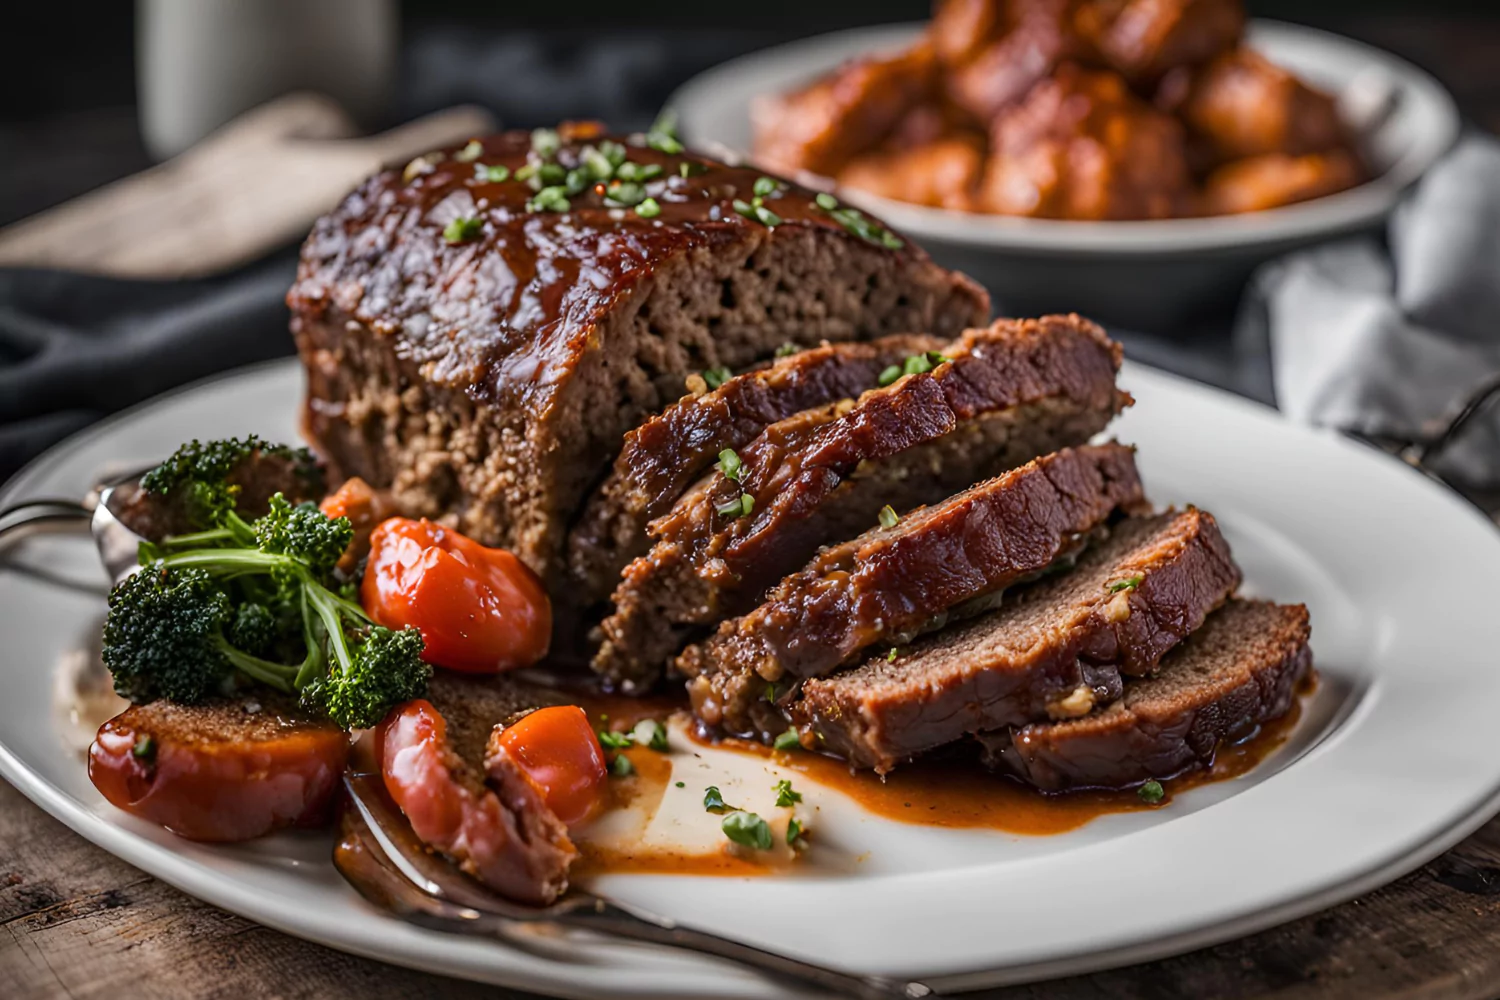
    • Accompaniments: Serve with mashed potatoes, green beans, or a fresh salad. A dollop of extra glaze on the side makes a tasty addition.

    Smoked Meatloaf Variations and Common Mistakes

    Smoked Meatloaf Variations

    Smoking meatloaf offers a versatile canvas for creativity. You can tailor the recipe to suit dietary preferences or experiment with different flavors to keep things interesting.

    Dairy-Free Meatloaf

    • Ingredients: Substitute heavy cream with dairy-free cream or coconut milk.
    • Flavor Profile: The result is a rich and creamy texture without the dairy, perfect for lactose-intolerant guests.

    Vegetable-Enhanced Meatloaf

    • Additions: Incorporate finely chopped bell peppers, onions, carrots, or zucchini into the meat mixture.
    • Benefits: Vegetables add moisture, flavor, and a nutritional boost, making the meatloaf both hearty and healthy.

    Sweeter Glaze Variation

    • Ingredients: Replace apple cider vinegar with apple juice in the glaze for a sweeter finish.
    • Taste: This variation provides a delightful contrast between the savory meatloaf and the sweet glaze.

    Gluten-Free Meatloaf

    • Substitutes: Use gluten-free breadcrumbs or oats instead of regular breadcrumbs.
    • Tip: Ensure all other ingredients, like sauces and seasonings, are also gluten-free to avoid cross-contamination.

    Common Mistakes to Avoid

    While smoking meatloaf is relatively straightforward, there are a few common pitfalls to watch out for:

    Overmixing the Meat

    • Issue: Overworking the meat mixture can lead to a tough and dense meatloaf.
    • Solution: Mix the ingredients just until combined. Use your hands for the best results.

    Insufficient Binders

    • Issue: Without enough binders, the meatloaf can fall apart during smoking.
    • Solution: Ensure you use adequate breadcrumbs or oats and eggs to hold the mixture together.

    Inconsistent Smoker Temperature

    • Issue: Fluctuating temperatures can cause uneven cooking and affect the final texture.
    • Solution: Monitor the smoker temperature regularly. Use a smoker with a reliable thermostat or an external thermometer for accuracy.

    Skipping the Resting Period

    • Issue: Slicing the meatloaf immediately after smoking can cause the juices to run out, resulting in a dry meatloaf.
    • Solution: Let the meatloaf rest for at least 10-15 minutes before slicing.

    Final Thoughts and Recommendations

    how long to smoke a meatloaf at 225

    Final Thoughts on Smoking Meatloaf at 225°F

    Smoking a meatloaf at 225°F is a fantastic way to transform a traditional dish into a flavorful, smoky delight. By following the steps outlined in this guide, you can achieve a perfectly smoked meatloaf that’s juicy, tender, and bursting with flavor.

    Key Takeaways:

    • Patience is Key: Smoking meatloaf is a slow process, but the results are well worth the wait.
    • Consistent Temperature: Maintaining a steady 225°F ensures even cooking and optimal flavor infusion.
    • Use a Thermometer: Always check the internal temperature to ensure the meatloaf is cooked to perfection.
    • Experiment with Flavors: Don’t be afraid to try different woods, glazes, and meat blends to find your perfect combination.

    Recommendations for Best Results

    Here are some additional tips and recommendations to help you make the most of your smoked meatloaf:

    1. Invest in Quality Equipment:

    • A reliable smoker and a good meat thermometer are essential tools for smoking meatloaf. Consider investing in these if you plan to smoke meatloaf or other meats regularly.

    2. Plan Ahead:

    • Smoking meatloaf is a time-consuming process. Ensure you have enough time set aside for preheating, smoking, and resting the meatloaf. It’s a great weekend project or a special treat for family gatherings.

    3. Try Different Wood Types:

    • Each type of wood adds a unique flavor to the meat. Experiment with different woods like hickory, applewood, and mesquite to discover your favorite.

    4. Customize Your Recipe:

    • Feel free to add your personal touch to the meatloaf recipe. Whether it’s adding your favorite herbs, trying a new glaze, or incorporating different types of meat, customization can make the dish uniquely yours.

    5. Share Your Creations:

    • Smoked meatloaf is a dish meant to be shared. Invite friends and family over to enjoy your creation, and don’t forget to share your tips and tricks with fellow barbecue enthusiasts.

    Frequently Asked Questions (FAQs)

    When it comes to smoking meatloaf, several common questions arise. Here are the answers to help you achieve the best results.

    How do I keep the meatloaf from falling apart on the smoker?

    • Answer: Use binders such as eggs, breadcrumbs, or oats. These ingredients help hold the meat mixture together during cooking.

    Can I glaze the meatloaf while it’s smoking?

    • Answer: Yes, apply the glaze during the last 30 minutes of smoking. This allows the glaze to set and develop a caramelized crust without burning.

    Should I preheat the smoker before adding the meatloaf?

    • Answer: Absolutely. Preheating the smoker to 225°F ensures even cooking and allows the meat to absorb the smoky flavor from the start.

    Can I use wood chips or chunks for smoking the meatloaf?

    • Answer: Yes, both wood chips and chunks are suitable. Popular choices include hickory, applewood, and mesquite for a rich, aromatic flavor.

    How often should I check the temperature of the smoker?

    • Answer: Monitor the temperature regularly, especially in the first hour. After that, check it every hour to maintain a consistent 225°F.

    Do I need to let the meatloaf rest after smoking?

    • Answer: Yes, let the meatloaf rest for 10-15 minutes. This resting period allows the juices to redistribute, resulting in a juicier meatloaf.

    How can I use a meat thermometer to check the doneness of the meatloaf?

    • Answer: Definitely. Place a meat thermometer in the meatloaf’s thickest area. It should read 160°F when the meatloaf is done.

    Can I freeze smoked meatloaf?

    • Answer: Yes, you can freeze it for future meals. Let the meatloaf cool completely, then wrap it tightly in plastic wrap and aluminum foil. Store in the freezer for up to 3 months.

    Can I add vegetables to the meatloaf mixture before smoking?

    • Answer: Yes, adding finely chopped vegetables like onions, peppers, and mushrooms can enhance the flavor and moisture of the meatloaf.

    Conclusion of How Long to Smoke a Meatloaf at 225

    Smoking a meatloaf at 225°F is an enjoyable and rewarding culinary adventure. This guide has covered everything from selecting ingredients and prepping the meatloaf to the smoking process and final touches. By following these steps, you can answer the key question: how long to smoke a meatloaf at 225? and create a delicious smoked meatloaf that will impress your family and friends. For more information check out here.

  • How Long to Smoke Meatloaf? Tips for Perfect Results

    How Long to Smoke Meatloaf? Tips for Perfect Results

    Smoking meatloaf is a delicious twist on a classic comfort food, adding a rich, smoky flavor that elevates this dish to a whole new level. Whether you’re a seasoned BBQ enthusiast or a home cook looking to try something new, understanding how long to smoke meatloaf is crucial for achieving that perfect balance of flavor and tenderness. In this comprehensive guide, we’ll walk you through every step of the smoking process, from selecting the right ingredients to serving up a mouth-watering smoked meatloaf. We’ll also explore different smoking techniques, essential tools, and troubleshooting tips to ensure your meatloaf turns out perfect every time. Let’s dive in!

    Introduction to Smoking Meatloaf

    Introduction to Smoking Meatloaf

    Smoking meatloaf is a fantastic way to elevate a classic dish with rich, smoky flavors. But one of the most common questions for beginners and even seasoned cooks is, how long to smoke meatloaf? Understanding the optimal smoking time is crucial to achieving a perfectly cooked, flavorful meatloaf. The smoking process not only cooks the meatloaf but also infuses it with a depth of flavor that traditional baking simply can’t match.

    What is Smoked Meatloaf?

    Smoking meatloaf involves cooking it at a low temperature over a long period, using wood smoke to enhance its flavor. The result is a tender, juicy meatloaf with a deliciously smoky crust. This method is ideal for those who love BBQ and want to try something different with their meatloaf.

    Why Smoke Meatloaf?

    Smoking meatloaf adds a unique flavor profile that’s hard to achieve with other cooking methods. The slow cooking process allows the meat to absorb the smoky essence, resulting in a dish that’s both rich and complex. Plus, the low and slow method helps retain moisture, ensuring your meatloaf is juicy and flavorful.

    Flavor Profiles and Ingredients

    When preparing your smoked meatloaf, you can get creative with the ingredients. Traditional ground beef can be mixed with pork, turkey, or even lamb for a varied taste. Adding binders like breadcrumbs and eggs helps maintain the meatloaf’s structure, while spices and herbs enhance the overall flavor. Consider incorporating vegetables, cheese, or even bacon for extra texture and taste.

    Choosing Your Ingredients

    • Ground Meat Options: Ground beef, pork, turkey, or a combination.
    • Binders and Fillers: Breadcrumbs, oats, eggs, and milk.
    • Seasonings and Spices: Garlic, onion, paprika, salt, and pepper.

    Equipment and Tools Needed

    • Types of Smokers: Pellet, electric, charcoal.
    • Essential Tools: Meat thermometer, wood chips or pellets.
    • Wood Selection: Hickory, oak, apple, or cherry for varied smoky flavors.

    Understanding how long to smoke meatloaf and mastering the preparation and smoking process can turn this classic dish into a showstopper. In the next section, we’ll dive into the detailed steps of preparing your meatloaf mixture for smoking.

    Preparing the Meatloaf

    How long to smoke meatloaf

    Ingredients and Preparation

    To start, gather your ingredients. Here’s a basic list to get you going:

    • 2 pounds ground beef
    • 1 pound ground pork
    • 1 cup breadcrumbs
    • 2 eggs, lightly beaten
    • 1 onion, finely chopped
    • 2 cloves garlic, minced
    • 1/2 cup milk
    • Salt and pepper to taste
    • Optional: shredded cheese, diced bell peppers, bacon strips

    First, mix the ground beef and pork in a large bowl. Add the breadcrumbs, eggs, chopped onion, garlic, milk, salt, and pepper. Mix gently to combine without overworking the meat, which can make it tough. If you’re adding cheese or vegetables, incorporate them at this stage.

    Shape the mixture into a loaf and place it on a tray or directly onto the smoker rack. If you prefer a bacon-wrapped meatloaf, lay strips of bacon over the top, tucking the ends underneath.

    Smoking Techniques

    Setting Up the Smoker

    Before you start smoking, it’s important to set up your smoker correctly. You can use various types of smokers such as pellet, electric, or charcoal. Choose your wood chips or pellets based on the flavor you prefer. Stronger woods like oak and mesquite add robust flavors, while fruit woods like apple and cherry offer a milder taste. For a deeper understanding of the chemistry of smoke and its impact on flavor, check out this Science of BBQ guide.

    Smoking Time and Temperature

    The smoking temperature for meatloaf should ideally be between 225°F and 250°F. Here’s a general guideline for smoking times based on the size of your meatloaf:

    • 2-pound meatloaf: Approximately 2-3 hours
    • 3-pound meatloaf: Approximately 3-4 hours
    • 4-pound meatloaf: Approximately 4-4.5 hours

    Keep a close eye on the internal temperature, aiming for 160°F in the center of the loaf. Always use a reliable meat thermometer to check this.

    Monitoring and Checking

    Using a Meat Thermometer

    Using a meat thermometer is essential to ensure your meatloaf is cooked to perfection. Place the thermometer in the meatloaf’s center. When it reads 160°F, your meatloaf is done. Wireless or meat probes can be particularly handy for monitoring without opening the smoker too often.

    Checking Doneness

    Beyond just temperature, visual cues can help determine if your meatloaf is ready. The outer crust should be firm and slightly crisp, while the inside remains juicy. Allow the meatloaf to rest for about 10 minutes before slicing to retain moisture.

    Enhancing Flavor

    Glazing the Meatloaf

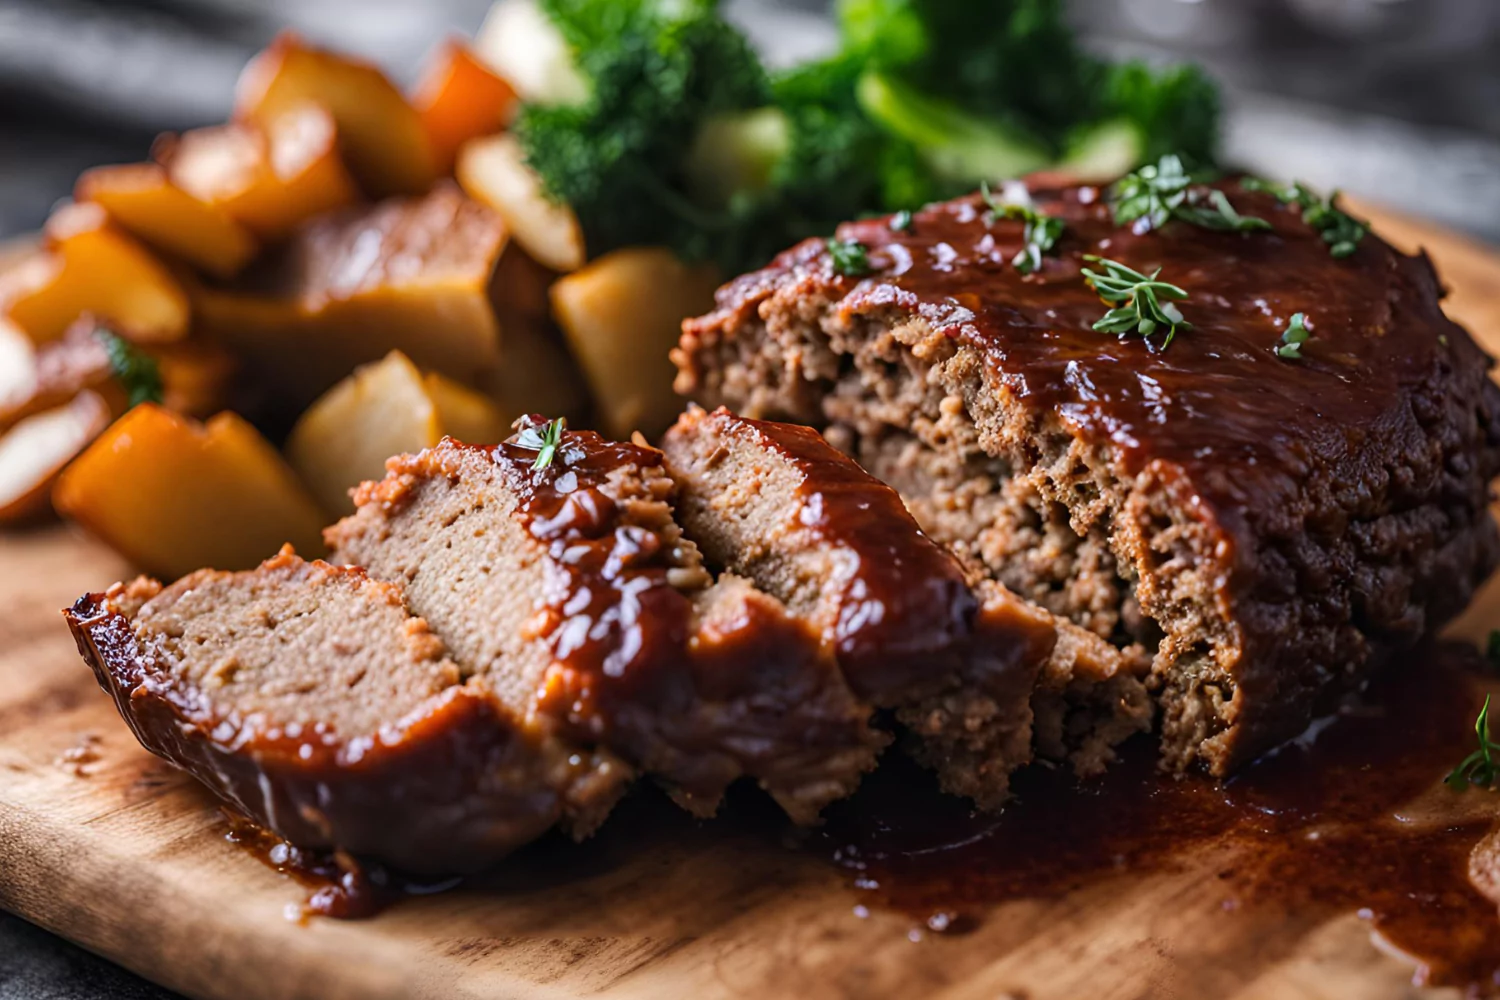
    A good glaze can take your smoked meatloaf to the next level. Common glazes include BBQ sauce, ketchup, or a mixture of honey and mustard. Apply the glaze about 30 minutes before the meatloaf is finished smoking for a sticky, flavorful crust.

    Flavor Variations

    Don’t be afraid to get creative with your smoked meatloaf. You can add diced vegetables like bell peppers and carrots for extra texture. For a cheesy twist, stuff the meatloaf with your favorite cheese. Bacon-wrapped meatloaf is another popular variation that adds a savory, crispy exterior.

    Serving and Leftovers

    Serving Suggestions

    A number of dishes go nicely with smoked meatloaf. Classic options include mashed potatoes, green beans, and macaroni and cheese. For a lighter meal, consider serving with a fresh salad or roasted vegetables.

    Storing and Reheating

    Leftover smoked meatloaf can be just as delicious. Wrap it tightly in foil and store in the refrigerator for up to 4 days. To reheat, place slices in the oven at 250°F for about 20 minutes, or microwave individual slices for 2 minutes.

    Troubleshooting Common Issues About How Long To Smoke Meatloaf

    How long to smoke meatloaf

    Common Problems and Solutions

    Even with careful preparation and attention to detail, smoking meatloaf can sometimes present challenges. The following are some typical problems you may run into and solutions for them:

    Meatloaf Falling Apart (150 words)

    • Issue: Your meatloaf crumbles when sliced.
    • Solution: This usually means there aren’t enough binders in the mix. Ensure you’re using the correct ratio of breadcrumbs and eggs to meat. Mixing gently and thoroughly can also help. Additionally, chilling the meatloaf mixture for a short time before shaping can improve its structure.

    Dry Meatloaf (150 words)

    • Issue: The meatloaf turns out dry.
    • Solution: Overcooking is often the culprit. Always monitor the internal temperature closely and remove the meatloaf once it reaches 160°F. Adding moisture-rich ingredients like milk, cheese, or vegetables to the mix can also help keep it juicy.

    Uneven Cooking (150 words)

    • Issue: Parts of the meatloaf are overcooked while others are undercooked.
    • Solution: Ensure your smoker maintains a consistent temperature. Shaping the meatloaf evenly and not too thick will help it cook uniformly. Using a meat thermometer in different areas can also ensure even cooking.

    Lack of Smoky Flavor (150 words)

    • Issue: The meatloaf doesn’t have a strong smoky flavor.
    • Solution: Experiment with different wood types and ensure the smoker is producing enough smoke. Keeping the smoker lid closed as much as possible can also help infuse more smoky flavor into the meatloaf.

    Customizing Your Smoked Meatloaf Recipe

    Personalizing Your Recipe

    Smoking meatloaf offers endless possibilities for customization. Here are some ideas to help you tailor the recipe to your taste.

    Meat Variations

    • Beef and Pork Blend: Combining ground beef with pork adds richness and flavor. You can also experiment with other meats like turkey, chicken, or even lamb. Each type of meat brings a unique taste and texture.
    • Venison and Game Meats: For a more adventurous option, try using venison or a mix of game meats. These provide a distinctive, earthy flavor that pairs well with smoky notes.

    Spice and Herb Blends

    • Classic Seasoning: Stick with traditional spices like garlic powder, onion powder, paprika, and black pepper. These staples create a familiar, comforting flavor profile.
    • Bold Flavors: Add a kick with spices like cayenne pepper, smoked paprika, or even a touch of chili powder. Fresh herbs like thyme, rosemary, and oregano can also enhance the meatloaf’s aroma and taste.

    Stuffing and Fillings

    • Cheese-Stuffed Meatloaf: Incorporate a layer of cheese in the middle of your meatloaf for a gooey surprise. Cheddar, mozzarella, or pepper jack work well.
    • Vegetable Fillings: Add chopped vegetables like bell peppers, spinach, or mushrooms for extra texture and nutrition. These additions also help keep the meatloaf moist.

    Glazes and Toppings

    • Traditional Glaze: A simple glaze of ketchup, brown sugar, and mustard is a classic choice.
    • BBQ Glaze: For a smoky-sweet finish, brush your meatloaf with your favorite BBQ sauce during the last 30 minutes of smoking.
    • Bacon-Wrapped: Lay strips of bacon over the top of your meatloaf before smoking. The bacon crisps up and adds a savory, smoky flavor.

    Customizing your smoked meatloaf not only enhances its flavor but also makes it your own. Don’t be afraid to experiment with different ingredients and techniques to discover your perfect smoked meatloaf recipe.

    Health Considerations and Dietary Modifications

    Making Smoked Meatloaf Healthier

    Smoking meatloaf can be a delicious indulgence, but you can also make it healthier with a few smart modifications. Here’s how to keep your smoked meatloaf nutritious without sacrificing flavor.

    Lean Meat Choices

    • Using Lean Ground Beef: Opt for ground beef with a lower fat content, such as 90% lean, to reduce saturated fat. Ground turkey or chicken can be excellent substitutes that offer a lighter option.
    • Mixing Meats: Combine lean meats like turkey or chicken with a small amount of pork or beef to retain moisture while cutting down on fat.

    Adding Vegetables

    • Incorporating Veggies: Finely chop vegetables like bell peppers, carrots, zucchini, or spinach and mix them into the meatloaf. This not only boosts the nutritional value but also adds moisture and texture.
    • Vegetable Purees: Use pureed vegetables like butternut squash or sweet potatoes as a binder instead of breadcrumbs for added fiber and nutrients.

    Healthier Binders

    • Oats and Whole Grains: Replace breadcrumbs with whole oats or quinoa. These options are higher in fiber and nutrients, contributing to a healthier meatloaf.
    • Gluten-Free Options: For those with gluten sensitivities, use gluten-free oats or gluten-free breadcrumbs.

    Lowering Sodium and Sugar

    • Salt Reduction: Use herbs and spices to enhance flavor instead of relying heavily on salt. Consider salt substitutes or lower-sodium versions of ingredients.
    • Healthier Glaze Alternatives: Instead of traditional sugary glazes, use a mix of balsamic vinegar and a small amount of honey or maple syrup. Tomato paste with a splash of vinegar and spices can also create a tangy, lower-sugar topping.

    Dietary Modifications

    • Dairy-Free Options: Substitute dairy milk with almond milk, oat milk, or other plant-based milks. Use dairy-free cheese alternatives if adding cheese to the meatloaf.
    • Egg Substitutes: For those avoiding eggs, flaxseed meal mixed with water or chia seeds can act as a binder.

    Vegetarian and Vegan Variations

    • Plant-Based Proteins: Use lentils, chickpeas, or a combination of beans as the base for a vegetarian or vegan meatloaf. Add plenty of vegetables and seasonings to enhance flavor.
    • Meat Alternatives: There are many plant-based meat substitutes available that can be used in place of ground meat, providing a similar texture and taste.

    Historical and Cultural Background of Smoked Meatloaf

    How long to smoke meatloaf

    Origins and Evolution of Meatloaf

    Meatloaf has a long and storied history, tracing its origins back to ancient times. Let’s explore how this beloved dish has evolved and how smoking meatloaf adds a modern twist.

    Ancient Beginnings

    • Early Meatloaf Recipes: The concept of mixing ground meat with spices and other ingredients dates back to the 5th century in ancient Rome. These early versions of meatloaf were quite different from what we know today but laid the foundation for the dish.
    • Medieval Europe: During the Middle Ages, meatloaf recipes began to appear in European cookbooks, often using leftover meats combined with breadcrumbs and seasonings.

    American Adaptation

    • 19th Century America: Meatloaf became a popular dish in the United States in the 19th century. It was an economical way to stretch meat and use up leftovers, especially during tough economic times.
    • The Great Depression: During the 1930s, meatloaf became a staple in American households due to its affordability and versatility. Recipes often included fillers like oats, breadcrumbs, and vegetables to make the meat go further.

    Modern Variations and Smoking

    • Contemporary Takes: Today, meatloaf is a versatile dish enjoyed in many variations worldwide. From gourmet versions with exotic ingredients to vegetarian and vegan alternatives, the possibilities are endless.
    • Smoking Techniques: Adding smoking techniques to meatloaf has brought a new dimension to this classic dish. The process of smoking infuses the meat with rich, smoky flavors, enhancing its taste and texture. This modern twist pays homage to traditional BBQ while elevating the humble meatloaf.

    Cultural Significance

    • American Comfort Food: Meatloaf holds a special place in American culinary culture as a quintessential comfort food. It evokes nostalgia and family traditions, often served at gatherings and holiday meals.
    • Global Influence: While meatloaf is most closely associated with American cuisine, many cultures have their versions of the dish. For example, in Germany, it’s known as “Falscher Hase,” and in Denmark, it’s called “Forloren Hare.”

    Smoking Meatloaf Today

    • Popular Trends: Smoked meatloaf has gained popularity among BBQ enthusiasts and home cooks alike. The process of smoking adds depth and complexity to the flavors, making it a sought-after dish at cookouts and gatherings.
    • Cultural Fusion: The modern smoked meatloaf often incorporates flavors and techniques from various cuisines, reflecting the diverse culinary landscape. From incorporating spices like cumin and coriander to using different types of wood for smoking, the variations are endless.

    FAQs About How Long To Smoke Meatloaf

    FAQs Section

    How long does it take to smoke a meatloaf at 250°F? Smoking a meatloaf at 250°F typically takes about 2-3 hours for a 2-pound loaf and longer for larger sizes.

    Can you freeze smoked meatloaf? Yes, you can freeze smoked meatloaf. Wrap it tightly in plastic wrap and foil, then store in an airtight container for up to 3 months.

    What type of wood is best for smoking meatloaf? Good options include oak, hickory, and fruit woods like apple and cherry. Experiment to find your preferred flavor profile.

    How do you keep the meatloaf from drying out? Ensure you don’t overcook it and let it rest after smoking. Adding ingredients like milk, cheese, or vegetables can also help retain moisture.

    Conclusion For How Long To Smoke Meatloaf

    In conclusion, mastering how long to smoke meatloaf can transform a simple dish into a culinary delight that impresses family and friends. By understanding the key aspects of preparation, smoking techniques, and flavor enhancements, you can ensure that your smoked meatloaf is always perfectly cooked and bursting with flavor. Remember to monitor the internal temperature closely, experiment with different wood types, and try various glazes and seasonings to find your favorite combination. Whether you’re a beginner or an experienced cook, the satisfaction of serving a perfectly smoked meatloaf is unparalleled. So fire up your smoker, follow these guidelines, and enjoy the delicious results!


  • Smoked Meatloaf Recipe: Guide to Perfectly Smoked Meatloaf

    Smoked Meatloaf Recipe: Guide to Perfectly Smoked Meatloaf

    Are you ready to elevate your meatloaf game? Look no further! Our comprehensive guide to smoked meatloaf covers everything you need to know. From essential ingredients and preparation tips to smoking techniques and creative variations, we’ve got you covered. Learn how to make this ultimate comfort food that’s packed with smoky flavor and perfect for any occasion.

    Introduction to Smoked Meatloaf

    What is Smoked Meatloaf?

    Smoked meatloaf is a delicious twist on the classic meatloaf, adding a rich, smoky flavor that takes this comfort food to new heights. By cooking the meatloaf in a smoker, the flavors intensify, and the meat remains juicy and tender. This method infuses the loaf with a unique taste that’s hard to beat.

    Why Smoked Meatloaf is Popular

    Smoked meatloaf has become increasingly popular due to its enhanced flavor and moist texture. The smoking process allows the meat to absorb the aromatic qualities of the wood, creating a dish that’s both flavorful and satisfying. Plus, it’s a versatile recipe that can be customized with different ingredients and seasonings to suit your taste.

    Brief History and Origin of Meatloaf

    Meatloaf has a rich history, dating back to ancient Rome, where minced meat recipes were common. In America, it became popular during the Great Depression as a way to stretch inexpensive cuts of meat. Over time, various cultures have added their twists, leading to the modern smoked meatloaf we enjoy today.

    In the following sections, we’ll dive into the details of making the perfect smoked meatloaf, starting with the essential ingredients and preparation steps.

    Essential Ingredients for Smoked Meatloaf

    To make the best smoked meatloaf, you’ll need a blend of high-quality ingredients. Here’s what you’ll need:

    • Ground Meat: Use a mix of ground beef and pork for a balanced flavor and texture.
    • Binders: Eggs, breadcrumbs, and milk help hold the meatloaf together and keep it moist.
    • Seasonings and Spices: Incorporate your favorite seasonings like garlic powder, onion powder, and BBQ rubs for added flavor.
    • Flavor Enhancers: Worcestershire sauce, cheese, and vegetables like onions and bell peppers can elevate the taste.

    Preparation Steps

    1. Mixing the Ingredients: Combine the ground meat, binders, seasonings, and flavor enhancers in a large bowl. Mix gently to avoid overworking the meat, which can lead to a tough texture.
    2. Forming the Meatloaf: Shape the mixture into a loaf on a sheet of parchment paper. Ensure the loaf is compact and uniform to cook evenly.
    3. Resting the Meatloaf: Let the formed meatloaf rest in the refrigerator for about 30 minutes. This helps the flavors meld and makes the loaf easier to handle.

    Now that we’ve covered the basics, we’re ready to move on to the smoking techniques that will transform your meatloaf into a smoky masterpiece.

    Ingredients and Preparation of Smoked Meatloaf

    Smoked Meatloaf

    Essential Ingredients for Smoked Meatloaf

    Creating a flavorful smoked meatloaf starts with selecting the right ingredients. Here’s what you’ll need:

    • Ground Meat: A mix of ground beef and pork provides a balanced flavor and texture. You can also use all beef or add some ground turkey for a lighter version.
    • Binders: Eggs, breadcrumbs, and milk are crucial for holding the meatloaf together and keeping it moist.
    • Seasonings and Spices: Use garlic powder, onion powder, paprika, salt, and pepper. Adding your favorite BBQ rub can enhance the flavor.
    • Flavor Enhancers: Worcestershire sauce, diced onions, minced garlic, and shredded cheese add depth to the taste.
    • Additional Ingredients: You can add cooked bacon bits, chopped bell peppers, or jalapeños for extra flavor and texture.

    Preparation Steps

    1. Mixing the Ingredients: In a large mixing bowl, combine the ground meat, eggs, breadcrumbs, and milk. Add the seasonings and flavor enhancers. Using a spatula or your hands, gently stir until just mixed. Overmixing can make the meatloaf tough.
    2. Forming the Meatloaf: Shape the mixture into a loaf on a sheet of parchment paper. Ensure the loaf is compact and even for uniform cooking. Place the loaf on a wire rack or a grill rack set over a baking sheet.
    3. Resting the Meatloaf: Let the formed meatloaf rest in the refrigerator for about 30 minutes. This helps the flavors meld and makes the loaf easier to handle when transferring to the smoker.

    Smoking Techniques

    Setting Up Your Smoker

    1. Choosing the Right Smoker: You can use an electric, pellet, or charcoal smoker. Each type has its advantages, but all can produce excellent results with proper use.
    2. Selecting the Wood: The type of wood you use will influence the flavor. Hickory and oak provide a strong, smoky flavor, while apple and cherry offer a sweeter, milder smoke. Mix woods for a balanced profile. check out this guide on Carnivore Style.
    3. Preheating the Smoker: Preheat your smoker to 225°F. This low and slow temperature is ideal for cooking meatloaf, allowing the flavors to develop without drying out the meat.

    Smoking the Meatloaf

    1. Placing the Meatloaf in the Smoker: Transfer the rested meatloaf to the preheated smoker. Place it on the middle rack to ensure even heat distribution.
    2. Monitoring Internal Temperature: To keep an eye on the internal temperature, use a meat thermometer. Aim for an internal temp of 160°F. This typically takes about 3-4 hours, depending on the size and thickness of the meatloaf.
    3. Adding Smoke Flavor: Maintain a steady stream of smoke throughout the cooking process. Replenish wood chips or pellets as needed to keep the smoke consistent.
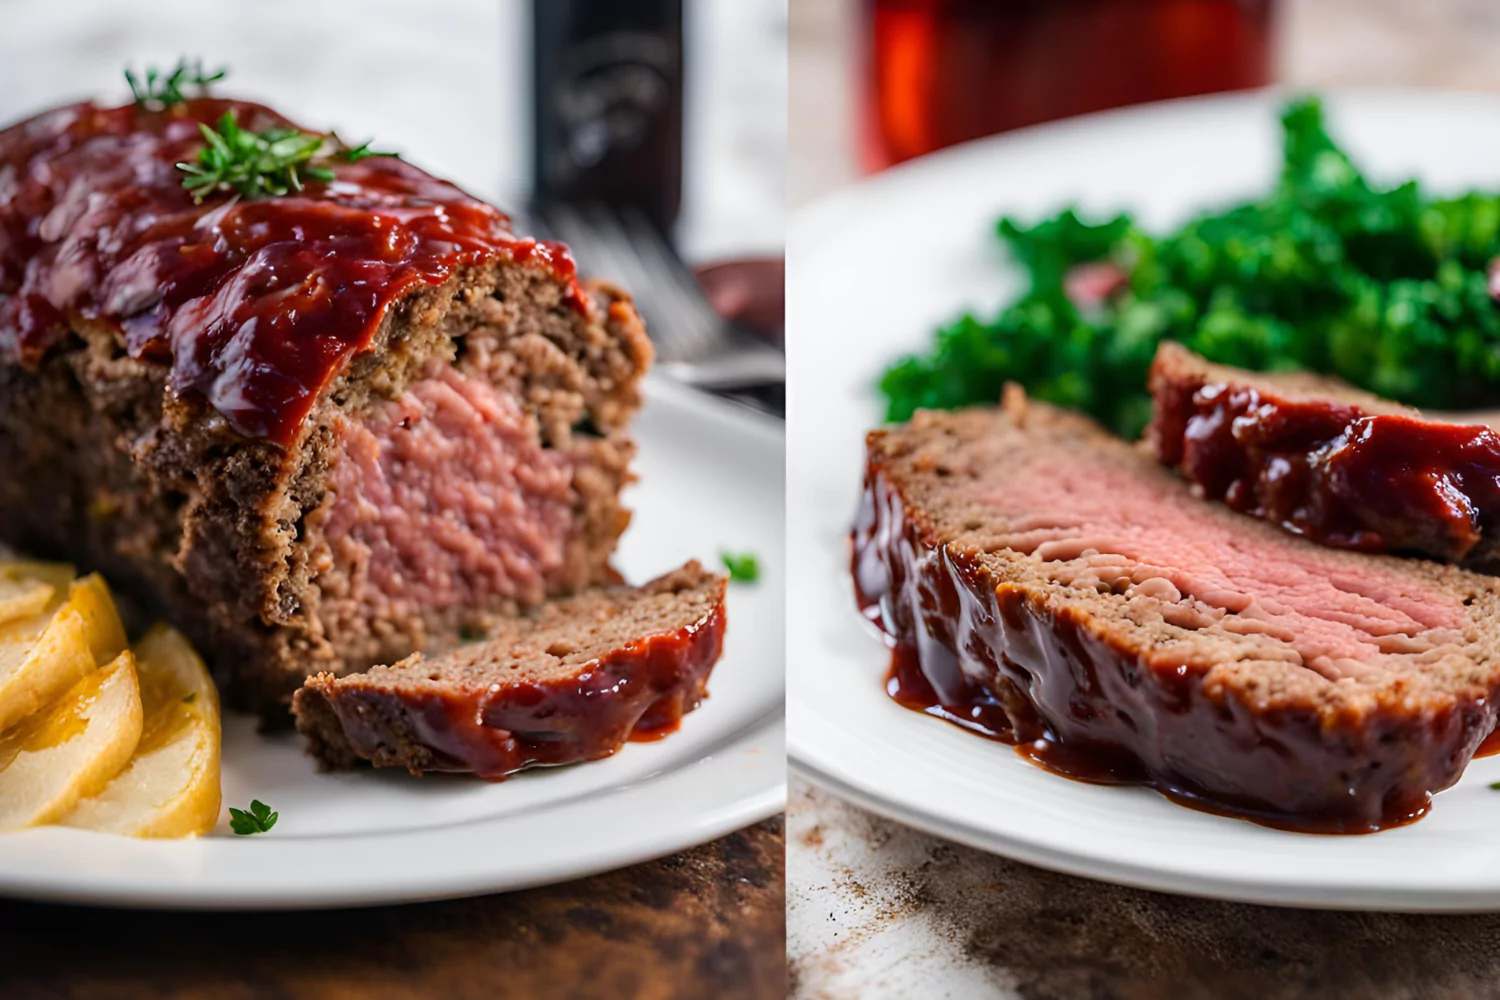
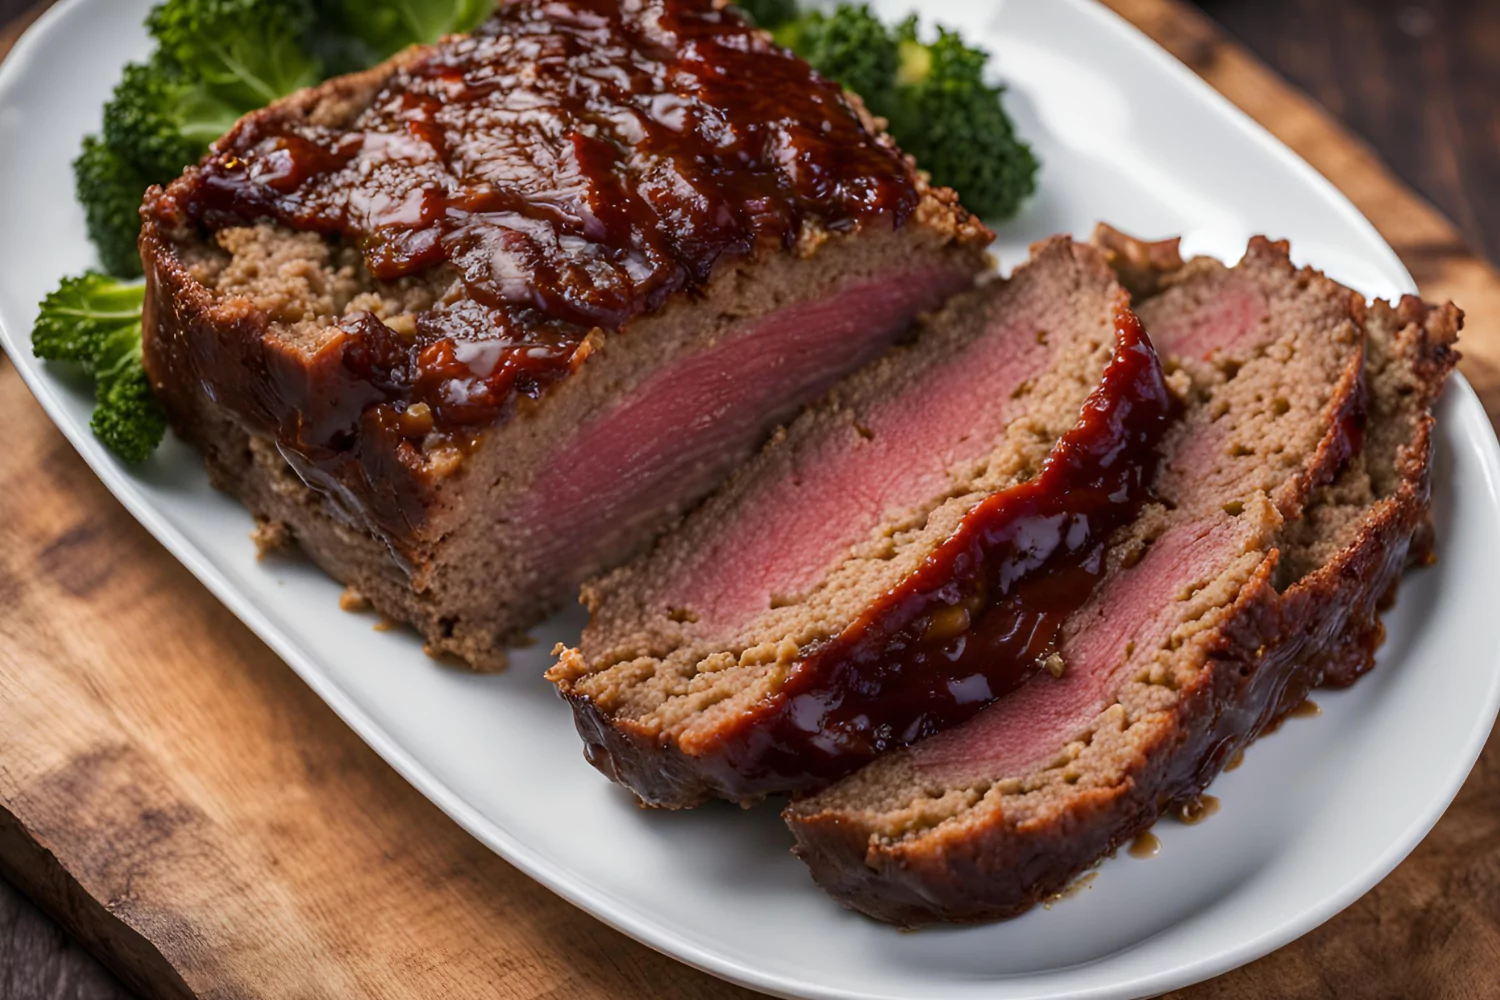
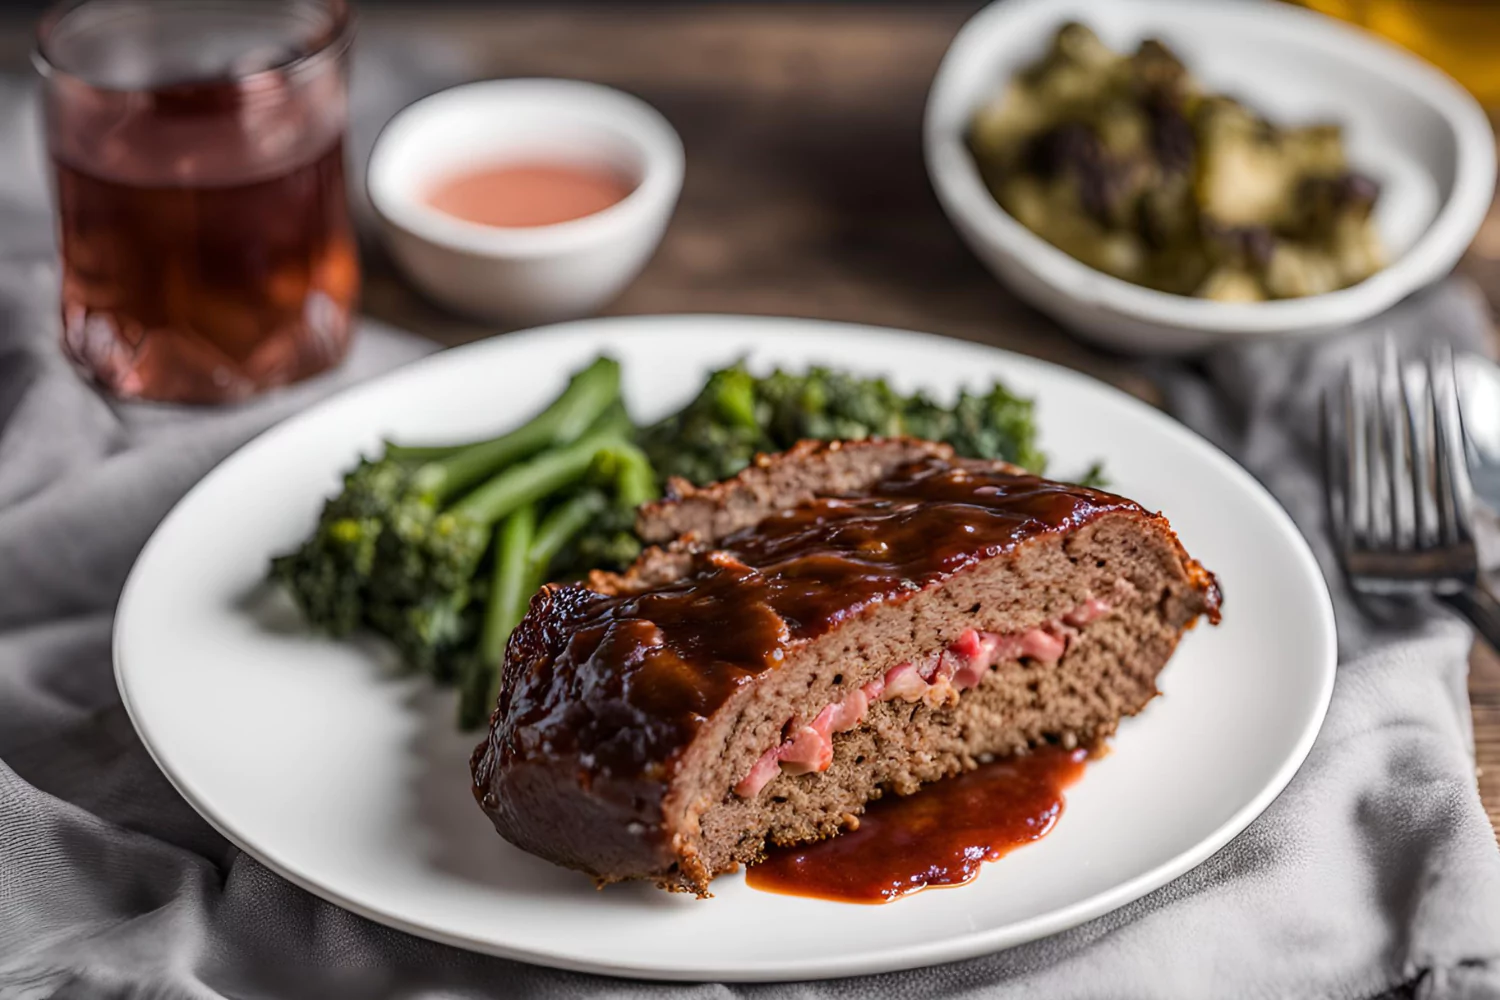
    4. Achieving a Smoke Ring: The coveted smoke ring—a pinkish layer just below the surface—is a sign of well-smoked meat. To enhance the smoke ring, ensure your smoker maintains a steady temperature and consistent smoke.

    Variations and Enhancements For Smoked Meatloaf

    Glazing and Sauces

    1. Types of Glazes: Applying a glaze adds a finishing touch to your smoked meatloaf. Popular options include BBQ sauce, honey mustard, and a ketchup-brown sugar mixture.
    2. Applying the Glaze: Brush the glaze on the meatloaf about 30 minutes before it’s done smoking. This allows the glaze to caramelize and create a flavorful crust.

    Creative Variations

    1. Bacon-Wrapped Smoked Meatloaf: For extra flavor and texture, wrap the meatloaf in bacon before smoking. The bacon adds a crispy exterior and keeps the meatloaf moist.
    2. Cheese-Stuffed Smoked Meatloaf: Add a layer of cheese in the center of the meatloaf. Pepper jack or cheddar are great choices. This creates a gooey, melty surprise in every bite.
    3. Dairy-Free and Gluten-Free Options: Substitute milk with almond or soy milk and use gluten-free breadcrumbs to accommodate dietary restrictions without sacrificing flavor.

    Serving Suggestions

    Smoked Meatloaf

    Best Side Dishes for Smoked Meatloaf

    Serving smoked meatloaf with the right sides can elevate your meal. Here are some excellent pairings:

    • Mashed Potatoes: A traditional side dish is creamy mashed potatoes. Their smooth texture complements the hearty meatloaf perfectly.
    • Green Beans: Steamed or sautéed green beans add a fresh, crunchy contrast.
    • Garlic Bread: A slice of garlic bread can be a delicious addition, offering a crispy, buttery complement to the smoky meatloaf.
    • Roasted Brussels Sprouts: The slight bitterness of Brussels sprouts pairs well with the rich flavors of smoked meatloaf.

    How to Slice and Serve

    1. Rest the Meatloaf: After removing the meatloaf from the smoker, let it rest for about 10 minutes. This allows the juices to redistribute, making for a juicier slice.
    2. Use a Sharp Knife: Slice the meatloaf with a sharp knife to get clean, even slices. Aim for slices about 1 inch thick.
    3. Presentation Ideas: Arrange the slices on a platter with some of the glaze drizzled over the top. Use fresh herbs, such as parsley, as a garnish to add some color.

    Storing and Reheating Leftovers

    Storage Tips

    To ensure your smoked meatloaf stays fresh, follow these storage tips:

    • Refrigerator: Store leftover meatloaf in an airtight container. It will keep for 3-4 days.
    • Freezer: For longer storage, wrap the meatloaf tightly in plastic wrap and place it in a freezer-safe bag. It can be frozen for up to 3 months.

    Reheating Methods

    1. Oven: Preheat your oven to 250°F. Place slices of meatloaf on a baking sheet and cover with foil. Heat for 20 minutes or until thoroughly heated.
    2. Microwave: Place a slice of meatloaf on a microwave-safe plate and cover with a damp paper towel. Microwave in 30-second intervals until hot.
    3. Maintaining Moisture and Flavor: To keep the meatloaf moist while reheating, add a splash of broth or water to the dish before heating.

    Cooking Tips and Common Mistakes

    Cooking Tips for Perfect Smoked Meatloaf

    To ensure your smoked meatloaf turns out perfectly every time, follow these tips:

    1. Use a Meat Thermometer: Always cook to temperature, not time. Aim for an internal temperature of 160°F. This ensures the meatloaf is cooked through without being dry.
    2. Maintain Consistent Heat: Keep your smoker at a steady 225°F. Fluctuating temperatures can affect cooking times and the quality of the smoke ring.
    3. Rest the Meatloaf: Allow the meatloaf to rest for about 10 minutes after smoking. This helps the juices redistribute, making for a juicier bite.

    Common Mistakes to Avoid

    Avoid these common mistakes to achieve the best results with your smoked meatloaf:

    1. Overmixing the Meat: Mixing the meat too much can make it tough. Just until the ingredients are dispersed equally, combine them.
    2. Skipping the Binder: Binders like eggs and breadcrumbs are crucial for keeping the meatloaf together. Without them, your meatloaf might fall apart.
    3. Ignoring the Rest Period: Resting the meatloaf before slicing is essential. Cutting into it too soon can cause it to lose moisture and crumble.

    Additional Tips and Tricks

    Enhancing Smoky Flavor

    1. Select the Proper Wood: Distinct woods contribute varying tastes. For a robust smoky taste, use hickory or oak. For a sweeter, milder smoke, try apple or cherry wood.
    2. Add Smoke Early: The meat absorbs the most smoke flavor in the first few hours of cooking. Make sure your smoker is producing good smoke during this time.
    3. Keep the Lid Closed: Avoid opening the smoker frequently. Each time you open the lid, you let out heat and smoke, which can affect the cooking process.

    Making Ahead and Meal Prep

    1. Prepare in Advance: You can prepare the meatloaf mixture a day ahead and refrigerate it. This facilitates handling by allowing the flavors to mingle.
    2. Freezing: If you want to freeze the meatloaf, shape it and wrap it tightly in plastic wrap. It can be kept for up to three months if you put it in a freezer-safe bag.
    3. Reheating Leftovers: When reheating, add a splash of broth or water to keep the meatloaf moist. Cover it with foil to prevent drying out.

    Smoked Meatloaf Variations and Enhancements

    Smoked Meatloaf

    Glazing and Sauces

    1. Types of Glazes: Adding a glaze to your smoked meatloaf can enhance its flavor and give it a beautiful finish. Popular options include:
      • BBQ Sauce: A classic choice that adds a sweet and tangy flavor. Brush it on about 30 minutes before the meatloaf is done smoking.
      • Ketchup and Brown Sugar Mixture: This traditional glaze is simple yet delicious. Mix ketchup with brown sugar and a bit of mustard for a sweet and savory topping.
      • Honey Mustard Glaze: For a touch of sweetness with a hint of spice, try a honey mustard glaze.
    2. Applying the Glaze: To apply the glaze, brush it evenly over the meatloaf about 30 minutes before it’s done smoking. This allows the glaze to caramelize and create a sticky, flavorful crust.

    Creative Variations

    1. Bacon-Wrapped Smoked Meatloaf: Wrap the meatloaf in strips of bacon before smoking. The bacon adds a crispy texture and keeps the meatloaf moist. This variation is a crowd-pleaser and adds an extra layer of flavor.
    2. Cheese-Stuffed Smoked Meatloaf: Add a layer of cheese inside the meatloaf. Cheddar, pepper jack, or mozzarella are great options. To do this, form half of the meat mixture into a loaf, place the cheese in the center, and then cover it with the remaining meat mixture. This creates a gooey, melty center that’s irresistible.
    3. Dairy-Free and Gluten-Free Options: For those with dietary restrictions, you can make adjustments without sacrificing flavor. Use almond or soy milk instead of regular milk, and gluten-free breadcrumbs in place of regular ones. This ensures everyone can enjoy your smoked meatloaf.
    4. Adding Vegetables: Incorporate finely chopped vegetables like bell peppers, carrots, or spinach into the meat mixture. This not only adds flavor and texture but also boosts the nutritional value of the meatloaf.

    FAQs

    Frequently Asked Questions

    1. Can you freeze smoked meatloaf?
      • Yes, you can freeze smoked meatloaf. Wrap it tightly and store it in a freezer-safe bag for up to 3 months.
    2. How to prevent meatloaf from falling apart?
      • Ensure you use enough binders like eggs and breadcrumbs. Mixing the ingredients thoroughly and letting the loaf rest before cooking can help it hold together.
    3. What type of wood is best for smoking meatloaf?
      • Hickory and oak are great for a strong smoky flavor, while apple and cherry provide a milder, sweeter smoke. Midwest Foodie offers more insights on wood choices.
    4. How long does it take to smoke meatloaf?
      • Smoking meatloaf typically takes about 3-4 hours at 225°F. The exact time can vary based on the size and thickness of the loaf. Always cook to an internal temperature of 160°F.

    This comprehensive guide has covered everything you need to know about making and enjoying the perfect smoked meatloaf. From the essential ingredients and preparation steps to the best smoking techniques and serving suggestions, you’re now equipped to create a mouthwatering meal that will impress your family and friends.

    Conclusion

    Smoked meatloaf is a flavorful and comforting dish that brings a unique twist to a classic recipe. By following the steps and tips outlined in this guide, you can create a delicious smoked meatloaf that will impress your family and friends. From selecting the right ingredients and preparation methods to perfecting your smoking technique and exploring creative variations, every detail contributes to making this dish a standout. Enjoy the rich, smoky flavors and the satisfaction of mastering the art of smoked meatloaf!

  • Air Fry Frozen Chicken Breast: Easy, Juicy & Delicious Recipe

    Air Fry Frozen Chicken Breast: Easy, Juicy & Delicious Recipe

    Cooking air fry frozen chicken breast is a game-changer for quick, healthy, and delicious meals. You don’t need to thaw the chicken, and the air fryer ensures a juicy, flavorful result every time. This guide will walk you through the process step-by-step, offering tips, tricks, and variations to make your air fry frozen chicken breast perfect.

    Introduction to Air Fry Frozen Chicken Breast

    Air frying has revolutionized the way we cook, offering a healthier and faster alternative to traditional frying. When it comes to air frying frozen chicken breast, the benefits are plentiful. Not only do you save time by skipping the thawing process, but you also achieve a perfectly cooked, juicy chicken breast with minimal effort.

    The rapid hot air circulation in an air fryer ensures even cooking and a crispy exterior, making it an ideal method for busy weeknights or meal prepping. Plus, you can experiment with various seasonings and sauces to suit your taste.

    What You Need to Get Started

    Before diving into the cooking process, let’s gather all the necessary equipment and ingredients. Here’s what you’ll need:

    • Air Fryer: Any model works, but ensure it’s large enough to fit the chicken breasts without overcrowding.
    • Tongs: For safely handling the hot chicken.
    • Meat Thermometer: Essential for checking if the chicken is cooked to a safe internal temperature of 165°F.
    • Chicken Breasts: Boneless, skinless, and frozen.
    • Olive Oil: Helps the seasoning stick and adds a bit of crispiness.
    • Spices: Common options include paprika, garlic powder, salt, and pepper, but feel free to get creative.

    Prepping the Frozen Chicken Breast

    You might wonder, should you thaw frozen chicken breasts before air frying? The answer is no. Air fryers are designed to cook food from frozen, saving you time and effort.

    Preheat the Air Fryer: Preheating your air fryer is crucial for even cooking. Set your air fryer to 375°F and let it preheat for about 3-5 minutes.

    Season the Chicken: Lightly spray or brush the frozen chicken breasts with olive oil. This helps the seasoning adhere better. Then, sprinkle your chosen spices evenly on both sides of the chicken.

    Next, it’s time to cook these seasoned frozen chicken breasts to perfection.

    Cooking Process

    air fry frozen chicken breast

    Step-by-Step Guide to Air Fry Frozen Chicken Breast

    Cooking frozen chicken breast in the air fryer is straightforward. Follow these steps to ensure a delicious, juicy result every time.

    1. Preheat the Air Fryer:
    Preheating ensures that the chicken cooks evenly from the start. Set your air fryer to 375°F and let it run empty for about 3-5 minutes. For more on mastering air frying techniques, visit WebMD.

    2. Season the Chicken:
    While the air fryer preheats, prepare your chicken. Lightly spray or brush the frozen chicken breasts with olive oil. This helps the seasoning stick and adds a bit of crispiness. Sprinkle your chosen spices evenly on both sides of the chicken. Popular seasonings include paprika, garlic powder, salt, and pepper. Add a tiny bit of cayenne pepper for spice.

    3. Place the Chicken in the Air Fryer:
    Fill the air fryer basket with the seasoned chicken breasts arranged in a single layer. Ensure there’s enough space for the hot air to circulate around each piece. Your air fryer’s size will determine whether you need to cook in batches or not.

    4. Cook the Chicken:
    Set the timer for 30 minutes. Halfway through the cooking time, around the 15-minute mark, open the air fryer and flip the chicken breasts using tongs. This ensures even cooking on both sides. Using a meat thermometer, determine the chicken’s internal temperature. The chicken is done when it reaches 165°F. Depending on the size and thickness of your chicken breasts, cooking times may vary slightly.

    5. Let the Chicken Rest:
    Once the chicken reaches the proper internal temperature, remove it from the air fryer and let it rest on a plate for about 5 minutes. This resting period allows the juices to redistribute, resulting in juicier chicken.

    Using a Meat Thermometer

    Using a meat thermometer is crucial for ensuring your chicken is cooked to a safe temperature. Place the thermometer in the area of the chicken breast that is the thickest. The USDA recommends an internal temperature of 165°F for safe consumption. This step is especially important when cooking from frozen, as it ensures the chicken is thoroughly cooked without overcooking the exterior.

    Tips for Even Cooking

    To avoid uneven cooking, make sure the chicken breasts are similar in size and thickness. If they’re different sizes, you may need to adjust the cooking time. Additionally, flipping the chicken halfway through the cooking process helps achieve a uniformly cooked piece of meat.

    How to Keep the Chicken Juicy

    To keep your air-fried chicken juicy, avoid overcooking it. Monitor the internal temperature closely and remove the chicken from the air fryer as soon as it reaches 165°F. Letting the chicken rest for a few minutes after cooking also helps retain its juices.

    Tips and Tricks

    Ensuring Perfectly Cooked Chicken Every Time

    Achieving perfectly cooked air fryer chicken breast involves a few handy tips and tricks that can make all the difference.

    Use a Meat Thermometer
    One of the best ways to ensure your chicken is perfectly cooked is by using a meat thermometer. This tool helps you avoid the guesswork and ensures the chicken reaches an internal temperature of 165°F, which is safe for consumption. Always check the temperature at the thickest part of the breast.

    Tips for Even Cooking
    For even cooking, make sure the chicken breasts are of similar size and thickness. If you have varying sizes, consider pounding them to an even thickness before freezing. This ensures they cook at the same rate. Additionally, arranging the chicken in a single layer without overcrowding the air fryer basket allows hot air to circulate evenly.

    How to Keep the Chicken Juicy
    To keep your air-fried chicken juicy, avoid overcooking. Monitor the internal temperature closely and remove the chicken as soon as it hits 165°F. After cooking, let the chicken rest for about 5 minutes. This resting period helps the juices redistribute throughout the meat, making it more succulent.

    Seasoning Tips
    When seasoning frozen chicken breasts, oil helps the spices adhere better. Lightly spray or brush the chicken with olive oil before adding your spices. You can experiment with different seasoning blends to suit your taste. For instance, try a mix of smoked paprika, garlic powder, and Italian herbs for a flavorful twist.

    Preheat Your Air Fryer
    Always preheat your air fryer before cooking. This step ensures the chicken cooks evenly from the start. Preheating usually takes about 3-5 minutes and is well worth the effort for consistent results.

    Serving Suggestions

    air fry frozen chicken breast

    Delicious Ways to Serve Air Fried Chicken Breast

    Now that you have perfectly cooked air-fried chicken breast, let’s explore some delicious serving ideas.

    Serving with Sides
    Pair your chicken with a variety of sides to create a balanced meal. Some popular options include:

    • Air Fryer Green Beans: Crispy and healthy, green beans make a great side dish.
    • Air Fryer Mac and Cheese: Comfort food at its best, this cheesy dish complements the chicken well.
    • Air Fryer Stuffed Mushrooms: A savory and satisfying addition to your meal.

    Incorporating into Meals
    Air-fried chicken breasts are versatile and can be used in various dishes. Here are some ideas:

    • Salads: Slice the chicken and add it to a fresh garden salad with your favorite dressing.
    • Wraps: Combine the chicken with lettuce, tomatoes, and a light sauce in a whole wheat wrap.
    • Tacos: Use the chicken as a protein base in tacos, adding toppings like avocado, salsa, and cheese.

    Sauce and Garnish Ideas
    Elevate your chicken by serving it with different sauces and garnishes. Here are some suggestions:

    • Garlic Butter Sauce: Melt butter with minced garlic and pour over the chicken for a rich flavor.
    • Lemon Herb Sauce: Mix lemon juice, olive oil, and fresh herbs like parsley and thyme.
    • BBQ Sauce: Brush the chicken with your favorite BBQ sauce for a sweet and smoky taste.

    Storage and Reheating

    Proper Storage Techniques

    Once you’ve enjoyed your delicious air-fried chicken breast, you might have leftovers. Proper storage is key to maintaining the chicken’s flavor and texture.

    How to Store Leftovers
    Store any leftover chicken breasts in an airtight container. This prevents moisture loss and keeps the chicken fresh. You can keep the chicken in the refrigerator for up to 3-4 days. For longer storage, freeze the cooked chicken breasts. They keep for up to three months in the freezer. Ensure you label the container with the date so you can keep track of how long it’s been stored.

    Best Practices for Reheating
    Reheating air-fried chicken breast correctly ensures it remains juicy and flavorful. Here are some methods:

    In the Air Fryer:
    Preheat your air fryer to 350°F. Place the chicken breasts in the air fryer basket and heat for 3-5 minutes until warmed through. This method helps retain the chicken’s crispy exterior.

    In the Oven:
    Preheat your oven to 350°F. To keep it from drying out, put the chicken on a baking sheet and cover it with foil. Heat for about 10-15 minutes.

    Avoid the Microwave:
    While convenient, microwaving can make the chicken rubbery and dry. If you must use a microwave, cover the chicken with a damp paper towel and heat on medium power in short intervals.

    Variations and Customizations

    Flavor Variations

    Spice up your air fryer frozen chicken breast with these exciting variations:

    Spicy Chicken:
    Add a ¼-1/2 teaspoon of cayenne pepper or chili powder to your seasoning mix for a kick.

    Herb-Infused:
    Mix dried herbs like thyme, rosemary, and oregano into your seasoning for a fragrant, herbaceous flavor.

    Lemon Pepper Chicken:
    Use lemon zest and cracked black pepper for a fresh, zesty twist. This combination is particularly great for summer meals.

    Garlic Parmesan:
    Combine garlic powder, grated Parmesan cheese, and Italian seasoning for a rich, savory taste.

    Cooking Other Frozen Meats

    The air fryer isn’t just for chicken. Similar techniques can be applied to prepare different frozen meats:

    Chicken Thighs:
    Cook at 375°F for 25-30 minutes, flipping halfway through.

    Chicken Wings:
    Cook at 380°F for 20-25 minutes, shaking the basket occasionally.

    Pork Chops:
    Cook at 400°F for 20-25 minutes, turning halfway through.

    Fish Fillets:
    Cook at 375°F for 12-15 minutes, depending on thickness.

    Troubleshooting and Expert Tips

    air fry frozen chicken breast

    Common Problems and Solutions

    Even with the best preparations, you might encounter some issues when air frying frozen chicken breast. Here are some common problems and how to solve them:

    Uneven Cooking
    If your chicken isn’t cooking evenly, it might be due to varying sizes or overcrowding in the air fryer basket. Try reducing the number of pieces in the basket or making sure they are similar in size. If the chicken is still unevenly cooked, reduce the temperature slightly and increase the cooking time to ensure thorough cooking without burning the outside.

    Seasoning Issues
    Sometimes, seasoning might not stick to the chicken properly. To fix this, ensure the chicken is well-coated with oil before applying the spices. If the seasoning still falls off, you can lightly mist the chicken with cooking spray after seasoning.

    Overcooking and Drying Out
    Overcooking can result in dry, tough chicken. To prevent this, keep a close eye on the internal temperature. Remove the chicken from the air fryer as soon as it reaches 165°F. Letting the chicken rest for a few minutes after cooking also helps retain moisture.

    Air Fryer Differences
    Different air fryers can yield different results. If your chicken comes out too dry or undercooked, try adjusting the temperature and cooking time slightly. You might need to experiment a bit to find the perfect settings for your specific model.

    Tips From the Chef

    Flip the Chicken Halfway Through
    Flipping the chicken halfway through cooking ensures even browning and cooking. This step is crucial for achieving a uniform texture.

    Check Internal Temperature
    Always use a meat thermometer to check the internal temperature of the chicken. Insert it into the thickest part of the breast to ensure it reads 165°F. This ensures the chicken is safe to eat and perfectly cooked.

    Preheat the Air Fryer
    Preheating the air fryer helps achieve a crispy exterior and evenly cooked interior. Set your air fryer to the desired temperature and let it run empty for about 3-5 minutes before adding the chicken.

    Use Oil for Crispiness
    Lightly coating the chicken with oil helps achieve a crispy texture. Use a neutral oil, such as avocado or olive oil. This not only helps the seasoning stick but also adds a delicious crispiness.

    Experiment with Seasonings
    Don’t be afraid to experiment with different spices and herbs. Combine different flavors to create your ideal blend. From smoked paprika to Italian herbs, the possibilities are endless.

    Common Questions About Air Fry Frozen Chicken Breast

    FAQs Section

    Can I cook frozen chicken breasts in the air fryer?
    Yes, you can. You may cook frozen chicken breasts in the air fryer without having to thaw them beforehand thanks to its quick hot air circulation.

    How long does it take to cook frozen chicken breasts in the air fryer?
    Cooking times vary based on thickness, but typically, it takes about 20-30 minutes at 375°F. check more information here 

    Should I season the frozen chicken breasts before cooking?
    Yes, seasoning enhances the flavor. Apply oil and your favorite spices before cooking.

    Do I need to preheat the air fryer before cooking frozen chicken breasts?
    Preheating ensures even cooking. Set your air fryer to the desired temperature and preheat for a few minutes.

    How can I tell if the frozen chicken breasts are cooked through?
    Check the interior temperature with a meat thermometer. It should read 165°F.

    Can I add sauce or marinade to the frozen chicken breasts before cooking?
    Yes, you can add sauce or marinade. However, excessive moisture can affect the crispiness.

    Can I cook other frozen meats in the air fryer using the same method?
    Yes, similar methods can be used for other meats. Adjust cooking time and temperature based on the type of meat.

    Can I reheat leftover cooked chicken breasts in the air fryer?
    Yes, reheat at 350°F for 3-5 minutes until warmed through.

    Conclusion Of Air Fry Frozen Chicken Breast

    Cooking air fry frozen chicken breast is a simple, efficient, and healthy method that delivers delicious results every time. Whether you’re new to air frying or a seasoned pro, this guide provides all the essential steps and tips to make your air fry frozen chicken breast a success.

    The air fryer not only saves time but also ensures your chicken is juicy on the inside and crispy on the outside. From seasoning ideas to troubleshooting tips, you’re now equipped with everything you need to create a perfect meal.

    Don’t hesitate to experiment with different spices and side dishes to keep your meals exciting and varied. And remember, practice makes perfect. The more you use your air fryer, the more confident you’ll become in creating a wide range of tasty dishes.

  • What to Eat with Fried Chicken: Top Side Dishes and Pairings

    What to Eat with Fried Chicken: Top Side Dishes and Pairings

    What To Eat With Fried Chicken is a timeless favorite, loved for its crispy skin and tender meat. But what makes it even better? The perfect side dishes! From creamy mashed potatoes to tangy coleslaw, there are endless options to pair with this classic dish. Pairing fried chicken with the right side dishes can elevate your meal to new heights. Whether you’re hosting a family dinner, a picnic, or a festive gathering, the perfect sides will complement the rich flavors of fried chicken. In this article, we’ll dive into the best side dishes for fried chicken, ensuring every bite is a burst of flavor.

    What To Eat With Fried Chicken Classic Side Dishes

    Mashed Potatoes and Gravy

    Mashed potatoes and gravy are a classic combination with fried chicken. The creamy texture of the mashed potatoes contrasts beautifully with the crispy chicken, while the savory gravy ties everything together.

    • Ingredients: Potatoes, butter, milk, salt, pepper, chicken or beef gravy.
    • Preparation: Boil potatoes until tender, mash with butter and milk, season to taste, and serve with warm gravy.

    Mashed potatoes and gravy are not just filling but also incredibly comforting. They’re a must-have for any fried chicken meal.

    Macaroni and Cheese

    Macaroni and cheese, or mac and cheese, is a favorite comfort food that pairs perfectly with fried chicken. The gooey, melted cheese and tender pasta provide a delicious contrast to the crispy chicken.

    • Ingredients: Elbow macaroni, cheddar cheese, milk, butter, flour, salt.
    • Preparation: Cook macaroni, make a cheese sauce with butter, flour, milk, and cheese, mix, and bake until bubbly.

    Mac and cheese is a crowd-pleaser that adds a rich, cheesy element to your meal. It’s perfect for both kids and adults.

    Coleslaw

    Coleslaw adds a refreshing, tangy crunch to your fried chicken feast. Whether you prefer a creamy or vinegar-based dressing, coleslaw is an essential side dish.

    • Ingredients: Cabbage, carrots, mayonnaise or vinegar, sugar, salt, pepper.
    • Preparation: Shred cabbage and carrots, mix with dressing, and chill before serving.

    Coleslaw’s crispiness and tanginess cut through the richness of the fried chicken, creating a balanced and satisfying meal.

    What To Eat With Fried Chicken Southern Favorites

    what to eat with fried chicken

    When thinking about what to eat with fried chicken, Southern favorites often come to mind. These classic sides are staples in Southern cuisine and perfectly complement the flavors of fried chicken.

    Biscuits

    Biscuits are a staple in Southern cuisine and a perfect accompaniment to fried chicken. These fluffy, buttery delights are ideal for sopping up any leftover gravy or chicken juices.

    • Ingredients: Flour, baking powder, salt, butter, buttermilk.
    • Preparation: Mix dry ingredients, cut in butter, add buttermilk, knead dough, cut into rounds, and bake until golden.

    Biscuits add a comforting, homemade touch to your meal and are incredibly versatile. Enjoy them plain or with a dab of butter and honey.

    Cornbread

    Cornbread is another Southern favorite that pairs beautifully with fried chicken. Whether you prefer it sweet or savory, cornbread provides a delightful contrast to the rich, savory chicken.

    • Ingredients: Cornmeal, flour, baking powder, salt, milk, eggs, butter.
    • Preparation: Mix dry ingredients, add wet ingredients, pour into a hot skillet, and bake until golden brown.

    Cornbread’s crumbly texture and slightly sweet flavor make it a fantastic side dish that complements the meal perfectly.

    Collard Greens

    Collard greens, slow-cooked with smoky bacon or ham, are a nutritious and flavorful side dish. These tender greens are a Southern classic and add a hearty, wholesome element to your fried chicken dinner.

    • Ingredients: Collard greens, bacon or ham hock, onions, garlic, chicken broth, apple cider vinegar.
    • Preparation: Sauté onions and garlic, add bacon or ham, cook until tender, add greens and broth, simmer until greens are tender.

    Collard greens bring color and a depth of flavor to the meal, balancing the richness of the fried chicken with their smoky, savory notes.

    Potato-Based Sides

    French Fries

    French fries are a classic side dish that complements fried chicken perfectly. The crispy, golden fries provide a satisfying crunch, making them an ideal accompaniment to the crunchy chicken.

    • Ingredients: Potatoes, oil for frying, salt.
    • Preparation: Cut potatoes into sticks, soak in water to remove excess starch, dry thoroughly, fry in hot oil until golden brown, and season with salt.

    French fries are not only easy to make but also loved by everyone, adding a familiar and comforting touch to your meal.

    Potato Salad

    Potato salad, with its cool, creamy texture, is a great side dish for fried chicken. The warm, crunchy chicken is perfectly counterbalanced by the crisp potatoes and tart vinaigrette.

    • Ingredients: Potatoes, mayonnaise, mustard, vinegar, celery, onions, salt, pepper.
    • Preparation: Boil potatoes until tender, chop and mix with other ingredients, chill before serving.

    This picnic staple is perfect for outdoor gatherings and adds a delicious, creamy element to your fried chicken meal.

    Baked Potatoes

    Baked potatoes are versatile and filling, making them an excellent choice to serve with fried chicken. They can be loaded with a variety of toppings to suit your taste.

    • Ingredients: Russet potatoes, olive oil, salt, pepper, toppings like sour cream, cheese, bacon, chives.
    • Preparation: Rub potatoes with olive oil, season with salt and pepper, bake until tender, and serve with desired toppings.

    Baked potatoes are easy to prepare and allow for creativity with toppings, making them a great addition to your meal.

    Other Popular Sides

    what to eat with fried chicken

    Corn on the Cob

    Grilled or boiled corn on the cob is a simple yet delicious side dish that pairs beautifully with fried chicken. The sweet, charred kernels offer a fresh and vibrant contrast to the crispy chicken.

    • Ingredients: Fresh corn, butter, salt, pepper.
    • Preparation: Grill or boil corn until tender, then season with butter, salt, and pepper.

    This easy-to-make side dish is perfect for outdoor grilling and warm weather gatherings, adding a touch of sweetness to your meal.

    Baked Beans

    Fried chicken pairs wonderfully with sweet and savory baked beans, made in the South. Tender beans and rich, zesty sauce combine to produce a tasty mix that gives your dinner depth and coziness.

    • Ingredients: Canned beans, barbecue sauce, brown sugar, onions, bacon.
    • Preparation: Mix all ingredients in a baking dish and bake until bubbly and hot.

    Baked beans are a hearty, comforting side that is a classic choice for any fried chicken dinner.

    Fresh Salads

    Fresh salads add a light and refreshing element to your fried chicken meal. Whether you prefer a simple green salad or something more elaborate, fresh salads are always a good choice.

    • Ingredients: Mixed greens, tomatoes, cucumbers, onions, dressing of choice.
    • Preparation: Toss all ingredients together and serve with your favorite dressing.

    Salads provide a crisp, fresh contrast to the richness of fried chicken, making your meal balanced and satisfying.

    Desserts and Drinks

    Peach Cobbler

    Peach cobbler is a traditional Southern dessert that pairs wonderfully with fried chicken. The sweet, juicy peaches and flaky crust make it a perfect ending to your meal.

    • Ingredients: Peaches, sugar, flour, butter, cinnamon.
    • Preparation: Mix sliced peaches with sugar and cinnamon, place in a baking dish, top with a flour and butter mixture, and bake until golden brown.

    Peach cobbler is a delightful treat that brings a sweet finish to your savory meal.

    Sweet Tea

    No Southern meal is complete without sweet tea. This refreshing beverage complements the flavors of fried chicken and other side dishes perfectly.

    • Ingredients: Black tea, sugar, water, lemon (optional).
    • Preparation: Brew strong black tea, mix with sugar until dissolved, chill and serve over ice with a slice of lemon if desired.

    Sweet tea adds a refreshing touch to your meal and is a must-have drink for any fried chicken feast.

    More Creative Pairings

    When considering what to eat with fried chicken, exploring creative pairings can elevate your meal. These unique sides offer a fresh twist on traditional accompaniments.

    Hush Puppies

    Hush puppies are deep-fried balls of cornmeal batter that make an excellent side dish for fried chicken. They add a crunchy, slightly sweet element that enhances the overall meal.

    • Ingredients: Cornmeal, flour, sugar, baking powder, salt, buttermilk, egg, onion, oil for frying.
    • Preparation: Mix dry ingredients, add wet ingredients and onions, shape into balls, and fry until golden brown.

    Hush puppies are a Southern classic that’s sure to be a hit with any fried chicken spread.

    Fried Green Tomatoes

    Fried green tomatoes are another iconic Southern side that pairs well with fried chicken. Their tangy flavor and crispy coating add an interesting twist to the meal.

    • Ingredients: Green tomatoes, cornmeal, flour, salt, pepper, buttermilk, oil for frying.
    • Preparation: Slice tomatoes, dip in buttermilk, coat with seasoned cornmeal, and fry until golden.

    These tasty morsels provide a delightful contrast to the savory, rich fried chicken.

    Deviled Eggs

    Deviled eggs are a simple yet delicious side dish that complements fried chicken beautifully. The creamy filling provides a nice contrast to the crispy chicken.

    • Ingredients: Hard-boiled eggs, mayonnaise, mustard, vinegar, salt, paprika.
    • Preparation: Halve eggs, remove yolks, mix yolks with other ingredients, refill egg whites, and sprinkle with paprika.

    Deviled eggs are a versatile and easy-to-make addition to any fried chicken meal.

    Seasonal and Regional Variations

    what to eat with fried chicken

    Considering what to eat with fried chicken often leads to exploring seasonal and regional variations. These sides highlight local flavors and seasonal produce, offering a fresh take on classic pairings.

    Summer Salads

    In the summer, light and refreshing salads are perfect to serve with fried chicken. Options like cucumber salad or heirloom tomato salad provide a fresh contrast to the heavy main dish.

    • Ingredients: Cucumbers or heirloom tomatoes, onions, vinegar, olive oil, salt, pepper.
    • Preparation: Slice vegetables, mix with dressing, and chill before serving.

    These salads are not only delicious but also help balance the richness of fried chicken. For more on the benefits of pairing light salads with meals, see https://www.thehealthyfish.com.

    Winter Comfort Sides

    In the winter, heartier sides like sweet potato casserole or roasted root vegetables are ideal for pairing with fried chicken.

    • Ingredients: Sweet potatoes or root vegetables, butter, brown sugar, cinnamon, salt, pepper.
    • Preparation: Peel and chop vegetables, toss with seasonings, and roast until tender.

    These warming sides add comfort and depth to your meal.

    Regional Specialties

    Explore regional specialties to pair with fried chicken. For example, consider serving fried chicken with New Orleans-style red beans and rice or Carolina-style boiled peanuts.

    • Ingredients: Red beans, rice, spices, or raw peanuts, salt.
    • Preparation: Cook red beans with spices and serve over rice, or boil peanuts until tender.

    FAQs About What To Eat With Fried Chicken

    Can I serve fried chicken with rice?

    Absolutely! Jasmine rice or seasoned rice can be a great accompaniment. The fluffy texture and mild flavor of rice complement the rich, savory taste of fried chicken perfectly.

    What are some healthy sides for fried chicken?

    Healthy sides include steamed vegetables, fresh salads, and fruit-based sides. These options provide a light and nutritious contrast to the fried chicken, making the meal balanced and enjoyable.

    Is it okay to serve fried chicken with bread?

    Yes, it’s perfectly fine to serve fried chicken with bread. Options like biscuits or cornbread are traditional choices that complement the dish well and add a comforting, homemade touch.

    What sides go well with fried chicken for a picnic?

    For a picnic, consider portable sides like potato chips, pasta salad, or fresh fruit. These easy-to-pack options pair well with fried chicken and are convenient for outdoor dining.

    Can I serve fried chicken with a sauce?

    Yes, dipping sauces like honey mustard, barbecue sauce, or ranch dressing are great with fried chicken. They add extra flavor and are sure to be a hit with guests.

    What vegetables pair well with fried chicken?

    Vegetables like green beans, collard greens, and corn on the cob are perfect pairings for fried chicken. These sides add color and nutrition to your meal.

    Pairing fried chicken with the right side dishes can transform a simple meal into a feast. From classic comfort foods to fresh, seasonal salads, there are countless ways to complement the rich, savory flavors of fried chicken. Whether you’re hosting a dinner party or enjoying a casual family meal, these side dish ideas will ensure your fried chicken is always the star of the show. For more on the benefits of pairing food with side dishes, check out https://www.foodandhealth.com. Enjoy your delicious meal and happy cooking!

  • How Many Calories in Fried Chicken? Comprehensive Guide

    How Many Calories in Fried Chicken? Comprehensive Guide

    Fried chicken is a beloved comfort food, enjoyed by many across the globe. However, it often raises questions about its calorie content and nutritional value. This comprehensive guide will break down the calories in different parts of fried chicken, explore how various cooking methods affect these numbers, and offer tips for making healthier choices. Let’s dive in!

    Introduction to Calories in Fried Chicken

    Fried chicken is a staple in many cuisines, but it’s not always clear how many calories we’re consuming with each crispy bite. Making educated dietary decisions can be aided by knowing the calorie content. In this section, we’ll introduce the concept of calories and their importance in our diet.

    What are Calories?

    Calories are a measure of energy. They indicate how much energy food will provide to the body when consumed. Maintaining a balance between calorie intake and energy expenditure is crucial for managing weight and overall health.

    How are Calories in Food Measured?

    Calories in food are typically measured using a bomb calorimeter, which calculates the energy released by burning food. For packaged foods, manufacturers often provide calorie information based on standardized measurements and ingredient analysis.

    By understanding these basics, we can better appreciate the details in the following sections where we break down the calorie content of different parts of fried chicken.

    Calories in Different Parts of Fried Chicken

    Not all fried chicken pieces are created equal when it comes to calorie content. Factors like the cut of chicken, cooking method, and whether the skin is included can significantly impact the calorie count.

    Calories in Drumsticks

    Chicken drumsticks are a popular choice for fried chicken lovers. On average, a drumstick can contain between 120 to 250 calories depending on its size and breading (Nutritionix). Typically, drumsticks have a higher calorie count due to the presence of both meat and skin.

    Calories in Chicken Breasts

    Chicken breasts are often considered a healthier option, but they can still pack a calorie punch when fried. A fried chicken breast with skin can have approximately 271 to 435 calories (CalorieKing). The calorie content can vary based on the breading and the cooking method.

    Calories in Wings

    Fried chicken wings are a favorite at many gatherings and sports events. A single wing can range from 100 to 200 calories (Chef’s Resource). Wings often have more calories due to their higher fat content and the additional oil absorbed during frying.

    Calories in Thighs

    Chicken thighs are another popular choice, known for their juicy and flavorful meat. A fried chicken thigh with skin can contain around 230 to 313 calories (CalorieKing). Thighs usually have more fat than breasts, contributing to their higher calorie content.

    Factors Affecting Calorie Content

    how many calories in fried chicken

    The way fried chicken is prepared can greatly influence its calorie content. Let’s explore how different cooking methods and ingredients impact the calories in your favorite fried chicken pieces.

    Cooking Methods and Their Impact

    Different cooking methods can lead to variations in calorie content. Deep-frying tends to add the most calories due to the oil absorbed during cooking. Pan-frying might have slightly fewer calories, while baking and air-frying are the healthier alternatives, as they use less or no oil (Chef’s Resource).

    Influence of Breading and Coating

    The type of breading and coating used on fried chicken can significantly affect its calorie content. Heavy batter or multiple layers of breading increase the calorie count compared to lighter coatings or no breading at all. Ingredients like flour, breadcrumbs, and seasonings all add to the total calorie content (Verywell Fit).

    Fast Food vs. Homemade Fried Chicken

    Fried chicken from fast-food chains can differ significantly in calorie content compared to homemade versions. Fast food options often include extra breading and are deep-fried, making them higher in calories.

    Caloric Content in Fast Food Fried Chicken

    Fast food fried chicken is known for its crispy texture and savory taste, but it often comes with a high calorie count. For example, a typical piece of fried chicken from KFC can contain anywhere from 300 to 700 calories depending on the size and preparation (CalorieKing). The extra breading and oil absorption significantly increase the calorie content.

    Different fast food outlets have varying calorie counts for their fried chicken:

    • KFC Original Recipe Chicken Breast: About 390 calories.
    • Popeyes Spicy Chicken Wing: Approximately 210 calories per piece.
    • Chick-fil-A Fried Chicken Sandwich: Around 440 calories.

    The additional breading and frying methods used by these chains add to the overall calorie content, making them higher than homemade options (FastFoodNutrition.org).

    How to Estimate Calories in Homemade Fried Chicken

    Homemade fried chicken allows for more control over ingredients and cooking methods, leading to potentially lower calorie counts. To estimate the calories, consider the following:

    1. Chicken Parts: Choose leaner cuts like skinless chicken breasts to reduce calories.
    2. Breading: Use lighter coatings such as whole wheat flour or panko breadcrumbs.
    3. Cooking Method: Opt for baking or air-frying instead of deep-frying.

    To calculate the calorie content of homemade fried chicken, tally the calories of each ingredient. For example, a homemade fried chicken breast might have around 250-350 calories, depending on the preparation (Chef’s Resource).

    Health Considerations

    Fried chicken is delicious, but it’s essential to consider its nutritional value and potential health impacts.

    Nutritional Value of Fried Chicken

    Fried chicken provides a substantial amount of protein, essential for muscle growth and repair. However, it also contains significant amounts of fat, especially saturated fat, which can be concerning if consumed in excess.

    Here’s a typical nutritional breakdown of fried chicken:

    • Protein: 24-62 grams per piece, depending on the cut (CalorieKing).
    • Fat: 10-20 grams per piece, with a mix of saturated, monounsaturated, and polyunsaturated fats.
    • Vitamins and Minerals: Fried chicken can provide vitamins like niacin (B3) and minerals such as phosphorus and selenium (Eat This Much).

    Health Risks and Benefits

    While fried chicken can be a good source of protein, it also has potential health risks:

    • High Calorie Count: Regular consumption of high-calorie foods can lead to weight gain and obesity.
    • Saturated Fat: Excessive intake of saturated fats can increase the risk of heart disease.
    • Sodium: Many fried chicken recipes are high in sodium, which can contribute to hypertension.

    To mitigate these risks, enjoy fried chicken in moderation and balance it with healthier options. Consider removing the skin and opting for baking or air-frying to reduce the calorie and fat content.

    Calorie Breakdown by Chicken Part

    Different parts of the chicken have varying calorie counts, especially when fried. Let’s take a closer look at how these differences stack up.

    Calories in Chicken Drumsticks

    Chicken drumsticks are a popular choice for many due to their flavor and convenience. A single fried drumstick can contain between 120 to 250 calories, depending on size and breading used (Nutritionix, Verywell Fit). They are often higher in calories because they include both meat and skin, which absorbs additional oil during frying.

    Calories in Chicken Breasts

    Chicken breasts are often chosen for their high protein content. However, a fried chicken breast can contain 271 to 435 calories per piece (CalorieKing, Eat This Much). The calorie content varies significantly based on whether the skin is included and the type of breading used. Skinless options and lighter breading can help reduce the calorie count.

    Calories in Chicken Wings

    Fried chicken wings are a staple at many gatherings. The calorie count for a single wing ranges from 100 to 200 calories, largely due to the breading and oil absorption (Chef’s Resource). Despite their small size, wings can be quite calorie-dense because of their fat content.

    Calories in Chicken Thighs

    Chicken thighs are known for their juicy texture and rich flavor. A fried chicken thigh can range from 230 to 313 calories (CalorieKing, Chef’s Resource). Thighs tend to have more fat than breasts, which contributes to their higher calorie count.

    Factors Affecting Calorie Content

    how many calories in fried chicken

    The way fried chicken is prepared can drastically alter its calorie content. Let’s explore how different methods and ingredients play a role.

    Cooking Methods and Their Impact

    Cooking methods significantly affect the calorie content of fried chicken. Deep-frying typically adds the most calories because the chicken absorbs more oil. In contrast, pan-frying might have fewer calories, while baking and air-frying are the healthier options, requiring less or no oil (Chef’s Resource, Verywell Fit).

    For instance:

    • Deep-fried: Absorbs a lot of oil, increasing calorie content.
    • Pan-fried: Uses less oil, resulting in slightly fewer calories.
    • Baked: Uses minimal oil, leading to a significant reduction in calories.
    • Air-fried: Uses hot air circulation to achieve a crispy texture with minimal or no oil.

    Influence of Breading and Coating

    The breading and coating used on fried chicken also impact its calorie count. Heavy batters or multiple layers of breading add more calories compared to lighter coatings. Ingredients like flour, breadcrumbs, and seasonings contribute to the overall calorie content (Verywell Fit, Chef’s Resource).

    For example:

    • Heavy batter: Higher calorie count due to more ingredients and oil absorption.
    • Light breading: Lower calorie count, especially when using whole wheat flour or panko breadcrumbs.
    • No breading: Significantly fewer calories, relying on spices for flavor.

    Health Considerations

    While fried chicken is delicious, it’s important to consider its nutritional value and potential health impacts.

    Nutritional Value of Fried Chicken

    Fried chicken provides a good amount of protein, essential for muscle growth and repair. However, it also comes with significant fat content, particularly saturated fat, which can be concerning if consumed excessively (Eat This Much).

    Typical nutritional breakdown:

    • Protein: 24-62 grams per piece, depending on the cut.
    • Fat: 10-20 grams per piece, including saturated, monounsaturated, and polyunsaturated fats.
    • Vitamins and Minerals: Provides vitamins like niacin (B3) and minerals such as phosphorus and selenium.

    Health Risks and Benefits

    Although fried chicken can be a great source of protein, it also poses health risks:

    • High Calorie Count: Regular consumption can lead to weight gain and obesity.
    • Saturated Fat: Excessive intake increases the risk of heart disease.
    • Sodium: High sodium content can contribute to hypertension.

    To enjoy fried chicken while maintaining a healthy diet, consider these tips:

    • Moderation: Enjoy fried chicken occasionally as part of a balanced meal.
    • Healthier Preparations: Opt for baking or air-frying to reduce calorie and fat content.
    • Lean Cuts: Choose skinless chicken breasts to lower the fat content.
    • Balanced Meals: Pair fried chicken with nutritious sides like vegetables and whole grains.

    Making Healthier Fried Chicken Choices

    how many calories in fried chicken

    Fried chicken can be part of a balanced diet if you make informed choices. Here are some tips for enjoying this delicious dish while keeping it healthier.

    Choose Lean Cuts

    Opt for skinless chicken breasts instead of thighs or wings. Skinless breasts are lower in fat and calories but still provide a good amount of protein. By removing the skin, you significantly reduce the fat content, making your fried chicken a healthier option (Verywell Fit, CalorieKing).

    Use Healthier Breading and Coatings

    Traditional breading can add a lot of calories and fat to fried chicken. To make it healthier, use lighter alternatives like whole wheat flour, panko breadcrumbs, or even crushed cornflakes. These options provide a satisfying crunch without the extra calories and fat (Chef’s Resource).

    Cooking Methods to Reduce Calories

    The way you cook your fried chicken can greatly affect its calorie content. Here are some healthier cooking methods:

    • Baking: Instead of deep-frying, bake your chicken in the oven. This method uses less oil and can still result in a crispy texture.
    • Air-frying: Air fryers use hot air to cook the chicken, giving it a crispy exterior with minimal oil.
    • Pan-frying: Use a minimal amount of healthy oil like olive oil or canola oil to reduce calorie intake.

    Flavor Without the Calories

    Enhance the flavor of your fried chicken without adding extra calories by using herbs and spices. Paprika, garlic powder, onion powder, and cayenne pepper can add a lot of flavor without the need for heavy breading or high-calorie sauces (Verywell Fit).

    Portion Control

    Be mindful of portion sizes. Larger pieces of fried chicken contain more calories. Opt for smaller portions and balance your meal with healthy sides like vegetables or a salad. This approach helps you enjoy fried chicken without overindulging (CalorieKing, Nutritionix).

    Additional Tips for Healthier Fried Chicken

    Here are some additional tips to make your fried chicken experience healthier:

    • Drain Excess Oil: After frying, place the chicken on a paper towel to absorb excess oil.
    • Homemade Sauces: Create your own low-calorie dipping sauces using ingredients like Greek yogurt, mustard, and fresh herbs.
    • Pair with Healthy Sides: Serve fried chicken with steamed vegetables, quinoa, or a fresh salad to create a balanced meal.

    FAQs

    In this section, we’ll address some frequently asked questions about the calorie content and health aspects of fried chicken.

    Are There Any Variations in Calories Depending on the Frying Method?

    Yes, the frying method can impact calorie content. Pan-fried chicken usually contains fewer calories than deep-fried chicken because it absorbs less oil (Chef’s Resource).

    Does the Size of the Chicken Piece Affect the Calorie Count?

    Absolutely. Larger pieces of chicken will generally have more calories compared to smaller ones. It’s crucial to consider portion sizes when calculating calorie content.

    How Can I Make Fried Chicken Healthier?

    To make fried chicken healthier, choose leaner cuts like skinless breast meat, use less oil for frying, and opt for lighter breading options or alternative coatings like crushed cornflakes.

    Can I Still Enjoy Fried Chicken as Part of a Balanced Diet?

    Yes, moderation is key. Enjoying fried chicken occasionally as part of a balanced meal, accompanied by nutritious sides and vegetables, can be a flavorful addition without sabotaging your overall health goals.

    By following these tips and considering the nutritional information, you can enjoy fried chicken while maintaining a healthy diet.

    Conclusion

    Understanding the calorie content in fried chicken and making informed choices can help you enjoy this delicious dish without guilt. By opting for healthier cuts, using lighter breading, and choosing better cooking methods, you can reduce the calories and still enjoy the crispy, savory goodness of fried chicken.

    By incorporating these tips and being mindful of portion sizes and ingredients, you can make fried chicken a part of a balanced diet. So, go ahead and enjoy your favorite comfort food, but do so wisely and healthily!

  • How Long to Deep Fry Chicken Breast: Expert Tips & Cooking Times

    How Long to Deep Fry Chicken Breast: Expert Tips & Cooking Times

    Deep frying chicken breasts can yield a delightfully crispy exterior and a juicy, tender interior. However, nailing the perfect cooking time is crucial to avoid undercooking or overcooking. Understanding how long to deep fry chicken breast is essential for achieving the best results. This comprehensive guide will explore everything you need to know about deep frying chicken breasts, from preparation to serving. With our step-by-step instructions and expert tips, you’ll be well-equipped to master this cooking technique and enjoy perfectly fried chicken every time. Let’s dive in!

    Introduction of How Long to Deep Fry Chicken Breast

    Deep frying chicken breasts might seem intimidating, but it’s actually quite straightforward. The key is to understand the right cooking techniques and times. By following our step-by-step guide, you’ll master deep frying chicken breasts in no time. Let’s dive in!

    Preparation

    Choosing the Right Chicken Breasts

    When it comes to deep frying, selecting the right type of chicken breasts is vital. Boneless, skinless chicken breasts are ideal because they cook evenly and quickly. Ensure the breasts are of similar thickness to avoid uneven cooking. If required, pound them to a uniform thickness using a meat mallet.

    Marinating and Seasoning

    Marinating chicken breasts can significantly enhance their flavor and juiciness. A simple marinade of buttermilk, salt, pepper, and garlic powder can work wonders. Allow the chicken to marinate for at least an hour, or overnight for the best results. Seasoning is equally important; use a blend of paprika, cayenne, and onion powder to add depth to the flavor.

    Breading Process

    Creating a Breading Station

    Setting up a breading station is the next step. You’ll need three shallow bowls: one with flour mixed with spices, one with beaten eggs, and one with breadcrumbs. This three-step process ensures the chicken breasts are well-coated and crispy.

    1. Flour Mixture: Combine flour, salt, pepper, paprika, and garlic powder.
    2. Egg Mixture: Beat the eggs with a splash of milk.
    3. Breadcrumbs: Use plain or seasoned breadcrumbs for extra flavor.

    Step-by-Step Breading Instructions

    1. Dredge the chicken breasts in the flour mixture, ensuring they are fully coated.
    2. Let any excess egg mixture drop off as you dip them in it.
    3. Roll them in the breadcrumbs, pressing lightly to ensure an even coating.

    Deep Frying

    how long to deep fry chicken breast

    Choosing the Right Oil

    When deep-frying, the oil selection is very important. Oils with high smoke points, like vegetable or peanut oil, are best. They maintain a stable temperature and prevent the chicken from burning. Heat the oil to around 350°F (175°C) for optimal results.

    Setting Up for Deep Frying

    Before you start frying, gather all necessary equipment: a deep fryer or a heavy-bottomed pot, a thermometer, and a slotted spoon. Safety is paramount; make sure to have a fire extinguisher nearby and keep children and pets out of the kitchen.

    Deep Frying Process

    Lower the breaded chicken breasts into the heated oil with caution. Fry them for 8-10 minutes, turning occasionally to ensure even browning. Use a meat thermometer to check the internal temperature, which should reach 165°F (74°C). If you’re new to deep frying, checking the temperature is essential to ensure the chicken is cooked through.

    Tip: Avoid overcrowding the pot as it can lower the oil temperature and result in greasy chicken. Fry in batches if necessary.

    Next, we’ll explore post-frying steps and serving suggestions.

    Cooking Time and Techniques of Deep Fry Chicken Breast Time

    Cooking Time for Chicken Breasts

    The cooking time for chicken breasts can vary based on their thickness and whether they are bone-in or boneless. Generally, boneless, skinless chicken breasts should be deep-fried for about 8-10 minutes. Maintaining the oil temperature at 350°F (175°C) is crucial for achieving a crispy exterior and juicy interior.

    Tip: Always use a meat thermometer to check the internal temperature of the chicken breasts. They should reach 165°F (74°C) to ensure they are safe to eat. If the chicken is not fully cooked, you can finish cooking it in the oven.

    Tips for Ensuring Even Cooking

    To ensure your chicken breasts cook evenly, avoid overcrowding the fryer. Overcrowding can lower the oil temperature, resulting in greasy and undercooked chicken. Fry in batches if necessary. Turn the chicken pieces occasionally for even browning. Using a deep pot can help maintain the oil temperature better than a shallow pan.

    For comprehensive safety guidelines, visit the National Fire Protection Association.

    Safety Tip: Keep children and pets away from the kitchen while deep frying to prevent accidents.

    Post-Frying

    Draining and Resting

    Once the chicken breasts are golden brown and cooked through, remove them from the oil using a slotted spoon. Place them on a plate lined with paper towels to drain any excess oil. Let the chicken rest for a few minutes before serving to lock in the juices and ensure they remain tender and flavorful.

    Serving Suggestions

    Deep-fried chicken breasts can be paired with a variety of side dishes. Here are some ideas:

    • Mashed potatoes
    • Coleslaw
    • Cornbread
    • Fresh salad

    For more ideas on what to serve with your fried chicken, check out these side dishes for fried chicken.

    Expert Tips and Tricks for How Long to Deep Fry Chicken Breast

    Expert Tips for Perfectly Deep-Fried Chicken Breasts

    Deep frying chicken breasts to perfection involves more than just knowing the right cooking time. Here are some expert tips to help you achieve consistently excellent results:

    1. Pat Chicken Dry: Before breading, ensure the chicken breasts are dry. Excess moisture can cause the breading to become soggy and can lead to oil splatters.

    2. Use a Meat Thermometer: Always use a meat thermometer to check the internal temperature. Aim for 165°F (74°C) to ensure the chicken is fully cooked and safe to eat.

    3. Maintain Oil Temperature: Keeping the oil at a steady 350°F (175°C) is crucial. Use a thermometer to monitor the oil temperature and adjust the heat as needed to prevent burning or undercooking.

    4. Bread Just Before Frying: Bread the chicken breasts just before you’re ready to fry them. This helps maintain the crispiness of the coating.

    5. Avoid Overcrowding: Fry only a few pieces at a time. Overcrowding the pot can lower the oil temperature, resulting in greasy and unevenly cooked chicken.

    6. Use Fresh Oil: For the best flavor, use fresh oil. Reusing oil can impart old flavors to your food and may contain burnt particles.

    7. Season Every Layer: Season the flour, egg wash, and breadcrumbs separately. This ensures that each layer of the coating is flavorful.

    Tips for a Healthier Alternative about The Best Way to Deep Fry Chicken Breast

    If you’re looking to enjoy fried chicken with less guilt, consider using an air fryer. Air frying requires little to no oil and can still produce a crispy exterior. Here’s a quick guide to air frying chicken breasts:

    1. Preheat your air fryer to 375°F (190°C).
    2. Season the chicken breasts as usual and coat them with breadcrumbs.
    3. Lightly spray the chicken with cooking oil spray.
    4. Arrange the chicken in a single layer within the air fryer basket.
    5. After cooking for 15 to 20 minutes, and turning once during that time, get the internal temperature up to 165°F (74°C).

    For more on healthy cooking techniques, visit Bon Appétit’s guide on best oils for frying.

    Common Mistakes to Avoid

    1. Overcooking: Overcooked chicken becomes dry and tough. Pay special attention to the internal temperature and cooking time.

    2. Using Low-Quality Oil: Low-quality oil can affect the taste and healthiness of your fried chicken. Always use high-quality oil with a high smoke point.

    3. Skipping the Resting Period: Allowing the chicken to rest after frying helps lock in the juices. Skipping this step can result in dry chicken.

    Serving and Storing Leftovers

    Serving Suggestions: Serve your deep-fried chicken breasts with a variety of side dishes like mashed potatoes, coleslaw, or a fresh salad. For more ideas, check out these side dishes for fried chicken.

    How to Store Leftovers: Put any leftovers in the refrigerator in an airtight container. They can be reheated in an oven at 350°F (175°C) for about 10-15 minutes to restore some of their crispiness.

    Troubleshooting Common Issues of Best Way to Deep Fry Chicken Breast

    how long to deep fry chicken breast

    Dealing with Common Issues in Deep Frying Chicken Breasts

    Even with the best preparation, you may encounter some common issues when deep frying chicken breasts. Here’s how to troubleshoot them, with a focus on understanding how long to deep fry chicken breast:

    1. Chicken is Undercooked Inside:

    • Solution: If the chicken is undercooked, the oil temperature may have been too high, causing the outside to cook faster than the inside. Ensure the oil is consistently at 350°F (175°C) and use a meat thermometer to check the internal temperature. Knowing how long to deep fry chicken breast is crucial; it typically takes 8-10 minutes, but always check the internal temperature to be sure.

    2. Breading Falls Off:

    • Solution: Ensure the chicken is dry before breading and that each layer (flour, egg, breadcrumbs) is applied thoroughly. Let the breaded chicken rest for a few minutes before frying to help the coating adhere better. This doesn’t directly affect how long to deep fry chicken breast, but a well-adhered breading cooks more evenly.

    3. Chicken is Too Greasy:

    • Solution: Greasiness can result from frying at too low a temperature. Make sure the oil is hot enough before adding the chicken and maintain the temperature during frying. Maintaining the right temperature is key to ensuring how long to deep fry chicken breast results in non-greasy, crispy chicken.

    4. Chicken is Overcooked and Dry:

    • Solution: Overcooking can happen if the chicken is left in the oil too long or the temperature is too low, causing prolonged cooking times. Monitor the oil temperature closely and remove the chicken as soon as it reaches 165°F (74°C) internally. Understanding precisely how long to deep fry chicken breast helps avoid overcooking.

    Enhancing Flavor and Texture

    1. Adding Spices to the Breading:

    • Experiment with different spices and herbs in the breading mixture. Adding spices like cayenne, paprika, garlic powder, and onion powder can enhance the flavor profile significantly without affecting how long to deep fry chicken breast.

    2. Using Buttermilk Marinades:

    • A buttermilk marinade not only tenderizes the chicken but also adds a subtle tangy flavor. Marinate the chicken for at least an hour, or overnight for best results. This can enhance the juiciness while adhering to the correct how long to deep fry chicken breast.

    3. Trying Different Breading Materials:

    • Instead of plain breadcrumbs, try panko for extra crunch or crushed cornflakes for a unique texture. You can also mix in grated Parmesan cheese for a cheesy crust. These variations do not change how long to deep fry chicken breast but can improve the texture and flavor.

    Pro Tips for Advanced Cooks For Best Way to Deep Fry Chicken Breast

    1. Double Breading:

    • For an extra crispy coating, consider double breading the chicken. After the initial breading, dip the chicken back into the egg wash and breadcrumbs for a second coat. Double breading might slightly extend how long to deep fry chicken breast, so keep an eye on the internal temperature.

    2. Using a Brine:

    • Brining the chicken in a saltwater solution before marinating can enhance juiciness and flavor. A simple brine of water, salt, and sugar can make a big difference, although it does not change how long to deep fry chicken breast.

    3. Infusing Oil with Aromatics:

    • Add whole garlic cloves, rosemary sprigs, or thyme to the oil while it heats. This infuses the oil with aromatic flavors that subtly enhance the chicken. This technique doesn’t affect how long to deep fry chicken breast but adds depth to the flavor.

    Final Thoughts and Encouragement about Deep Fry Chicken Breast Time

    how long to deep fry chicken breast

    Final Thoughts

    Mastering the art of deep frying chicken breasts requires understanding the right techniques and precise cooking times. Knowing exactly how long to deep fry chicken breast is essential to achieve a perfectly crispy exterior and a juicy, tender interior. Each step, from selecting the best chicken breasts to using the correct oil and maintaining a consistent temperature, plays a crucial role in achieving delicious results. By following this comprehensive guide, you’ll be well-equipped to create perfectly deep-fried chicken breasts every time.

    Encouragement to Practice

    Cooking is a journey, and perfection comes with practice. The more you experiment with how long to deep fry chicken breast, the more confident you’ll become in your culinary skills. Every effort is a chance to grow and learn. Don’t be afraid to try different seasonings, marinades, and breading techniques to make the recipe your own.

    Enjoy the process, savor the results, and share your delicious creations with family and friends. Thank you for following this guide, and happy frying!

    FAQs: How Long to Deep Fry Chicken Breast

    Frequently Asked Questions

    Is it necessary to marinate chicken breasts before frying?

    Marinating chicken breasts is not strictly necessary, but it can enhance the flavor and add moisture, preventing the meat from drying out during frying. A simple marinade of buttermilk and spices works well.

    Can I use a different type of oil for frying?

    Yes, you can use oils with high smoke points such as canola, peanut, or vegetable oil. Avoid using oils with low smoke points, as they can burn easily.

    Should the chicken breasts be boneless or bone-in?

    You can deep-fry chicken breasts with or without bones. Bone-in chicken may require slightly longer cooking times due to the bone.

    Can I reuse the frying oil for subsequent batches?

    Yes, you can reuse frying oil multiple times if it is properly strained and stored. Ensure the oil is completely cooled before transferring it to a container.

    What should I serve with deep-fried chicken breasts?

    Deep-fried chicken breasts pair well with a variety of sides such as mashed potatoes, coleslaw, cornbread, or a fresh salad.

    Can I oven-bake chicken breasts instead of deep-frying them?

    Yes, you can achieve delicious results by baking chicken breasts in the oven at 425°F (218°C) for approximately 20-25 minutes.

    How do I avoid the chicken breasts from becoming greasy?

    To prevent greasiness, ensure the oil is at the correct temperature before frying. Draining the cooked chicken on paper towels helps remove excess oil.

    Can I use frozen chicken breasts for deep-frying?

    It is best to thaw chicken breasts completely before frying to ensure even cooking and minimize the risk of oil splatters.

    Can I refrigerate leftover fried chicken breasts?

    Yes, you can refrigerate leftover fried chicken breasts. Remember that when they reheat, their texture could somewhat change.

    How can I make the fried chicken breasts spicier?

    To add a spicy kick, incorporate cayenne pepper, chili powder, paprika, or hot sauce into the flour or batter mixture when coating the chicken breasts.

    What should I do if the chicken breasts are still pink on the inside after frying?

    If the chicken breasts are still pink after frying, return them to the hot oil and cook for an additional few minutes until the internal temperature reaches 165°F (74°C).

    Can I make a healthier version of deep-fried chicken breasts?

    It is possible to utilize an air fryer in place of a deep fryer. Chicken breasts cooked this way are crispy and tasty with little to no oil needed.

    By following these steps, you’ll be well on your way to mastering the art of deep-frying chicken breasts. Enjoy experimenting with different seasonings and techniques to create your own signature dish!

    Conclusion of Best way To Deep Fry Chicken Breast

    Mastering the art of deep frying chicken breasts requires understanding the right techniques and cooking times. From selecting the perfect chicken breasts to using the correct oil and maintaining a steady temperature, each step plays a crucial role in achieving delicious results. By following this comprehensive guide, you’ll be well-equipped to create perfectly crispy and juicy deep-fried chicken breasts every time.

  • Can I Air Fry Frozen Chicken? Ultimate Guide & Tips

    Can I Air Fry Frozen Chicken? Ultimate Guide & Tips

    If you’ve ever found yourself wondering, can I air fry frozen chicken? then you’re in the right place. Air frying has revolutionized the way we cook, making it easier and healthier. This comprehensive guide will walk you through everything you need to know about air frying frozen chicken. From preparation to troubleshooting, we’ve got you covered. Let’s dive into the world of air frying frozen chicken and make your meals quick, delicious, and hassle-free.

    Introduction and Basics

    Air frying has gained popularity as a cooking technique since it is quick and healthy. But what about those times when you forget to thaw your chicken? Don’t worry! You can air fry frozen chicken directly, and it’s simpler than you might think. This method saves time and still delivers a tasty, juicy meal. In this article, we’ll explore why air frying frozen chicken is a game-changer and how you can do it perfectly.

    Why Air Fry Frozen Chicken?

    Air frying frozen chicken offers several advantages that make it an ideal cooking method, especially when you’re short on time. Here’s why:

    1. Convenience and Time-Saving Air frying frozen chicken eliminates the need for thawing, which can be a time-consuming process. You can go straight from the freezer to the air fryer, reducing meal prep time significantly. This is a huge benefit for busy individuals and families.
    2. Health Benefits Air fryers use significantly less oil compared to traditional frying methods, making your meals healthier. The hot air circulation cooks the chicken evenly and crisps up the exterior while keeping the inside moist and juicy. You get the delicious taste and texture of fried chicken without the added calories and fats.
    3. Versatility of Air Fryers Air fryers aren’t just for chicken; they can cook a variety of foods from vegetables to desserts. This versatility means you can use your air fryer for multiple dishes, making it a valuable kitchen appliance. Plus, it’s easy to clean, which adds to its convenience.

    Stay tuned for the next part, where we’ll dive into the preparation steps and detailed instructions for air frying frozen chicken breasts.

    Preparation and Cooking Steps

    Preparation Steps

    Getting ready to air fry frozen chicken is simple and quick. Here are the essential preparation steps to ensure your chicken turns out perfectly every time.

    Preheating the Air Fryer
    Preheating your air fryer is crucial for even cooking. Set your air fryer to 400°F (200°C) and let it preheat for about 5 minutes. This ensures that the chicken will cook evenly and develop a crispy exterior. It’s a step you don’t want to skip!

    Seasoning the Chicken
    While the air fryer is preheating, take your frozen chicken and season it well. Use a brush to coat the chicken with a thin layer of oil, such as olive or avocado oil. This helps the seasonings stick to the chicken. Paprika, garlic powder, salt, and pepper are common seasonings. Use your imagination and your favorite herbs and spices.

    Importance of Using Oil or Cooking Spray
    Using oil or cooking spray is key to achieving a crispy texture. It prevents the chicken from sticking to the air fryer basket and enhances the flavor. Plus, it helps the seasonings adhere better, giving you a deliciously seasoned chicken.

    Step-by-Step Guide to Air Fry Frozen Chicken Breasts

    can i air fry frozen chicken

    Here’s a detailed guide on how to air fry frozen chicken breasts perfectly every time.

    Detailed Instructions with Temperature and Time Settings

    1. Preheat: Preheat your air fryer to 400°F (200°C) for 5 minutes.
    2. Prepare Chicken: Lightly coat the chicken breasts with oil. Season generously with salt, pepper, garlic powder, and paprika.
    3. Place in Air Fryer: Arrange the chicken breasts in a single layer in the air fryer basket. Make sure they don’t overlap.
    4. Cook: Air fry the chicken at 400°F (200°C) for 20-25 minutes. To guarantee even browning, turn the chicken over halfway through cooking. The interior temperature of 165°F (75°C) indicates that the chicken is done.
    5. Rest and Serve: Let the chicken rest for 5 minutes after cooking. This helps the juices redistribute, making the chicken juicier.

    Tips for Checking Doneness
    Check the chicken’s internal temperature with a meat thermometer. It should read 165°F (75°C) when fully cooked. If you don’t have a thermometer, cut into the thickest part of the chicken; the juices should run clear, not pink.

    Resting and Serving the Chicken
    Before serving, allow the chicken to rest for a few minutes. This makes the chicken more delicious and moist by allowing the liquids to redistribute. Slice and serve with your favorite sides, and enjoy!

    Stay tuned for Part 3, where we’ll explore different cuts of chicken and variations in seasoning.

    Different Cuts and Variations

    Air Frying Different Cuts of Frozen Chicken

    Air frying isn’t just limited to chicken breasts. You can use this versatile method to cook a variety of chicken cuts directly from frozen. Each cut has its unique texture and flavor, and with the right approach, you can achieve perfect results every time.

    Chicken Breasts
    Chicken breasts are lean and cook relatively quickly in the air fryer. They’re perfect for quick meals and can be used in salads, sandwiches, or served with sides. Follow the detailed instructions in Part 2 for perfectly cooked chicken breasts.

    Chicken Thighs
    Chicken thighs are more flavorful and juicy due to their higher fat content. Preheat your air fryer to 375°F (190°C). Season the thighs with your preferred spices and air fry for 25-30 minutes, flipping halfway through. Ensure they reach an internal temperature of 165°F (75°C).

    Chicken Drumsticks
    Drumsticks are fun to eat and great for kids. Preheat your air fryer to 400°F (200°C). Season the drumsticks, place them in the air fryer basket, and cook for 25-30 minutes, turning halfway through. Check for doneness with a meat thermometer.

    Chicken Tenders
    Chicken tenders are quick and easy. Preheat your air fryer to 400°F (200°C). Lightly coat the tenders with oil and season them. Cook for 10-12 minutes, flipping halfway. They should be golden brown and have an internal temperature of 165°F (75°C).

    Seasoning and Flavor Variations

    To keep things exciting, experiment with different seasonings and marinades. Here are some ideas to get you started:

    Basic Seasoning Options
    Stick to the basics like salt, pepper, garlic powder, and paprika for a simple yet tasty meal. The chicken’s inherent flavor is enhanced by these ingredients.

    Marinades and Sauces
    Marinate your chicken in advance with options like teriyaki, lemon herb, or barbecue sauce. Marinating adds depth of flavor and keeps the chicken moist. After air frying, toss the chicken in extra sauce for added flavor.

    Creative Seasoning Ideas
    Get creative with your spices. Try Cajun seasoning for a spicy kick, or go for Italian herbs like rosemary and thyme. You can also use spice blends like taco seasoning or curry powder to infuse your chicken with unique flavors.

    Tips and Troubleshooting Air Fryer Frozen Chicken

    can i air fry frozen chicken

    Tips for Perfect Air FryFrozen Chicken

    Achieving the perfect air fried frozen chicken requires some handy tips and tricks. These will ensure your chicken is cooked to perfection every time.

    Ensuring Even Cooking
    Don’t overcrowd the air fryer basket. Arrange the chicken pieces in a single layer with space between them. This allows hot air to circulate evenly, cooking the chicken thoroughly.

    Using a Meat Thermometer
    To ensure doneness, use a meat thermometer at all times. The internal temperature should reach 165°F (75°C). This ensures the chicken is fully cooked and safe to eat.

    Avoiding Common Mistakes
    Common mistakes include not preheating the air fryer, overcrowding the basket, and not flipping the chicken halfway. Preheating ensures even cooking from the start. Overcrowding can lead to uneven cooking, so cook in batches if needed. Flipping the chicken halfway ensures both sides are evenly browned and cooked.

    Troubleshooting Common Issues

    Even with the best preparations, issues can arise. Here’s how to troubleshoot common problems:

    Chicken Not Cooking Evenly
    If your chicken isn’t cooking evenly, it’s likely due to overcrowding. Ensure there’s enough space between the pieces for air to circulate. Cooking in smaller batches can help.

    Chicken Too Dry or Overcooked
    To prevent dryness, avoid overcooking. Use a meat thermometer to check for doneness and remove the chicken once it reaches 165°F (75°C). Letting the chicken rest for a few minutes before serving helps retain its juices.

    Handling Smoke from the Air Fryer
    If your air fryer smokes, it could be due to excess oil or fat dripping and burning. Clean the air fryer regularly, especially after cooking fatty foods. Using less oil can also help reduce smoke.

    Storage and Reheating Air Fryer Frozen Chicken

    Storing and Reheating Air Fried Chicken

    Proper storage and reheating methods ensure your air fried chicken remains tasty and safe to eat.

    Proper Storage Techniques
    Keep any leftover air-fried chicken refrigerated in an airtight container. It can last for up to 3-4 days. If you plan to keep it longer, freeze the chicken in a freezer-safe container or bag for up to 3 months.

    Best Methods for Reheating
    Reheating in the air fryer is the best way to retain the chicken’s crispy texture. Preheat the air fryer to 360°F (180°C) and cook the chicken for 2-3 minutes until heated through. The microwave might make the chicken soggy, so stay away from it. If you must use the microwave, cover the chicken with a damp paper towel to retain moisture.

    Maintaining Moisture and Flavor
    To keep the chicken moist when reheating, add a bit of water or chicken broth to the air fryer basket. This creates steam that helps retain moisture. Also, consider brushing the chicken with a little oil before reheating to enhance flavor.

    Nutritional Information and Health Benefits

    can i air fry frozen chicken

    Nutritional Information of Air Fried Frozen Chicken

    Understanding the nutritional content of your food is crucial for maintaining a balanced diet. Air frying frozen chicken not only offers convenience and flavor but also retains the nutritional benefits of chicken without the added fats from traditional frying methods.

    Nutritional Breakdown
    A typical serving of air fried frozen chicken breast (about 4 ounces) contains approximately:

    • Calories: 160-200 kcal
    • Protein: 30-35 grams
    • Fat: 3-5 grams
    • Carbohydrates: 0-1 gram
      These values can vary slightly based on the type of chicken and seasoning used. Chicken thighs and drumsticks may have higher fat content due to their nature, providing a richer flavor and juicier texture.

    Health Benefits
    Air frying frozen chicken retains the lean protein benefits essential for muscle growth and repair. It’s a healthier alternative to deep frying, as it uses less oil, reducing the overall fat intake. The high protein content helps in satiety, making it an excellent choice for weight management. Additionally, chicken is a good source of essential vitamins and minerals like B vitamins, selenium, and phosphorus, which support various bodily functions including metabolism, immune response, and bone health.

    Comparison with Other Cooking Methods

    Comparing air frying with other cooking methods highlights its advantages in terms of health, convenience, and taste.

    Air Frying vs. Traditional Frying
    Air frying uses hot air to cook food, requiring minimal oil. This results in fewer calories and less fat compared to traditional frying, which can significantly increase the fat content due to the oil absorbed during cooking. Air frying also reduces the risk of harmful compounds like acrylamide that can form during high-temperature frying.

    Air Frying vs. Baking
    While baking is also a healthy cooking method, air frying offers a faster cooking time and a crispier texture. Air fryers circulate hot air more efficiently, leading to evenly cooked food in less time. Baking may require more oil or butter to achieve a similar crispiness, potentially adding more calories and fat.

    FAQs About Air Fryer Frozen Chicken

    Here are some frequently asked questions about air frying frozen chicken, based on the “people also ask” section for the keyword.

    Can I Cook Frozen Chicken Directly in the Air Fryer?

    Indeed, using an air fryer to cook frozen chicken directly is possible. This method saves time as there’s no need to thaw the chicken. Ensure you follow proper seasoning and cooking instructions to get the best results.

    How Long Does It Take to Cook Frozen Chicken in an Air Fryer?

    The size and cut of the chicken determine how long it takes to cook. Generally, it takes about 20-25 minutes for frozen chicken breasts at 400°F (200°C). Other cuts like thighs or drumsticks might take slightly longer. Always check for an internal temperature of 165°F (75°C).

    What Temperature Should I Use to Air Fry Frozen Chicken?

    Set your air fryer to 400°F (200°C) for most cuts of frozen chicken. This high temperature ensures the exterior becomes crispy while the interior cooks thoroughly. For larger pieces like whole chicken, you might start at a lower temperature to allow even cooking.

    How Do I Know When the Chicken is Fully Cooked?

    Use a meat thermometer to check the internal temperature, which should be 165°F (75°C). If you don’t have a thermometer, cut into the thickest part of the chicken; the juices should run clear, and the meat should be opaque.

    Can I Use Any Type of Seasoning on Frozen Chicken?

    Absolutely! You can use a wide range of seasonings and marinades. Popular choices include garlic powder, paprika, Italian herbs, and even barbecue sauce. Seasoning adds flavor and enhances the taste of the chicken.

    In conclusion, air frying frozen chicken is a convenient, healthy, and versatile method to prepare a quick and delicious meal. From chicken breasts to drumsticks, you can achieve perfectly cooked, juicy chicken without the need for thawing. By following the tips, steps, and troubleshooting advice provided in this guide, you can master the art of air frying frozen chicken. So, next time you forget to thaw your chicken, don’t worry—just grab your air fryer and enjoy a tasty meal in no time.

  • How Long Does Buffalo Chicken Dip Last in the Fridge? | Storage Tips

    How Long Does Buffalo Chicken Dip Last in the Fridge? | Storage Tips

    Understanding how long your buffalo chicken dip lasts in the fridge is crucial. This popular party appetizer, loaded with chicken, hot sauce, and creamy cheese, can be a hit at any gathering. However, knowing the proper storage techniques ensures it remains fresh and safe to eat. In this article, we’ll dive into the details of buffalo chicken dip storage, covering everything from shelf life to safety tips. Let’s get started!

    Introduction and Basics

    Buffalo chicken dip is a beloved snack, especially during game days and parties. Yet, many people wonder how long it remains safe to eat when stored in the fridge. In this article, we’ll explore the shelf life of buffalo chicken dip, best storage practices, and safety tips to ensure your dip stays delicious and fresh.

    What is Buffalo Chicken Dip?

    Buffalo chicken dip is a creamy, spicy dip made with shredded chicken, hot sauce, cream cheese, ranch or blue cheese dressing, and shredded cheese. It’s a crowd-pleaser, perfect for parties, gatherings, or simply enjoying as a snack.

    Why Proper Storage is Important

    Storing buffalo chicken dip properly is essential to avoid foodborne illnesses and maintain its flavor. Incorrect storage can lead to bacterial growth, making the dip unsafe to eat. Let’s explore the best ways to store your dip to keep it fresh and tasty.

    How Long Does Buffalo Chicken Dip Last in the Fridge?

    Typically, buffalo chicken dip lasts for 3 to 5 days in the fridge. This duration can vary based on ingredients and storage conditions. The dip should be kept at a constant, temperate temperature and kept in an airtight container to extend its shelf life.

    Best Practices for Storing Buffalo Chicken Dip

    To ensure your buffalo chicken dip stays fresh, follow these storage tips:

    • Use airtight containers to prevent air exposure.
    • Label containers with the date to track freshness.
    • Keep the dip in the coldest part of the fridge, away from the door.
    • Avoid cross-contamination by using clean utensils when serving.

    Signs Your Buffalo Chicken Dip Has Gone Bad

    It’s important to recognize when your dip is no longer safe to eat. Here are some signs your buffalo chicken dip has spoiled:

    • Visual indicators: Mold or discoloration on the surface.
    • Smell: A sour or off odor indicates spoilage.
    • Taste: A change in taste or texture can mean the dip is past its prime.

    Can You Freeze Buffalo Chicken Dip?

    Yes, you can freeze buffalo chicken dip to extend its shelf life. Here’s how:

    • Transfer the dip to a freezer-safe container.
    • Leave some space at the top for expansion.
    • Date the label, then freeze for a maximum of three months.
    • To reheat, thaw in the fridge overnight and warm up in the oven or microwave.

    For more food storage guidelines, you can refer to FoodSafety.gov.

    Safety and Hygiene

    how long does buffalo chicken dip last in the fridge

    Food Safety Tips for Buffalo Chicken Dip

    Ensuring your buffalo chicken dip remains safe to eat requires attention to food safety practices. Here are some essential tips:

    • Avoid Cross-Contamination: Use separate utensils for raw and cooked ingredients to prevent the spread of bacteria.
    • Proper Handling: Always wash your hands before preparing and serving the dip.
    • Timely Refrigeration: After serving, refrigerate the dip promptly. It should not be left out for longer than two hours.
    • Temperature Control: Keep the dip at a consistent temperature in the fridge, ideally below 40°F.

    Understanding Foodborne Illnesses

    Improper storage of buffalo chicken dip can lead to foodborne illnesses caused by bacteria such as Salmonella and Listeria. Symptoms can include nausea, vomiting, and diarrhea. Here’s how to prevent these illnesses:

    • Cook Chicken Thoroughly: Ensure the chicken in your dip is cooked to an internal temperature of 165°F.
    • Clean Surfaces: Disinfect kitchen surfaces and utensils after use.
    • Store Correctly: Follow proper storage guidelines to inhibit bacterial growth.

    How to Properly Reheat Buffalo Chicken Dip

    Reheating your buffalo chicken dip correctly is crucial for safety and taste. Here are some tips:

    • Oven Method: Preheat the oven to 350°F. Spoon the dip into a dish that is ovenproof and cover with foil. Heat for about 20 minutes, or until warm.
    • Microwave Method: Place the dip in a microwave-safe container and heat in 30-second intervals, stirring in between, until warm.
    • Maintain Quality: Reheat only the portion you plan to eat to avoid repeatedly cooling and reheating the dip.

    Extending Shelf Life

    Homemade vs. Store-Bought Buffalo Chicken Dip

    Homemade buffalo chicken dip typically lasts 3 to 5 days in the fridge. Store-bought versions might last longer due to preservatives. Here’s a quick comparison:

    • Homemade Dip: No preservatives, fresher ingredients, shorter shelf life.
    • Store-Bought Dip: Contains preservatives, longer shelf life, may include additives.

    Recipes and Variations that Last Longer

    Certain ingredients can help extend the shelf life of your buffalo chicken dip. Consider these variations:

    • Add More Vinegar: Vinegar acts as a natural preservative.
    • Use Yogurt: Replacing some of the cheese with yogurt can extend freshness.
    • Healthier Alternatives: Opt for low-fat cheese and yogurt to maintain taste and quality longer.

    Using Leftover Buffalo Chicken Dip

    Leftovers can be creatively repurposed to avoid waste. Here are some ideas:

    • Chicken Stuffed Peppers: Use leftover dip to stuff bell peppers and bake.
    • Chicken Pizza: Spread the dip on a pizza crust, top with cheese, and bake.
    • Buffalo Chicken Sandwich: Use the dip as a spread on sandwiches for a spicy kick.

    Signs Your Buffalo Chicken Dip Has Gone Bad

    Recognizing spoilage signs is crucial. Here are the key indicators:

    • Visual Indicators: Mold or discoloration means it’s time to discard the dip.
    • Smell: An off or sour odor indicates it’s no longer safe.
    • Taste: If the dip tastes off, it’s best to throw it out.

    Extending Shelf Life

    how long does buffalo chicken dip last in the fridge

    Homemade vs. Store-Bought Buffalo Chicken Dip

    When it comes to the longevity of buffalo chicken dip, there are notable differences between homemade and store-bought varieties. Here’s a closer look:

    Homemade Buffalo Chicken Dip

    Homemade versions of buffalo chicken dip are typically fresher and free from preservatives, giving them a more natural taste. However, this also means they have a shorter shelf life, generally lasting 3 to 5 days in the fridge. To keep your homemade dip fresh longer:

    • Use Fresh Ingredients: Start with fresh, high-quality ingredients.
    • Store Properly: Use airtight containers and refrigerate promptly.
    • Consider Additives: A small amount of vinegar or lemon juice can act as a natural preservative.

    Store-Bought Buffalo Chicken Dip

    Store-bought buffalo chicken dip often contains preservatives that extend its shelf life. These versions can last longer in the fridge, sometimes up to two weeks. Make sure you regularly review the packaging’s expiration date and storage guidelines. If unopened, store-bought dips can also be frozen for extended shelf life.

    Recipes and Variations that Last Longer

    Some recipes and ingredient modifications can help your buffalo chicken dip stay fresh longer. Here are a few ideas:

    • Add More Vinegar or Lemon Juice: These natural preservatives can extend the dip’s shelf life without altering the flavor too much.
    • Use Greek Yogurt: Substituting some cream cheese with Greek yogurt not only makes the dip healthier but can also help it stay fresh longer.
    • Low-Fat Ingredients: Using low-fat cheeses and yogurts can maintain the quality and taste for a longer period.

    Using Leftover Buffalo Chicken Dip

    Don’t let your leftovers go to waste! Here are some creative ways to repurpose your leftover buffalo chicken dip:

    Buffalo Chicken Stuffed Peppers

    • Ingredients: Leftover buffalo chicken dip, bell peppers, shredded cheese.
    • Instructions: Preheat the oven to 350°F. Cut the tops off bell peppers and remove seeds. Fill peppers with buffalo chicken dip and top with shredded cheese. Bake for 20-25 minutes until peppers are tender and cheese is melted.

    Chicken Pizza

    • Ingredients: Pizza dough, leftover buffalo chicken dip, shredded mozzarella.
    • Instructions: Preheat the oven to 450°F. Roll out the pizza dough and spread a thin layer of buffalo chicken dip over it. Top with shredded mozzarella and bake for 10-15 minutes until the crust is golden and the cheese is bubbly.

    Buffalo Chicken Sandwich

    • Ingredients: Leftover buffalo chicken dip, sandwich rolls, lettuce, and tomato.
    • Instructions: Spread the dip on sandwich rolls and add lettuce and tomato for a spicy, flavorful sandwich.

    Nutritional Information and Health Considerations

    Understanding the nutritional content of buffalo chicken dip can help you make healthier choices. Here’s a typical nutritional breakdown for a serving (approximately 1/4 cup):

    • Calories: 150-200
    • Protein: 8-10 grams
    • Fat: 12-15 grams
    • Carbohydrates: 2-5 grams
    • Sodium: 400-600 mg

    These values can vary based on the ingredients used and the recipe. Homemade dips allow for better control over nutritional content.

    Health Considerations

    While delicious, buffalo chicken dip can be high in calories, fat, and sodium. Here are some health considerations:

    High Fat Content

    Most of the fat in buffalo chicken dip comes from cheese and cream cheese. Overindulging in saturated fat can elevate cholesterol and heighten the risk of cardiovascular disease.

    Sodium Levels

    Buffalo chicken dip can be high in sodium, particularly if you use store-bought hot sauce and cheese. High sodium intake is linked to high blood pressure and heart disease.

    Caloric Density

    Due to its rich ingredients, buffalo chicken dip is calorie-dense. It’s easy to consume a lot of calories quickly, which can contribute to weight gain if not balanced with physical activity.

    Making Healthier Buffalo Chicken Dip

    There are ways to make buffalo chicken dip healthier without sacrificing taste:

    • Use Low-Fat or Fat-Free Ingredients: Substitute full-fat cream cheese and cheese with low-fat or fat-free versions.
    • Add Vegetables: Incorporate finely chopped vegetables like bell peppers or spinach to add nutrients and fiber.
    • Control Portions: Serve the dip with fresh vegetables like celery sticks or carrot sticks instead of chips to reduce calorie intake.

    Healthy Serving Suggestions

    To enjoy buffalo chicken dip in a healthier way, consider these serving suggestions:

    • Veggie Platter: Serve the dip with a variety of fresh vegetables like cucumbers, cherry tomatoes, and broccoli florets.
    • Whole Grain Crackers: Use whole grain crackers instead of regular chips to add fiber and nutrients.
    • Lettuce Wraps: Use large lettuce leaves as a low-carb alternative to wraps or chips.

    Environmental Impact and Sustainability

    how long does buffalo chicken dip last in the fridge

    Reducing Food Waste

    Food waste is a significant environmental issue. By properly storing and using your buffalo chicken dip, you can help reduce waste. Here are some tips:

    • Portion Control: Make only as much dip as you need. If you have leftovers, incorporate them into other meals.
    • Use Leftovers Creatively: As mentioned earlier, use leftover dip in recipes like stuffed peppers or sandwiches.
    • Monitor Freshness: Regularly check the freshness of your dip and consume it before it spoils.

    Sustainable Ingredient Choices

    Choosing sustainable ingredients for your buffalo chicken dip can lessen your environmental footprint. Consider the following:

    • Organic and Free-Range Chicken: Opt for chicken that is organic and free-range. These options are typically raised with better practices and have a smaller environmental impact.
    • Locally Sourced Ingredients: Buy ingredients from local farmers and markets. By doing this, the carbon footprint of long-distance food transportation is decreased.
    • Eco-Friendly Packaging: When buying store-bought dip or ingredients, choose products with minimal and recyclable packaging.

    Eco-Friendly Storage Options

    How you store your buffalo chicken dip can also make a difference:

    • Reusable Containers: Use glass or BPA-free plastic containers that can be reused multiple times, reducing the need for single-use plastics.
    • Silicone Storage Bags: These are a great alternative to disposable plastic bags and can be used for freezing portions of your dip.
    • Avoid Aluminum Foil and Plastic Wrap: Instead, use beeswax wraps or other sustainable options to cover and store food.

    The Impact of Dairy and Meat Production

    Dairy and meat production have significant environmental impacts due to greenhouse gas emissions, water usage, and land use. Here’s how to minimize these effects:

    • Reduce Meat and Dairy: Consider making a portion of your dip with plant-based ingredients. Use dairy-free cheese or reduce the amount of chicken.
    • Support Sustainable Brands: Choose brands that prioritize sustainability and ethical practices in their production processes.

    Educating Yourself and Others

    Being informed about sustainability and food waste can help you make better choices. Here are some resources:

    • Sustainable Food Practices: Websites like Sustainable Table provide valuable information on how to make eco-friendly food choices.
    • Environmental Impact of Food: Learn more about the environmental impact of different foods from sources like USDA.

    FAQs

    Frequently Asked Questions

    This section addresses some of the most common questions people have about storing buffalo chicken dip. These FAQs are designed to provide quick and useful information to keep your dip fresh and safe.

    How Can I Tell if My Buffalo Chicken Dip Has Spoiled?

    Recognizing spoilage signs is crucial for food safety. Here are key indicators:

    • Visual Indicators: Look for mold or discoloration on the surface.
    • Smell: A sour or off odor suggests spoilage.
    • Taste: If the dip tastes off or has a strange texture, discard it.

    Can I Leave Buffalo Chicken Dip Out Overnight?

    No, buffalo chicken dip should not be left out overnight. It’s recommended to refrigerate it within two hours of serving to prevent bacterial growth. Leaving it out longer increases the risk of foodborne illnesses.

    What Are the Best Containers for Storing Buffalo Chicken Dip?

    Using the right container is essential for maintaining freshness:

    • Airtight Containers: These prevent air from entering, keeping the dip fresh.
    • Glass or BPA-Free Plastic: Both are safe options for food storage.
    • Labeling: Always label your containers with the date to track how long the dip has been stored.

    How Long Does Homemade Buffalo Chicken Dip Last Compared to Store-Bought?

    Homemade buffalo chicken dip generally lasts 3 to 5 days in the fridge. Store-bought dip, due to preservatives, may last longer. Always check the expiration date on store-bought dips and follow storage instructions.

    How Long Does Buffalo Chicken Dip Last in the Fridge?

    Buffalo chicken dip typically lasts 3 to 5 days in the fridge when stored properly. Use airtight containers and store the dip away from the door in the coldest section of the refrigerator to extend its shelf life.

    Conclusion and Additional Resources

    Storing buffalo chicken dip properly is key to enjoying this delicious appetizer safely. Remember to refrigerate promptly, use airtight containers, and watch for spoilage signs. With these tips, you can keep your dip fresh and tasty for several days.