Author: admin

  • Frank’s Buffalo Chicken Dip: Ultimate Recipe and Tips

    Frank’s Buffalo Chicken Dip: Ultimate Recipe and Tips

    Introduction to Frank’s Buffalo Chicken Dip: A Crowd-Pleasing Favorite

    Welcome to the ultimate guide to making the perfect Frank’s Buffalo Chicken Dip, a party favorite that’s as delicious as it is easy to whip up! This creamy, spicy, and utterly irresistible dip is the centerpiece of game day feasts, cozy movie nights, and casual gatherings. In this comprehensive article, we’ll walk you through various methods of preparing this classic appetizer, including traditional oven baking and convenient slow cooker options. Plus, we’ll offer creative variations and essential tips for serving and storing. So grab your dipping chips and get ready for a dip that’s sure to score big with your taste buds!

    Introduction to the Recipe

    What Makes Frank’s Buffalo Chicken Dip Unique?

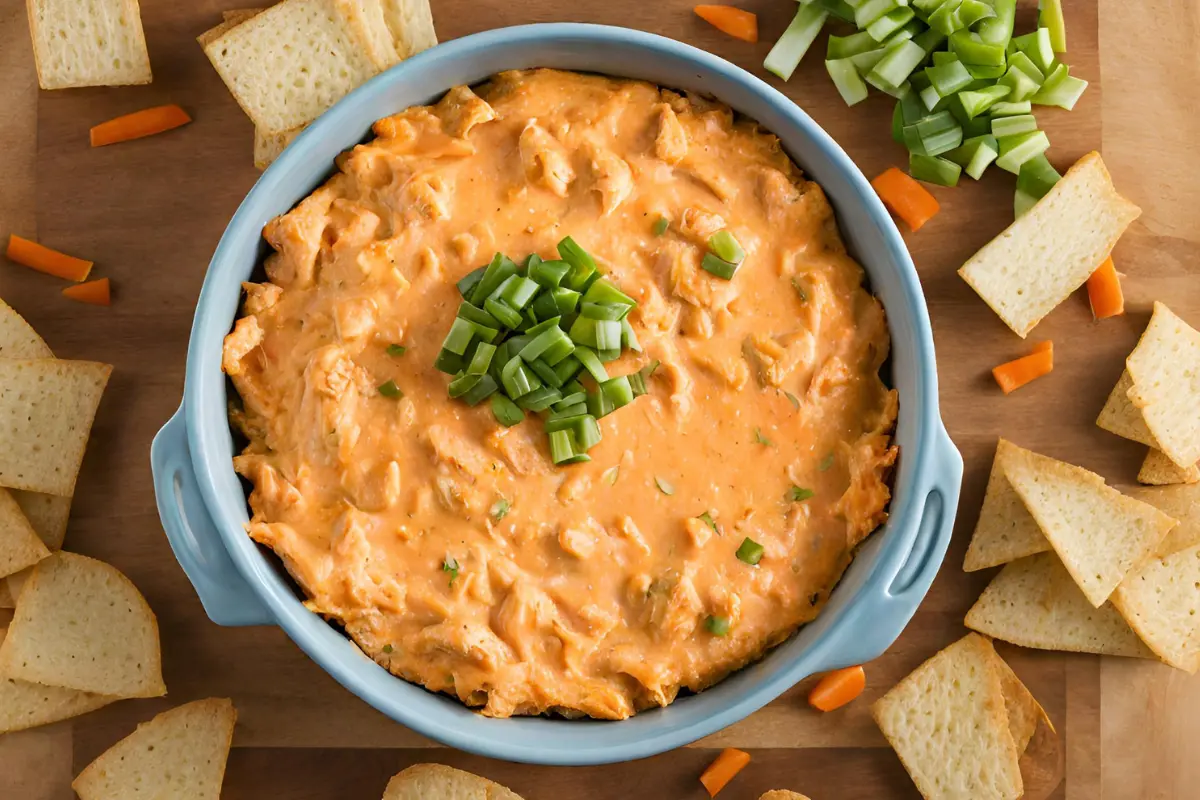
    Ah, the classic Frank’s Buffalo Chicken Dip—it’s not just any dip; it’s a flavor-packed experience that turns any gathering into a festive occasion. What sets it apart? It’s all about that bold kick of Frank’s RedHot® Original Cayenne Pepper Sauce, combined with creamy cheese and tender chicken. This dip isn’t just tasty; it’s a conversation starter and a party in a bowl!

    When making this dip, the ingredients’ harmony creates a perfect balance of creamy texture and spicy tang. Whether you’re well-versed in spicy foods or new to hot sauces, you can adjust the dip’s heat to everyone’s liking. Let’s explore the traditional method of crafting this beloved appetizer, ensuring each bite is unforgettable.

    Recipe Variations and Preparation

    Traditional Oven Method

    To create the quintessential Frank’s Buffalo Chicken Dip, begin by preheating your oven—a crucial step to ensure even cooking. Gather your ingredients: shredded cooked chicken, softened cream cheese, Frank’s RedHot®, ranch dressing, and some delectable blue cheese crumbles. Mixing these ingredients might seem simple, but the order in which you combine them can elevate the texture and flavor of your dip.

    First, blend the cream cheese until it’s smooth and creamy. This base will help the other ingredients meld beautifully without lumps. Next, stir in the hot sauce and ranch dressing, adding a zesty and creamy dimension. Finally, fold in the chicken and blue cheese, ensuring every scoop will be packed with flavor. Once mixed, transfer the concoction to a baking dish and bake until bubbly and golden brown, typically about 20 minutes at 350°F. This method not only infuses the flavors but also creates a tempting golden top layer that’s hard to resist.

    Slow Cooker Method

    For those who prefer a hands-off approach or need to keep the dip warm throughout an event, the slow cooker method is a game-changer. Simply dump all your ingredients into the slow cooker and let it do the work. Set it on low for about 2-3 hours or on high for 1 hour. The gentle heat allows the flavors to meld beautifully, resulting in a dip that stays warm and creamy for hours. Perfect for gatherings where you want to prepare ahead and focus on your guests!

    Creative Variations

    The beauty of Frank’s Buffalo Chicken Dip lies in its versatility. For a healthier twist, opt for Neufchatel cheese instead of regular cream cheese, and low-fat ranch dressing. Vegan? No problem! Use plant-based cream cheese and shredded non-dairy cheese. Want it spicier? Add extra Frank’s RedHot® or throw in some diced jalapeños for an additional kick. Each variation allows you to tailor the dip to your taste preferences and dietary needs, making it a truly personalized treat.

    This section provides not just the steps but also the tips to enhance your dip-making experience. Remember, the best recipes adapt to your lifestyle and taste preferences. Now, let’s explore the best ways to serve and present this crowd-pleaser.

    Serving and Presentation

    franks buffalo chicken dip

    Best Dippers and Pairings

    When it comes to enjoying Frank’s Buffalo Chicken Dip, the dippers you choose can enhance the experience. Classic picks like tortilla chips and celery aren’t just traditional; they’re ideal for crunch lovers, offering a pleasing contrast to the creamy dip. For more substance, toasted baguette slices or pita bread make a sturdy base, perfect for generous scooping.

    But why stop at the basics? Explore a variety of dippers to please all palates: from carrot sticks for a fresh crunch to Fritos scoops for that extra salty kick. The array of textures and flavors can turn a simple dip into a diverse snack platter. Get creative and perhaps introduce some unexpected pairings like crispy bacon bits or a sprinkle of chives on top for a burst of flavor and color.

    Presentation Tips

    Presentation is key in transforming your Frank’s Buffalo Chicken Dip from a simple snack into a show-stopping centerpiece. Start by choosing an attractive dish that complements your setting. A colorful ceramic bowl can add a pop of color to your table, while a sleek glass dish lets the vibrant colors of the dip shine through.

    To really elevate your presentation, garnish the dip just before serving. A light sprinkle of paprika adds a hint of spice and a dash of color, while a handful of chopped parsley can give a fresh visual contrast. Arranging your various dippers around the dip in an appealing way not only makes it easy for guests to choose what they like but also adds to the visual feast. Remember, the first taste is with the eyes!

    Now that we’ve covered how to serve this delightful dip, let’s dive into the nutritional aspects to ensure that all your guests can enjoy it guilt-free.

    Nutritional Information

    Caloric and Nutritional Breakdown

    Understanding the nutritional content of Frank’s Buffalo Chicken Dip is crucial, especially for those tracking their dietary intake. At its core, the dip combines high-protein chicken with fats from cheese and dressing, providing a satisfying balance that can fit into various dietary plans when consumed in moderation.

    A typical serving of this dip contains about 300-400 calories, with variations depending on the specific ingredients used. For instance, using full-fat cream cheese and regular ranch dressing will increase the calorie count, whereas opting for low-fat versions can decrease it. Each serving generally delivers a good amount of protein, essential for muscle repair and growth, thanks to the chicken and cheese content.

    However, it’s important to note the sodium levels, which can be quite high due to the processed ingredients like bottled hot sauce and blue cheese. For those watching their sodium intake, consider adjusting the amount of these ingredients or choosing low-sodium alternatives.

    Adjusting for Dietary Needs

    For guests with specific dietary restrictions, it’s easy to modify the recipe to suit lower-calorie, lower-fat, or lower-sodium needs. Substitute ingredients like Neufchatel cheese for cream cheese and low-fat ranch dressing to cut down on fats without sacrificing flavor. Additionally, making your own ranch dressing at home can significantly reduce the sodium content, giving you better control over what goes into your food.

    Providing this nutritional breakdown allows guests to make informed choices about their consumption, ensuring everyone can enjoy this delicious dip without concern. Up next, let’s look at how best to store any leftovers and tips for making your dip ahead of time, keeping it as fresh and tasty as when it was first made.

    Storage and Make-Ahead Tips

    Storing the Dip

    Proper storage is key to maintaining the freshness and safety of Frank’s Buffalo Chicken Dip. If you find yourself with leftovers, they can be stored in the refrigerator for up to three days. Ensure the dip is cooled to room temperature before covering it with a tight lid or plastic wrap to prevent any moisture from getting in, which could affect the texture and flavor.

    For those who prefer to prepare ahead of time, the dip can be frozen for up to three months. Store it in an airtight container or wrap it tightly in plastic wrap followed by aluminum foil. When ready to enjoy, thaw the dip overnight in the refrigerator and reheat gently to preserve its creamy consistency.

    Make-Ahead Tips

    Frank’s Buffalo Chicken Dip is an excellent candidate for preparing ahead of your event, which can be a real time-saver. You can assemble all the ingredients in your baking dish, cover it tightly, and refrigerate for up to two days before you plan to serve it. When it’s party time, simply bake as directed, perhaps adding a few extra minutes to the cooking time since it will start from a chilled state.

    These storage and make-ahead tips not only help in planning your gatherings but also ensure that the dip remains delicious and safe to eat. By managing leftovers effectively and understanding how to prep in advance, you can make hosting a breeze. Next, let’s address some common questions to help you perfect your dip-making skills and enhance your serving techniques.

    Enhancing Your Event with Themed Decor and Activities

    franks buffalo chicken dip

    When serving Frank’s Buffalo Chicken Dip at your event, why not elevate the experience with themed decor and engaging activities? This not only enhances the ambiance but also creates a memorable occasion that complements the bold flavors of your dip.

    Thematic Decorations

    Choose a theme that aligns with the spicy and vibrant nature of Buffalo chicken. For a game day party, deck out your space with sports memorabilia, team colors, and fun, casual seating arrangements. Use football-shaped plates or napkins with your team’s logo to serve the dip, creating a festive and spirited atmosphere.

    For a more general party theme, opt for a fiery decor palette with reds and oranges, which symbolizes the heat of the dip. You can incorporate chili pepper lights, napkins with flame motifs, and even serve drinks in red cups to keep the theme cohesive and lively.

    Interactive Activities

    To keep guests entertained, organize activities that complement the casual, finger-food nature of your gathering. Set up a DIY dip bar where guests can customize their own portions with various toppings like extra blue cheese, diced celery, or additional hot sauce. This not only makes the dining experience interactive but also caters to different taste preferences.

    Consider hosting a mini cooking demo earlier in the event where you show guests how to make their own Frank’s Buffalo Chicken Dip at home. This can be a fun and engaging activity that allows guests to learn something new and take some culinary inspiration back to their kitchens.

    By integrating themed decor and interactive activities, you enhance the overall enjoyment of your event, making it as memorable as the flavors on the table. This approach turns a simple gathering into a thematic celebration, where both the food and the environment contribute to a festive and enjoyable experience.

    Pairing Drinks with Frank’s Buffalo Chicken Dip

    When hosting an event featuring Frank’s Buffalo Chicken Dip, selecting the right drinks to complement the spicy and creamy flavors can enhance your guests’ overall experience. Here’s a guide to pairing non-alcoholic beverages that balance the heat and enrich the tasting adventure.

    Refreshing Beverage Options

    • Iced Lemonade: The tartness and sweetness of lemonade provide a refreshing counterbalance to the heat of the dip. Consider adding a sprig of mint for an extra refreshing element.
    • Sparkling Water with a Twist: Offer a variety of sparkling waters infused with natural flavors like cucumber, lime, or raspberry. These beverages offer a bubbly, light accompaniment that helps cleanse the palate between bites.
    • Homemade Iced Tea: Brew a batch of iced tea and offer options like peach, lemon, or mint. Iced tea is a great way to quench thirst and its slight bitterness can complement the creamy dip effectively.

    Specialty Non-Alcoholic Cocktails

    • Virgin Mojito: Mix fresh lime juice, mint, sugar, and soda water to create this non-alcoholic version of the classic mojito. Its freshness pairs well with the richness of the dip, making it a hit at any party.
    • Non-Alcoholic Sangria: Combine a mix of juices like grape, pineapple, and orange with slices of citrus fruits and berries in a large pitcher. Let it chill for a few hours before serving to allow the flavors to meld together beautifully.

    Kid-Friendly Sips

    • Fruit Smoothies: Whip up a variety of fruit smoothies using ingredients like bananas, strawberries, and yogurt. These smoothies are not only healthy but their creamy texture and coolness can be a delightful match for the spicy dip.
    • Apple Cider: Warm or cold, apple cider offers a sweet and tangy flavor that kids and adults alike will enjoy. Its robustness stands up well to the flavors of the dip.

    By carefully choosing drinks that complement the flavors of your Frank’s Buffalo Chicken Dip, you can ensure that your guests have a well-rounded and enjoyable eating experience. Whether you opt for simple refreshments or crafty mocktails, the right drink choices can make your event memorable and enjoyable for everyone.

    FAQs

    Can You Freeze Buffalo Chicken Dip?

    Absolutely! Freezing Frank’s Buffalo Chicken Dip is a practical way to extend its shelf life. Just ensure it’s stored in an airtight, freezer-friendly container to prevent freezer burn. When you’re ready to enjoy it again, thaw the dip in the refrigerator overnight and reheat it slowly in the oven or microwave to retain its creamy texture. This make-ahead strategy is perfect for those who want to prepare for parties or have a quick appetizer ready at a moment’s notice.

    Adjusting Spice Levels

    One of the great things about Frank’s Buffalo Chicken Dip is how customizable it is, especially when it comes to spice. If your guests prefer a milder flavor, simply reduce the amount of Frank’s RedHot® sauce. Conversely, if they love a fiery kick, feel free to amp up the hot sauce or add chopped jalapeños or chili powder for extra heat. Tailoring the spice level ensures that the dip will be a crowd-pleaser, no matter the audience.

  • What to Serve with Buffalo Chicken Dip: Best Sides & Pairings

    What to Serve with Buffalo Chicken Dip: Best Sides & Pairings

    Introduction to Buffalo Chicken Dip

    Ah, buffalo chicken dip—a crowd-pleaser with its irresistibly creamy, tangy, and spicy flavors that can fire up any gathering. This versatile dip serves up a delightful treat at parties, game days, or even a casual hangout. Wondering what to serve with buffalo chicken dip to complement its bold flavors? From comforting starchy sides to light and crunchy vegetables, this article dives into a plethora of options that will balance, enhance, and make your dip-dishing experience utterly delightful.

    Perfect Starchy Pairings

    When it comes to dishing out buffalo chicken dip, starchy sides are not just traditional; they’re essential! They soak up the dip’s richness and provide a satisfying heft to each bite. Let’s explore some top starchy partners that promise to be a hit.

    Loaded Baked Potatoes

    Imagine scooping some hot, creamy dip onto a fluffy, steamy baked potato. It’s a combination that brings comfort food to a whole new level. Loaded baked potatoes are a simple yet sublime choice. Just sprinkle some mozzarella, a dash of salt, and a touch of pepper. Pop them in the microwave for a quick fix or let them crispen up in the oven if you’re not pressed for time. Either way, you’ve got a winning side that fills the belly and pleases the palate.

    Homemade Soft Pretzels

    Who can resist the allure of soft pretzels? These twisty, chewy delights make an excellent tool for scooping up generous amounts of buffalo chicken dip. Making them at home can be a fun kitchen project too. Roll out your dough, twist into that classic pretzel shape, and bake until golden. A little sprinkle of sea salt on top, and you’re ready to dip!

    Cheesy Breadsticks

    Talk about a heavenly match! Cheesy breadsticks and buffalo chicken dip are the duo you didn’t know you needed. Start with some basic pizza dough, add garlic, butter, and heaps of Parmesan and mozzarella. Bake until they’re irresistibly golden and cheesy. These breadsticks are not just for dipping; they’re for savoring each creamy, cheesy bite.

    Stay tuned for more delightful sides in the next parts of this series, where we’ll explore healthier options and unique twists that keep your menu exciting and your guests guessing.

    Fresh and Healthy Side Dishes

    what to serve with buffalo chicken dip?

    In the whirlwind of rich, creamy flavors that buffalo chicken dip brings, adding some fresh and healthy sides can offer a crisp and refreshing balance. These sides not only lighten the meal but also add a vibrant pop of color to your table.

    Carrot and Celery Sticks

    Nothing beats the simplicity and crunch of carrot and celery sticks when paired with the spicy zest of buffalo chicken dip. These veggies are not just healthy; they are perfect for those who love to munch while mingling. The sweet crunch of carrots and the fresh bite of celery contrast beautifully with the creamy dip, making them a party favorite.

    Bell Pepper Strips

    For a side that’s as visually appealing as it is tasty, turn to bell pepper strips. Choose a mix of red, yellow, and green peppers to brighten up your serving platter. These crisp strips are perfect for scooping up generous amounts of dip without overwhelming its flavor. Bell peppers add a mild, sweet flavor that complements the heat of the dip, making every bite a perfect balance of flavors.

    Oven-Baked Zucchini Sticks

    Looking to sneak in some veggies in a way that everyone will love? Oven-baked zucchini sticks are the answer. After lightly coating them with bread crumbs and Parmesan, they are cooked until the outside is crispy and the inside is soft. Serve them with a side of buffalo chicken dip for a delightful contrast of flavors and textures. This dish not only adds a healthful twist but also keeps everyone reaching for more.

    These lighter options ensure that your guests enjoy a well-rounded meal, balancing out the indulgence of buffalo chicken dip with healthier alternatives. Stay tuned for more creative ways to enhance your dip in the next part of this article!

    Creative Sides to Elevate Your Dip

    When it’s time to really impress your guests, pairing creative and unique sides with your buffalo chicken dip can turn a simple snack into a gourmet experience. Let’s dive into some innovative options that are sure to be conversation starters.

    Buffalo Chicken Pizza

    Imagine a dish where every slice is a new opportunity to enjoy buffalo chicken dip in a whole new way. Buffalo chicken pizza combines the spicy, creamy flavors of the dip with a crispy pizza base, creating a mouth-watering fusion that’s hard to resist. Top a pre-made pizza crust with a layer of buffalo chicken dip, some extra chicken pieces, and a generous amount of cheese. Bake until bubbly and golden for a game day treat that doubles as a hearty meal.

    Spinach and Artichoke Dip

    Why stop at one dip when you can double the fun? Serving a spinach and artichoke dip alongside buffalo chicken dip gives your guests the power to choose or double-dip! This classic dip brings a creamy texture and a comforting taste that perfectly complements the spicy kick of buffalo chicken. It’s a duo that offers both variety and an abundance of flavors.

    Jalapeno Poppers

    Add a bit of spice and everything nice with jalapeno poppers. These little bites are filled with cheese and wrapped in a crispy coating, with just enough heat to enhance the buffalo chicken dip without overpowering it. Serve them hot and watch them disappear!

    These creative dishes not only elevate the flavors of your buffalo chicken dip but also ensure your gathering is anything but ordinary. Keep reading for more tips on the perfect chips and breads for dipping in the upcoming section of this series.

    Chips and Breads for Dipping

    what to serve with buffalo chicken dip?

    Dips like buffalo chicken dip demand the perfect scooping tool. Chips and breads not only add texture and variety to your dip, but they also play a crucial role in how each bite is enjoyed. Let’s explore the best options for transforming your dipping experience.

    Tortilla Chips and Pita Chips

    For a crunch that stands up to the robust buffalo chicken dip, tortilla chips are a go-to. Opt for thick-cut, restaurant-style chips that don’t break under pressure. Pita chips, with their rustic, hearty texture, offer an excellent alternative. They provide a satisfying crunch and a slight nuttiness that pairs wonderfully with the creamy dip. Both options are perfect for those who love a good crunch with each dip.

    Garlic Bread

    Garlic bread is a crowd-pleaser with its crispy edges and soft, buttery center. It’s perfect for gathering up generous amounts of buffalo chicken dip. The robust flavor of garlic adds an extra layer of taste to the spicy and tangy dip, making each bite a flavor explosion. This side is not just delicious but also a smart choice for balancing the intense flavors of your main dip.

    These dipping options are not only practical but elevate the overall eating experience, making your buffalo chicken dip the star of the show. As we wrap up this delicious journey, stay tuned for the conclusion where we bring all these ideas together for your next party or gathering.

    The Health Benefits of Buffalo Chicken Dip

    While buffalo chicken dip may seem indulgent, it can actually offer some surprising health benefits when enjoyed in moderation. Here’s a closer look at how the ingredients in buffalo chicken dip can contribute to a balanced diet and overall well-being.

    Lean Protein Source

    Chicken, the main ingredient in buffalo chicken dip, is a rich source of lean protein. Protein is essential for muscle growth and repair, as well as for supporting a healthy metabolism. By including chicken in your dip, you’re adding a nutrient-dense ingredient that can help keep you feeling full and satisfied.

    Healthy Fats from Dairy

    Dairy products like cream cheese and sour cream, often used in buffalo chicken dip, contain healthy fats that are important for brain health and hormone regulation. While these fats should be consumed in moderation, they can be part of a balanced diet when paired with lean protein and plenty of vegetables.

    Vitamin-Rich Additions

    Many buffalo chicken dip recipes include ingredients like celery, bell peppers, and carrots, which are packed with essential vitamins and minerals. These vegetables add fiber, antioxidants, and other nutrients to the dip, making it a more wholesome option compared to other party snacks.

    Spice Things Up

    The hot sauce used to give buffalo chicken dip its signature kick contains capsaicin, a compound known for its potential health benefits. Capsaicin has been shown to boost metabolism, reduce inflammation, and even improve heart health when consumed regularly in moderate amounts.

    Moderation is Key

    While buffalo chicken dip can offer some health benefits, it’s important to enjoy it in moderation. Like any indulgent food, it’s best enjoyed as part of a balanced diet that includes plenty of fruits, vegetables, whole grains, and lean proteins. By savoring your buffalo chicken dip alongside nutritious sides and snacks, you can enjoy its delicious flavors while still prioritizing your health.

    Frequently Asked Questions

    As buffalo chicken dip continues to reign as a party favorite, many questions arise about how to serve it best. Here, we answer some of the most common queries to help you perfect your dip presentation and ensure your gathering is a hit.

    What are the best vegetables to serve with buffalo chicken dip? Carrot and celery sticks are classic choices that offer a refreshing crunch to balance the creamy dip. Bell pepper strips and cucumber slices also make excellent choices for those looking for a healthy, colorful addition to their snack table.

    Can I prepare sides for buffalo chicken dip in advance? Absolutely! Many sides, like homemade soft pretzels and cheesy breadsticks, can be made ahead of time. Simply reheat them before serving to save time and reduce stress during your event.

    What are some low-carb options for serving with buffalo chicken dip? For those watching their carb intake, consider serving the dip with an array of fresh vegetables or baked zucchini sticks. These options provide the same satisfying crunch without the carbs found in traditional breads or chips.

    How do I keep the dip warm during the party? Keeping your buffalo chicken dip warm is crucial for maximum enjoyment. A slow cooker set on low heat or a chafing dish can keep your dip invitingly warm throughout the event without drying it out.

    Addressing these FAQs not only helps in planning your menu but also ensures that every guest has a delightful dining experience. Now, let’s wrap up with our final thoughts on making your buffalo chicken dip a standout success.

    Wrapping Up

    As we conclude our flavorful journey on what to serve with buffalo chicken dip, remember that the key to a great party spread is variety and balance. From hearty starchy sides like loaded baked potatoes and homemade soft pretzels to lighter fare such as carrot and celery sticks, each option offers a unique way to enjoy this beloved dip. Creative additions like buffalo chicken pizza and jalapeno poppers keep the menu exciting and unpredictable.

    Whether you’re hosting a large gathering or a small get-together, these sides ensure that your buffalo chicken dip is not just another appetizer but the highlight of the meal. So go ahead, mix and match these suggestions, and prepare for a round of compliments from your guests! Remember, the perfect side dish enhances every dip, turning simple snacks into memorable meals. Enjoy the feast!

    Conclusion

    When it comes to hosting a successful gathering, serving buffalo chicken dip alongside the perfect sides can make all the difference. Whether you prefer classic favorites like cheesy breadsticks or innovative creations like buffalo chicken pizza, there’s a side dish to suit every taste and occasion.

    But the fun doesn’t stop there! You can get even more creative by pairing your buffalo chicken dip with unexpected options like baked potato skins or crispy sweet potato fries. These unique combinations are sure to impress your guests and keep them coming back for more.

    And let’s not forget about presentation! Serving your sides in individual ramekins or on a colorful platter can elevate the visual appeal of your spread and make it even more enticing. Thus, do not be scared to use your imagination and enjoy making your presentation.

    In conclusion, when it comes to serving buffalo chicken dip, the possibilities are endless. Whether you stick to classic favorites or get adventurous with unique pairings, the key is to have fun and enjoy the process. So gather your ingredients, fire up the oven, and get ready to impress your guests with an unforgettable spread!

  • Can You Freeze Buffalo Chicken Wing Dip? Best Practices & Tips

    Can You Freeze Buffalo Chicken Wing Dip? Best Practices & Tips

    Introduction to Freezing Buffalo Chicken Wing Dip

    Ever found yourself with a surplus of delicious buffalo chicken wing dip after a party and wondered, “Can I freeze this?” Well, you’re in luck! Freezing buffalo chicken wing dip is a fantastic way to preserve its tangy, creamy goodness for future enjoyment. This article will guide you through the steps to prepare, freeze, thaw, and reheat your dip to maintain the best quality. Plus, we’ll toss in some pro tips and serving suggestions to keep your dip the star of the show at any gathering.

    Preparing Buffalo Chicken Wing Dip for Freezing

    Ingredients and Initial Preparation

    Before you can stash your buffalo chicken wing dip in the freezer, getting it ready is crucial. Start with quality ingredients—freshly cooked chicken, real cream cheese, and authentic buffalo wing sauce. Combining these ingredients while they’re fresh enhances both the flavor and the texture of the dip upon reheating.

    Here’s a simple way to prepare your dip:

    1. Mix cooked, shredded chicken with creamy cream cheese and spicy buffalo sauce.
    2. Blend until the mixture is smooth, ensuring that the flavors meld beautifully.

    Cooling and Portioning

    Once your dip is prepared, let it cool to room temperature before freezing. Cooling prevents condensation inside the container, which could lead to sogginess or freezer burn. Next, consider how you’ll use the dip in the future. Portioning the dip into smaller containers can be a smart move. This way, you can thaw exactly what you need for a single serving or a small gathering.

    For the best results:

    • Use airtight, freezer-safe containers or bags.
    • Leave a small space at the top of each container because the dip will expand slightly as it freezes.

    Now that your dip is ready, it’s time to move it to the freezer. But remember, how you freeze it matters just as much as how you prepare it. Let’s dive into that in the next section.

    How to Properly Freeze Buffalo Chicken Wing Dip

    Container Selection and Freezing Techniques

    Choosing the right container is key to preserving the quality of your buffalo chicken wing dip. Opt for airtight, freezer-safe containers or bags. Glass containers can work too, but make sure they are labeled as freezer-safe to avoid any risk of cracking due to temperature changes.

    Freezing Techniques:

    1. If using containers, fill them while leaving about an inch of space at the top to accommodate expansion as the dip freezes.
    2. For bags, remove as much air as possible before sealing. This will help prevent freezer burn and keep your dip tasting fresh.

    Properly sealing your dip isn’t just a suggestion—it’s a must. Tight sealing prevents air exposure that can degrade the quality and taste of your dip. Here’s how to ensure a good seal:

    • For containers with lids, press down firmly to close any gaps.
    • For bags, squeeze out the air and seal tightly.

    Labeling and Storage Tips

    Once your dip is securely packed, don’t forget to label each container or bag with the date and contents. This step will help you keep track of how long the dip has been in the freezer. Properly labeled food allows for better inventory management and meal planning.

    Storage Tips:

    • Place your sealed containers or bags in a part of the freezer where they won’t be crushed by other items.
    • For optimal quality, consume your frozen dip within 3 months.

    Ensuring your buffalo chicken wing dip is properly frozen will make a huge difference when it’s time to thaw and reheat it. Speaking of which, let’s look at the best practices for thawing and reheating your dip in the next section. For more tips on food safety, check out FDA’s Freezing and Food Safety Information.

    Thawing and Reheating Frozen Buffalo Chicken Wing Dip

    Safe Thawing Practices

    Thawing your buffalo chicken wing dip correctly is crucial to maintain its quality and ensure safety. Always thaw the dip in the refrigerator rather than at room temperature. This slow thawing process helps maintain the dip’s texture and prevents the growth of harmful bacteria.

    Steps for Safe Thawing:

    1. Plan ahead and transfer the dip from the freezer to the refrigerator at least 24 hours before you intend to use it.
    2. Keep the dip in its container or bag while thawing to avoid any leakage and contamination.

    Reheating for Best Quality

    Once thawed, the buffalo chicken wing dip needs to be reheated properly to restore its creamy, delicious texture. You can reheat the dip in the oven, on the stove, or in the microwave, depending on your preference and the equipment available.

    Oven Method:

    • Preheat your oven to 350°F (175°C).
    • Place the dip in an oven-safe dish and cover lightly with foil to prevent drying out.
    • Heat for about 15-20 minutes, or until hot and bubbly.

    Stove Method:

    • Transfer the dip to a saucepan.
    • Reheat on low heat, stirring frequently to avoid sticking and burning.

    Microwave Method:

    • Place the dip in a microwave-safe container.
    • Heat on high in 30-second intervals, stirring in between to ensure even heating.

    For each method, ensure the dip reaches an internal temperature of 165°F (74°C), which is safe for consumption. Stirring the dip as it reheats can help redistribute the ingredients evenly, enhancing the flavor and texture.

    Reheating your dip properly will make it just as delightful as when it was first made. Now, let’s talk about how to serve your dip to impress your guests in the next section.

    Quality Concerns with Frozen Buffalo Chicken Wing Dip

    can you freeze buffalo chicken wing dip?

    Texture and Flavor Changes

    Freezing can slightly alter the texture and flavor of your buffalo chicken wing dip, especially if it contains ingredients like cream cheese or sour cream, which don’t always freeze well. You might notice a slight separation or change in consistency after thawing.

    Tips to Minimize Texture Changes:

    • Ensure the dip is well mixed before freezing, as this can help maintain an even consistency.
    • Consider adding a stabilizer like xanthan gum to the dip before freezing if you’re making it from scratch.

    How to Address Separation Issues

    If you notice some separation after thawing your dip, don’t worry—it’s usually fixable with a bit of quick kitchen magic.

    Fixing Separation:

    • Gently reheat the dip as per the methods outlined previously and give it a vigorous stir.
    • Adding a splash of milk or a dollop of sour cream can help reintegrate the mixture and bring back its creamy texture.

    Taking these steps to address potential quality concerns will help ensure that your dip remains a hit at your next party. Next, we’ll explore the best ways to serve your dip to keep guests coming back for more.

    Serving and Enjoying Reheated Buffalo Chicken Wing Dip is up next, where we’ll dive into creative and tasty ways to enjoy your dip at any gathering. Stay tuned for more tips and tricks!

    Serving and Enjoying Reheated Buffalo Chicken Wing Dip

    Best Dippers and Pairings

    Once your buffalo chicken wing dip is hot and ready, choosing the right accompaniments can turn it into the highlight of your snack table. The dip’s creamy, spicy flavor pairs wonderfully with a variety of dippers.

    Ideal Dippers:

    • Crunchy Vegetables: Celery sticks, carrot sticks, and bell pepper slices offer a fresh contrast to the rich dip.
    • Chips and Crackers: Tortilla chips, pita chips, or any sturdy cracker are perfect for scooping.
    • Bread: Toasted baguette slices or cubed focaccia can add a delightful texture.

    Creative Serving Suggestions

    Looking to spice up your presentation? Here are a few creative ideas to serve your buffalo chicken wing dip that might just make your guests do a double-take.

    Serving Ideas:

    • Serve in a hollowed-out bread bowl for an edible and eye-catching container.
    • Offer a variety of hot sauces on the side for guests to customize their dip’s heat level.
    • Garnish with chopped green onions or a sprinkle of paprika for a touch of elegance.

    Combining these serving tips with the perfect dippers will ensure your buffalo chicken wing dip is a total smash at your next gathering. Ready to tackle some common questions and misconceptions about freezing this popular party favorite? Let’s dive into the FAQs next.

    Troubleshooting Common Issues with Frozen Buffalo Chicken Wing Dip

    can you freeze buffalo chicken wing dip?

    When it comes to freezing and reheating buffalo chicken wing dip, you might encounter a few common issues. Knowing how to troubleshoot these problems will ensure that your dip maintains its quality and taste, even after being stored in the freezer.

    Addressing Texture Changes After Freezing

    Freezing dairy-based dips like buffalo chicken wing dip can sometimes lead to texture changes, such as separation or graininess. This is often due to the way fat and water content react to freezing.

    Tips for Managing Texture Issues:

    • Stir Well: Once thawed, give your dip a good stir to reintegrate any separated components.
    • Add Fresh Ingredients: Mixing in a small amount of fresh cream cheese or sour cream can help restore the creamy texture.
    • Slow Reheat: Gently reheating the dip on a low heat setting can prevent it from overheating and separating further.

    Enhancing Flavor After Freezing

    Sometimes, flavors can dull in the freezing process. To ensure your dip tastes as good as it did when it was fresh, you might need to give it a little flavor boost.

    Flavor Enhancement Tips:

    • Adjust Seasonings: Taste your dip after reheating and adjust the seasonings if necessary. A little extra buffalo sauce or a pinch of salt can revive the flavors.
    • Add Fresh Toppings: Sprinkle some fresh herbs, extra cheese, or a drizzle of hot sauce on top before serving to enhance the flavor and presentation.

    Dealing with Excess Moisture

    Thawing and reheating can sometimes introduce unwanted moisture into your dip, making it watery.

    How to Handle Excess Moisture:

    • Drain Off Liquid: After thawing, gently drain off any excess liquid that has separated from the dip.
    • Thicken with Ingredients: A small amount of cornstarch mixed with water or additional cheese can be stirred in to help thicken the dip and improve its consistency.

    By mastering these troubleshooting tips, you can ensure that your buffalo chicken wing dip remains a crowd-pleaser, even after it’s been stored in the freezer. These strategies help maintain the dip’s desired texture and flavor, making it just as enjoyable as when it was freshly made.

    Frequently Asked Questions

    Can I freeze buffalo chicken wing dip with various cheeses?

    Yes, you can freeze buffalo chicken wing dip with various cheeses such as cheddar, mozzarella, or blue cheese. However, be aware that some cheeses may change texture slightly when frozen and thawed, becoming a bit crumbly or watery. Mixing them thoroughly with other dip ingredients before freezing can help mitigate these changes.

    How long can I keep buffalo chicken wing dip frozen?

    For optimal flavor and texture, it’s best to consume your frozen buffalo chicken wing dip within 3 months. While it can remain safe to eat beyond this period, the quality may start to decline.

    Can I refreeze thawed buffalo chicken wing dip?

    It is generally not recommended to refreeze thawed buffalo chicken wing dip. Refreezing can further break down the texture and may increase the risk of bacterial growth if the dip was not handled properly during thawing.

    Tips for freezing individual portions

    Freezing individual portions of buffalo chicken wing dip can be extremely convenient, especially if you anticipate needing only small amounts at a time. Use small, airtight containers or freezer bags to store individual servings. This approach not only makes it easier to thaw only what you need but also helps maintain the freshness and flavor of each portion.

    Handling these common inquiries can help ensure that your dip remains a delicious and safe choice for impromptu gatherings or a quick snack. Next, we’ll wrap up our comprehensive guide on freezing buffalo chicken wing dip, ensuring you’re fully equipped to handle this tasty dish from preparation to serving.

    Conclusion

    In wrapping up our comprehensive guide to freezing buffalo chicken wing dip, we’ve covered everything from the initial preparation and proper freezing techniques to thawing, reheating, and serving. Whether you’re planning ahead for a party or saving leftovers, knowing how to handle this dip effectively ensures that you can always enjoy its bold flavors at their best.

    Key Takeaways:

    • Preparation is Key: Ensuring your dip is cool and portioned properly before freezing will make storage and later use much simpler.
    • Proper Freezing: Using airtight containers and labeling them clearly helps maintain quality and organization in your freezer.
    • Safe Thawing and Reheating: Always thaw in the refrigerator and reheat to an internal temperature of 165°F to keep your dip delicious and safe to eat.
    • Creative Serving: Don’t forget that presentation can make a big difference. Serving your dip in innovative ways can enhance the enjoyment for you and your guests.

    Remember, while freezing can slightly alter the texture and taste of your buffalo chicken wing dip, following these guidelines will help minimize these effects, ensuring that your dip remains a popular feature at your social gatherings. Enjoy the convenience and deliciousness of your well-preserved dip at any time!


  • What to Eat with Buffalo Chicken Dip? Best Pairings & Sides

    What to Eat with Buffalo Chicken Dip? Best Pairings & Sides

    Introduction

    When it comes to diving into a bowl of spicy, creamy buffalo chicken dip, the first question often is, “What to Eat with Buffalo Chicken Dip?” This guide will explore a variety of dippers and sides that perfectly complement this favorite party dish. From classic celery sticks to innovative main dishes like buffalo chicken pizza, we’ve got your dipping needs covered. Whether you’re planning a game day feast or just a casual get-together, these pairing ideas will elevate your buffalo chicken dip experience to new heights.

    Classic Dippers for Buffalo Chicken Dip

    Celery Sticks

    Nothing beats the crunch of a fresh celery stick plunged into gooey buffalo chicken dip. The earthy, leafy flavor of celery not only contrasts the tangy spice of the dip but also offers a refreshing crunch that’s hard to resist. Plus, it’s a healthy choice for those watching their calorie intake!

    Carrot Sticks

    For a touch of sweetness to balance the heat, carrot sticks are your go-to. Their bright color and crisp texture make them an attractive and tasty option for scooping up that rich and cheesy dip.

    Tortilla Chips

    What’s a dip without the chips? Tortilla chips are sturdy and ideal for heavy scooping, making them a fail-safe choice for any dipping scenario. Opt for the classic salted variety to let the flavors of the buffalo chicken dip shine.

    Pita Chips

    If you prefer something a bit thicker than tortilla chips, pita chips are a fabulous alternative. Their extra crunch and ability to hold more dip per scoop make them a robust companion for your buffalo chicken indulgence.

    These classic dippers are not only easy to prepare but also cater to a variety of tastes and dietary preferences. Next, we’ll explore some bread-based sides that are sure to be a hit at your next gathering. Stay tuned for more delicious pairings in the next part.

    Bread-Based Sides

    Cornbread

    A southern staple, cornbread offers a sweet, fluffy texture that beautifully complements the spicy kick of buffalo chicken dip. Whether you prefer it plain or jazzed up with jalapeños or cheese, cornbread is not just delicious—it’s comfort food that feels like a warm hug for your taste buds.

    Homemade Soft Pretzels

    Imagine pulling a warm, soft pretzel out of the oven and dunking it into creamy buffalo chicken dip. The slight saltiness of the pretzel pairs perfectly with the tangy dip, creating a match made in snack heaven. Plus, making these at home can be a fun baking project!

    Cheesy Breadsticks

    Cheesy breadsticks are a crowd-pleaser at any gathering. The combination of gooey cheese on a crisp breadstick dipped into spicy buffalo chicken dip is irresistible. Making them is simple, and eating them is even simpler.

    Flatbread Crackers

    For a lighter option that still satisfies your dipping desires, flatbread crackers are the way to go. They are thin, crispy, and the perfect vessel for transporting copious amounts of dip to your mouth without overwhelming the flavors.

    In our next segment, we’ll dive into some vegetable-based sides that not only add a healthy twist but also enhance the dipping experience with their natural flavors and textures. Stay tuned for Part 3, where we explore vibrant and nutritious options!

    Vegetable Sides

    what to eat with buffalo chicken dip?

    Bell Pepper Strips

    Add a splash of color to your dip platter with bell pepper strips. The sweet and crisp texture of red, green, and yellow peppers makes them an excellent choice for scooping up hearty amounts of buffalo chicken dip. They’re not only pleasing to the eye but also pack a nutritious punch.

    Roasted Green Beans

    For a side that’s as simple as it is satisfying, try roasted green beans. Just toss them with a bit of olive oil, salt, and pepper, and roast to perfection. The crispy outcome pairs wonderfully with the creamy dip, providing a contrasting texture that’s absolutely delightful.

    Blistered Padron Peppers

    If you’re feeling adventurous, blistered Padron peppers are a must-try. These Spanish tapas are quick to prepare and most are mild, with the occasional spicy surprise. They offer a unique flavor that complements the buffalo chicken dip in an unexpected but delightful way.

    These vegetable sides not only offer a healthy alternative to more traditional dippers but also bring a variety of flavors and textures to your table, enhancing the overall dipping experience. Next, we will explore some creative main dish pairings that incorporate buffalo chicken dip in exciting new ways. Join us in Part 4 for more innovative ideas!

    Creative Main Dish Pairings

    Buffalo Chicken Pizza

    Why not spread your buffalo chicken dip over a freshly baked pizza crust for an ultimate game-day treat? The spicy, creamy dip acts as the sauce, topped with mozzarella, and perhaps even some blue cheese for an extra flavor kick. This mouthwatering combination ensures every slice is loaded with flavor.

    Loaded Baked Potatoes

    Take your baked potatoes to the next level by stuffing them with buffalo chicken dip. The creamy, spicy filling complements the soft, fluffy potato perfectly. Top with a sprinkle of cheddar cheese and a dollop of sour cream for a satisfying meal that’s sure to please.

    Buffalo Chicken Pasta

    Mix buffalo chicken dip into freshly cooked pasta for a creamy and spicy dish. Whether you choose penne, fusilli, or shells, the noodles capture the dip in every bite, making it a hearty main dish. It’s a creative way to transform leftover dip into a whole new meal.

    These main dish ideas not only utilize the delicious flavors of buffalo chicken dip but also provide filling, comforting options for any meal. Next, in Part 5, we will look at unique and international dippers that can spice up your dip enjoyment in even more exciting ways. Stay tuned!

    Unique and International Dippers

    Eggy Bread (Savory French Toast)

    For a twist that’s perfect for brunch, try Eggy Bread, also known as savory French toast. Dip slices of hearty bread in a mixture of eggs and milk, then fry until golden. The savory version complements the creamy buffalo chicken dip beautifully, offering a unique alternative to more traditional dippers.

    Cheesy Garlic French Bread

    Take a loaf of French bread, slather it with garlic butter, sprinkle generously with cheese, and bake until the cheese is bubbly and golden. Slice and serve alongside your buffalo chicken dip for a garlicky, cheesy experience that enhances the dip’s flavors.

    These unique and international dippers bring a world of flavors right to your buffalo chicken dip platter. Not only do they provide delicious scooping options, but they also introduce exciting, diverse tastes that make your dip spread anything but ordinary. Next up, we’ll explore some crunchy, baked alternatives in Part 6 that are sure to be crowd-pleasers at any gathering. Stay tuned for more tasty suggestions!

    Crunchy, Baked Alternatives

    what to eat with buffalo chicken dip?

    Homemade Potato Chips

    For a classic dipper with a homemade twist, try crafting your own potato chips. Thinly slice potatoes, toss them with a little olive oil and sea salt, and bake until crispy. These chips are not only healthier than their store-bought counterparts but also offer a satisfying crunch that pairs perfectly with the creamy buffalo chicken dip.

    Baked Zucchini Chips

    Looking for a low-carb option? Slice zucchini thinly, season with herbs and a touch of salt, and bake until they’re crispy. These chips provide a lighter, yet flavorful alternative to traditional dippers, and their subtle taste lets the bold flavors of the buffalo chicken dip shine through.

    Crispy Baked Kale Chips

    Kale chips offer a nutritious twist to your dipping game. Toss chopped kale in olive oil, sprinkle with a bit of salt, and bake until the edges are crispy but not burnt. The earthy flavor of kale complements the spiciness of the dip, making for a wholesome and delicious pairing.

    These crunchy, baked alternatives not only add a variety of textures to your snack spread but also cater to health-conscious guests without sacrificing taste. For our final exploration, Part 7 will delve into a frequently asked questions section, offering valuable insights and tips to help you make the most of your buffalo chicken dip experience. Stay tuned!

    Tips for Making the Perfect Buffalo Chicken Dip

    Ensuring your buffalo chicken dip is consistently delicious involves a few key practices. Here’s a guide to help you perfect your dip, making it a guaranteed crowd-pleaser at any event:

    Choose Quality Ingredients

    The base of your buffalo chicken dip—chicken, cheese, and hot sauce—should be of high quality. Opt for real, full-fat cheeses for better melt and flavor, and use freshly cooked chicken for the best texture.

    Get the Consistency Right

    The ideal buffalo chicken dip is creamy but not too runny. To achieve this, balance your wet and dry ingredients properly. Be cautious with liquid ingredients like hot sauce or cream; add them gradually until you reach the desired consistency.

    Spice to Your Taste

    Buffalo chicken dip should have a kick, but how much is up to you. Start with a moderate amount of hot sauce, and adjust according to your taste preferences. Recall that it is simpler to increase spice than to decrease it!

    Slow Cooker Utilization

    For a dip that stays warm throughout your event, consider using a slow cooker. Not only does this keep the dip at an ideal serving temperature, but it also allows the flavors to meld beautifully over time.

    Frequent Tasting

    As you prepare your dip, taste it frequently to adjust the seasonings as needed. This is the best way to ensure the flavor is just right before you serve it.

    By following these tips, you’ll make a buffalo chicken dip that not only tastes great but also impresses your guests with its perfect balance of flavor and consistency. Happy cooking and dipping!

    Creative Serving Ideas for Buffalo Chicken Dip

    When it comes to serving buffalo chicken dip, presentation can be just as important as the dish itself. Here are some creative ideas to make your buffalo chicken dip the highlight of any gathering:

    Individual Dip Cups

    Serve buffalo chicken dip in individual cups or mini mason jars for a personal touch. This not only looks charming but also makes it easier for guests to enjoy their dip without the need to reach over others. Garnish each cup with a sprig of celery or a slice of carrot for added appeal.

    Dip Platter Art

    Arrange various dippers artistically around a central bowl of buffalo chicken dip on a large platter. Use colorful vegetables, different types of bread, and homemade chips to create a vibrant and inviting display. This setup encourages guests to try a variety of combinations.

    Buffalo Chicken Dip Bar

    Set up a dip bar with bowls of buffalo chicken dip accompanied by assorted dippers, sauces, and toppings. Include options like crumbled blue cheese, chopped scallions, and diced tomatoes to allow guests to customize their servings. This interactive element is sure to be a hit at any party.

    Themed Presentation

    For sports events or themed parties, present your buffalo chicken dip in a way that matches the theme. For example, use football-shaped serving dishes during a Super Bowl party or serve the dip in a dish shaped like a chicken for a farm-themed event. This playful approach will delight your guests and make the occasion memorable.

    These creative serving ideas not only enhance the visual appeal of your buffalo chicken dip but also add an element of fun and festivity to your event. Experiment with different presentations to find the perfect setup that complements your gathering’s style and atmosphere.

    FAQs

    What are the best low-carb options to eat with buffalo chicken dip?

    For those looking to enjoy buffalo chicken dip without the carbs, consider dippers like celery sticks, bell pepper strips, and homemade zucchini chips. These options provide the crunch and flavor pairing you crave while keeping your carb intake in check.

    Can buffalo chicken dip be used as a sauce?

    Absolutely! Buffalo chicken dip is versatile and can be used as a sauce over dishes like pasta, loaded baked potatoes, or even as a pizza topping. It adds a creamy, spicy kick to any dish, enhancing the overall flavor profile.

    What are some gluten-free options for buffalo chicken dip sides?

    Many of the vegetable-based dippers such as celery, carrots, and bell peppers are naturally gluten-free. Additionally, homemade potato chips and crispy baked kale chips are excellent gluten-free choices that are easy to prepare and delicious to eat.

    These FAQs aim to address common queries and provide useful tips for enjoying buffalo chicken dip in various delicious and health-conscious ways. Whether you’re hosting a party or simply enjoying a cozy night in, these pairing ideas will ensure that your buffalo chicken dip is always the star of the show.

  • Can You Freeze Buffalo Chicken Dip? Complete Guide and Tips

    Can You Freeze Buffalo Chicken Dip? Complete Guide and Tips

    Introduction

    Have you ever found yourself with a surplus of buffalo chicken dip after a party and wondered, “Can you freeze buffalo chicken dip?” You’re not alone! This creamy, spicy favorite is a hit at gatherings, but often we’re left with more than we can eat in one sitting. Freezing can be a perfect solution to extend the dip’s shelf life while preserving its delicious flavors. In this guide, we’ll dive into the best practices for preparing, freezing, thawing, and reheating buffalo chicken dip to ensure it remains tasty and safe to consume.

    Overview of Buffalo Chicken Dip and Purpose of Freezing

    Understanding Buffalo Chicken Dip

    Buffalo chicken dip combines the fiery zest of buffalo sauce with creamy elements like cream cheese and sometimes sour cream or ranch dressing. It’s often served with chips, bread, or veggies, making it a versatile choice for snacking or entertaining. The dip’s popularity stems from its rich flavor profile and ease of preparation.

    Why Consider Freezing Buffalo Chicken Dip?

    Freezing buffalo chicken dip isn’t just about avoiding waste. It’s about having a ready-to-go appetizer for unexpected guests or busy days. Properly freezing and reheating this dip can save time and reduce stress, all while delivering the comfort of a homemade dish. However, it’s crucial to follow specific steps to ensure the dip retains its quality and safety. Let’s explore how to prepare your dip for the freezing process to maintain its delightful taste and creamy texture.

    Stay tuned as we delve into the preparation and packing techniques in the next section of this comprehensive guide!

    Preparing Buffalo Chicken Dip for Freezing

    Ingredients and Initial Preparation

    Before you think about freezing, you need to whip up a batch of buffalo chicken dip that’s worth preserving. Start with quality ingredients — this can’t be overstated. Fresh chicken, real cheeses like cheddar or mozzarella, and authentic buffalo wing sauce will yield the best flavor. Combine your cooked, shredded chicken with cream cheese, hot sauce, and your choice of other cheeses in a bowl. Stir until the mixture is uniform and creamy.

    Packing the Dip for Freezing

    Once your dip is cooled to room temperature, it’s crucial to pack it properly for freezing. Opt for airtight, freezer-safe containers or heavy-duty freezer bags to protect the dip from freezer burn and flavor loss. Leave a small space at the top of each container to allow for expansion as the dip freezes. If you’re using bags, press out as much air as possible before sealing to help maintain the dip’s moisture and texture.

    It’s also wise to label each container or bag with the freezing date and contents. This organization tip will help you keep track of how long the dip has been stored. Remember, even frozen foods have a shelf life! For a detailed guide on food safety and storage, check out FDA food safety guidelines.

    Ensuring your buffalo chicken dip is properly prepared and packed will make a big difference in how well it holds up in the freezer. Next, we’ll cover the actual freezing process to lock in freshness and flavor.

    Freezing Process

    can you freeze buffalo chicken dip

    Step-by-Step Freezing Guide

    Freezing your buffalo chicken dip properly is essential to enjoy it later without any quality compromise. First, make sure the dip is at room temperature — freezing it while still warm can lead to ice crystal formation, which damages its creamy texture. Once cooled, follow these steps:

    1. Pre-freeze: If space allows, spread the dip in a thin layer on a baking sheet lined with parchment paper and place it in the freezer for about two hours. This step helps prevent the ingredients from separating.
    2. Final Packing: Transfer the semi-frozen dip into your labeled containers or bags. If using containers, ensure they have tight-fitting lids. For bags, squeeze out any remaining air and seal tightly.

    Tips for Maximizing Dip Quality

    Quick freezing is your friend here. The faster the dip freezes, the smaller the ice crystals, preserving the dip’s creamy texture. Also, ensure your freezer is set to 0°F or lower, as consistent, adequate freezing temperatures are critical for food safety and quality.

    For further tips on maintaining the quality of frozen foods, consider checking out culinary techniques for freezing dairy products, which offer valuable insights into dealing with dairy-rich recipes like buffalo chicken dip.

    Properly freezing your dip not only extends its life but also retains the flavors and textures that make buffalo chicken dip such a crowd-pleaser. Up next, we’ll dive into how to thaw and reheat your dip to ensure it tastes as good as fresh.

    Thawing and Reheating

    Thawing your buffalo chicken dip correctly is crucial to preserving its taste and texture. The best method is to thaw it in the refrigerator overnight. This slow thawing process helps the dip maintain a consistent texture and prevents it from becoming too watery or separating.

    1. Refrigerator Thawing: Simply transfer the frozen dip from the freezer to the refrigerator the night before you plan to serve it. This method ensures the dip remains at a safe temperature, reducing the risk of bacterial growth.

    Reheating Methods

    Once your dip is thawed, reheating it properly can make it just as delicious as when it was fresh. Here are some effective methods:

    • Oven: Preheat your oven to 350°F. Place the thawed dip in an oven-safe dish and cover it lightly with aluminum foil. Heat for about 15-20 minutes or until hot and bubbly. Stirring once midway through can help redistribute the heat evenly.
    • Microwave: Using the microwave is a quicker solution. Place the dip in a microwave-safe dish, cover, and heat on high in 30-second intervals, stirring in between until the dip is thoroughly warmed through.
    • Stovetop: Pour the dip into a saucepan and warm it over medium heat, stirring frequently to prevent sticking and ensure even heating.

    Thawing and reheating your buffalo chicken dip with care ensures that each bite is as satisfying as it was when it was freshly made. Next, we’ll look into some frequently asked questions about freezing and handling buffalo chicken dip, providing expert tips and practical advice.

    Common Questions and Expert Tips

    can you freeze buffalo chicken dip

    FAQs About Freezing Buffalo Chicken Dip

    Handling buffalo chicken dip can bring up several questions, especially when it comes to freezing and storing. Here are some answers to common inquiries:

    • Can you freeze buffalo chicken dip with dairy ingredients like cream cheese or sour cream? Yes, you can, but be aware that dairy components may change in texture slightly when frozen and thawed. Stirring well after reheating can help restore its creamy consistency.
    • How long can you safely freeze buffalo chicken dip? For best quality, consume the dip within three months of freezing. Although it might be safe beyond this period, the quality could decline.
    • Is it safe to refreeze thawed buffalo chicken dip? Refreezing is generally not recommended as it can significantly affect the texture and taste, and potentially compromise food safety.

    Expert Tips and Tricks

    Here are some expert tips to ensure your dip remains delicious and safe:

    • Avoid contamination: Always use clean utensils when serving buffalo chicken dip to prevent bacterial growth.
    • Storage: If you have leftovers after a party, refrigerate them within two hours to keep the dip safe and tasty.
    • Quality ingredients: Using high-quality ingredients not only enhances the flavor but also helps the dip maintain its integrity when frozen and reheated.

    By keeping these FAQs and tips in mind, you can make the most out of your buffalo chicken dip, enjoying it as a quick snack or a party favorite even after it’s been frozen.

    Maintaining the integrity of your buffalo chicken dip involves more than just freezing; it includes proper serving and storage practices. Up next, we’ll explore various serving suggestions and recipe variations that can complement your dip experience.

    Health Considerations and Dietary Adjustments

    Health Considerations

    When indulging in rich, creamy dishes like buffalo chicken dip, it’s important to consider dietary restrictions and nutritional impact. This section will offer insights into making the dip more accommodating for various health needs:

    • Reduced Fat Options: Discuss substitutions such as using low-fat cream cheese or Greek yogurt instead of full-fat versions to decrease the overall calorie and fat content without sacrificing texture.
    • Low-Carb and Keto-Friendly Modifications: Provide alternatives for serving that don’t include bread or chips, such as using fresh vegetables or creating keto-friendly “chips” made from low-carb ingredients.

    Dietary Adjustments for Allergies

    Buffalo chicken dip typically contains dairy and may not be suitable for everyone. Here, we’ll explore how to adjust the recipe to be more allergy-friendly:

    • Dairy-Free Version: Suggest using dairy-free cheese and cream alternatives that mimic the texture and flavor of the traditional ingredients used in buffalo chicken dip.
    • Gluten-Free Serving Suggestions: Ensure that all ingredients, especially sauces and dips, are gluten-free, and offer ideas for gluten-free dippers like rice crackers or homemade vegetable chips.

    By addressing these health considerations and dietary adjustments, you can make buffalo chicken dip a more inclusive dish that more people can enjoy, regardless of their dietary restrictions. This ensures that everyone can partake in enjoying this flavorful and beloved appetizer.

    Common Questions and Expert Tips

    FAQs About Freezing Buffalo Chicken Dip

    Handling buffalo chicken dip can bring up several questions, especially when it comes to freezing and storing. Here are some answers to common inquiries:

    • Can you freeze buffalo chicken dip with dairy ingredients like cream cheese or sour cream? Yes, you can, but be aware that dairy components may change in texture slightly when frozen and thawed. Stirring well after reheating can help restore its creamy consistency.
    • How long can you safely freeze buffalo chicken dip? For best quality, consume the dip within three months of freezing. Although it might be safe beyond this period, the quality could decline.
    • Is it safe to refreeze thawed buffalo chicken dip? Refreezing is generally not recommended as it can significantly affect the texture and taste, and potentially compromise food safety.

    Expert Tips and Tricks

    Here are some expert tips to ensure your dip remains delicious and safe:

    • Avoid contamination: Always use clean utensils when serving buffalo chicken dip to prevent bacterial growth.
    • Storage: If you have leftovers after a party, refrigerate them within two hours to keep the dip safe and tasty.
    • Quality ingredients: Using high-quality ingredients not only enhances the flavor but also helps the dip maintain its integrity when frozen and reheated.

    By keeping these FAQs and tips in mind, you can make the most out of your buffalo chicken dip, enjoying it as a quick snack or a party favorite even after it’s been frozen.

    Maintaining the integrity of your buffalo chicken dip involves more than just freezing; it includes proper serving and storage practices. Up next, we’ll explore various serving suggestions and recipe variations that can complement your dip experience.

    Serving Suggestions and Variations

    Serving Suggestions

    The versatility of buffalo chicken dip makes it a popular choice for various occasions. Here are some great ways to serve it:

    • With Veggies: Offer a healthy alternative by pairing the dip with celery sticks, carrot sticks, or bell pepper slices. These add a nice crunch and freshness to balance the dip’s richness.
    • Chips and Bread: The classic companions for buffalo chicken dip are tortilla chips and baguette slices. Their sturdy texture holds up well against the creamy dip.
    • Creative Dippers: Try something different like pretzel bites or pork rinds for added flavor and texture contrasts.

    Recipe Variations

    To keep things interesting, you can tweak your buffalo chicken dip recipe:

    • Less Spicy Version: For those who prefer milder flavors, reduce the amount of buffalo sauce and add a pinch of brown sugar to soften the heat.
    • Cheese Varieties: Experiment with different types of cheese such as gorgonzola or pepper jack for a different flavor profile.
    • Add-ins: Incorporating ingredients like chopped green onions, diced jalapeños, or black beans can add new flavors and textures to your dip.

    By exploring these serving suggestions and recipe variations, you can tailor your buffalo chicken dip to fit any occasion or personal taste preference. This flexibility makes the dip a perennial favorite in many households.

    Now, let’s wrap up our comprehensive guide to freezing buffalo chicken dip with a concise conclusion that ties together all the key points discussed.

    Conclusion

    In this guide, we’ve explored the ins and outs of how to effectively freeze, thaw, and reheat buffalo chicken dip, ensuring it remains a delicious and convenient option for your culinary repertoire. We began by understanding why you might consider freezing this popular dish and moved through each step of the process, from preparation to serving.

    Properly freezing buffalo chicken dip allows you to enjoy this flavorful appetizer on your schedule, without sacrificing taste or texture. Remember, the key to successful freezing lies in using fresh, high-quality ingredients and ensuring that all storage containers are airtight. Thawing in the refrigerator and reheating gently will help maintain the dip’s best qualities.

    Whether you’re preparing for a large gathering or seeking a quick snack, buffalo chicken dip is a versatile choice that can be adapted to suit any taste. With the tips and techniques covered in this guide, you can confidently preserve and savor your buffalo chicken dip any time the craving strikes.

    Thank you for following along, and here’s to many more delightful dips in your future!

  • Should Strawberries Be Cold Before Dipping in Chocolate? Best Practices

    Should Strawberries Be Cold Before Dipping in Chocolate? Best Practices

    Should strawberries be cold before dipping in chocolate?

    Are you eyeing those luscious strawberries and contemplating whether they should be chilled before diving into a pool of glossy chocolate? This article unfolds the layers of this conundrum, examining how the temperature of strawberries affects the end result when they are dipped in chocolate. From preparation tips to the actual dipping and creative decorating ideas, we will guide you through achieving the perfect chocolate-covered strawberries without any mishaps.

    Overview of Chocolate Dipping

    Importance of Strawberry Temperature

    Before you start melting that chocolate, let’s consider the strawberries themselves. The temperature of these berries plays a pivotal role in the success of your chocolate-covered treats. Room temperature strawberries are typically recommended because they help avoid the dreaded condensation which can result in chocolate that slips off or cracks after setting.

    This phenomenon occurs because cold strawberries, straight from the refrigerator, tend to develop a light moisture layer as they warm up to room temperature. This moisture creates a barrier between the fruit and the chocolate. On the other hand, room temperature strawberries ensure a dry surface, which is crucial as chocolate adheres best to dry and non-greasy surfaces.

    Furthermore, diving into the art of chocolate dipping without considering the temperature can lead to less-than-ideal results. A glossy and smooth chocolate coating is often achievable only when the strawberries are at room temperature, thus ensuring that the chocolate sticks well and sets evenly.

    In the next segment, we will delve deeper into the meticulous process of preparing strawberries for that perfect dip. Stay tuned to master the technique of preparing your strawberries for a flawless chocolate embrace.

    Preparing Strawberries for Dipping

    Cleaning and Drying

    To ensure your chocolate-covered strawberries are nothing short of perfect, start with the cleaning and drying process. Thoroughly wash your strawberries to remove any dirt or chemicals, but here’s the catch — they must be completely dry before you proceed. Any residual moisture is the nemesis of a smooth chocolate finish. Pat them gently with paper towels, and let them air dry on a clean kitchen towel until no moisture is visible.

    This meticulous drying process is vital because, as we’ve discussed, water causes the chocolate to seize up, becoming clumpy and unworkable. Additionally, moisture on the surface of the strawberries will prevent the chocolate from adhering correctly, leading to it sliding off or forming an uneven coat.

    Temperature Impact on Chocolate Adhesion

    Should strawberries be cold before dipping in chocolate
    Should strawberries be cold before dipping in chocolate?


    Now, let’s talk about the temperature of your strawberries. As highlighted, room temperature strawberries are ideal. This condition prevents the formation of condensation which interferes with the consistency of your chocolate layer. If you’ve just pulled your strawberries out of the fridge, give them about 30 minutes to an hour to reach room temperature.

    The key here is patience; rushing this step might lead to disappointing chocolate coverage, where the chocolate could crack or fail to form a satisfying shell. Remember, the goal is to achieve a seamless bond between your strawberry and its chocolate coating, which is best accomplished under the right temperature conditions.

    In our next part, we will dive into the techniques of melting chocolate to the perfect consistency for dipping. Ensuring your chocolate is just right is crucial for that decadent finish we all love.

    The Strawberries Be Cold Before Dipping Process

    Melting the Chocolate

    Melting your chocolate correctly is crucial for ensuring that it coats the strawberries beautifully. You can use a microwave, double boiler, or even an Instant Pot as a makeshift double boiler to achieve this. Here’s how to do it right:

    • Microwave: Heat your chocolate in short bursts of 20-30 seconds, stirring in between, until it’s completely smooth and just warm to the touch. This method is quick but requires attention to avoid overheating the chocolate.
    • Double Boiler: Place the chocolate in a heatproof bowl over a pot of simmering water. Make sure the water is not in contact with the bowl’s bottom. Stir continuously until the chocolate is just melted. This method provides more control and is great for keeping the chocolate at a gentle heat.
    • Instant Pot Method: Add water to the pot and set it on a low sauté setting. Place the chocolate in a bowl that fits snugly into the pot without touching the water. Stir until the chocolate melts. This method combines the benefits of indirect heat with the convenience of an Instant Pot.

    Ensuring Even Coating

    Dipping your strawberries in the melted chocolate requires a gentle hand. Hold each strawberry by the stem or use a skewer inserted at the top. Dip it into the chocolate, allowing it to coat evenly, and lift it out smoothly. Let the excess chocolate drip off by gently shaking the strawberry before placing it on a parchment-lined tray. This step is essential for achieving a smooth, even layer of chocolate.

    Decoration Tips

    While the chocolate is still wet, it’s the perfect time to add some creativity. Roll the dipped strawberries in toppings like crushed nuts, coconut flakes, or even colorful sprinkles. You can also drizzle them with a different type of melted chocolate for an attractive finish. This not only enhances the flavor but also adds a visually appealing touch to your chocolate-covered strawberries.

    The journey doesn’t end here. After mastering the dipping and decorating, the next step is setting the chocolate properly to ensure it remains crisp and adheres well. We’ll explore this in the next part, focusing on how to let your chocolate masterpieces set to perfection.

    Post-Dipping

    Setting the Chocolate

    Once your strawberries are beautifully coated and decorated, the setting stage is crucial for achieving that snap of well-tempered chocolate. Here’s how to ensure your chocolate sets just right:

    • Avoid the Refrigerator: It might be tempting to speed up the setting process by popping your dipped strawberries into the fridge. However, this can lead to moisture condensation, which we’ve established is not ideal. Instead, let them set at room temperature in a cool, dry place. This method ensures a glossy finish without the risk of the chocolate becoming too hard or developing a whitish coating known as ‘bloom’.
    • Proper Airflow: Arrange your strawberries on a parchment paper-lined tray with enough space between each to allow air to circulate. This not only prevents them from sticking together but also helps the chocolate set evenly and quickly.

    Storage Recommendations

    Once set, your chocolate-covered strawberries are ready to enjoy, but if you must store them, here are some tips to maintain their quality:

    • Short-Term Storage: If you need to store the strawberries for a few hours before serving, keep them in a cool, dark place in your kitchen. Avoid stacking them as they can stick together and ruin the finish.
    • Longer Storage: For storage up to 24 hours, place them in an airtight container lined with wax paper. This setup helps manage moisture and keeps the strawberries from becoming soggy. Remember, these delights are best enjoyed fresh, so plan accordingly.

    In the next section, we’ll explore various ways to expand your repertoire with alternative chocolates and vegan options, adding diversity and inclusivity to your dessert presentations.

    Variations and Creative Ideas

    Should strawberries be cold before dipping in chocolate
    Should strawberries be cold before dipping in chocolate?


    Alternative Chocolates and Vegan Options

    Exploring alternative chocolates can transform the traditional chocolate-dipped strawberry into an inclusive dessert that everyone can enjoy. Consider these delicious options:

    • Dark Chocolate: Ideal for those preferring less sweetness, dark chocolate also provides a robust flavor that contrasts beautifully with the natural sweetness of strawberries.
    • Milk Chocolate: A classic choice that offers a creamier, smoother taste. It’s a hit among all age groups due to its mild flavor and silky texture.
    • White Chocolate: Offers a sweet, creamy alternative that pairs wonderfully with the slight tartness of strawberries. It’s also perfect for adding color when dyed with oil-based food colorings.
    • Vegan Chocolate: For those following a vegan diet, several brands offer dairy-free chocolates that melt and coat just as beautifully as their traditional counterparts. These chocolates often utilize alternative milks like almond or coconut, providing a unique flavor profile.

    Creative Decorations and Flavors

    The versatility of chocolate-covered strawberries allows for endless creativity. Here are some innovative ideas to elevate your creations:

    • Flavored Chocolate: Infuse your melted chocolate with natural flavor extracts such as orange, mint, or raspberry for a burst of flavor that complements the fruity undertone of strawberries.
    • Luxurious Toppings: After dipping the strawberries in chocolate, roll them in gourmet toppings like crushed pistachios, edible gold leaf, or freeze-dried raspberry powder for a touch of elegance and extra flavor.
    • Theme-Based Decorations: Tailor your strawberries to specific events or holidays by choosing themed decorations, such as heart-shaped sprinkles for Valentine’s Day or red, white, and blue toppings for Independence Day celebrations.

    These variations not only cater to different dietary needs and preferences but also add a fun twist to this classic treat, making it suitable for any occasion or gathering.

    In our next section, we’ll address some of the most commonly asked questions about making chocolate-covered strawberries to help clear up any uncertainties and ensure your dessert is a success.

    Additional Tips and Tricks ( Should strawberries be cold before dipping in chocolate? )

    Experiment with Temperatures

    While room temperature is ideal for strawberries, you can experiment with different chocolate temperatures for dipping. Some prefer slightly warmer chocolate for a thinner coating, while others enjoy the contrast of colder chocolate against the juicy strawberries. Explore and find what works best for your taste preferences.

    Share the Joy

    Chocolate-covered strawberries make for delightful gifts or party favors. Consider packaging them in elegant boxes or arranging them on a platter for a stunning presentation. Sharing these homemade treats with loved ones adds an extra layer of joy to the experience.

    Get Creative with Shapes

    Don’t limit yourself to traditional dipped strawberries. Experiment with different shapes and sizes by slicing strawberries into halves, quarters, or even using strawberry hearts. Each shape offers a unique canvas for your chocolate creations.

    Embrace Imperfection

    Remember, perfection is subjective. Embrace the imperfections that arise during the dipping process—they add character and charm to your homemade treats. Whether a slight drizzle or a lopsided coating, each strawberry tells its own delicious story.

    Conclusion

    With these additional tips and tricks, you’re well-equipped to embark on your chocolate-covered strawberry journey with confidence and creativity. From mastering the dipping process to exploring new flavors and shapes, there’s no limit to the delicious delights you can create. So gather your ingredients, unleash your imagination, and let the chocolate-covered magic begin!

    FAQs

    Should strawberries be cold before dipping in chocolate?

    No, strawberries should be at room temperature before dipping. Cold strawberries can cause condensation when dipped in warm chocolate, leading to issues with the chocolate adhering properly and possibly causing the coating to crack as it sets.

    How to store chocolate covered strawberries?

    For optimal taste and texture, chocolate covered strawberries should be consumed soon after they are made. If you need to store them, place them in a cool, dark place for a few hours. For longer storage, up to 24 hours, keep them in an airtight container in the refrigerator, lined with paper towels to absorb any moisture.

    Can you freeze chocolate covered strawberries?

    Freezing is not recommended for chocolate covered strawberries as it can alter the texture and cause the chocolate to sweat and become mushy when thawed. However, if you prefer to enjoy them frozen, consume them directly from the freezer without thawing.

    What is the best chocolate for dipping?

    The best chocolate for dipping is one that suits your taste preferences and melts smoothly. Couverture chocolate, which contains a higher percentage of cocoa butter, is ideal for a smooth, glossy finish. However, good quality baking chocolate or chocolate chips can also produce excellent results when melted properly.

    How to prevent chocolate from cracking?

    To prevent chocolate from cracking, ensure the strawberries are at room temperature before dipping and allow the chocolate to set naturally at room temperature. Avoid drastic temperature changes, as these can cause the chocolate to contract quickly and crack.

    In the next part, we conclude our detailed guide on making perfect chocolate-covered strawberries, summarizing the key points and offering final thoughts on how to perfect this delightful treat.

    Conclusion of Should strawberries be cold before dipping in chocolate?

    As we wrap up our comprehensive guide to making the perfect chocolate-covered strawberries, let’s revisit the essential steps and tips that ensure success. Starting with strawberries at room temperature is crucial to avoid any moisture issues that can interfere with chocolate adhesion. Properly melting the chocolate whether using a microwave, double boiler, or an Instant Pot sets the stage for a smooth dipping process.

    Remember, the key to exquisite chocolate-covered strawberries lies in the details: the temperature of both the strawberries and the chocolate, thorough drying of the berries, and patient setting of the chocolate at room temperature. Embrace creativity with different types of chocolate and a variety of toppings to enhance both the appearance and taste of your strawberries.

    By following these guidelines, you’ll be equipped to create not just a delicious treat but also a visually stunning one that can be the centerpiece of your next gathering or a special gift for someone dear. Whether for a holiday, a party, or a quiet night in, chocolate-covered strawberries are a simple luxury that delights the senses and brings joy to any occasion.

    Thank you for joining us on this sweet journey. May your chocolate-covered strawberries turn out as delightful and delectable as you imagine!


  • Is Overnight Oats Actually Healthy? Uncovering the Truth

    Is Overnight Oats Actually Healthy? Uncovering the Truth

    Is overnight oats actually healthy?Is Overnight Oats Actually Healthy?

    Overnight oats have surged in popularity as a convenient, nutritious breakfast option, lauded for their potential health benefits. But is this trendy dish as healthy as it seems? This comprehensive article delves into the nutritional makeup of overnight oats, their health benefits, potential downsides, and ways to make them part of a balanced diet. Let’s unravel the truth behind overnight oats and discover whether they truly deserve a spot in your morning routine.

    Overview of Overnight Oats

    What are Overnight Oats?

    Overnight oats are oats soaked in liquid like water or milk overnight, creating a creamy, pudding-like breakfast.

    Popularity and Perceived Healthy Benefits

    Their ease of preparation and versatility make overnight oats popular. They are seen as a healthier alternative for breakfast, loaded with fiber, protein, and essential nutrients.

    To further explore the health credentials of overnight oats, we’ll look at their nutritional profile, health benefits, and any potential concerns that might arise from including them in your diet. This investigation aims to provide a balanced view, helping you to make informed dietary choices.

    In the next section, we will dive into the specific nutrients that overnight oats can provide and compare their benefits to those of traditional cooked oats.

    Nutritional Profile of Overnight Oats

    Is overnight oats actually healthy?

    Macronutrients in Overnight Oats

    Overnight oats are often celebrated for their balanced nutritional profile. A typical serving provides a hearty dose of macronutrients: carbohydrates for energy, proteins for muscle repair, and fats for long-lasting satiety. This combination can help keep you fueled throughout the morning without a mid-morning slump.

    Vitamins and Minerals

    These humble oats are more than just filling; they’re also rich in essential vitamins and minerals. They provide a good source of B-vitamins, essential for energy metabolism, and minerals like iron and magnesium, crucial for blood health and muscle function, respectively. This makes overnight oats not only a convenient but also a nutrient-dense breakfast option.

    Comparison with Traditional Cooked Oats

    While both overnight and cooked oats offer health benefits, the preparation method of overnight oats might edge them ahead slightly. Soaking oats overnight helps reduce phytate levels, which can inhibit the absorption of minerals. This means that overnight oats might allow your body to better absorb the nutrients available, compared to their cooked counterparts.

    Overnight oats might absorb nutrients better than cooked oats due to reduced phytate levels from soaking.

    Health Benefits of Overnight Oats

    Heart Health

    One of the standout features of overnight oats is their positive impact on heart health. Rich in beta-glucan, a type of soluble fiber, overnight oats help to lower total and LDL cholesterol, crucial factors in reducing heart disease risk. This fiber forms a gel-like solution in the gut, which binds to cholesterol and helps remove it from the body, thereby improving cardiovascular health.

    Digestive Health

    Overnight oats also offer significant benefits for digestive health. The high fiber content aids in regular bowel movements and helps maintain a healthy gut microbiome. Prebiotic fibers in oats promote good gut bacteria, supporting a healthy digestive system and overall well-being.

    Weight Management

    For those looking to manage their weight, overnight oats can be a valuable addition to the diet. The fiber in oats increases satiety, helping you feel fuller for longer, which can reduce overall calorie intake throughout the day. Additionally, the slow-digesting carbs in oats provide a steady source of energy, preventing spikes in blood sugar that can lead to cravings and overeating.

    Blood Sugar Regulation

    Finally, overnight oats can play a role in stabilizing blood sugar levels. Resistant starch in oats, especially when soaked overnight, slows digestion, leading to a gradual glucose release into the bloodstream. This can be particularly beneficial for individuals managing diabetes or those looking to prevent the onset of type 2 diabetes.

    Incorporate overnight oats into your morning for health benefits and a tasty, easy meal. Next, we’ll explore potential downsides to ensure they’re enjoyed healthily.

    Potential Downsides of Overnight Oats

    Caloric Content and Toppings

    While overnight oats themselves are a healthy option, the caloric content can quickly escalate with the addition of toppings. Ingredients like nuts, seeds, sweeteners, or dried fruits, while nutritious, are also high in calories. Be mindful of topping types and amounts to keep your healthy breakfast from becoming high-calorie.

    Anti-Nutrients in Oats

    Oats contain phytic acid, an anti-nutrient that can bind minerals and reduce their absorption. Although soaking oats overnight can help decrease phytic acid levels, it doesn’t eliminate them completely. People with mineral deficiencies or on plant-based diets should ensure their oats supply enough minerals.

    Allergens and Sensitivities

    Choose gluten-free oats if sensitive or allergic, and consider alternative milks for lactose intolerance.

    Choose certified gluten-free oats for those with celiac or gluten sensitivity, and use suitable liquids for other dietary needs.

    Seasonal and Festive Variations of Overnight Oats


    Customize overnight oats for dietary needs or to celebrate seasonal flavors and events. This section suggests ways to make each bowl festive.

    Spring and Summer Delights

    • Berry and Mint Mix: Utilize the abundance of fresh berries available in spring and summer. Mix strawberries, raspberries, and blueberries with a hint of fresh mint for a refreshing breakfast.
    • Tropical Twist: Incorporate mango, pineapple, and a splash of coconut milk to bring a taste of the tropics to your morning routine during the warmer months.

    Fall and Winter Warmth

    • Pumpkin Spice Oats: Embrace the flavors of fall by stirring in pumpkin puree and a sprinkle of pumpkin spice to your oats for a comforting autumn breakfast.
    • Gingerbread Oats: Infuse your oats with molasses, ginger, nutmeg, and cinnamon to capture the essence of winter holidays in a wholesome bowl.

    Festive Treats

    • Valentine’s Day Special: Add red fruits like cherries and raspberries to create a naturally sweet, red-hued dish perfect for starting Valentine’s Day on a loving note.
    • Christmas Morning Oats: Mix in cranberries, nutmeg, and a dash of vanilla to create a festive and hearty breakfast that’s perfect for Christmas morning.

    Add seasonal fruits, spices, and themes to your overnight oats to enjoy varied flavors and nutrients all year. This method enhances taste and boosts nutrient diversity.

    Incorporating Overnight Oats into Different Diets

    Overnight oats are not only a versatile breakfast choice but also remarkably adaptable to various dietary needs. This section shows how to adapt overnight oats to meet various dietary needs, ensuring everyone can enjoy this healthy meal.

    Adapting Overnight Oats for Different Dietary Needs

    • Low-Carb and Keto Diets: Although traditional overnight oats are high in carbs, they can be modified for low-carb diets by reducing the portion of oats and substituting part of them with chia seeds or flaxseeds. which are lower in carbs and higher in fats.
    • Paleo Diet: For those following a Paleo diet. oats can be replaced with ingredients like almond meal or coconut flakes, keeping the base concept but aligning it with Paleo guidelines.
    • Low-FODMAP Diet: For individuals sensitive to FODMAPs, making overnight oats with lactose-free milk or a gut-friendly plant-based milk like almond milk, and avoiding high-FODMAP fruits can make this dish suitable.

    Nutritional Enhancements for Specific Health Goals

    • Boosting Antioxidant Intake: Add a mix of berries—such as blueberries, strawberries, and blackberries—to enhance the antioxidant content, which can help combat oxidative stress and inflammation.
    • Increasing Protein Content: Incorporate a scoop of your favorite protein powder or Greek yogurt to increase the protein content, which is ideal for muscle repair and growth, especially beneficial for those engaged in regular physical activity.

    Cultural Variations of Overnight Oats

    • Tropical Flavors: Mix in mango, pineapple, and coconut milk for a tropical twist that brings a bit of island flavor to your morning routine.
    • Spiced Versions: For a warming breakfast, add spices such as cinnamon, nutmeg, and cardamom, which not only flavor your oats but also offer various health benefits, including improved blood sugar control.

    By customizing overnight oats according to different dietary needs and cultural preferences, this simple dish can be a global staple in any healthy diet. Explore these variations to keep your breakfast exciting and aligned with your nutritional goals.

    FAQs on Overnight Oats

    Are Overnight Oats Gluten-Free?

    Overnight oats are naturally gluten-free as long as they are made from oats that have not been contaminated with gluten during processing. Always ensure that the oats you purchase are labeled gluten-free, especially if you have celiac disease or gluten sensitivity.

    Can Overnight Oats Be Made Dairy-Free?

    Absolutely! Overnight oats are incredibly versatile and can easily be made dairy-free by using plant-based milks such as almond milk, soy milk, or oat milk. This makes them a great breakfast option for those who are lactose intolerant or following a vegan diet.

    How Long Can You Store Overnight Oats in the Refrigerator?

    You may keep overnight oats in the fridge for up to five days. These are ideal for preparing meals at the start of the week. Ensure they are kept in an airtight container to maintain freshness and prevent them from absorbing other flavors from the fridge.

    Are Overnight Oats Suitable for Weight Loss Diets?

    Yes, overnight oats are a great choice for a weight loss diet due to their high fiber content, which helps keep you full and reduces the likelihood of overeating. To make them even more suitable for weight loss, choose toppings and mix-ins that are nutritious but low in calories.

    These FAQs address common questions and concerns about overnight oats. Understanding these details can help you tailor overnight oats to fit your dietary needs and lifestyle.

    We’ll conclude by summarizing the health benefits of overnight oats and how to effectively incorporate them into a balanced diet.

    Conclusion

    Our review shows overnight oats are a healthy breakfast if prepared carefully. They’re rich in fiber, protein, vitamins, and minerals, enhancing heart health, digestion, weight management, and blood sugar levels.

    Overnight oats are also adaptable and convenient for busy mornings, allowing for countless customizations to fit various diets and tastes. Enhance them with fruits, nuts, seeds, or spices to align with your dietary preferences, ideal for meal planning.

    Be aware of potential issues like high calories from too many toppings and anti-nutrients like phytic acid. Manage these by preparing carefully and choosing ingredients wisely.

    Enjoy the simplicity and health benefits of overnight oats. Try various flavors and toppings to tailor your ideal breakfast bowl, ensuring it meets your nutritional needs and starts your day right.


  • Chocolate Birthday Cake: Tips and Recipes for the Perfect Celebration

    Chocolate Birthday Cake: Tips and Recipes for the Perfect Celebration

    Introduction to Chocolate Birthday Cakes

    Welcome to the ultimate guide for crafting the perfect chocolate birthday cake. Whether you are new to baking or an experienced baker, this post is full of helpful hints and mouthwatering recipes to help you celebrate in style. We have everything you need to produce a stunning chocolate cake that will be the talk of the party, from selecting the perfect ingredients to perfecting the art of decorating. Let’s dive into the art of creating a memorable chocolate birthday cake!

    The Popularity of Chocolate Cakes

    Oh, the universal appeal of a chocolate cake! It’s no surprise that this sweet treat tops the list of favorite birthday desserts. Across cultures and continents, chocolate birthday cakes symbolize joy and celebration. Why, you ask? Chocolate is more than a flavor; it’s a universal symbol of love and joy, uplifting every gathering with smiles.

    Why Choose Chocolate for Birthday Celebrations?

    Choosing chocolate for a birthday cake isn’t just about taste—it’s about creating moments. Chocolate is popular, adaptable, and can be dressed up or down to fit the whims of each birthday person. Chocolate cake suits any event, making birthdays memorable with its rich flavor and nostalgic sweetness.

    In crafting the perfect chocolate birthday cake, one must consider not just the taste but also the joy it will bring. Stay tuned as we delve deeper into the essential ingredients that make up this beloved treat in our next section. When the candles are blown out, let us prepare a cake that will have everyone talking for hours!

    Choosing the Right Ingredients

    chocolate birthday cake

    Essential Ingredients for a Chocolate Birthday Cake

    Creating a scrumptious chocolate birthday cake begins with selecting the right ingredients. Quality matters, so let’s start with the basics: flour, sugar, and, most importantly, the star of the show—cocoa powder. For the best results, opt for high-quality unsweetened cocoa to give your cake that rich, deep chocolate flavor. Another crucial ingredient is eggs, which add structure and moisture, ensuring your cake is both sturdy and soft.

    Best Chocolate for Baking

    Not all chocolates are created equal, especially when it comes to baking. Choosing the right type of chocolate can make or break your cake. For a truly luxurious texture and flavor, go for dark chocolate with a cocoa content of at least 70%. It provides a robust flavor that complements the sweetness of the cake. If you’re curious about what makes certain chocolates better for baking, check out this detailed guide on the varieties of chocolate for baking.

    Substitutes and Variations

    Flexibility is key in baking, and sometimes you need to swap ingredients based on dietary preferences or availability. For dairy-free options, almond milk or coconut milk can replace cow’s milk without losing moisture. For a gluten-free chocolate cake, a reputable gluten-free flour blend can be a game-changer. And if you’re out of eggs, fear not! Mashed bananas or applesauce can be used as a binder while adding a hint of extra sweetness.

    By paying attention to each ingredient’s quality and understanding how they interact within your recipe, you’re well on your way to creating a chocolate birthday cake that will dazzle and delight. Next, we’ll guide you through the mixing and baking process to ensure your cake comes out perfectly every time. Stay tuned for a step-by-step journey into the baking heartland!

    Step-by-Step Baking Guide

    Preparing Your Kitchen

    Before diving into the baking process, it’s crucial to set the stage for success. Start by preheating your oven—accuracy in temperature is vital for a perfectly baked chocolate cake. Next, line your cake pans with parchment paper and lightly grease the sides. This preparation helps ensure that your cakes release easily without breaking. Gather all your ingredients and measure them out beforehand to streamline the mixing process, making it smoother and more enjoyable.

    Mixing the Ingredients

    Mixing the right way can make all the difference. Begin by sifting together the dry ingredients—flour, cocoa powder, baking soda, and baking powder—to avoid any lumps and ensure an even distribution throughout the batter. In a separate bowl, whisk the wet ingredients—eggs, milk, and oil—until they are well combined. Mix dry ingredients into wet until smooth; avoid over-mixing to prevent a dense cake—gentle patience is crucial.

    Baking the Perfect Chocolate Cake

    Pour the batter into the prepared pans, smoothing the tops with a spatula to ensure an even layer. Place the pans in the center of your oven to promote uniform heating. Baking times may vary depending on the size and depth of your pans, so keep an eye on your cake and perform the toothpick test at the 30-minute mark. A toothpick inserted into the center should come out clean or with just a few moist crumbs attached. Once done, remove the cakes from the oven and let them cool in the pans for about 10 minutes before transferring them to a wire rack to cool completely.

    Achieving the perfect chocolate cake involves precision and care at every step, from preparation to the final moments in the oven. With these detailed instructions, you’re well-equipped to bake a cake that not only tastes wonderful but also looks professionally made. Next, we’ll explore the art of decorating your chocolate birthday cake to make it as visually appealing as it is delicious. Stay tuned for tips and tricks that will elevate your baking game to new heights!

    Decorating Your Chocolate Birthday Cake

    chocolate birthday cake

    Classic Chocolate Frosting Options

    Once your cakes are cooled, it’s time to turn them into a celebratory masterpiece with the perfect frosting. A classic choice is chocolate buttercream, beloved for its smooth texture and rich flavor. To make it, simply cream together butter, powdered sugar, and cocoa powder until light and fluffy. For a richer flavor, you can add a splash of vanilla extract or a pinch of salt to enhance the chocolatey notes. For those looking for something a bit different, a chocolate ganache can provide a glossy, decadent covering that’s sure to impress.

    Creative Decoration Ideas

    Now, let your creativity shine! Decoration is where you can truly personalize your chocolate birthday cake. Consider using chocolate shavings, sprinkles, or even edible gold leaf for a touch of elegance. Piping designs along the edges or across the top with a contrasting color (think white chocolate or a raspberry puree) can add a stunning visual element. If you’re celebrating a specific theme, tailor your decorations to match—be it with color-coordinated toppings or bespoke cake toppers.

    Tips for a Professional Finish

    For that immaculately polished look, here are a few tips: First, ensure your frosting is smooth and even by using an offset spatula. If the frosting becomes too soft to work with, chilling it for a few minutes can help regain consistency. To get a super-smooth finish on your buttercream, dip your spatula in hot water, dry it, and then smooth over the cake. This technique melts the buttercream slightly, creating a flawless surface. Lastly, remember to let your creativity lead the way and have fun with the process, because a cake made with joy always tastes better!

    With your cake beautifully baked and decorated, it’s ready to take center stage at any birthday celebration. But what’s next after the party’s over? Up next, we’ll dive into the best practices for serving and storing your chocolate birthday cake to ensure every slice is as delicious as the first. Stay tuned for more expert advice to keep your cake sensational from the first bite to the last!

    Variations of the Chocolate Birthday Cake

    Vegan and Gluten-Free Options

    Everyone deserves a slice of birthday joy, which means accommodating different dietary needs without compromising on taste. For a vegan chocolate birthday cake, swap out animal products for alternatives like almond milk, coconut oil, and flax eggs. These substitutions keep the cake moist and flavorful, ensuring no one misses out on the celebration. Gluten-free baking has also come a long way, with various flour blends available that mimic the texture and density of traditional flour. Remember, when choosing a gluten-free flour blend, look for one that offers a balance of rice flour, potato starch, and xanthan gum to achieve the best results.

    Adding Unique Flavors

    A chocolate birthday cake doesn’t have to be just about chocolate. Infusing additional flavors can elevate the basic recipe into something extraordinary. Consider adding a hint of espresso powder to deepen the chocolate flavor, or mix in some orange zest for a refreshing citrus note. For a richer, more complex profile, fold in some caramel or toasted nuts into the batter or frosting. These tweaks not only enhance the flavor but also introduce delightful textures to the cake, making every bite a new discovery.

    By exploring these variations, you can tailor your chocolate birthday cake to fit any preference or occasion, making it as unique as the person you’re celebrating. Next, we’ll discuss the best practices for serving and storing your masterpiece, ensuring it remains as stunning and delicious as the moment it was sliced. Stay tuned for practical tips to maximize the enjoyment of your chocolate birthday cake long after the candles have been blown out!

    Serving and Storage Tips

    Best Practices for Serving

    When it comes time to serve your chocolate birthday cake, a few tips can help enhance the experience. First, ensure the cake is at room temperature. A cold cake can taste denser and less flavorful, so pulling it out of the fridge an hour before serving is ideal. For clean, sharp cuts, use a thin-bladed knife and dip it in hot water between slices. This method ensures that each piece is beautifully presented without dragging crumbs or frosting across the top.

    How to Store Leftovers

    Proper storage is key to maintaining the freshness and texture of your chocolate birthday cake. If you have leftovers, they should be covered with plastic wrap or placed in an airtight container to prevent drying out. Refrigerate if the frosting is dairy-based or if you’re in a warm climate; otherwise, a cool, dark place can suffice. For longer storage, consider freezing slices on a baking sheet before wrapping them individually. This way, you can enjoy a piece of birthday bliss long after the event has passed.

    By following these serving and storage tips, you ensure that your chocolate birthday cake remains the centerpiece of the celebration, from the first slice to the last crumb. Next, we’ll address some common questions in our FAQs section, providing you with all the insider knowledge needed to bake and enjoy the perfect chocolate birthday cake. Stay tuned for answers to all your cake-related queries!

    FAQs (Frequently Asked Questions)

    What are the best tips for a moist chocolate cake?

    Achieving a moist chocolate birthday cake starts with the right balance of ingredients. Ensure you use enough wet ingredients like oil or buttermilk, which contribute to the tenderness of the cake. Avoid overbaking by checking the cake a few minutes before the suggested baking time ends. A simple trick is to add a spoonful of mayonnaise or sour cream to the batter; these ingredients contain fats that enhance moisture retention.

    Can I make a chocolate birthday cake in advance?

    Absolutely! Baking your chocolate cake in advance can be a great time-saver. Once cooled, wrap the cake layers tightly in plastic wrap and store them in the refrigerator for up to three days or freeze for up to a month. This not only helps in managing your time but also makes the cake easier to frost as chilled cakes crumb less during the frosting process.

    How do I make my chocolate cake fluffy and light?

    For a fluffy and light chocolate cake, ensure that your leavening agents (baking powder and baking soda) are fresh. Incorporate air into the cake batter by creaming the sugar and butter until pale and fluffy before adding other ingredients. Another tip is to use cake flour instead of all-purpose flour; it has less protein and creates a finer, lighter crumb.

    By addressing these FAQs, we hope to enhance your baking experience, making it easier and more enjoyable to create the perfect chocolate birthday cake. With these tips and techniques, you’re well-equipped to bake a cake that impresses in both taste and presentation, ensuring every birthday celebration is a delicious success. Happy baking and celebrating!

    Conclusion

    This concludes our comprehensive guide on creating the ultimate chocolate birthday cake. From choosing the right ingredients to baking and decorating with finesse, we’ve covered all the essentials to help you master the art of chocolate cake making. Whether it’s for a grand celebration or a cozy family gathering, your chocolate cake is sure to bring smiles and sweet memories.

    Remember, baking is not just about following recipes—it’s about creating joy and sharing love. Each step, from mixing the batter to applying the final touches of frosting, is an opportunity to infuse your personal touch and creativity. So, the next time a birthday rolls around, don your apron, preheat your oven, and prepare to bake a cake that will be the highlight of the party.

    Thank you for following along with this guide. We hope it inspires you to create many more delightful and delicious chocolate birthday cakes. Here’s to many happy returns and sweet celebrations!

  • Dog Birthday Cakes: Celebrate Your Pup’s Special Day

    Dog Birthday Cakes: Celebrate Your Pup’s Special Day

    Introduction to Dog Birthday Cakes

    Why Celebrate with a Dog Birthday Cake?

    Celebrating your dog’s birthday with a dog birthday cake is a fantastic way to show your love and appreciation. These celebrations can strengthen the bond between you and your pet, creating cherished memories. Plus, it’s just a blast to see your pup’s tail wag with joy over a special treat!

    Benefits of Celebrating Your Dog’s Birthday

    The main perk of whipping up a birthday cake for your dog is the joy and excitement it brings. Watching your dog enjoy their special treat is a heartwarming sight and reinforces the strong bond you share. It’s a day where your attention is fully focused on your pet, making them feel loved and cherished.

    Safety Considerations

    When planning your dog’s birthday cake, it’s crucial to prioritize safety. The internet is a treasure trove of recipes, but not all ingredients found in human cakes are safe for dogs. For instance, chocolate and xylitol are toxic to dogs and should always be avoided. Instead, opt for dog-safe ingredients like peanut butter, carrots, and apples. Learn more about dog nutrition to ensure your treats are not only delicious but also beneficial for your dog’s health.

    This first section of our celebration guide sets the stage for an unforgettable birthday bash for your canine companion, filled with fun, love, and plenty of tail-wagging. As we continue, we’ll dive into some popular and safe recipes that you can try at home to spoil your pup on their special day.

    Popular Recipes

    Classic Peanut Butter Carrot Cake

    One of the most beloved recipes for a dog birthday cake is the Classic Peanut Butter Carrot Cake. This cake is not only delicious but also packed with dog-friendly ingredients that offer health benefits.

    • Ingredients and Preparation Steps
      • Start by preheating your oven to 350°F (175°C). You’ll need one egg, a cup of shredded carrots, a quarter cup of peanut butter (make sure it’s xylitol-free), and a third of a cup of honey (optional). Mix these together with a cup of whole wheat flour and a teaspoon of baking soda for lift.
      • In a bowl, mix together all ingredients until well combined. Pour the batter into a greased cake pan and bake for about 40 minutes or until a toothpick comes out clean from the center. Let it cool before serving a slice to your birthday pup!
    • Nutritional Benefits of Each Ingredient
      • Carrots are a great source of vitamin A, which is beneficial for your dog’s vision, skin, and coat health. Peanut butter provides protein and healthy fats, making it an excellent energy source. Just remember, moderation is key!

    Grain-Free Apple and Cheddar Cake

    For pups with grain sensitivities, this Grain-Free Apple and Cheddar Cake is a perfect choice. It’s as tasty as it is nutritious, providing a safe way to indulge your dog on their special day.

    • Recipe Details
      • You will need one apple, peeled and finely chopped, a half cup of shredded cheddar cheese, two tablespoons of coconut oil, and three eggs. Combine these with a cup of coconut flour to keep it grain-free.
      • Mix all the ingredients until they form a consistent batter. Spoon into a greased baking dish and bake at 350°F (175°C) for 22-25 minutes. Let it cool completely before giving your dog a taste of this cheesy delight.
    • How to Serve and Store
      • Cut the cake into manageable pieces for your dog. If you’re not serving the cake immediately, store it in the refrigerator for up to five days. You can also freeze slices for future treats!

    These recipes not only celebrate your dog’s special day but also cater to their health and dietary needs. By choosing ingredients wisely and focusing on their benefits, you ensure a happy and healthy celebration. As we move on, get ready to explore some creative variations that can add a little extra flair to your dog’s party treats.

    Creative Variations

    Pupcakes and Mini-Cakes

    If you’re looking to add a dash of variety or need smaller servings for a puppy party, pupcakes and mini-cakes are perfect. These fun-sized treats are easy to serve and just as festive as a full-sized cake.

    • Smaller Alternatives for Small Dogs or Parties
      • To make pupcakes, simply adjust your favorite dog cake recipe by dividing the batter into a muffin tin. Bake for a shorter time, usually around 15-20 minutes, depending on the size. This makes the cakes ideal for individual servings and helps manage portion sizes, ensuring all the furry guests get a taste without overindulging.
    • Decorative Ideas to Make Them Festive
      • Get creative with dog-safe decorations! Top your pupcakes with a dollop of plain Greek yogurt or a small spoonful of peanut butter as frosting. For a touch of flair, add a tiny piece of dog-friendly fruit or a small treat on top. These decorations not only look great but are also safe for dogs to enjoy.

    Frozen and No-Bake Options

    For those hot summer birthdays or for dogs with sensitive teeth, frozen and no-bake cakes are a fantastic alternative. These treats can help cool down your pup while still providing a festive birthday treat.

    • Recipes for Summer Birthdays or Dogs with Dental Issues
      • Try a simple frozen cake by mixing plain yogurt with mashed banana and a spoonful of peanut butter. Pour the mixture into silicone molds or an ice cube tray and freeze Transfer the mixture into ice cube trays or silicone molds, then freeze until it solidifies. until solid. These frozen treats are refreshing and soft, perfect for dogs to easily chew.
    • Importance of Cooling Treats for Dogs
      • Besides being a delightful surprise, cooling treats like these can help regulate your dog’s temperature during warmer months and provide a gentle eating experience for pets with dental sensitivities or older dogs.

    Creating these creative variations not only caters to your dog’s preferences and needs but also adds an element of fun to their special day. As we continue, we’ll explore how to enhance these treats further with dog-friendly decorating tips and presentation ideas, making your pup’s birthday celebration both beautiful and unforgettable.

    Decorating and Presentation

    Dog-Friendly Decorating Tips

    When it comes to decorating your dog’s birthday cake or treats, it’s important to keep both safety and appeal in mind. Opt for simple, safe ingredients that will make your creations look festive and inviting.

    • Safe icings and toppings
      • For a dog-safe icing, blend together Greek yogurt with a bit of peanut butter. This mixture is easy to spread and safe for dogs to eat. Avoid any ingredients that are harmful to dogs, like chocolate or artificial sweeteners. As an alternative, mashed bananas or pureed pumpkin can also serve as tasty, healthy frostings.
    • Presentation ideas that excite dogs
      • Dogs may not care about aesthetics the way humans do, but they definitely get excited by the smells and colors of their treats. Use natural food colorings, like beet juice for a pink hue or turmeric for a golden color, to make the treats more visually appealing. Arrange the treats on a fun, colorful plate or in a pattern that might intrigue your dog.

    DIY Dog Party Decorations

    Creating a themed birthday party for your dog can enhance the festive atmosphere and make the day even more special. Here are some simple DIY ideas to decorate your space and celebrate your furry friend.

    • How to create a themed birthday party for dogs
      • Choose a theme based on your dog’s interests, such as a “Bark Park Party” or “Beach Ball Bash.” Use toys and accessories as decorations that align with the theme. For example, for a Bark Park Party, you could have plush squirrel toys and tennis balls scattered around.
      • Make banners or signs with paw prints or bones printed on them. You can easily create these at home with some craft paper and non-toxic paints.

    These decorating and presentation ideas are designed to not only please the eye but also to engage your dog’s senses and make them feel like the star of the show. By using safe ingredients and creative DIY decorations, you ensure a joyful and memorable celebration.

    As we move forward, we’ll delve into the FAQs about dog birthday cakes, addressing common concerns and providing useful tips to help you prepare the perfect treat for your pet’s special day.

    Advanced Tips for Dog Cake Baking and Safety

    Mastering the Art of Dog-Friendly Baking

    Baking a cake for your dog is a delightful way to show your love, but mastering the craft can take your celebrations to the next level. This section will delve into advanced baking tips and techniques that ensure your cakes are not only tasty but also perfectly suited to your dog’s dietary needs.

    • Experimenting with Flavors and Textures
      • Dogs have different taste preferences, just like humans. Don’t be afraid to experiment with various dog-safe ingredients to find what your pup loves best. Consider incorporating sweet potatoes, blueberries, or even lean meats like chicken or turkey for a savory twist. Each ingredient offers unique flavors and benefits, so mixing and matching can lead to your dog’s new favorite treat.
    • Techniques for Perfect Consistency
      • Achieving the right texture is crucial for making sure the cake is easy for your dog to eat and enjoy. For older dogs or those with dental issues, softer cakes might be necessary. You can adjust the moisture content with ingredients like applesauce or pumpkin puree to create a softer, more palatable texture.

    Ensuring Ultimate Safety in Dog Treats

    When it comes to your dog’s health, safety is paramount. This section covers additional precautions and checks to keep in mind when preparing dog-friendly cakes.

    • Regular Ingredient Checks
      • Always double-check the ingredients list on products like peanut butter or yogurt to ensure they do not contain xylitol or other harmful additives. Keeping up-to-date with FDA warnings about pet foods and treats can also help you avoid ingredients that may be under scrutiny for safety concerns.
    • Consulting with a Veterinarian
      • If you’re unsure about a recipe or an ingredient, especially if your dog has specific health issues like allergies or dietary restrictions, consulting with your vet can provide peace of mind. They can offer advice tailored to your dog’s health needs, ensuring that your culinary creations are both safe and beneficial.

    By incorporating these advanced baking tips and safety guidelines, you can enhance your dog’s birthday celebrations, ensuring they are not only fun and festive but also contribute positively to their health and well-being. This attention to detail will make your homemade treats even more special, reinforcing the loving bond between you and your pet.

    FAQs

    Frequently asked questions about dog birthday cakes offer valuable insights into common concerns and helpful tips for pet owners looking to celebrate their dog’s special day with a homemade treat. We answer some of the most frequently asked questions below.

    • What are the best ingredients to use in a dog birthday cake?

      • The best ingredients for dog cakes are ones that are safe and healthy for dogs. Good options include whole wheat flour (or coconut flour for grain-free recipes), eggs, apples, carrots, and peanut butter. Always ensure that the peanut butter is xylitol-free as xylitol is toxic to dogs.
    • How can I ensure the cake is safe for my dog to eat?

      • To ensure the cake is safe, avoid using any ingredients known to be harmful to dogs, such as chocolate, grapes, raisins, onions, and artificial sweeteners like xylitol. Stick to simple, wholesome ingredients and, when in doubt, consult your veterinarian.
    • Can I make a dog birthday cake without baking?
      • Absolutely! No-bake dog cakes can be a great alternative, especially for owners who are short on time or prefer not to use an oven. A simple recipe involves mixing natural peanut butter, plain yogurt, and mashed bananas together, then freezing the mixture in a cake mold until solid.
    • Are there any quick dog cake recipes for last-minute preparations?

      • For a quick and easy dog cake, mix one egg, a half cup of peanut butter, a quarter cup of cooking oil, and one cup of shredded carrots. Combine these with a cup of flour and a teaspoon of baking soda, then bake for 30 minutes at 350°F (175°C). This simple cake is both quick to prepare and delicious for dogs.

    These FAQs aim to ensure that every pet owner can feel confident and informed when preparing a birthday treat for their dog, emphasizing safety, simplicity, and enjoyment.

    In the next section, we’ll wrap up with a summary and final thoughts on creating memorable and safe celebrations for your beloved canine.

    Conclusion

    Summary and Final Thoughts

    As we wrap up our guide to celebrating your dog’s birthday with a delightful dog birthday cake, it’s important to reflect on the joy and bonding such an occasion brings. Creating a homemade treat for your pet is more than just a fun activity; it’s an expression of love and appreciation for your furry companion. By choosing safe, healthy ingredients and following the tips and recipes provided, you can ensure that your dog’s birthday is not only festive but also beneficial to their health.

    Encouragement to Try Making a Dog Birthday Cake

    Whether it’s your first time baking a cake for your dog or you’re looking to try new recipes and ideas, the process is sure to strengthen the bond between you and your pet. Remember, the key is to enjoy the moment and watch your dog’s excitement as they dig into a cake made just for them. Don’t hesitate to get creative with the recipes and decorations, tailoring them to your dog’s tastes and dietary needs.

    Celebrating your dog’s birthday with a homemade cake is a wonderful way to show your pet how much they are loved and cherished. Each bite of the cake represents the care and thought you’ve put into their well-being and happiness. So, grab your baking supplies, choose a recipe, and start planning a birthday bash that your dog will remember for years to come!

    This guide aims to provide everything you need to know to make your dog’s special day extraordinary. From safe and nutritious recipes to festive decorations and practical tips, you have the tools to create a celebration that is as enjoyable as it is memorable. Happy baking, and here’s to many more joyful birthdays with your beloved pup!


  • Cat Birthday Cake: Best Recipes & Tips for Your Feline’s Party

    Cat Birthday Cake: Best Recipes & Tips for Your Feline’s Party

    Introduction to Cat Birthday Cakes

    Celebrating your feline friend’s birthday with a special treat can be a delightful way to show your love and appreciation. A cat birthday cake offers a unique twist on typical pet celebrations and can be a fun, engaging activity for both you and your kitty. In this guide, we’ll explore safe ingredients, nutritional guidelines, and creative recipes to help you whip up the perfect birthday treat for your feline. Let’s make this birthday one to remember with a cake that’s not only delicious but also perfectly suited for your cat’s dietary needs.

    Celebrating your cat’s special day with a cat birthday cake isn’t just about indulgence; it’s about crafting a moment of joy and affection that resonates with their natural preferences and dietary health. Here’s why dedicating a little time to create a homemade cake is worth the whisk and stir.

    Choosing Safe Ingredients

    When planning your cat’s birthday treat, picking the right ingredients is crucial. Since cats are obligate carnivores, meat should make up the majority of their diet. However, But that does not mean you can not use some imagination. this doesn’t mean you can’t get a little creative. Here are some cat-safe ingredients that you might consider:

    • Cooked lean meats: Chicken, turkey, and lean beef are great options.
    • Fish: Tuna or salmon can be used, but always ensure they are cooked and free from bones.
    • Catnip: A sprinkle of this can make the cake irresistible to your feline.

    Remember to steer clear of onions, garlic, and chocolates, as these can be toxic to cats. For more detailed information, consider visiting the ASPCA Poison Control to ensure your cat’s safety and health.

    Nutritional Considerations

    While treats like a birthday cake are not everyday food, making sure they are nutritionally appropriate is essential. The key is balance and moderation:

    • Protein-rich: Cats need a high amount of protein, so make sure that meat or fish is the main ingredient of your cake.
    • Low-fat: Keep the fat content low, as high fat can lead to digestive issues in cats.
    • No sugar: Cats do not need sugar. Avoid sweeteners of any kind to keep the cake healthy.

    Understanding your pet’s dietary needs is paramount, and ensuring that their birthday cake aligns with these needs will help prevent any health issues. Stay tuned for some pawsome recipes coming up in the next sections!

    Recipes for a Perfect Cat Birthday Cake

    cat birthday cake

    Creating a birthday cake for your cat is about combining nutrition with festivity. Here are a few recipes that are bound to make your kitty purr with delight on their special day.

    Simple Tuna Cake

    Tuna is a feline favorite and serves as the perfect main ingredient for a celebratory cake. Here’s how you can make a simple yet delicious tuna cake:

    • Ingredients:
      • 1 can of tuna in spring water, drained
      • 1 egg, beaten
      • 2 tablespoons of whole wheat flour (optional)
      • A pinch of catnip for garnish
    • Method:
      1. Preheat your oven to 350 degrees Fahrenheit (175 degrees Celsius).
      2. In a mixing bowl, combine the tuna, egg, and flour until the mixture binds together.
      3. Press the mixture into a small cake tin or a cupcake mold for individual servings.
      4. Bake for 20 minutes or until the cake is firm and slightly golden on top.
      5. Let it cool completely before topping with a sprinkle of catnip.

    This cake not only satisfies your cat’s protein cravings but also adds a fun twist with the catnip garnish!

    Chicken and Catnip Delight

    For cats who are not fans of fish, a chicken cake can be equally delightful. Here’s what you need to do:

    • Ingredients:
      • 1/2 cup cooked, finely shredded chicken
      • 1/4 cup plain mashed potatoes for binding
      • A few leaves of fresh catnip, finely chopped
    • Method:
      1. Combine chicken and mashed potatoes in a bowl until well mixed.
      2. Fold in the chopped catnip for that extra flavor that cats adore.
      3. Shape the mixture into a small cake or individual patties.
      4. Serve at room temperature to let your cat enjoy the fresh flavors.

    Salmon and Sweet Potato Cake

    Offering a rich source of omega-3 fatty acids, salmon is excellent for your cat’s coat and skin health. Here’s how to make a salmon cake:

    • Ingredients:
      • 1/4 pound cooked salmon, deboned and flaked
      • 1/4 cup cooked, mashed sweet potato
      • An egg as a binder
    • Method:
      1. Preheat your oven to 350 degrees Fahrenheit (175 degrees Celsius).
      2. In a bowl, thoroughly mix the salmon, sweet potato, and egg.
      3. Press the mixture into a greased cake tin.
      4. Bake for 25 minutes, then allow to cool completely before serving.

    Each of these recipes provides a nutritious and delicious way to celebrate your cat’s birthday. Remember, these cakes are a treat and should not replace your cat’s regular diet. Stay tuned for tips on how to present these delightful dishes at your cat’s birthday bash!

    Decoration and Serving

    A cat birthday cake deserves as much flair in presentation as it does in preparation. Here are some creative ways to decorate and serve your cat’s birthday cake that ensure safety and fun.

    Decorating Your Cat’s Birthday Cake

    Decorating a cat cake involves more than aesthetic appeal—it’s about making the cake enticing and enjoyable for your kitty while keeping safety in mind:

    • Safe Decorations:
      • Edible flowers: Small amounts of cat-safe flowers like roses or marigolds can add a splash of color.
      • Cat treats: Use your cat’s favorite crunchy treats as a topping for added texture and flavor.
      • Catnip: A light dusting of catnip over the cake can make it irresistible.

    Always ensure that any decoration is non-toxic and safe for cats to ingest. This consideration keeps the celebration worry-free and healthy.

    Serving Suggestions

    How you serve the cake can make a big difference in how your cat interacts with their special treat:

    • Individual Portions: Cutting the cake into small, manageable pieces can prevent overeating and ensure it’s easy for your cat to enjoy.
    • At the Right Time: Serve the cake after your cat has had their regular meal. This way, they won’t be too hungry and can enjoy the treat moderately.
    • Party Setting: If you’re throwing a party, ensure each feline guest has her plate to avoid any conflicts.

    By following these tips, you can create a festive atmosphere that celebrates your cat’s milestone in a memorable and joyful way.

    Stay tuned for the next part, where we’ll dive into some of the most commonly asked questions about making cat birthday cakes and how to handle various aspects of feline dietary needs.

    Capturing the Memories

    A cat’s birthday is not just about the celebration and the cake—it’s also a perfect opportunity to create lasting memories. Here’s how you can capture these moments beautifully and preserve them for years to come.

    Photography Tips for Pet Birthdays

    cat birthday cake

    Taking photos of your cat during their birthday can be a fun and rewarding activity. The following advice will help you take the greatest pictures:

    • Natural Light: Use natural light whenever possible. It’s flattering and less likely to startle your cat than flash photography.
    • Keep It Candid: While you can set up a few posed shots, candid photos often capture the most genuine expressions and memorable moments.
    • Eye Level: Get down to your cat’s level. Photos taken at their eye level tend to be more engaging and give a better perspective of their world.

    Creating a Birthday Video

    Videos are another great way to capture the celebration:

    • Short Clips: Take short clips of various moments, like your cat trying the cake, playing with toys, or interacting with other pets.
    • Edit Together: Use a simple video editing tool to stitch these clips together, adding music or captions to enhance the storytelling.

    Preserving the Memories

    Once you have your photos and videos, consider the following ways to preserve these memories:

    • Photo Albums: Create a digital or physical photo album dedicated to your cat’s birthdays.
    • Social Media: Share your celebration on social media platforms. It’s a fun way to connect with other cat lovers and show off your feline’s big day.
    • Yearly Tradition: Make a tradition of taking a special photo every birthday. This can be a delightful way to see how your cat grows and changes over the years.

    Capturing and preserving memories of your cat’s birthday not only provides you with a treasure trove of moments to look back on but also strengthens the bond between you and your pet, celebrating every milestone in their life.

    FAQs About Cat Birthday Cakes

    When planning a cat birthday celebration, it’s common to have questions about the best practices and safety. Here are answers to some frequently asked questions that can help ensure your feline’s feast is a hit.

    What ingredients are toxic to cats?

    Cats have specific dietary requirements and restrictions. Some commonly known toxic ingredients to avoid include:

    • Onions and garlic: These can cause anemia in cats.
    • Caffeine and chocolate: both include ingredients that are poisonous to cats.
    • Grapes and raisins: Known to cause kidney failure in cats.
    • Xylitol: Often found in sweets and some peanut butters, xylitol is highly toxic to pets.

    For a complete list and more details on toxic substances, please refer to resources like the ASPCA Poison Control for guidance.

    How much cake can a cat safely eat?

    Moderation is key when feeding your cat a birthday cake. As a rule of thumb:

    • Small Portions: A few bites (depending on the size and the diet of your cat) are enough to make the day special without overfeeding.
    • Treat, Not Meal: Remember, a birthday cake is a treat and should not replace your cat’s regular meal. It’s meant to add a little extra joy to their day, not nutritional balance.

    Can I make a vegan cake for my cat?

    Cats are obligate carnivores, which means their diet must primarily consist of meat. Vegan diets generally do not meet a cat’s nutritional needs, but if you’re looking for a meat-free option for a party setting, consider:

    • Vegetable garnishes: These can be used to decorate meat-based cakes for aesthetic purposes without intending them to be a significant part of the meal.

    Each cat is unique, so it’s always best to consult with your veterinarian before introducing any new food to your cat’s diet. Next, we will provide additional tips for throwing a successful cat birthday party, ensuring it’s safe and enjoyable for all your feline guests.

    Additional Tips for a Successful Cat Birthday

    Throwing a birthday party for your cat can be as fun as it is memorable. To make sure everything goes smoothly and your pet enjoys their special day to the fullest, here are some additional tips and considerations.

    Planning a Cat Birthday Party

    Planning is crucial when it comes to hosting any event, especially a pet party. Here’s how to ensure a joyous occasion for your feline friend:

    • Guest List: Only invite cats that your pet already knows and gets along with to avoid any potential conflicts.
    • Safe Space: Make sure the party area is safe and secure. Remove any potential hazards and ensure all escape routes are secured if the party is outdoors.
    • Playtime: Have a variety of toys available to encourage play and interaction among the kitty guests.

    Creating a party-themed environment that’s both stimulating and safe will help make the celebration enjoyable for all attendees.

    How to Involve Other Pets Safely

    If other pets are in the household, it’s important to involve them in a way that is safe and stress-free:

    • Proper Introductions: If the pets haven’t met before, introduce them gradually and under controlled circumstances before the party.
    • Separate Areas: Provide separate areas for cats and other pets if they are not used to each other to prevent any potential mishaps.
    • Supervision: Always supervise interactions between pets at a party to ensure everyone stays safe and comfortable.

    These strategies help maintain harmony and ensure that all your pets can enjoy the festivities without anxiety or risk of injury.

    By following these tips, you can create a fantastic birthday experience for your cat and a fun day for everyone involved. Stay tuned for the conclusion, where we’ll wrap up our discussion on celebrating your cat’s special day with heartfelt final thoughts.

    Conclusion and Final Thoughts

    As we wrap up our guide to creating the perfect cat birthday cake and celebrating your feline’s special day, it’s important to reflect on why we go to these lengths for our pets. Celebrating a cat’s birthday with a custom-made cake is more than just a charming tradition; it’s a meaningful expression of love and appreciation for our furry family members.

    Summary of Key Points

    • Safe Ingredients: Always choose ingredients that are safe and healthy for cats, avoiding anything toxic or harmful.
    • Nutritional Balance: Remember, while birthday cakes are a fun treat, they should not replace regular, balanced meals.
    • Creative Recipes: Whether it’s tuna, chicken, or salmon, making a cake your cat will love is all about knowing their preferences and dietary needs.
    • Enjoy the Celebration: Taking the time to celebrate your cat’s birthday can strengthen your bond and create lasting memories.

    Encouraging Joyful Celebrations

    In the end, the effort you put into preparing a special treat for your cat’s birthday shows your deep care and commitment to their happiness and well-being. It’s these moments of shared joy and celebration that enrich our lives and the lives of our pets.

    So, as you plan your cat’s next birthday bash, remember the tips and recipes provided here. Not only will you have a happy and healthy cat, but you’ll also have the pleasure of knowing you made their day truly special.

    Thank you for following along with this guide. Here’s to many more delightful birthdays with your beloved feline friends!