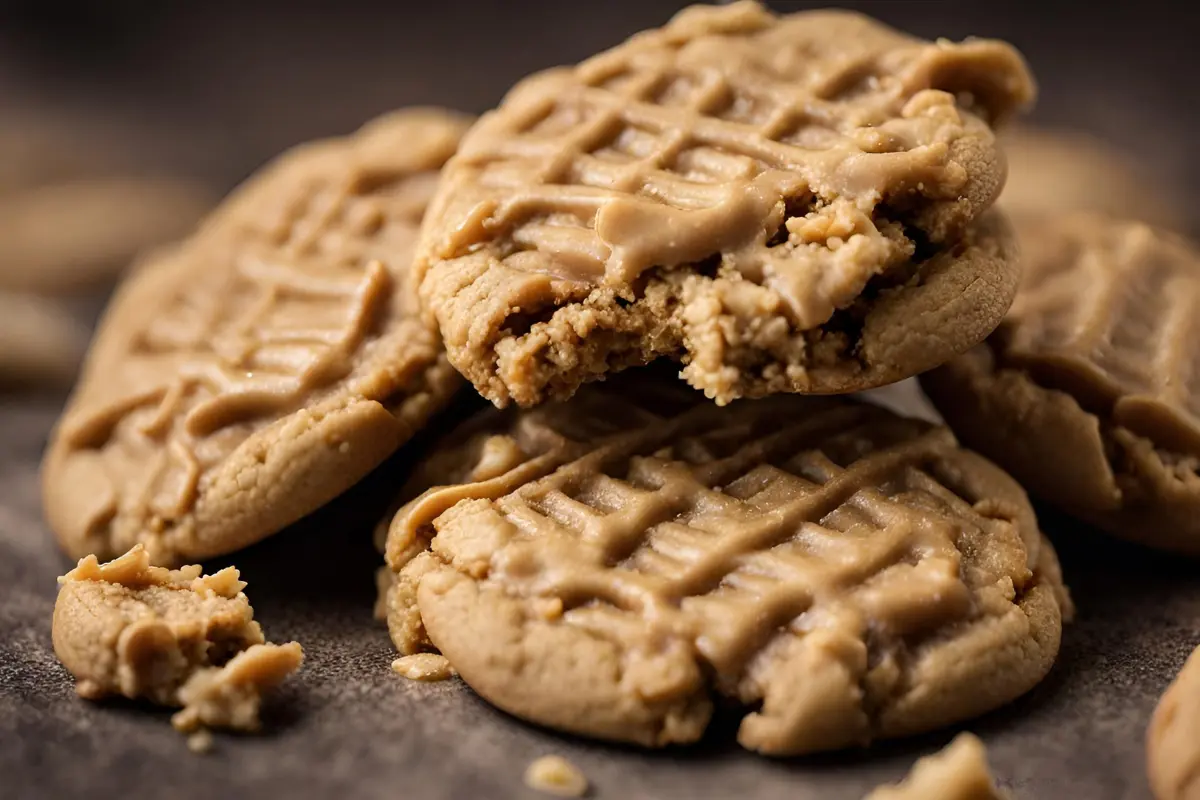
Category: Dessert

  • Can Dogs Have Peanut Butter Cookies? Safety, Risks, and Recipes

    Can Dogs Have Peanut Butter Cookies? Safety, Risks, and Recipes

    Introduction and Overview

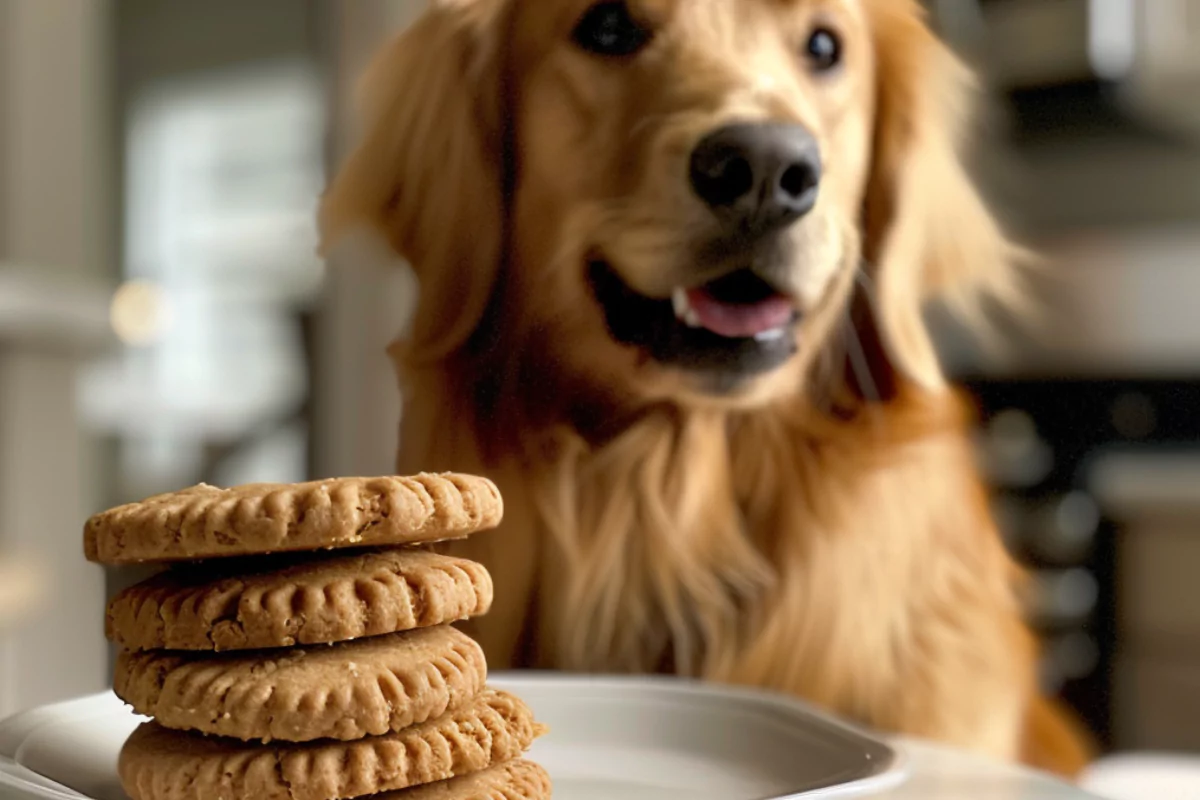
    Are you a dog owner curious about whether you can share your favorite snack with your furry friend? Specifically, can dogs have peanut butter cookies? This article dives deep into the safety, risks, and possible recipes for peanut butter cookies suitable for dogs. We’ll explore everything from the potential dangers of certain ingredients to how you can whip up a safe, tasty treat for your pet. So, buckle up and let’s find out more about dogs and peanut butter cookies.

    Can Dogs Have Peanut Butter Cookies? Understanding the Topic

    Many dog owners love sharing their snacks with their pets, but when it comes to peanut butter cookies for dogs, there are several things to consider before handing over a treat. While peanut butter itself can be a healthy occasional snack for dogs, the additional ingredients in peanut butter cookies may not be safe. Let’s break down what you need to know about these sweet treats and your canine pals.

    Is It Safe for Dogs to Eat Peanut Butter Cookies? Safety Considerations

    When pondering if dogs eating peanut butter cookies is a good idea, the first thing to check is the ingredient list. Two major ingredients can turn a harmless treat into a danger zone: chocolate and xylitol. Chocolate is widely known to be toxic to dogs, and xylitol, an artificial sweetener found in many sugar-free foods, can be lethal for your pet. Ensuring these substances are absent is crucial before considering sharing any cookie with your dog.

    Moreover, the overall nutritional content of peanut butter cookies typically includes high amounts of sugar and fat, which, although tempting, can contribute to obesity and related health issues in dogs if consumed regularly. Thus, while your dog might glance longingly at your peanut butter cookie, think twice about the implications for their health.

    Stay tuned for the next part where we’ll delve into the potential risks and benefits of peanut butter for dogs, helping you make an informed decision about treating your furry friend.

    Risks and Benefits

    Potential Risks of Peanut Butter Cookies

    While peanut butter can be a delightful treat for dogs, peanut butter cookies come with some potential risks. The cookies might contain harmful ingredients like xylitol, which can lead to severe health problems in dogs, including liver failure. Moreover, the sugar and fat content of these cookies can cause obesity and other health issues if consumed excessively​.

    Besides that, some dogs may have allergies to peanuts or other ingredients in the cookies. Symptoms like itching, red skin, and digestive distress can occur if a dog has an adverse reaction. In extreme cases, consuming peanut butter cookies could lead to pancreatitis due to the high-fat content. It’s essential to be mindful of these risks before sharing your favorite treat with your furry friend.

    Potential Benefits of Peanut Butter

    Despite the potential risks, there are benefits to feeding dogs peanut butter in moderation. Peanut butter contains healthy fats, proteins, and niacin, all beneficial for a dog’s health. Healthy fats contribute to skin health, while protein supports muscle development and immune function. Niacin helps with energy production and digestive health.

    The key is moderation and choosing the right type of peanut butter. Natural, unsalted, and organic peanut butter without added sugar or harmful additives is the safest option. Given as an occasional treat, peanut butter can be a fun snack for dogs and a useful tool for training or dispensing medication.

    Recipes and Alternatives

    can-dogs-have-peanut-butter-cookies

    Homemade Peanut Butter Cookie Recipes for Dogs

    Homemade peanut butter cookies can be a safer alternative for your dog because you control the ingredients. Here’s a simple recipe: mix 2 cups of flour, 1 cup of natural peanut butter, 1 egg, and a teaspoon of baking powder. Shape the dough and bake at 350°F until golden brown. Always use natural peanut butter without xylitol or added sugars.

    Alternatives to Peanut Butter Cookies for Dogs

    If you want to avoid peanut butter cookies altogether, there are plenty of other treats for dogs. Natural peanut butter itself is a great option; you can give it to your dog directly or spread it on a toy. Other alternatives include homemade treats using dog-friendly ingredients and commercial dog treats specifically formulated for canine consumption.

    How to Recognize and Address Peanut Butter Poisoning in Dogs

    Signs of Peanut Butter Poisoning

    While peanut butter is often a delightful treat for dogs, poisoning can occur if they consume harmful ingredients like xylitol. Recognizing the symptoms of peanut butter poisoning is crucial for early intervention. Look out for signs like vomiting, lethargy, loss of coordination, and seizures. If your dog exhibits these symptoms after consuming peanut butter cookies, immediate veterinary care is essential​.

    What to Do If Your Dog Eats Harmful Peanut Butter

    If your dog accidentally consumes peanut butter containing harmful ingredients, quick action is vital. For advice, get in touch with a pet poison control center or your veterinarian right away. Providing them with information about the ingredients will help determine the best course of action. In some cases, inducing vomiting might be recommended, but only do this under professional advice to avoid complications.

    Prevention Strategies

    Preventing peanut butter poisoning involves being vigilant about what your dog consumes. Always check the ingredient list of any peanut butter product for xylitol or other harmful substances before giving it to your dog. Store harmful foods out of reach and educate family members about the dangers of sharing certain snacks with pets. Keeping harmful products away from your dog is a proactive way to prevent accidental poisoning.

    Supporting Recovery

    If your dog has experienced peanut butter poisoning, follow your veterinarian’s advice for recovery. This might involve dietary changes, medication, or other supportive care. Monitoring your dog’s health closely during recovery will help ensure they bounce back quickly. In the future, consider safer alternatives and always consult your vet before introducing new treats into your dog’s diet.

    Special Considerations for Different Dog Breeds and Ages

    Tailoring Treats to Different Breeds

    When considering whether dogs can have peanut butter cookies, it’s crucial to factor in the breed of your dog. Some breeds, particularly smaller ones, have unique dietary needs and tolerances. For example, small dog breeds like Chihuahuas are more prone to obesity, so high-calorie treats should be given sparingly. Larger breeds might tolerate peanut butter better, but even they require moderation to avoid excessive weight gain.

    Age-Related Considerations

    Puppies and senior dogs have different nutritional needs compared to adult dogs. Puppies are still developing, and their diets should primarily focus on essential nutrients for growth, making high-sugar treats less suitable. Senior dogs may have health issues such as obesity or diabetes, which require careful dietary management. For these age groups, it’s better to opt for healthier treats that align with their specific dietary needs.

    Managing Special Dietary Needs

    Some dogs have special dietary needs due to health conditions or allergies. If your dog has a health issue, such as diabetes or a peanut allergy, peanut butter cookies might not be suitable. Instead, it’s essential to find alternative treats that align with their dietary restrictions. Consulting with a veterinarian can help you navigate these special needs and ensure your dog stays healthy.

    Monitoring and Adjusting Diets

    Even if your dog can have peanut butter cookies, it’s crucial to monitor their response and adjust their diet accordingly. Watch for any signs of discomfort or health issues after introducing new treats. Regular check-ins with your vet can help ensure your dog’s diet is balanced and that any adjustments align with their health and nutritional needs.

    Monitoring Your Dog’s Health When Consuming Peanut Butter

    can-dogs-have-peanut-butter-cookies

    Importance of Monitoring

    When feeding your dog peanut butter, it’s crucial to keep an eye on their health and behavior. Monitoring ensures that you catch any adverse reactions or potential issues early. For example, symptoms such as vomiting, diarrhea, itching, or lethargy could indicate an allergy or intolerance. Being vigilant allows you to adjust your diet accordingly.

    Recognizing Allergic Reactions

    Some dogs may be allergic to peanuts or other ingredients commonly found in peanut butter cookies. Signs of an allergic reaction can include itching, redness, hives, or difficulty breathing. If your dog exhibits any of these symptoms, you should discontinue feeding them peanut butter and consult a veterinarian immediately. It’s better to be cautious, as allergic reactions can escalate quickly in dogs.

    Maintaining a Balanced Diet

    While peanut butter can be a tasty treat, it should only be a small part of your dog’s overall diet. Maintaining a balanced diet is vital for your dog’s health and well-being. Make sure that peanut butter and other treats don’t displace more nutritious meals or lead to excess calorie intake. Your dog’s regular food should provide a balanced mix of nutrients, while peanut butter should be an occasional supplement or reward.

    Consulting with a Veterinarian

    If you’re unsure about how much peanut butter is safe for your dog or if you have concerns about their health, it’s always best to consult with a veterinarian. They can provide personalized advice based on your dog’s size, age, health, and dietary needs. Regular check-ups can also help identify potential issues early and ensure that your dog stays healthy while enjoying occasional treats like peanut butter cookies.

    How to Incorporate Peanut Butter into Your Dog’s Diet

    Peanut Butter as a Training Tool

    For dog training, peanut butter can be a very useful tool. The key is to use it in moderation and as a high-value reward for specific training milestones. Spread a small amount on a spoon and let your dog lick it as a treat after performing a desired behavior. This helps reinforce positive behavior and provides a tasty incentive.

    Peanut Butter as a Food Topper

    Another way to incorporate peanut butter into your dog’s diet is by using it as a food topper. A small dollop of peanut butter on top of your dog’s regular food can make mealtime more exciting, especially for picky eaters. This method also allows you to introduce new flavors to your dog’s diet gradually.

    Peanut Butter in Interactive Toys

    Using peanut butter in interactive toys like KONGs is a great way to keep your dog engaged. Fill the toy with a small amount of peanut butter and let your dog work to get it out. This provides mental stimulation and a rewarding treat, keeping your dog occupied for longer periods.

    Moderation and Monitoring

    No matter how you choose to incorporate peanut butter into your dog’s diet, moderation and monitoring are crucial. Too much peanut butter can lead to weight gain and digestive issues. It’s essential to keep an eye on your dog’s weight and health, adjusting the amount of peanut butter given accordingly. Consulting your veterinarian can also help you determine the appropriate amount for your dog’s specific needs.

    Best Peanut Butter Brands for Dogs

    can-dogs-have-peanut-butter-cookies

    Recommended Brands

    When choosing a peanut butter brand for your dog, it’s essential to focus on natural, unsweetened, and salt-free options. A few brands that fit this profile include Green Coast Pet Pawnut Butter, KONG Real Peanut Butter Tube, and Poochie Peanut Butter. These brands offer products that are free from harmful additives and preservatives, ensuring your dog gets a healthy treat.

    Factors to Consider

    When picking peanut butter for your furry friend, there are a few crucial factors to keep in mind. Always check the ingredient list for xylitol, a sweetener that’s toxic to dogs. Opt for organic and natural products that contain minimal ingredients to avoid unnecessary additives and preservatives. The simpler the ingredient list, the better. Additionally, portion control is vital as peanut butter is calorie-dense. Use it sparingly to avoid overfeeding your pet.

    Using Peanut Butter as a Treat

    Peanut butter can be used in interactive toys like KONGs to entertain your dog. It’s also useful as a training treat or as a food topper to entice picky eaters. Just ensure you monitor portion sizes and keep an eye on your dog’s weight to prevent obesity.

    Frequently Asked Questions

    Can dogs eat peanut butter cookies?

    It’s generally best to avoid giving dogs peanut butter cookies because of their high sugar content. However, a small piece now and then is usually not harmful.

    Can dogs eat peanut butter and jelly?

    No, dogs should avoid this combo since jelly contains high levels of sugar, which can be unhealthy for them.

    Can dogs eat peanut butter with palm oil?

    Yes, peanut butter with palm oil is generally safe for dogs. However, it’s still essential to check for other harmful ingredients.

    Can dogs eat peanuts?

    Yes, dogs can eat peanuts in moderation, as long as they’re unsalted and dry-roasted.

    Can peanut butter make my dog constipated?

    It’s unlikely, but too much of any treat, including peanut butter, can pose risks, so moderation is key.

    These questions address common concerns about feeding dogs peanut butter and related products, highlighting essential points like ingredient safety and moderation.

    Conclusion

    Summary of Risks and Considerations

    When addressing whether dogs can have peanut butter cookies, it’s crucial to balance the potential risks and benefits. The key risks include xylitol poisoning, obesity, and digestive issues. Considering the ingredients and your dog’s health is essential before feeding them these treats.

    Final Recommendations for Feeding Dogs Peanut Butter Cookies

    Feeding dogs peanut butter cookies can be safe when done responsibly. However, homemade treats or safer alternatives are often a better choice. Always read ingredient labels carefully and consult a veterinarian for personalized advice, especially if your dog has health conditions.
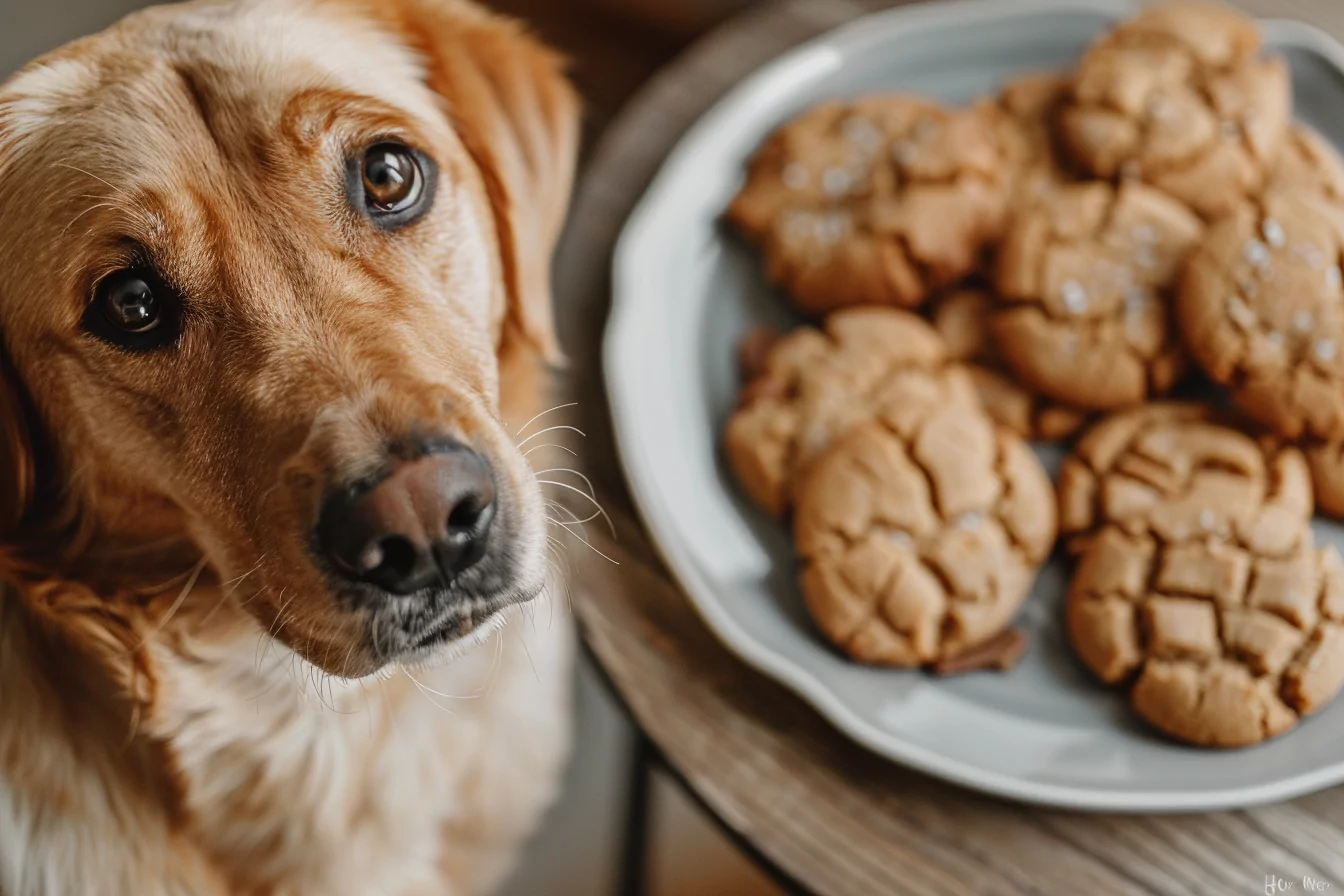
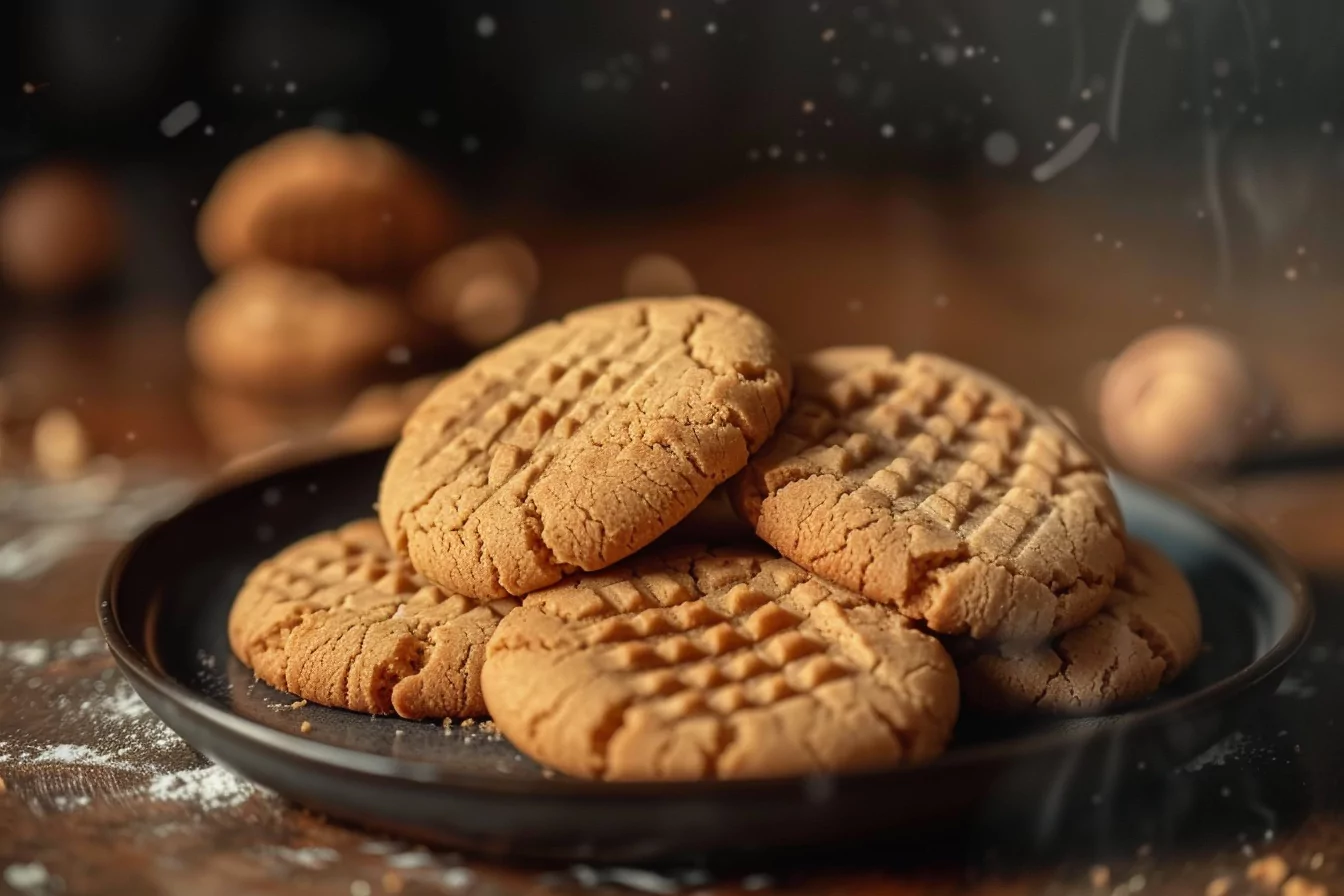
  • How to Make Peanut Butter Cookies Without Eggs – Easy Recipe

    How to Make Peanut Butter Cookies Without Eggs – Easy Recipe

    Introduction

    Who doesn’t love a delicious peanut butter cookie? They’re classic, comforting, and oh-so-tasty! But what if you’re out of eggs or can’t eat them due to dietary restrictions? No worries! In this article, we’ll explore exactly how to make peanut butter cookies without eggs. You’ll learn all about the benefits, essential ingredients, and step-by-step instructions. Plus, we’ll dive into some fantastic tips and variations to suit your unique preferences. Let’s dig in!

    How to Make Peanut Butter Cookies Without Eggs

    When it comes to creating delightful desserts without eggs, peanut butter cookies are at the top of the list. Egg-free baking is not only handy for those who can’t consume eggs but also aligns with various dietary needs and lifestyle choices. Whether you’re allergic, vegan, or just out of eggs, this recipe is your go-to solution.

    Why Make Peanut Butter Cookies Without Eggs?

    Why Make Eggless Peanut Butter Cookies?

    Peanut butter cookies without eggs offer several benefits, whether due to dietary restrictions or personal preference. Let’s explore why making these cookies is a great idea.

    Dietary Restrictions

    If you have dietary restrictions, you’ll be glad to know that making eggless peanut butter cookies caters to various needs. For example, people with egg allergies can still enjoy this tasty treat. This recipe also accommodates those who prefer to avoid animal products altogether.

    Vegan Preferences

    Vegans, rejoice! These cookies are perfect for a plant-based diet. By omitting eggs, you can still indulge in a sweet snack without compromising your values. Additionally, these cookies are ideal for vegans who want a tasty treat that’s quick and easy to make.

    Economic or Availability Reasons

    Sometimes, you just run out of eggs, or you want to save a bit of money. Eggless peanut butter cookies are a budget-friendly option that doesn’t sacrifice flavor or texture. Plus, when eggs are hard to find, you can still whip up a delightful batch of cookies.

    Ingredients for Eggless Peanut Butter Cookies

    How to Make Peanut Butter Cookies Without Eggs

    Essential Ingredients

    Creating delicious peanut butter cookies without eggs starts with the right ingredients. Here’s what you’ll need.

    Peanut Butter

    Peanut butter is the star of the show. Using creamy or chunky peanut butter will give your cookies that irresistible flavor and texture.

    Sugar

    Sugar adds sweetness to the cookies. You can use regular granulated sugar or experiment with brown sugar for a richer taste.

    Butter

    Butter helps bind the ingredients together and adds moisture. You can use regular or dairy-free butter, depending on your preference.

    Flour

    Flour is the base for the cookies. You can use all-purpose flour or opt for a gluten-free alternative.

    Baking Powder

    Baking powder helps the cookies rise and stay light and fluffy.

    Salt

    A dash of salt cuts through the sweetness and improves flavor profile.

    Optional Ingredients

    While the essential ingredients cover the basics, you can add some extras to jazz up your eggless peanut butter cookies.

    Vanilla Extract

    Vanilla extract adds a lovely aroma and enhances the flavor of your cookies.

    Chocolate Chips

    Chocolate chips are a delightful addition that complements the peanut butter flavor. You can use dairy-free chocolate chips for a vegan-friendly option.

    Recipe Instructions

    How to Make Peanut Butter Cookies Without Eggs

    Step-by-Step Guide to Making Eggless Peanut Butter Cookies

    Now, let’s get to the fun part – making the cookies! Follow this easy guide, and you’ll have a delicious batch of eggless peanut butter cookies in no time.

    Preheat the Oven

    Set your oven’s temperature to 350°F (175°C) first things first. This will ensure your cookies bake evenly. It’s essential to start with a properly heated oven, so your cookies have the right texture.

    Mix the Dry Ingredients

    In a medium bowl, mix the flour, baking powder, and salt. Stir them together until they’re evenly combined. This step helps ensure the leavening agent is distributed correctly, leading to light and fluffy cookies.

    Mix the Wet Ingredients

    In a separate, larger bowl, cream the butter and sugar until smooth. After adding the peanut butter, stir until thoroughly combined. If using vanilla extract, add it at this time. The key here is to achieve a creamy consistency that will bind your cookies together.

    Combine the Mixtures

    Next, gradually add the dry mixture to the wet mixture. Mix all the ingredients until a smooth dough is achieved. This step might take a little effort, but it’s worth it to create a cohesive dough.

    Form the Cookies

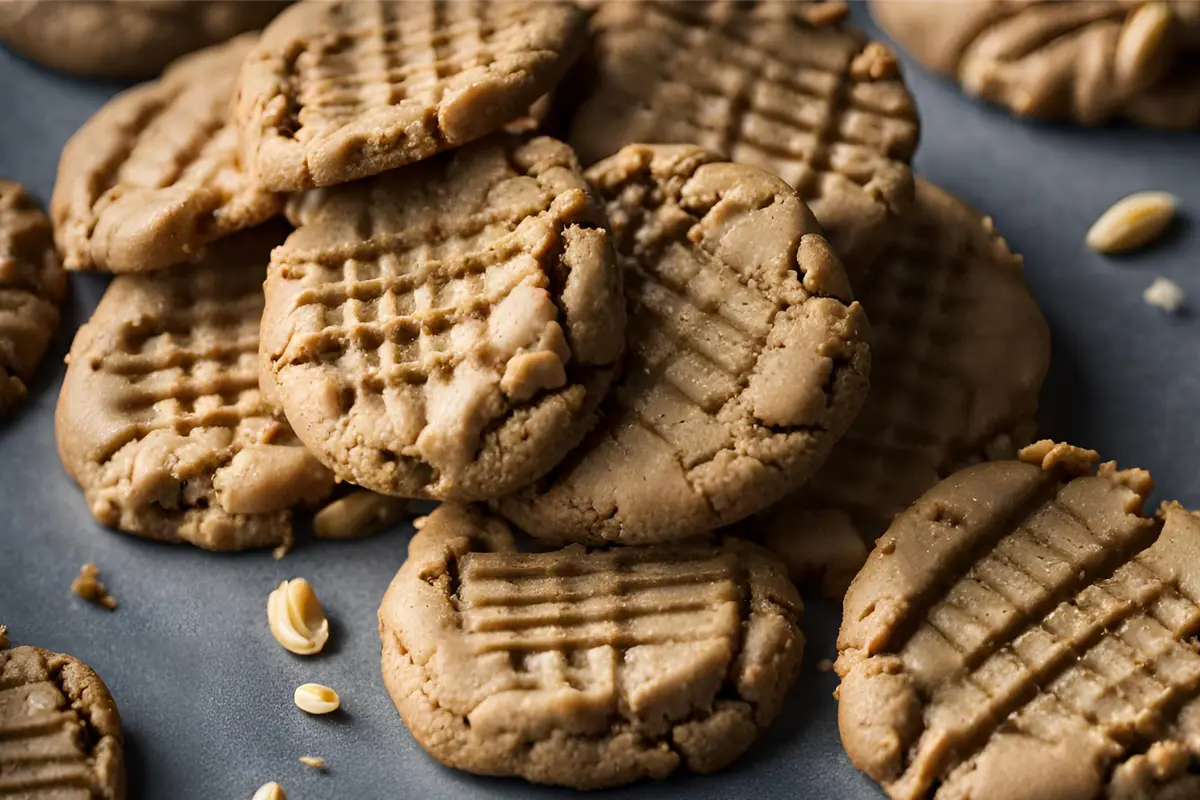
    Using a spoon or cookie scoop, form the dough into balls and place them on a baking sheet. You can gently press down with a fork to create a crisscross pattern, which is a classic look for peanut butter cookies.

    Bake and Cool

    Bake the cookies for 10-12 minutes or until they’re golden brown. After baking, allow them to cool on a cooling rack. This cooling time helps the cookies firm up and develop their final texture.

    Tips for Making Perfect Eggless Peanut Butter Cookies


    Tips for Success

    To make sure your eggless peanut butter cookies turn out just right, here are some handy tips.

    Using the Right Peanut Butter

    Using the right type of peanut butter makes a big difference. Natural peanut butter tends to separate, which can affect the texture of your cookies. Opt for commercial peanut butter for the best results.

    Adjusting Sugar Levels

    You can use less sugar if you would rather it be less sweet. However, be cautious, as this might affect the texture. Balancing sweetness and texture is key to creating the perfect cookie.

    Achieving the Right Texture

    The texture of your cookies depends on how long you bake them. For softer cookies, bake for a shorter time. If you prefer crispy cookies, bake a bit longer. Just be mindful not to overbake.

    Baking Time and Temperature

    It’s important to monitor your cookies while baking. Oven temperatures can vary, so keep an eye on your cookies to avoid burning them. Using an oven thermometer can help ensure accurate baking temperatures.

    Common Variations of Eggless Peanut Butter Cookies

    Popular Variations

    While classic eggless peanut butter cookies are delightful, you can jazz them up with a few creative variations.

    Chocolate-Dipped Peanut Butter Cookies

    For an extra indulgent treat, dip your baked and cooled cookies into melted chocolate. This variation combines the best of both worlds, making for a truly decadent dessert. It’s perfect for when you want to impress your guests or treat yourself!

    Peanut Butter and Jelly Thumbprints

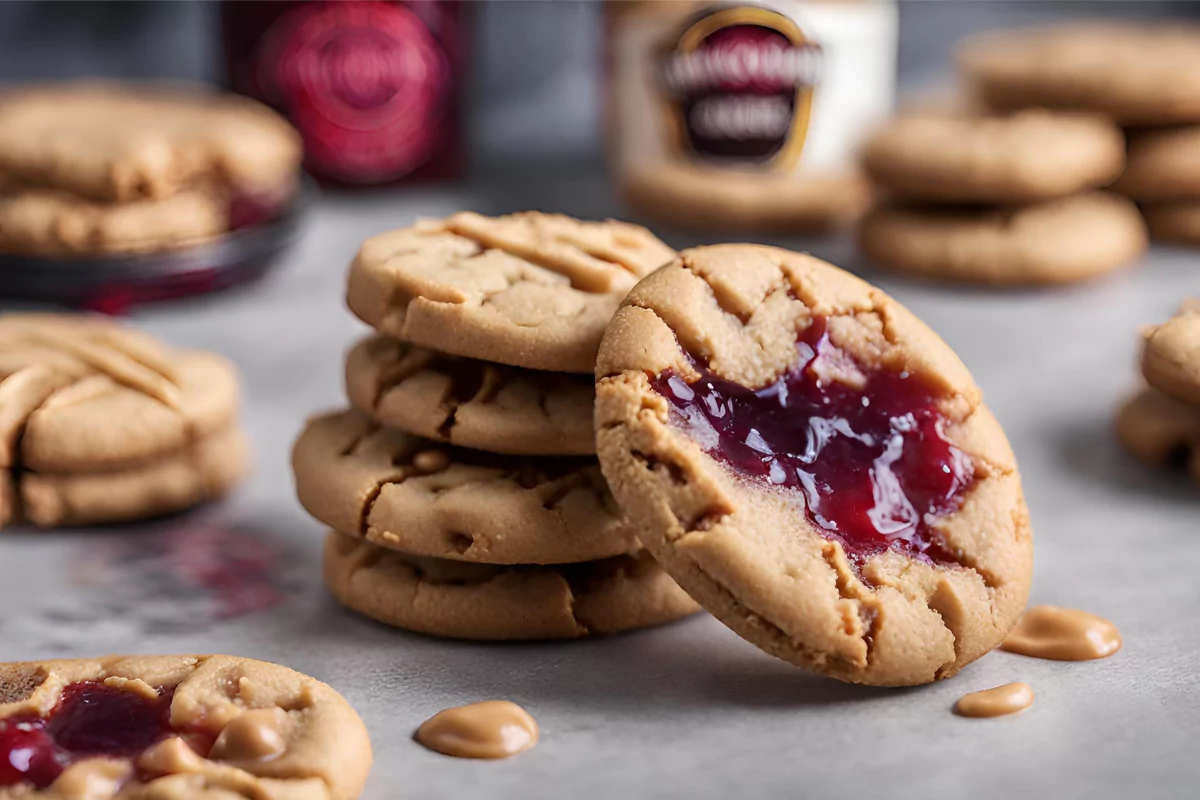
    Take inspiration from a childhood favorite and create thumbprint cookies filled with jam. Press a small indentation into each cookie before baking and fill it with your favorite jam. The combination of sweet jam and peanut butter is irresistible and nostalgic.

    Nut-Free Peanut Butter Cookies

    If you or someone you know is allergic to nuts, you can still enjoy these cookies! Use a nut-free peanut butter alternative, like sunflower seed butter, to create equally delicious cookies without any worries. This variation ensures everyone can partake in the treat.

    Storage and Shelf Life

    How to Make Peanut Butter Cookies Without Eggs

    How to Store Eggless Peanut Butter Cookies

    Proper storage ensures your cookies stay fresh and tasty for longer.

    Room Temperature

    Store your eggless peanut butter cookies in an airtight container at room temperature. They should stay fresh for up to a week, making them a great snack to have on hand.

    Refrigeration

    For longer storage, you can refrigerate the cookies. To keep them from drying out, be sure to store them in an airtight container. This option is great if you want to make a larger batch and enjoy them over time.

    Freezing

    You can freeze cookies to store them for a later time. Place the cookies in a freezer-safe container or bag, and they’ll keep for up to three months. Just thaw them out when you’re ready to enjoy a sweet treat.

    We’ve covered how to store your delicious cookies, and now it’s time to tackle frequently asked questions in the next part.

    Health Benefits of Eggless Peanut Butter Cookies

    Health Benefits

    Peanut butter cookies without eggs can be healthier than traditional recipes, thanks to their unique ingredients.

    Protein-Packed

    Peanut butter is a great source of protein, which helps build and repair tissues. These cookies provide a satisfying protein boost, making them an excellent snack for those looking to maintain or build muscle.

    Healthy Fats

    Peanut butter contains healthy fats that are good for your heart. Unlike cookies made with high-saturated-fat ingredients, these treats can contribute to your intake of beneficial monounsaturated and polyunsaturated fats.

    Lower Cholesterol

    Since egg yolks contain cholesterol, eggless peanut butter cookies can be a better option for those watching their cholesterol levels. These cookies allow you to indulge without worrying about increased cholesterol intake.

    Customizable Sweetness

    You have control over the sugar content in homemade cookies. By using natural sweeteners or reducing sugar, you can create a healthier version that satisfies your sweet tooth without overloading on refined sugars.

    History and Cultural Significance of Peanut Butter Cookies

    History and Cultural Significance

    Peanut butter cookies have a rich history and cultural presence, making them a beloved treat for generations.

    Origins

    Peanut butter cookies trace their origins back to the early 20th century when George Washington Carver, an agricultural scientist, promoted the use of peanuts in recipes. His work helped popularize peanut-based dishes, including the now-famous cookie.

    The Classic Crisscross Pattern

    The crisscross pattern commonly found on peanut butter cookies has an interesting backstory. The tradition likely started in the 1930s when Pillsbury’s cookbook recommended pressing the cookies with a fork for even cooking. The iconic pattern has since become synonymous with peanut butter cookies.

    Popular in American Culture

    Peanut butter cookies have become an iconic part of American culture, often associated with family gatherings and childhood nostalgia. They are a staple at bake sales and holiday celebrations, representing comfort and togetherness.

    Global Popularity

    While peanut butter cookies have strong roots in American culture, their popularity has spread worldwide. Different countries have put their unique spin on the recipe, adapting it to local tastes and preferences, which showcases the cookie’s universal appeal.

    Pairing Suggestions for Eggless Peanut Butter Cookies

    Pairing eggless peanut butter cookies with the right drinks or sides can enhance the overall experience.

    Beverages

    The right drink can elevate your cookie-tasting experience.

    1. Milk
      The classic pairing for cookies, a glass of cold milk, complements the richness of peanut butter. You can opt for dairy milk or choose a plant-based alternative like almond or oat milk.
    2. Hot Chocolate
      Pairing the cookies with a warm cup of hot chocolate creates a cozy and comforting treat, especially during colder months.
    3. Coffee
      Coffee lovers can pair their cookies with a freshly brewed cup. The bitter notes of coffee contrast nicely with the sweetness of the cookies.

    Sides

    Adding a side to your cookies can create a more filling snack or dessert.

    1. Fresh Fruit
      Serve your cookies with fresh fruit for a refreshing contrast. Slices of apple or banana go particularly well with peanut butter cookies.
    2. Ice Cream
      For a decadent dessert, pair your cookies with a scoop of ice cream. The combination of warm cookies and cold ice cream is a delight.
    3. Yogurt
      A dollop of yogurt, whether plain or flavored, offers a tangy contrast that pairs nicely with the sweet and nutty flavor of the cookies.

    Frequently Asked Questions

    It’s natural to have a few questions when baking eggless cookies. Let’s address some common inquiries about peanut butter cookies without eggs.

    Can you make these cookies gluten-free?

    Absolutely! You can easily make these cookies gluten-free by substituting regular flour with a gluten-free flour blend. Be sure to choose a blend designed for baking, as this will give you the best results. Just remember to check all other ingredients for potential gluten as well.

    Can you use different nut butter?

    Yes, you can swap out peanut butter for other nut or seed butter. Almond butter or cashew butter makes for a delightful twist on the classic cookie. If you’re dealing with nut allergies, you can also use sunflower seed butter or soy nut butter as an alternative.

    How long do they last?

    These cookies can last up to a week when stored at room temperature in an airtight container. If you refrigerate or freeze them, they can last even longer. To keep them tasting fresh, proper storage is essential.

    Conclusion

    Making peanut butter cookies without eggs is a great way to accommodate dietary needs and preferences. These cookies are not only delicious but also versatile and easy to make. With the right ingredients, a few helpful tips, and creative variations, you can enjoy a delightful treat anytime.

  • Can Dogs Eat Peanut Butter Cookies? Safe Treats and Risks Explained

    Can Dogs Eat Peanut Butter Cookies? Safe Treats and Risks Explained

    Safe Treats and Risks Explained

    Introduction
    Peanut butter cookies are a popular treat among humans, but what about dogs? The question “Can dogs eat peanut butter cookies? arises frequently for pet owners who wish to pamper their animal companions. This article dives deep into this topic, exploring the safety of peanut butter cookies for dogs, the risks involved, and how to make them at home. We’ll also cover the health benefits of peanut butter for dogs and provide answers to frequently asked questions.

    Introduction

    Can Dogs Eat Peanut Butter Cookies?

    When it comes to treating our pets, we want to make sure we’re making safe choices. Can dogs eat peanut butter cookies safely? It’s essential to understand the ingredients in these cookies and their effects on dogs​.

    The Ingredients of Peanut Butter Cookies

    Peanut butter cookies typically include ingredients like peanut butter, flour, eggs, and sugar. While peanut butter can be beneficial for dogs, some other ingredients might pose risks. For example, some peanut butter brands contain xylitol, which is toxic to dogs​.

    Risks of Peanut Butter Cookies for Dogs

    Feeding dogs peanut butter cookies can come with risks. Some dogs might have allergies, and others might react poorly to certain ingredients. Additionally, the high sugar content in many cookies can lead to health issues.

    Benefits of Peanut Butter for Dogs

    Peanut butter can offer several health benefits for dogs when consumed in moderation. It’s rich in protein and healthy fats, contributing to a balanced diet. However, portion control is crucial, as too much peanut butter can lead to weight gain

    Are Peanut Butter Cookies Safe for Dogs?

    Can dogs eat peanut butter cookies?

    The Ingredients of Peanut Butter Cookies

    Peanut butter cookies usually contain ingredients like peanut butter, flour, eggs, and sugar. While peanut butter can be beneficial for dogs, some ingredients may not be. For example, certain brands of peanut butter contain xylitol, which is toxic to dogs. Additionally, too much sugar can lead to obesity and other health issues​.

    Risks of Peanut Butter Cookies for Dogs

    Feeding dogs peanut butter cookies can come with risks. Some dogs might have allergies, while others might react poorly to certain ingredients. Furthermore, high sugar content in many cookies can lead to health issues like obesity.

    Benefits of Peanut Butter for Dogs

    Peanut butter offers several health benefits for dogs when consumed in moderation. It’s rich in protein and healthy fats, contributing to a balanced diet. However, portion control is crucial, as too much peanut butter can lead to weight gain​.

    How to Make Safe Peanut Butter Cookies for Dogs

    Making Safe Peanut Butter Cookies for Dogs

    Homemade peanut butter cookies are a great way to control the ingredients and ensure they’re safe for your dog. These cookies usually include simple ingredients like flour, peanut butter, and eggs. It’s important to use natural peanut butter without additives like xylitol​.

    Safe Decoration for Dog Cookies

    Decorating dog cookies can be fun, but you should use safe ingredients for your pup. For example, natural color options like berries and vegetables are excellent choices for dog-safe icing. Additionally, avoid artificial colors and sweeteners, which can harm dogs.

    Feeding and Serving

    How to Serve Peanut Butter Cookies to Dogs

    When feeding peanut butter cookies to dogs, moderation is key. The serving size should depend on the dog’s size and dietary needs. Small dogs should consume fewer calories than larger ones, so it’s important to consider their overall calorie intake.

    Storing Homemade Dog Cookies

    Proper storage is crucial for homemade dog cookies to keep them fresh and safe to eat. Store the cookies in an airtight container, separating layers with wax or parchment paper. They can be kept on the counter, in the fridge, or frozen.

    Potential Health Concerns and Consulting with a Veterinarian

    Can dogs eat peanut butter cookies?

    Health Concerns with Peanut Butter Cookies

    Feeding peanut butter cookies to dogs can lead to health issues such as obesity, gastrointestinal problems, and allergic reactions. It’s important to monitor the ingredients used and observe any negative symptoms in your pet after consuming peanut butter cookies. Additionally, introducing any new treats should be done gradually to avoid potential digestive issues.

    Consulting with a Veterinarian

    Before introducing any new treats, including peanut butter cookies, into your dog’s diet, it’s a good idea to consult with a veterinarian. They can offer personalized advice based on your dog’s health and dietary needs.

    Alternative Treats and Conclusion

    Alternative Treats for Dogs

    If your dog can’t enjoy peanut butter cookies due to allergies or dietary restrictions, there are other treatment options available. For instance, fruits like apples (without seeds) and vegetables like carrots can be healthy alternatives. Additionally, there are commercial treats specifically designed for dogs with dietary sensitivities.

    Final Thoughts

    Peanut butter cookies can be a delightful treat for dogs if made and served correctly. With proper ingredients and portion control, you can safely treat your furry friend to these cookies. Always remember to monitor for any adverse reactions and consult with a veterinarian if you have any concerns​.

    Training and Behavioral Benefits of Peanut Butter Treats (300 words)

    Using Peanut Butter Treats for Training

    Peanut butter treats can be an effective training tool for dogs. The enticing smell and taste make them excellent rewards for positive reinforcement during training sessions. Many dog trainers recommend using peanut butter-filled toys or small peanut butter cookies as rewards when teaching new commands or reinforcing good behavior. It’s crucial, however, to ensure that the treats you use don’t contain harmful ingredients like xylitol and are given in moderation to avoid overfeeding.

    Behavioral Enrichment with Peanut Butter Treats

    Behavioral enrichment is essential for keeping dogs mentally stimulated and happy. Peanut butter treats can be used to provide such enrichment. Filling toys with peanut butter or freezing them can keep dogs occupied and engaged for longer periods, helping to reduce boredom and anxiety. This method can be particularly useful for dogs left alone at home or during stressful situations like thunderstorms or fireworks.

    Addressing Overfeeding Risks

    While peanut butter treats can be beneficial for training and behavioral enrichment, overfeeding can lead to health issues like obesity. It’s important to balance the number of treats with the dog’s overall calorie intake. Smaller dogs should receive smaller portions, while larger dogs may handle larger treats, but always in moderation. Consulting with a veterinarian can help determine the appropriate portion size for your dog.

    Using peanut butter treats for training and behavioral enrichment offers great benefits, but moderation and ingredient safety are key. By carefully managing treat portions and choosing safe, healthy ingredients, you can use peanut butter treats to improve your dog’s behavior and well-being while avoiding health risks. (American Kennel Club).

    Homemade vs. Store-Bought Peanut Butter Treats for Dogs

    Homemade Peanut Butter Treats

    Homemade peanut butter treats allow pet owners to control the ingredients and ensure their safety for dogs. Making treats at home means you can avoid harmful additives like xylitol and choose natural, organic ingredients. Homemade treats also offer the advantage of being customizable based on your dog’s preferences and dietary needs. For example, you can make grain-free options for dogs with allergies or low-fat versions for dogs struggling with obesity. Additionally, making treats at home allows you to create unique shapes and flavors, making them fun for your dog.

    Store-Bought Peanut Butter Treats

    Store-bought peanut butter treats offer convenience and a wide variety of choices. Several commercial brands produce safe and healthy peanut butter treats for dogs, often enriched with vitamins and minerals. These treats can also cater to specific needs, like dental health or weight management. However, it’s crucial to read the ingredients list carefully when purchasing store-bought treats, as some may contain unhealthy additives or excess sugar. Brands like Greenies, Blue Buffalo, and Milk-Bone offer peanut butter treats designed specifically for dogs, ensuring they meet nutritional needs while being tasty.

    Balancing Homemade and Store-Bought Treats

    Balancing homemade and store-bought treats can provide variety and flexibility in your dog’s diet. Homemade treats allow for personalization and control over ingredients, while store-bought options offer convenience and specialized nutrition. By combining both, you can offer your dog a balanced treat routine while meeting their specific health and dietary needs.

    Peanut Butter Cookies for Special Dietary Needs

    Catering to Special Dietary Needs

    Not all dogs have the same dietary needs. Some dogs might require special diets due to health conditions like diabetes, allergies, or obesity. Making peanut butter cookies that cater to these special needs can help ensure your dog enjoys a treat without compromising their health.

    Diabetic Dogs

    For diabetic dogs, it’s crucial to avoid high-sugar treats. Opt for peanut butter cookies that use whole grains and avoid added sugars. Using ingredients like oats and natural peanut butter can create a healthier treat for dogs with diabetes. Always monitor your dog’s blood sugar levels and consult with a veterinarian before introducing new treats.

    Allergic Dogs

    If your dog has allergies, it’s essential to identify safe ingredients. Some dogs might be allergic to peanuts, grains, or other common ingredients in peanut butter cookies. For such dogs, grain-free peanut butter cookies or alternatives using safe ingredients like chickpea flour can be great options.

    Obese Dogs

    For dogs struggling with obesity, portion control and low-calorie ingredients are key. Using smaller amounts of peanut butter and incorporating high-fiber ingredients can help create a healthier treat for overweight dogs. It’s also important to use treats as occasional rewards rather than daily snacks.

    By catering to your dog’s special dietary needs, you can ensure they enjoy peanut butter cookies without risking their health. Always consult with a veterinarian for personalized advice tailored to your dog’s unique health requirements.

    Best Peanut Butter Products for Dogs

    Recommended Peanut Butter Brands for Dogs

    When choosing peanut butter for your dog, it’s essential to select brands that don’t contain harmful additives like xylitol. Brands like Green Coast Pet Pawnut Butter, KONG Real Peanut Butter Tube, and other organic, unsalted peanut butter options are great choices​.

    Peanut Butter Products for Dog Training

    Peanut butter is often used as a training tool due to its tasty and rewarding nature. Products like Kong Stuff’N Easy Treat Peanut Butter Recipe are designed for use in interactive toys, which can help in dog training​

    Allergic Reactions to Peanut Butter

    Can dogs eat peanut butter cookies?

    Recognizing Allergic Reactions in Dogs

    While peanut butter is generally safe for dogs, some may experience allergic reactions. Signs of a peanut allergy in dogs can include itching, hives, swelling, and difficulty breathing. If you suspect your dog is having an allergic reaction, contact your veterinarian immediately.

    Managing Peanut Allergies

    If your dog has a peanut allergy, it’s crucial to eliminate peanut butter and any peanut-based treats from their diet. Monitor for signs of allergies when introducing new foods, and consult with your veterinarian about safe alternatives​

    Peanut Butter Cookie Alternatives and Variations

    Variations of Peanut Butter Cookies

    There are various ways to tweak peanut butter cookies for dogs to suit their preferences and dietary needs. For example, adding ingredients like bananas or oats can provide additional nutrients and flavors. Additionally, grain-free variations using alternative flours like coconut or chickpea flour can cater to dogs with sensitivities​.

    Healthy Treat Alternatives

    If you’re looking for alternative healthy treats, consider fresh fruits and vegetables that are safe for dogs. For example, carrots, apples (without seeds), and green beans can be great snacks. You can also find commercial treats designed for dogs with dietary restrictions, such as grain-free or low-fat options.

    FAQs and Conclusion

    Frequently Asked Questions

    Can dogs eat regular peanut butter cookies?
    Regular peanut butter cookies are generally not recommended for dogs because they often contain added sugars and ingredients that aren’t healthy for them​.

    Can dogs eat peanut butter and jelly?
    No, jelly is high in sugar, which isn’t good for dogs.

    Can peanut butter make my dog sick?
    In large amounts, peanut butter can cause vomiting or diarrhea due to its high-fat content. It’s essential to avoid xylitol, which is toxic to dogs​.

    Can dogs have peanut allergies?
    Dogs can have allergies to peanuts, although it’s rare. If you notice symptoms like itching or stomach issues, it’s best to eliminate peanuts from your diet​.

    Are there safe store-bought peanut butter treats for dogs?
    Yes, some commercial dog treats contain peanut butter and are safe for dogs. It’s important to check the nutritional information and avoid ingredients like xylitol​.

    Conclusion

    Peanut butter cookies can be a safe and delightful treat for dogs if made and served correctly. Homemade options allow you to control the ingredients, ensuring they’re healthy for your furry friend. Remember, moderation is key, and it’s always a good idea to consult a veterinarian if you’re unsure about your dog’s diet.


  • Peanut Butter and Jelly Cookies: Classic Recipes & Tips for Perfect Baking

    Peanut Butter and Jelly Cookies: Classic Recipes & Tips for Perfect Baking

    Introduction to the World of Peanut Butter and Jelly Cookies

    Who doesn’t have fond memories of enjoying a classic PB&J sandwich as a kid? Now, imagine that nostalgic taste turned into a cookie! This article will take you through the delightful world of Peanut Butter and Jelly Cookies, offering everything from timeless recipes to essential baking tips. Whether you’re a baking novice or a seasoned pro, get ready to explore the charm of these cookies that merge creamy peanut butter with sweet, fruity jelly, creating treats that are simply irresistible.

    Introduction and History

    Introduction to Peanut Butter and Jelly Cookies

    Peanut Butter and Jelly Cookies are not just a treat; they’re a trip down memory lane. Combining the classic flavors of creamy peanut butter with sweet and tangy jelly, these cookies offer a unique twist on two beloved ingredients. Perfect for parties, school lunches, or a nostalgic snack, they’re sure to delight folks of all ages.

    The Childhood Favorite

    It’s no secret that peanut butter and jelly sandwiches hold a special place in the hearts of many. These cookies take that classic childhood flavor combo and spin it into something you can bake and share. Imagine the joy of biting into a cookie and being hit with familiar flavors that bring back the simplest, yet most cherished moments of childhood.

    From Sandwich to Cookie

    The evolution from sandwich to cookie isn’t as complex as one might think. It started with the idea of transforming the gooey and satisfying sandwich filling into a solid, munchable form. Bakers began experimenting with adding jelly to peanut butter cookie dough, and voila! A new favorite was born.

    Why This Article Matters

    In this post, you’ll get more than just recipes. You’ll learn about the subtle art of cookie-making, the nuances of flavor pairing, and how to ensure your cookies come out perfectly every time. Whether you’re baking for fun or looking to impress, mastering the Peanut Butter and Jelly Cookie is a skill worth having.

    Brief History of Peanut Butter and Jelly Combination

    The peanut butter and jelly combination has been a staple in American households since peanut butter was first introduced at the St. Louis World’s Fair in 1904. The History of the Peanut Butter and Jelly Sandwich Jelly soon became the go-to pair for its sweet and fruity contrast to the salty, nutty flavor of peanut butter. This beloved duo made its way into cookies as bakers began to capitalize on America’s favorite sandwich spread, giving rise to an iconic treat that combines sweetness, saltiness, and a whole lot of personality.

    By grounding our cookie journey in history and evolution, we not only pay homage to this fantastic flavor combo but also enrich our baking experience with a dash of culture and tradition. So, let’s roll up our sleeves and dive into the world of these delightful cookies, armed with recipes and techniques that will make your next baking session a hit!

    Recipes and Techniques

    Classic Peanut Butter and Jelly Cookies Recipe

    If you’re ready to bake, let’s dive into the classic recipe for Peanut Butter and Jelly Cookies. This recipe offers the perfect balance of sweet and salty, with a soft, chewy texture that’s absolutely irresistible.

    Ingredients

    • 1/2 cup butter
    • 3/4 cup granulated sugar
    • 1/4 cup brown sugar
    • 1 cup creamy peanut butter
    • 1 large egg
    • 1 teaspoon vanilla extract
    • 1 1/2 cups all-purpose flour
    • 1 teaspoon baking soda
    • 1/4 teaspoon salt
    • 1/2 cup seedless jam

    Directions

    1. Set a baking sheet covered with parchment paper and preheat the oven to 350°F.
    2. In a mixing bowl, cream together butter, granulated sugar, and brown sugar until light and fluffy.
    3. Add peanut butter, egg, and vanilla extract, mixing until smooth.
    4. Combine the flour, baking soda, and salt in a different bowl. Gradually add the dry ingredients to the wet ingredients, mixing until combined.
    5. Roll the dough into 1-inch balls and place them on the baking sheet. Use a fork to flatten the cookies, creating a crisscross pattern.
    6. In the center of each cookie, place one teaspoon of jam.
    7. Bake for ten to twelve minutes, or until the edges are browned.
    8. Let the cookies cool before transferring them to a wire rack.

    Variations of Peanut Butter and Jelly Cookies

    Peanut Butter and Jelly Cookies

    Now that you’ve mastered the classic recipe, it’s time to experiment with some creative variations. The possibilities are endless when it comes to PB&J Cookies.

    Creative PB&J Cookie Variations
    1. Crunchy vs. Smooth Peanut Butter
      • Choose between smooth and crunchy peanut butter for different textures. Smooth peanut butter creates a classic texture, while crunchy peanut butter adds a delightful crunch.
    2. Different Types of Jellies
      • Experiment with different types of jellies or jams, such as raspberry, grape, or apricot. Each brings its unique flavor profile to the cookie.
    3. Alternative Ingredients
      • Get creative with ingredients like chocolate chips, nuts, or dried fruit to add extra flavor and texture to your cookies.

    These recipes and variations allow you to tailor your Peanut Butter and Jelly Cookies to suit your tastes and preferences, making each batch uniquely yours.

    Tips and Troubleshooting

    Baking Tips for Perfect Peanut Butter and Jelly Cookies

    Baking can be as simple as following a recipe, but sometimes, it’s the little tips and tricks that can make a big difference. Here are some helpful hints to ensure your cookies turn out perfect every time.

    Consistency of Dough
    The key to perfect peanut butter cookies is in the dough consistency. If the dough is too soft, the cookies will spread too much during baking. If it’s too firm, they’ll be too dense. Aim for a soft but manageable dough that’s easy to roll into balls.

    Baking Time and Temperature
    Baking cookies at 350°F for about 10-12 minutes usually works well. However, keep an eye on them, as baking times can vary. You’ll want to remove the cookies from the oven when the edges are lightly browned, but the center is still soft.

    Troubleshooting Common Issues

    Even with the best recipes, things can go wrong in the kitchen. Here’s how to address common issues you might encounter while baking Peanut Butter and Jelly Cookies.

    Too Dry or Too Wet Cookies
    If your cookies turn out too dry, it might be due to overmixing or overbaking. To avoid this, mix until the ingredients are just combined and keep an eye on the baking time. If they’re too wet, it could be because the dough wasn’t firm enough. Try chilling the dough before baking next time.

    Uneven Baking
    Uneven baking can result from inconsistent dough sizes or oven temperature variations. Use a cookie scoop to ensure uniform size and invest in an oven thermometer to check for temperature accuracy.

    Burnt Edges
    Burnt edges usually happen when the cookies are baked for too long or at too high a temperature. Stick to the recommended baking temperature and check the cookies a couple of minutes before the suggested time to avoid this issue.

    Nutrition and Serving

    Nutritional Information

    When it comes to enjoying cookies, it’s always good to know what you’re eating. Here’s a breakdown of the nutritional value of Peanut Butter and Jelly Cookies.

    Caloric Breakdown
    A typical PB&J Cookie contains about 150 calories. This number can vary depending on the type of ingredients used, especially if you experiment with different kinds of peanut butter or jam.

    Key Nutrients
    Peanut butter is a great source of protein, while jelly adds a touch of sweetness. These cookies also contain fats and carbohydrates, making them a satisfying snack.

    Healthier Alternatives
    To make a healthier version of these cookies, consider using natural peanut butter, reducing the sugar, or using a low-sugar jelly. You can also experiment with whole wheat flour for added fiber.

    Serving Suggestions

    Now that you’ve baked your cookies, it’s time to enjoy them! Here are some fun and creative serving suggestions.

    Pairing with Beverages
    These cookies pair wonderfully with a cold glass of milk or a hot cup of coffee. The rich flavors of peanut butter and jelly are perfectly complemented by these beverages.

    Presentation Ideas
    For a festive presentation, consider drizzling melted chocolate or peanut butter over the cookies. You can also top them with chopped nuts or sprinkle powdered sugar for a finishing touch.

    Customizing for Dietary Preferences and Special Occasions

    Peanut Butter and Jelly Cookies

    Customizing for Dietary Preferences

    1. Gluten-Free Peanut Butter and Jelly Cookies
      • Offer tips on using gluten-free flour blends.
      • Discuss the importance of binding agents like xanthan gum.
    2. Vegan Peanut Butter and Jelly Cookies
      • Share how to substitute eggs and butter with plant-based alternatives.
      • Highlight the importance of checking for vegan-friendly jellies.
    3. Low-Sugar Peanut Butter and Jelly Cookies
      • Discuss using sugar substitutes.
      • Offer guidance on selecting low-sugar or sugar-free jellies.

    Special Occasion Variations

    1. Holiday-Themed Peanut Butter and Jelly Cookies
      • Suggest adding holiday-themed toppings or decorations.
      • Recommend using holiday-themed cookie cutters.
    2. Peanut Butter and Jelly Cookie Bars
      • Describe how to turn the classic cookie recipe into a bar form.
      • Highlight the versatility of serving cookie bars at parties or events.

    Peanut Butter and Jelly Cookie Pairings

    Beverage Pairings

    1. Classic Milk Pairing
      • Highlight why cold milk complements the richness of the cookies.
      • Discuss options for non-dairy milk alternatives.
    2. Coffee Pairing
      • Explain how the bold flavor of coffee contrasts with the sweet cookies.
      • Suggest different coffee preparations (e.g., espresso, cappuccino).
    3. Tea Pairing
      • Explore herbal and black tea options that pair well.
      • Mention the benefits of pairing with tea for a lighter experience.

    Food Pairings

    1. Fruit Pairing
      • Suggest serving the cookies with fresh fruits like berries or apple slices.
      • Highlight how the freshness of fruit balances the cookies’ sweetness.
    2. Cheese Pairing
      • Discuss how certain cheeses, such as mild cheddar or brie, can pair well.
      • Recommend creating a dessert cheese board featuring the cookies.
    3. Ice Cream Pairing
      • Suggest pairing with vanilla or peanut butter-flavored ice cream.
      • Highlight the fun of making cookie ice cream sandwiches.

    Creative Uses for Peanut Butter and Jelly Cookies

    Dessert Enhancements

    1. Ice Cream Topping
      • Suggest crumbling the cookies over ice cream for added texture and flavor.
      • Highlight different ice cream flavors that pair well.
    2. Milkshake Mix-In
      • Describe how to blend the cookies into a milkshake for a unique twist.
      • Offer tips on combining with other ingredients like chocolate or banana.

    Festive Treats

    1. Holiday Gifts
      • Suggest packaging the cookies in decorative tins or bags for gifting.
      • Provide tips on creating personalized labels or tags.
    2. Party Favors
      • Recommend using the cookies as party favors for events like birthdays or weddings.
      • Highlight the option of customizing with themed decorations.

    Creative Baking Ideas

    1. Cookie Crust
      • Explain how to use the cookies as a crust for pies or cheesecakes.
      • Provide a simple recipe for making a cookie crust.
    2. Trifles and Parfaits
      • Suggest layering the cookies with whipped cream and fruit for trifles or parfaits.
      • Offer different ingredient combinations for various flavor profiles.

    FAQs and Conclusion

    Frequently Asked Questions (FAQs)

    To address some common questions about Peanut Butter and Jelly Cookies, let’s explore the following frequently asked questions:

    Can I use natural peanut butter?
    Yes, you can use natural peanut butter, but be mindful of its consistency. Natural peanut butter tends to be oilier and may require more mixing to achieve a smooth texture in your cookies. You can check out this guide on homemade peanut butter to understand how to adjust the consistency.

    What’s the best type of jelly to use?
    The best type of jelly to use is one that you enjoy eating. Popular choices include grape, strawberry, and raspberry, but you can also experiment with more unique flavors. If you’re curious about different jellies for baking, consider exploring the best jellies for baking.

    How do I store these cookies?
    To keep your cookies fresh, store them in an airtight container at room temperature for up to a week. You can freeze them for up to 3 months if you want to keep them longer. Learn more about storing homemade cookies for best results.

    Conclusion

    In this article, we’ve explored the delightful world of Peanut Butter and Jelly Cookies. From classic recipes to creative variations, tips, and troubleshooting, you’ve got all the knowledge you need to bake these treats perfectly. Remember, the key is to experiment and have fun with the process. So, gather your ingredients, preheat that oven, and enjoy the sweet and savory combination of peanut butter and jelly in cookie form!


  • Peanut Butter Cookies with Reese’s Peanut Butter Cups: Irresistible Delight

    Peanut Butter Cookies with Reese’s Peanut Butter Cups: Irresistible Delight

    Introduction

    There’s nothing quite like a fresh batch of homemade peanut butter cookies with Reese’s Peanut Butter Cups to satisfy your sweet tooth. In this article, we will delve into the world of these irresistible cookies, from their history to the recipe details, baking tips, and more. If you’re a fan of the delightful combination of chocolate and peanut butter, you’re in for a treat. Let’s start with the introduction and background of these mouthwatering cookies.

    Introduction to Peanut Butter Cookies with Reese’s Peanut Butter Cups

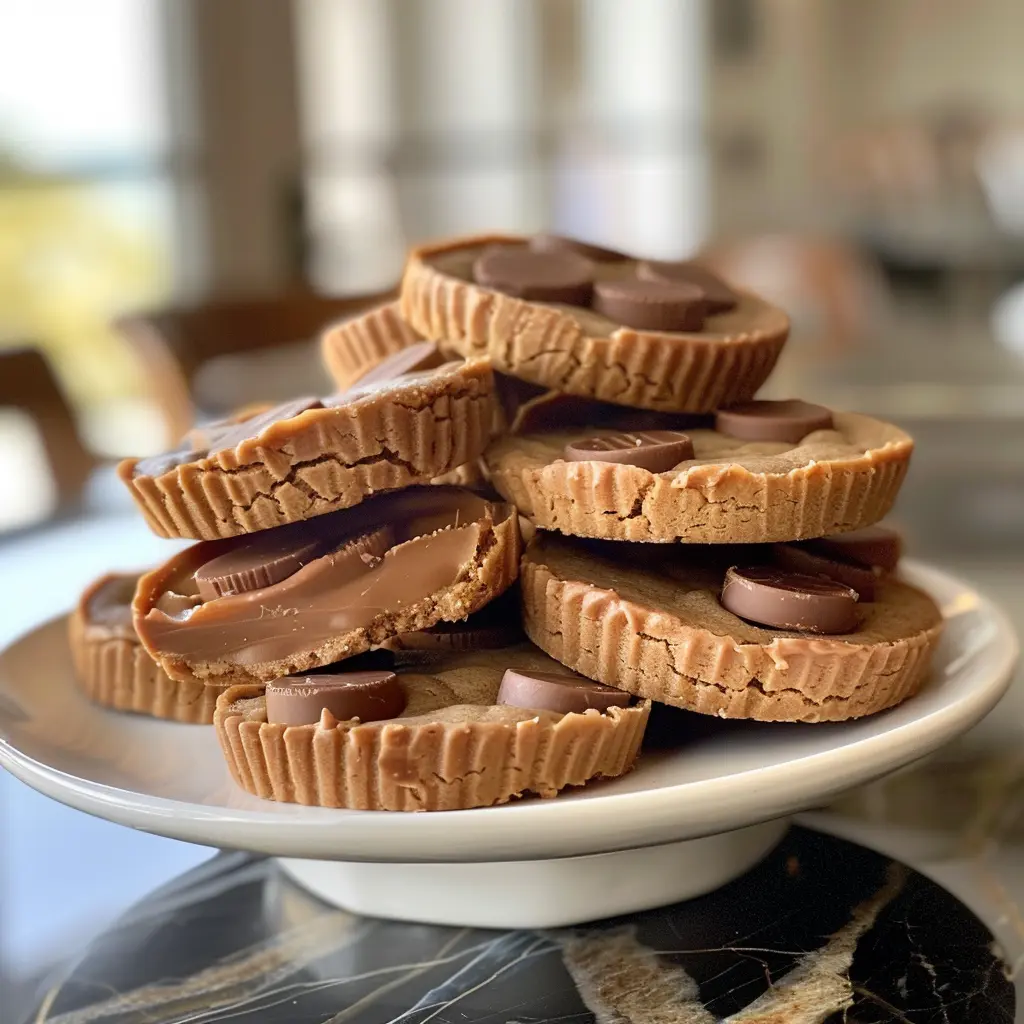
    The fusion of peanut butter and chocolate is a classic that never gets old. These peanut butter cookies with Reese’s Peanut Butter Cups elevate this combination to new heights. Soft and chewy, with chunks of delicious Reese’s Peanut Butter Cups, these cookies are a crowd-pleaser. They’re easy to make and perfect for any occasion, whether it’s a family gathering or a holiday celebration.

    History of Peanut Butter and Reese’s

    Peanut butter cookies have been a staple of American baking for generations. The story began in the early 1900s when peanut butter first became popular. Adding Reese’s Peanut Butter Cups to the mix was a natural evolution, combining two beloved treats into one. Reese’s, with its distinctive orange packaging, has been a favorite since it was introduced in the 1920s, and it remains a top choice for chocolate and peanut butter lovers.

    Recipe Details

    Ingredients for Peanut Butter Cookies with Reese’s Peanut Butter Cups

    Creating these delicious cookies requires a few essential ingredients. You’ll need creamy peanut butter, unsalted butter, granulated sugar, brown sugar, eggs, vanilla extract, all-purpose flour, baking soda, salt, chocolate chips, and of course, Reese’s Peanut Butter Cups. Using high-quality ingredients will ensure that your cookies are packed with flavor and have a delightful texture.

    Equipment Needed for Peanut Butter Cookies with Reese’s Peanut Butter Cups

    To make these cookies, you don’t need any fancy kitchen gadgets. A mixing bowl, a spoon or mixer, a baking sheet, and an oven should suffice. Additionally, a wire rack for cooling the cookies is handy. This simplicity makes these cookies ideal for home bakers who want an easy yet impressive dessert to share with loved ones.

    Step-by-Step Instructions

    Preparation for Peanut Butter Cookies with Reese’s Peanut Butter Cups

    Before you begin baking, prepare your ingredients and tools. Measure out your butter, sugars, peanut butter, eggs, vanilla, flour, baking soda, salt, chocolate chips, and Reese’s Peanut Butter Cups. Preheat your oven to 350°F and line your baking sheet with parchment paper. Now, you’re ready to create these delightful cookies.

    Baking the Peanut Butter Cookies with Reese’s Peanut Butter Cups

    1. Mixing Ingredients: Cream the butter, peanut butter, and sugars together until light and fluffy. Beat in the eggs and vanilla. Gradually add the flour, baking soda, and salt, mixing until just combined. Fold in the chocolate chips and chopped Reese’s Peanut Butter Cups​.
    2. Shaping the Cookies: Scoop rounded tablespoons of dough onto the prepared baking sheet, spacing them a few inches apart. Slightly flatten each cookie, then press additional chopped Reese’s Peanut Butter Cups on top​.
    3. Baking: Bake the cookies for about 10-11 minutes until the edges are set and lightly browned. Let the cookies cool on the baking sheet for a few minutes before transferring them to a wire rack to cool completely.

    Now that you have the basic baking process down, you can enjoy these warm and gooey delights or save them for later!

    Tips and Variations

    Peanut Butter Cookies with Reese's Peanut Butter Cups

    Baking Tips for Peanut Butter Cookies with Reese’s Peanut Butter Cups

    To achieve perfect peanut butter cookies, here are some tips to keep in mind:

    1. Chilling the Dough: Chilling the dough can help prevent the cookies from spreading too much. However, it’s optional. If you’re short on time, you can skip this step​.
    2. Switching Racks: Halfway through baking, switch the racks to ensure even baking. This helps prevent the cookies from burning on the bottom while staying raw on top​.
    3. Don’t Overbake: Keep a close eye on the cookies during the last few minutes of baking. They should be lightly browned on the edges but still soft in the middle​.

    Variations of Peanut Butter Cookies with Reese’s Peanut Butter Cups

    These cookies are versatile, and you can customize them to your liking:

    1. Different Types of Reese’s: Mix things up by using different flavors of Reese’s, such as dark or white chocolate​.
    2. Additional Mix-ins: Add in your favorite mix-ins, like nuts or other types of chocolate chips, to create your unique cookie​.

    These tips and variations will help you make the perfect batch of peanut butter and chocolate cookies every time!

    Storage and Serving

    Storage of Peanut Butter Cookies with Reese’s Peanut Butter Cups

    Store your cookies at room temperature in an airtight container to keep them fresh and delicious. They can last up to a week when kept fresh. You can freeze them to increase their shelf life. Just ensure the cookies are fully cooled before placing them in an airtight container for freezing. When ready to eat, let them thaw at room temperature before serving. Learn more about keeping baked goods fresh.

    Serving Suggestions for Peanut Butter Cookies with Reese’s Peanut Butter Cups

    These cookies are delightful on their own but even better when paired with a glass of cold milk or a scoop of vanilla ice cream. They also make excellent gifts for friends and family, especially during the holidays. Simply package them in a festive container or wrap them in decorative paper for a thoughtful, homemade gift.

    Special Occasions for Peanut Butter Cookies with Reese’s Peanut Butter Cups

    Celebrating with Peanut Butter Cookies

    These peanut butter cookies with Reese’s Peanut Butter Cups are not only a great everyday treat but also perfect for special occasions. They can be a delightful addition to birthday parties, holiday gatherings, and other celebrations.

    Birthdays

    For birthdays, you can arrange the cookies on a decorative platter or use them as party favors by wrapping them individually in colorful packaging. You can even use them to create a unique birthday cake alternative by stacking them into a cookie tower.

    Holidays

    These cookies also shine during the holidays. You can easily customize them with festive decorations, such as holiday-themed sprinkles or by using seasonal Reese’s Peanut Butter Cups, which often come in various shapes and colors. They’re ideal for Christmas, Thanksgiving, or even Valentine’s Day, making them a versatile treat.

    Family Gatherings

    Family gatherings are another great occasion for these cookies. Their comforting flavor and familiar ingredients make them a crowd-pleaser. You can serve them with coffee or tea for an afternoon treat or bring them to a picnic or barbecue for a sweet ending to the meal.

    Adding this part to the article will enhance its versatility and appeal, showing readers how these cookies can be a hit on various occasions.

    Healthier and Dietary-Friendly Peanut Butter Cookies with Reese’s Peanut Butter Cups

    Peanut Butter Cookies with Reese's Peanut Butter Cups

    Making Peanut Butter Cookies Healthier

    If you’re looking to make healthier choices while still enjoying these delicious cookies, there are a few adjustments you can make. You can swap out certain ingredients for healthier alternatives without compromising the taste.

    Healthier Ingredient Swaps

    1. Natural Peanut Butter: Using natural peanut butter instead of commercial brands can reduce added sugars and unhealthy fats. Just make sure the natural peanut butter is not too oily, as this can affect the cookie’s texture.
    2. Reduced Sugar: You can cut down on the sugar by using natural sweeteners like honey or maple syrup, or sugar substitutes such as stevia.
    3. Whole Wheat Flour: Replacing all-purpose flour with whole wheat flour can add fiber and nutrients to the cookies.

    Accommodating Dietary Restrictions

    For readers with dietary restrictions, such as those who are gluten-free or vegan, there are plenty of options.

    Gluten-Free Option

    To make these cookies gluten-free, you can use gluten-free flour blends that are specifically designed for baking. Ensure that all other ingredients, like Reese’s Peanut Butter Cups, are also gluten-free.

    Vegan Option

    For a vegan version, use a plant-based butter substitute and replace eggs with flaxseed meal or applesauce. Also, make sure to use vegan-friendly Reese’s alternatives or dark chocolate.

    This additional part will help you cater to readers with various dietary preferences, making the article more versatile and appealing to a wider audience.

    Pairing Peanut Butter Cookies with Reese’s Peanut Butter Cups

    Pairing these peanut butter cookies with other desserts can elevate your dessert table. Here are a few ideas:

    1. Ice Cream: A scoop of vanilla or chocolate ice cream pairs perfectly with these cookies. The cold, creamy texture of the ice cream complements the rich, chewy cookies.
    2. Milkshakes: Blend some of the cookies into a milkshake for an indulgent treat. You can add additional peanut butter or chocolate syrup for an extra layer of flavor.
    3. Pudding: Serve these cookies alongside chocolate or peanut butter pudding for a decadent duo. The pudding’s smooth texture contrasts nicely with the cookies’ crisp edges and soft centers.

    Pairing with Beverages

    Beverages can also enhance the experience of enjoying these cookies:

    1. Coffee: The rich, robust flavor of coffee pairs well with the sweet and salty notes of the cookies. Consider serving them as an afternoon pick-me-up with a cup of coffee.
    2. Hot Chocolate: During the colder months, pair these cookies with hot chocolate for a cozy treat. The warmth of the drink complements the cookies’ gooey centers.
    3. Tea: For a lighter pairing, try serving the cookies with a cup of tea. Black or green tea provides a nice balance to the cookies’ sweetness.

    This section will offer readers even more ways to enjoy their homemade cookies, whether for a special occasion or a casual treat.

    Themed Gift Basket with Peanut Butter Cookies with Reese’s Peanut Butter Cups

    Creating a Themed Gift Basket

    Making a themed gift basket is a thoughtful way to share these delightful peanut butter cookies. It’s perfect for various occasions, such as birthdays, holidays, or as a gesture of appreciation.

    Choosing a Theme

    Start by choosing a theme for your basket. For example, a cozy theme might include hot cocoa mix, a soft blanket, and these cookies. A movie night theme could feature popcorn, a DVD or streaming voucher, and the cookies as a sweet treat.

    Assembling the Basket

    Next, choose a basket or container that fits your theme. Line the basket with tissue paper or a cloth, and arrange the items neatly. Place the cookies in a decorative tin or wrap them in cellophane for a festive touch.

    Personalizing the Gift

    Adding a personal touch to the basket can make it even more special. Include a handwritten note or a custom label on the cookies. You could also add small items that reflect the recipient’s interests, such as a book or a favorite snack.

    Occasions for a Gift Basket

    These gift baskets are suitable for various occasions. They can be a great holiday gift, a thoughtful birthday present, or a gesture of thanks. The homemade cookies add a personal touch that recipients will appreciate.

    FAQs

    Frequently Asked Questions about Peanut Butter Cookies with Reese’s Peanut Butter Cups

    1. How do you keep cookies fresh?

      The cookies should be kept at room temperature in an airtight container. For longer storage, freeze them.

    2. Can you freeze peanut butter cup cookies?

      Yes, these cookies freeze well. Ensure they are fully cooled and the chocolate is set before freezing.

    3. What type of peanut butter should be used?

      Use creamy, thick, commercial peanut butter for best results. Avoid using natural peanut butter that’s oily, as it can affect the texture of the cookies.

    Conclusion

    Summary of Peanut Butter Cookies with Reese’s Peanut Butter Cups

    These peanut butter cookies with Reese’s Peanut Butter Cups are a delightful treat for any occasion. Their perfect balance of sweet and salty flavors makes them a favorite among cookie lovers. The recipe is straightforward, and the results are consistently delicious. Whether you enjoy these cookies fresh out of the oven or save them for later, they are sure to impress.

    In this article, we’ve covered everything from the recipe details to baking tips, variations, storage, and serving suggestions. We’ve also addressed common questions to ensure your cookies turn out perfectly every time. Now, it’s time for you to give this recipe a try and indulge in the irresistible combination of peanut butter and chocolate. Enjoy baking and savoring these delightful cookies!​


  • 2 Ingredient Peanut Butter Cookies: Easy, Delicious Recipe

    2 Ingredient Peanut Butter Cookies: Easy, Delicious Recipe

    Introduction to 2 Ingredient Peanut Butter Cookies

    If you’re looking for a quick and easy treat, look no further than 2 Ingredient Peanut Butter Cookies. This recipe not only simplifies the baking process but also delivers delicious, satisfying cookies with minimal effort. Perfect for busy individuals, minimalists, or anyone with a sweet tooth, these cookies are a delightful way to indulge without the fuss. Follow along as we explore how to create these tasty treats, with tips on ingredients, preparation, and creative variations.

    Overview of 2 Ingredient Peanut Butter Cookies

    Why This Recipe Works

    The beauty of 2 Ingredient Peanut Butter Cookies lies in their simplicity. With just two staples from your pantry, you can whip up a batch of cookies that are both tasty and tender. This recipe is ideal for last-minute gatherings or a quick snack, as it doesn’t require any complicated techniques or exotic ingredients.

    Easy Preparation

    Preparing these cookies is as simple as mixing peanut butter with a sweetener. The absence of flour, eggs, and butter not only makes this recipe quick and easy but also caters to various dietary preferences such as gluten-free and vegan diets. Whether you’re a seasoned baker or a kitchen novice, these cookies come together in a snap, leaving you more time to enjoy the results.

    Quick Baking Time

    One of the standout features of this recipe is the quick baking time. You can have freshly baked cookies ready in less than 15 minutes! This is a game-changer for those moments when you need a sweet fix in a hurry or when unexpected guests drop by.

    Stay tuned as we delve deeper into the essential components of these delightful treats in the next section, focusing on the key ingredients and some creative substitutions to tailor the recipe to your taste.

    Ingredients and Substitutions

    Key Ingredients

    The foundation of 2 Ingredient Peanut Butter Cookies is remarkably straightforward, requiring only:

    • Peanut Butter: The star of the show, peanut butter not only binds the cookies but also imparts a rich, creamy texture and all the beloved flavor. Opt for natural peanut butter for the best results, as it lacks stabilizers that can affect the texture of your cookies.
    • Sweetener: Traditional recipes often call for powdered sugar, which blends seamlessly into the peanut butter without leaving any grittiness. However, if you’re watching your sugar intake, alternatives like stevia or monk fruit powder can be used in equivalent proportions.

    Acceptable Substitutions

    This recipe is incredibly versatile, allowing for various substitutions that can accommodate different dietary needs or pantry limitations:

    • Alternative Nut Butters: If you’re allergic to peanuts or just prefer another flavor, almond butter, cashew butter, or even sunflower seed butter can be excellent substitutes. Each will lend a unique taste and texture to the cookies.
    • Sweetener Variations: For those avoiding refined sugars, natural sweeteners like maple syrup or honey can be used. Keep in mind that liquid sweeteners may slightly alter the texture, making the dough more sticky or less firm.

    By adjusting these key ingredients, you can customize the cookies to fit your taste and dietary preferences. Experimenting with different combinations can also lead to delightful new flavors, making this simple recipe a versatile addition to your culinary repertoire.

    Next, we’ll move on to the preparation steps, ensuring you have all the tips and tricks to master these cookies with ease.

    Step-by-Step Instructions

    Preparation Steps

    To ensure your 2 Ingredient Peanut Butter Cookies turn out perfectly every time, follow these straightforward steps:

    1. Mixing the Ingredients: In a large bowl, combine 1 cup of peanut butter with ½ cup of your chosen sweetener. Stir them together until the mixture is smooth and uniform. This ensures that each cookie has a consistent flavor and texture.
    2. Shaping the Cookies: With clean hands, scoop out a tablespoon of the dough. Form it into a ball and put it on a baking sheet covered with paper. This method helps the cookies cook evenly and makes clean-up a breeze.

    Baking and Cooling

    1. Flattening the Cookies: Using the back of a fork, gently press down on each dough ball to flatten it into a cookie shape. This not only gives them their classic crisscross pattern but also ensures they bake evenly.
    2. Baking: Preheat your oven to 350 degrees Fahrenheit. Place the baking sheet in the oven and bake the cookies for 8 to 10 minutes, or until the edges are slightly golden. The short baking time means you won’t have to wait long to enjoy your treats!
    3. Cooling: Once baked, let the cookies cool on the baking sheet for about 5 minutes before transferring them to a wire rack. This step is crucial as it allows the cookies to set properly and develop their texture.

    Following these steps will help you achieve soft, chewy cookies with minimal effort. Keep these tips in mind, and you’ll be enjoying homemade peanut butter cookies in no time!

    In the next section, we’ll discuss the nutritional benefits of these cookies and how they can fit into various dietary frameworks, adding yet another layer of value to this simple yet delightful recipe.

    Nutritional Information

    2 Ingredient Peanut Butter Cookies

    Health Benefits

    Peanut butter, the primary ingredient in 2 Ingredient Peanut Butter Cookies, is not just tasty; it’s also packed with nutritional benefits. It is a good source of protein, which is necessary for the growth and repair of muscles. Peanut butter also provides healthy fats, which are crucial for maintaining good cholesterol levels and supporting overall heart health.

    Dietary Considerations

    These cookies are a fantastic option for various dietary needs:

    • Gluten-Free: Naturally free from gluten, these cookies are safe for those with celiac disease or gluten intolerance.
    • Vegan: By choosing animal-free sweeteners, these cookies can easily be adapted to a vegan diet, making them a cruelty-free sweet treat.
    • Low Carb: For a lower carbohydrate version, substitute the sweetener with a keto-friendly option like erythritol or stevia. This adaptation makes the cookies suitable for those following ketogenic diets.

    Understanding the nutritional content and how these cookies can fit into your dietary preferences makes them a versatile choice for health-conscious individuals.

    Next, we’ll explore advanced tips and tricks to perfect your cookie-making skills, ensuring that every batch comes out just right. This section will help you refine your technique and perhaps even inspire you to experiment with new variations of this simple recipe.

    Advanced Tips and Tricks

    Achieving the Perfect Texture

    Ensuring your 2 Ingredient Peanut Butter Cookies have the perfect texture is key to their success. Here are some expert tips to help you get it right every time:

    • Quality of Peanut Butter: Opt for creamy natural peanut butter that contains only peanuts and salt. The lack of stabilizers in natural peanut butter allows it to blend smoothly with the sweetener, providing a better texture in the finished cookies.
    • Chilling the Dough: If you find the dough too sticky to handle, chilling it in the refrigerator for about 30 minutes before shaping can make a big difference. This makes the dough easier to handle and helps prevent the cookies from spreading too much during baking.

    Storage Tips

    Proper storage is crucial to maintaining the freshness and texture of your cookies. Here’s how to keep them delicious for days:

    • Room Temperature Storage: Store the cooled cookies in an airtight container at room temperature. They will stay fresh for up to a week.
    • Freezing for Longer Storage: For longer storage, place the cookies in a single layer on a baking sheet to flash freeze. Once frozen, transfer them to a freezer-safe bag or container. They can be enjoyed for up to 3 months; just thaw at room temperature before serving.

    Employing these tips will ensure that your cookies are not only delicious at first bite but remain enjoyable days after baking. This section of the article helps elevate your baking practice, ensuring that every batch of cookies comes out as intended.

    In the following section, we’ll dive into creative variations and serving suggestions to inspire you to experiment with this versatile recipe, adding your own twist to each batch.

    Variations and Creative Uses

    2 Ingredient Peanut Butter Cookies

    Creative Variations

    Even a simple recipe like 2 Ingredient Peanut Butter Cookies can be transformed with a little creativity. Here are some ideas to customize your cookies:

    • Flavor Add-Ins: Introduce small amounts of cinnamon, vanilla extract, or even espresso powder to enhance the flavor. These additions can dramatically change the profile of your cookies, making each batch unique.
    • Texture Enhancers: For those who enjoy a bit of crunch, consider adding chopped nuts or a sprinkle of granola into the dough before baking. This not only adds texture but also increases the nutritional value.

    Serving Suggestions

    Transform your 2 Ingredient Peanut Butter Cookies into a more elaborate dessert with these serving suggestions:

    • Ice Cream Sandwiches: Use two cookies to sandwich a scoop of your favorite ice cream. Roll the edges in mini chocolate chips or crushed nuts for an extra treat.
    • Dessert Platter: Arrange the cookies on a platter with fruits like sliced bananas or strawberries and a dipping sauce such as chocolate or caramel for a delightful dessert spread.

    These variations and serving ideas encourage you to think beyond the cookie jar and use your homemade treats in new and exciting ways. Whether you’re hosting a party or simply spicing up your weekly dessert routine, these ideas provide fresh inspiration for enjoying your peanut butter cookies.

    Next, we’ll address some of the most common questions about making 2 Ingredient Peanut Butter Cookies, ensuring you have all the information you need to bake with confidence and creativity.

    FAQs

    Common Questions

    When it comes to baking 2 Ingredient Peanut Butter Cookies, a few questions often come up. Let’s tackle some of these to ensure your baking success:

    Can I make these cookies with crunchy peanut butter?

    Yes, you can use crunchy peanut butter if you prefer a bit of extra texture in your cookies. Keep in mind that the final texture might be slightly less smooth but equally delicious.

    How do I ensure my cookies don’t come out too dry or crumbly?

    Achieving the right balance with your ingredients is key. If your cookies are coming out dry, try reducing the amount of sweetener slightly. Additionally, make sure not to overbake them. Keep a close eye on the cookies as they bake, removing them from the oven when they just begin to brown.

    Are these cookies suitable for diabetics?

    While these cookies have a lower ingredient count and you can control the type of sweetener used, it’s important for those managing diabetes to consider the overall sugar and carbohydrate content. Opting for a sugar substitute like stevia or using a natural, low-glycemic sweetener like agave might be beneficial. However, individual dietary needs vary, so it’s advisable to consult with a healthcare provider.

    Can these cookies be made without any sweeteners?

    The cookies can technically be made with just peanut butter, but they may not have the pleasant mild sweetness many expect from a cookie. If you prefer to avoid sweeteners, try adding a mashed ripe banana for a natural sweetness that also adds moisture.

    By answering these questions, we hope to make your baking experience smoother and more enjoyable. Armed with these tips and tricks, you’re now ready to whip up a batch of 2 Ingredient Peanut Butter Cookies with confidence! Whether you’re a novice baker or a seasoned pro, these cookies offer a simple, satisfying treat that everyone can enjoy. Happy baking!

    Conclusion

    Final Thoughts and Encouragement

    Mastering the art of making 2 Ingredient Peanut Butter Cookies is not only about enjoying a quick treat but also embracing the simplicity and joy of baking. These cookies exemplify how minimal ingredients can yield maximum flavor and satisfaction. They cater to a variety of dietary needs and can be adapted with creative twists to suit any palate or occasion.

    Whether you’re looking for a last-minute dessert for a gathering, a simple snack for your family, or a project to introduce children to baking, these cookies are a perfect choice. They encourage experimentation in the kitchen without the intimidation of complex recipes or long ingredient lists.

    We hope this guide inspires you to try making these cookies and perhaps even develop your variations. Remember, the beauty of cooking and baking lies in the personal touch you bring to the table. So, grab your peanut butter, pick your sweetener, and start baking those delicious, straightforward cookies that everyone will love!

    Engagement with Readers

    We’d love to hear from you! If you’ve tried making these 2 Ingredient Peanut Butter Cookies, share your experience in the comments below. Did you stick with the classic recipe, or did you add your twist? Photos of your cookie creations are also welcome; they might inspire others to start their baking adventure.

    Moreover, if you have questions or need further tips, don’t hesitate to ask. Let’s keep the conversation going and help each other achieve baking success. Happy baking, and enjoy your delicious homemade cookies!

  • Jif Peanut Butter Cookies: Best Recipes & Tips | Ultimate Guide

    Jif Peanut Butter Cookies: Best Recipes & Tips | Ultimate Guide

    Introduction

    Welcome to the ultimate guide on Jif Peanut Butter Cookies. If you’re a cookie enthusiast looking to elevate your baking game, you’ve come to the right place. In this comprehensive article, we’ll delve into everything you need to know about crafting the perfect batch of Jif Peanut Butter Cookies, from classic recipes to creative variations, baking tips, serving suggestions, and more. Let’s dive in!

    Exploring the World of Jif Peanut Butter Cookies

    The Allure of Jif Peanut Butter Cookies

    Indulging in a freshly baked Jif Peanut Butter Cookie is like taking a bite of nostalgia. These irresistible treats have captivated taste buds for generations, thanks to the creamy goodness of Jif Peanut Butter. Let’s embark on a journey to uncover the secrets behind these beloved cookies.

    Why Jif Peanut Butter Cookies?

    The selection of ingredients can have a major impact on baking results. Jif Peanut Butter stands out as a star ingredient for several reasons. Its rich, nutty flavor adds depth to cookies, while its creamy texture ensures a soft, chewy bite. Let’s explore what makes

    Peanut Butter the perfect companion for creating delectable cookies.

    The History of Peanut Butter Cookies

    The origins of Jif Peanut Butter Cookies trace back to the early 20th century when peanut butter became a staple in American households. Over time, bakers experimented with incorporating peanut butter into their cookie recipes, giving rise to the iconic Peanut Butter Cookies we know and love today. Let’s uncover the fascinating history behind these timeless treats.

    Crafting the Perfect Jif Peanut Butter Cookie Recipes

    Classic Jif Peanut Butter Cookie Recipe

    Let’s kick things off with the quintessential Classic Peanut Butter Cookie Recipe. With just a handful of pantry staples and a generous scoop of Peanut Butter, you can whip up a batch of cookies that will have everyone coming back for seconds. Get ready to preheat your oven and satisfy those sweet cravings!

    Ingredients Needed

    Gather your ingredients, including Jif Creamy Peanut Butter, flour, sugar, eggs, butter, vanilla extract, baking soda, and a pinch of salt. These simple yet essential components come together to create the perfect balance of sweetness and nuttiness in every bite.

    Step-by-Step Instructions

    1. Start by preheating your oven to 350°F (175°C) and lining a baking sheet with parchment paper.
    2. In a mixing bowl, cream together softened butter, Peanut Butter, and sugars until light and fluffy.
    3. Add eggs and vanilla essence, beating until thoroughly blended.
    4. Mix the baking soda, salt, and flour in a separate basin. Gradually add the dry ingredients to the wet mixture, stirring until a dough forms.
    5. Divide the dough into equal portions using a cookie scoop, making sure to leave space between each cookie on the baking pan.
    6. Flatten each dough ball with a fork, creating a crisscross pattern on top.
    7. Bake for ten to twelve minutes, or until the sides are beginning to turn brown, in a preheated oven.
    8. Allow the cookies to cool on the baking sheet for a few minutes before transferring them to a wire rack to cool completely.

    Tips for Perfect Cookies

    • Use room temperature ingredients for smoother blending.
    • Do not overmix the dough to avoid tough cookies.
    • For a chewier texture, slightly underbake the cookies.
    • Experiment with different sizes and shapes for a fun twist on the classic recipe.

    Exploring The Variations

    jif peanut butter cookies

    Chocolate Chip Jif Peanut Butter Cookies

    For those who crave an extra dose of indulgence, Chocolate Chip Jif Peanut Butter Cookies are a must-try. The combination of creamy Peanut Butter and rich chocolate chips creates a symphony of flavors that will delight your taste buds. Let’s dive into this irresistible variation.

    Oatmeal Peanut Butter Cookies

    If you’re looking to add a hint of wholesome goodness to your cookie repertoire, Oatmeal Peanut Butter Cookies are the way to go. Rolled oats add texture and depth to the cookies, while Peanut Butter lends its signature nutty flavor. Get ready to enjoy a satisfyingly chewy treat.

    Gluten-Free and Vegan Options

    No one should have to miss out on the joy of indulging in Jif Peanut Butter Cookies, which is why we’ve included gluten-free and vegan variations. Substitute traditional flour with gluten-free flour blends and swap eggs with flax or chia eggs for a plant-based twist. Everyone deserves a taste of these delectable cookies!

    Mastering the Art of Baking Jif Peanut Butter Cookies

    Choosing the Right Ingredients

    When it comes to baking Jif Peanut Butter Cookies, quality ingredients make all the difference. Opt for Jif Creamy Peanut Butter for its smooth texture and rich flavor. Additionally, use high-quality flour, sugar, and butter to ensure the best results. Selecting the right ingredients sets the foundation for perfectly baked cookies.

    Baking Techniques

    Achieving the perfect batch of  Peanut Butter Cookies requires attention to detail and proper technique. Ensure that the dough is thoroughly mixed but not overworked to maintain a tender texture. Chilling the dough before baking helps prevent excessive spreading, resulting in beautifully shaped cookies. Follow these tips to elevate your baking game.

    Storage and Preservation

    To prolong the freshness of your Peanut Butter Cookies, store them in an airtight container at room temperature. If you’re making a large batch, consider freezing some cookies for future enjoyment. Simply place cooled cookies in a freezer-safe bag or container, separating layers with parchment paper to prevent sticking. When cravings strike, thaw cookies at room temperature or gently reheat them in the oven for a warm, gooey treat.

    Serving and Presentation Ideas for Jif Peanut Butter Cookies

    Presentation Tips

    Elevate the presentation of your Jif Peanut Butter Cookies with creative serving ideas. Arrange cookies on a decorative platter or in a rustic basket for a charming touch. Dust cookies with powdered sugar or drizzle with melted chocolate for added visual appeal. Experiment with different garnishes, such as chopped nuts or sprinkles, to customize your cookie presentation.

    Pairing Suggestions

    Enhance the enjoyment of Jif Peanut Butter Cookies by pairing them with complementary beverages and snacks. Serve cookies alongside a glass of cold milk for a classic combination that never disappoints. For a more indulgent treat, pair cookies with a scoop of vanilla ice cream or sandwich them together with a layer of creamy frosting. Get creative with your pairings to create memorable taste experiences.

    Nutritional Information and Health Benefits of Jif Peanut Butter Cookies

    Nutritional Value of Jif Peanut Butter Cookies

    Indulging in Jif Peanut Butter Cookies doesn’t have to mean sacrificing your health goals. These delightful treats offer a balance of flavor and nutrition. A single cookie provides a satisfying blend of carbohydrates, protein, and fats, making it a convenient snack option. Dive into the nutritional breakdown of Peanut Butter Cookies to make informed choices about your indulgences.

    Health Benefits of Jif Peanut Butter

    Beyond their delicious taste, Jif Peanut Butter Cookies pack a nutritional punch. Peanut Butter is rich in protein, essential fats, and key vitamins and minerals, making it a wholesome addition to your diet. Enjoy the goodness of peanut butter while treating yourself to a scrumptious cookie. Discover the potential health benefits of incorporating Peanut Butter into your baking endeavors.

    Tips for Customizing Your Jif Peanut Butter Cookies

    jif peanut butter cookies

    Adding Mix-Ins

    Take your Jif Peanut Butter Cookies to the next level by incorporating mix-ins such as chocolate chips, chopped nuts, or dried fruit. These additions add depth of flavor and texture, creating a unique cookie experience with every bite. Try out several combinations to find the flavor profiles that you like most.

    Exploring Flavor Variations

    While the classic Jif Peanut Butter Cookie recipe is beloved by many, don’t be afraid to experiment with flavor variations. Consider adding a hint of cinnamon, a swirl of caramel, or a sprinkle of sea salt to elevate the flavor profile of your cookies. In the cooking, exercise creativity and follow your palate.

    Decorating Techniques

    Make your Jif Peanut Butter Cookies visually appealing by experimenting with different decorating techniques. Drizzle melted chocolate over cooled cookies, sprinkle with colored sugar, or sandwich two cookies together with a layer of frosting. The possibilities are endless when it comes to decorating your cookies, so let your imagination run wild.

    Jif Peanut Butter Cookie Troubleshooting Guide

    Preventing Dry Cookies

    If your Jif Peanut Butter Cookies turn out dry, it may be due to overbaking or using too much flour. To remedy this, try reducing the baking time and using a slightly lower oven temperature. Additionally, make sure to measure your flour accurately and consider adding a tablespoon of milk to the dough for extra moisture.

    Addressing Crumbly Texture

    A crumbly texture in your Jif Peanut Butter Cookies can result from using too little fat or not enough binding agents. Ensure that you’re using the correct ratio of butter and peanut butter in your recipe, and consider adding an extra egg yolk to provide additional moisture and structure to the dough.

    Fixing Spreading Issues

    Excessive spreading in your Jif Peanut Butter Cookies can occur if the dough is too warm or if the baking sheet is too greased. Chill the dough in the refrigerator for 30 minutes before baking to help firm it up, and use parchment paper or a silicone baking mat to prevent sticking without adding excess grease.

    Jif Peanut Butter Cookie Recipe Variations for Special Occasions

    Holiday-Inspired Flavors

    Celebrate festive occasions with Jif Peanut Butter Cookies infused with holiday-inspired flavors. Add a dash of pumpkin spice for a cozy fall treat, or incorporate peppermint extract and crushed candy canes for a refreshing twist during the winter holidays. These themed variations are perfect for spreading joy and cheer to family and friends.

    Seasonal Ingredients

    Embrace the flavors of each season by incorporating seasonal ingredients into your Peanut Butter Cookie recipes. Use fresh berries in the summer, toasted nuts in the fall, citrus zest in the spring, and spices like cinnamon and nutmeg in the winter. Let the bounty of each season inspire your baking creations.

    Special Occasion Decorations

    Elevate your Jif Peanut Butter Cookies for special occasions by decorating them with themed decorations. Use royal icing to pipe intricate designs for birthdays, weddings, and baby showers, or top cookies with edible flowers for an elegant touch. Get creative with your decorations to make each occasion memorable.

    Jif Peanut Butter Cookie Recipe Makeover

    Healthier Ingredient Swaps

    Transform your Peanut Butter Cookie recipe into a healthier version by making simple ingredient swaps. Substitute refined sugar with natural sweeteners like honey or maple syrup, and use whole wheat flour or almond flour instead of all-purpose flour for added fiber. These swaps reduce the overall calorie and sugar content while still delivering delicious cookies.

    Reduced-Fat Options

    For those looking to cut back on fat without sacrificing flavor, consider making reduced-fat Peanut Butter Cookies. Use a combination of applesauce and Greek yogurt to replace some of the butter or peanut butter in the recipe. This results in moist and tender cookies with fewer calories and less saturated fat.

    Allergy-Friendly Alternatives

    Create allergy-friendly Jif Peanut Butter Cookies by making substitutions to accommodate dietary restrictions. Use sunflower seed butter or almond butter for those with peanut allergies, and opt for gluten-free flour blends to make the cookies gluten-free. These alternatives allow everyone to enjoy the deliciousness of Peanut Butter Cookies without worry.

    Frequently Asked Questions (FAQs) About Jif Peanut Butter Cookies

    How do I prevent my Jif Peanut Butter Cookies from spreading too much?

    To prevent excessive spreading, ensure that your cookie dough is properly chilled before baking. Additionally, avoid overcrowding the baking sheet and use parchment paper to create a barrier between the dough and the pan.

    Can I use crunchy peanut butter instead of creamy for Jif Peanut Butter Cookies?

    While creamy peanut butter is traditionally used in Jif Peanut Butter Cookie recipes, you can certainly experiment with crunchy peanut butter for added texture. Keep in mind that the texture of the cookies may vary slightly, but the flavor will still be delicious.

    Are there any alternatives to Jif Peanut Butter that I can use in the recipes?

    While Peanut Butter is preferred for its smooth consistency and rich flavor, you can substitute other brands of creamy peanut butter if needed. Just be sure to choose a high-quality peanut butter with similar characteristics to achieve the best results.

    How long do Jif Peanut Butter Cookies stay fresh?

    When stored in an airtight container at room temperature, Peanut Butter Cookies can stay fresh for up to one week. For longer storage, you can freeze the cookies and thaw them as needed.

    Can I freeze Jif Peanut Butter Cookie dough for later use?

    Yes, you can freeze Jif Peanut Butter Cookie dough for future baking. Simply portion the dough into individual cookie-sized balls, place them on a baking sheet lined with parchment paper, and freeze until solid. Once frozen, transfer the dough balls to a freezer-safe bag or container for up to three months.


  • Reese’s Peanut Butter Cookies: Ultimate Baking Guide

    Reese’s Peanut Butter Cookies: Ultimate Baking Guide

    Introduction to Reese’s Peanut Butter Cookies

    If you’re on the hunt for the ultimate treat, look no further than Reese’s Peanut Butter Cookies. These delightful treats merge the rich, creamy texture of peanut butter with the iconic taste of Reese’s Peanut Butter Cups, creating a cookie that’s both irresistible and unforgettable. Whether you’re a seasoned baker or just starting out, this guide will walk you through everything from the key ingredients to expert baking tips, ensuring your cookies come out perfectly every time.

    Historical Background of Reese’s Peanut Butter Cookies

    Reese’s Peanut Butter Cookies didn’t just appear out of thin air! They’re a delightful twist on traditional peanut butter cookies, made famous by the inclusion of Reese’s Peanut Butter Cups, a favorite American candy since the 1920s. The cookies have evolved from simple peanut butter blobs to exquisite treats filled with chunks of that beloved peanut butter chocolate.

    Popularity and Cultural Significance

    It’s no surprise that Reese’s Peanut Butter Cookies have captured the hearts of many. Their popularity soars especially during the holidays and at family gatherings, where a sweet tooth is common and indulgence is encouraged. These cookies are more than just a dessert; they’re a piece of culinary Americana, often featured at bake sales and birthday parties, bringing smiles to faces with their unique blend of flavors.

    Stay tuned for the next part where we’ll dive into the essential ingredients that make these cookies a crowd-pleaser.

    Key Ingredients and Preparation Methods

    reeses peanut butter cookies

    List of Essential Ingredients with a Focus on Reese’s Peanut Butter Cups

    To whip up a batch of mouth-watering Reese’s Peanut Butter Cookies, you’ll need some basic baking ingredients and, of course, the star of the show—Reese’s Peanut Butter Cups. Here’s what you’ll need:

    • Butter: The foundation of any good cookie, providing richness and flavor.
    • Sugar and Brown Sugar: For sweetness and a chewy texture.
    • Peanut Butter: Use creamy for smoothness or chunky for extra texture.
    • Eggs: To bind the ingredients together.
    • Flour: The structural backbone of your cookies.
    • Reese’s Peanut Butter Cups: Chopped into pieces, these add the iconic flavor that sets these cookies apart.

    Creating these cookies is a breeze if you follow these simple steps:

    1. Cream the Butter and Sugars: Start by beating the butter with the sugars until light and fluffy, ensuring your cookies will be soft and tender.
    2. Add the Peanut Butter and Eggs: Continue mixing until each egg is fully incorporated, then blend in the peanut butter for that creamy texture.
    3. Combine Dry Ingredients: Whisk together your flour and other dry ingredients before gradually adding them to the wet mix to avoid clumping.
    4. Fold in Reese’s Pieces: The final, and perhaps most exciting step, is to gently fold in the chopped Reese’s Peanut Butter Cups.
    5. Bake to Perfection: Scoop the dough onto a baking sheet and bake until the edges are just golden, but the centers remain soft and chewy.

    Using these tips and ingredients, you’re well on your way to creating Reese’s Peanut Butter Cookies that are both delicious and memorable. Next, we’ll explore some creative variations to add a personal touch to your baking. Stay tuned!

    This part of the article guides the reader through the key ingredients and detailed steps required to bake Reese’s Peanut Butter Cookies, ensuring even novice bakers can achieve great results. The inclusion of an external link provides additional context and depth, enriching the reader’s experience and understanding.

    Variations of Reese’s Peanut Butter Cookies

    Gluten-Free and Vegan Options

    For those with dietary restrictions, Reese’s Peanut Butter Cookies can be easily modified. Swap out traditional flour for a gluten-free blend to cater to celiac or gluten-sensitive folks. To veganize these cookies, use plant-based substitutes for butter and eggs, such as vegan butter and flax eggs. Don’t forget to check that your peanut butter cups are vegan-friendly, as some brands include dairy.

    Creative Mix-ins and Topping Ideas

    Let your creativity shine by adding various mix-ins or toppings to your Reese’s Peanut Butter Cookies. Consider incorporating:

    • Nuts: Chopped walnuts or pecans provide a crunchy contrast to the soft cookie texture.
    • Chocolate Chips: For an extra chocolatey experience, mix in dark, milk, or white chocolate chips.
    • Caramel Bits: Add caramel bits for a sweet, gooey surprise in each bite.
    • Sea Salt: A light sprinkle of sea salt on top before baking can enhance the sweet peanut butter flavor.

    These tweaks not only add flavor but also make each batch of cookies uniquely delicious.

    In the next section, we’ll dive into a detailed recipe with expert tips to help you bake the perfect Reese’s Peanut Butter Cookies. Whether you’re a novice or a seasoned baker, these tips will ensure your cookies are a hit every time.

    Detailed Recipe with Expert Tips

    Reese’s Peanut Butter Cookie Recipe

    Here’s a foolproof recipe for baking the ultimate Reese’s Peanut Butter Cookies that are sure to impress:

    Ingredients:
    • 1 cup unsalted butter, softened
    • 1 cup creamy peanut butter
    • 1 cup granulated sugar
    • 1 cup packed brown sugar
    • 2 large eggs
    • 2 teaspoons vanilla extract
    • 3 cups all-purpose flour
    • 1 teaspoon baking soda
    • 1/2 teaspoon salt
    • 2 cups chopped Reese’s Peanut Butter Cups
    Instructions:
    1. Preheat the Oven: Start by heating your oven to 350°F (177°C) and lining your cookie sheets with parchment paper.
    2. Cream the Butters and Sugars: In a large mixing bowl, cream together the butter, peanut butter, and both sugars until the mixture is light and fluffy.
    3. Add Eggs and Vanilla: Beat in the eggs, one at a time, followed by the vanilla extract, ensuring each ingredient is fully incorporated.
    4. Mix Dry Ingredients: Sieve flour, baking soda, and salt in a different bowl. Gradually add this to the creamed mixture, mixing on low speed just until the dough comes together.
    5. Fold in Reese’s Cups: Gently fold in the chopped Reese’s Cups, distributing them evenly throughout the dough.
    6. Scoop and Bake: Using a cookie scoop, place dough balls onto the prepared sheets, spacing them about 2 inches apart. Bake until the edges begin to softly brown, 10 to 12 minutes.
    7. Cool: Let the cookies cool for five minutes on the baking sheet, then move them to a wire rack to finish cooling.

    Expert Baking Tips to Ensure Perfect Cookies Every Time

    • Room Temperature Ingredients: Ensure your butter and eggs are at room temperature to facilitate easier mixing and more uniform texture.
    • Avoid Overmixing: Only stir the dough until all the ingredients are well incorporated. Overmixing can lead to tough cookies.
    • Baking in Batches: To keep the oven temperature stable and cook each batch evenly, bake one sheet at a time in the center of the oven.
    • Test Batch: Consider baking a test cookie to check your dough and oven settings, adjusting the baking time or temperature as needed based on the results.

    These steps and tips are designed to help you master the art of making Reese’s Peanut Butter Cookies. Next, we’ll explore the nutritional information of these cookies, helping you understand the caloric impact of indulging in these delicious treats.

    Nutritional Profile of Reese’s Peanut Butter Cookies

    reeses peanut butter cookies

    Understanding the nutritional content of Reese’s Peanut Butter Cookies can help you enjoy them in moderation as part of a balanced diet. Here’s a breakdown of the typical nutritional values per cookie, based on the recipe provided:

    Nutritional Breakdown per Cookie:

    • Calories: Approximately 280 kcal
    • Carbohydrates: 34g (includes 22g of sugars)
    • Protein: 5g
    • Fat: 14g (includes 5g of saturated fat)
    • Fiber: 1g
    • Sodium: 190mg

    Discussion on Health Aspects of the Cookies

    While Reese’s Peanut Butter Cookies are undeniably a treat, there are aspects of their nutritional profile that can be adjusted for a healthier version. Consider these tips:

    • Reduce Sugar: You can lower the amount of granulated and brown sugars in the recipe to decrease the total caloric and sugar content.
    • Substitute Flour: For a healthier fiber boost, substitute half of the all-purpose flour with whole wheat flour.
    • Add Nuts: Incorporating chopped nuts can increase the protein and healthy fat content, making the cookies more satiating.

    Remember, enjoying desserts like Reese’s Peanut Butter Cookies is all about balance. They can be a delightful part of any diet when consumed mindfully and in moderation.

    In the next part, we’ll address common baking issues and provide solutions to ensure your baking experience is as smooth and enjoyable as possible.

    Common Baking Issues and Solutions

    Even experienced bakers can encounter issues when making Reese’s Peanut Butter Cookies. Here are some common problems and their solutions to help ensure your baking success:

    Handling Common Problems

    • Cookies Spreading Too Much: If your cookies are spreading too thin, it could be due to melted butter or too much sugar. Ensure your butter is soft but not overly melted and consider chilling your dough for 30 minutes before baking.
    • Cookies Not Spreading Enough: On the flip side, if your cookies aren’t spreading, it might be because the dough is too cold or the flour was over-measured. Make sure your dough is at room temperature before baking, and always fluff your flour before measuring it.
    • Dry or Crumbly Cookies: This issue often results from too much flour or insufficient fats. Double-check your measurements, especially for flour and butter, to ensure proper ratios.

    How to Store and Preserve Freshness

    Proper storage is key to maintaining the freshness and texture of your Reese’s Peanut Butter Cookies. Follow these tips:

    • Cooling: Allow cookies to cool completely on a cooling rack to prevent them from becoming soggy.
    • Airtight Containers: Store your cookies in an airtight container at room temperature. They should last for up to a week.
    • Separate Layers with Parchment Paper: If stacking cookies in the container, separate layers with parchment paper to prevent them from sticking together.
    • Revive with Bread: To keep cookies soft, add a slice of bread to the container. The bread will provide moisture that the cookies can absorb.

    By understanding and addressing these common baking issues, you can greatly enhance your chances of baking perfect Reese’s Peanut Butter Cookies every time.

    In the final part of our guide, we’ll explore frequently asked questions to help clarify any remaining queries you might have about making these delicious treats.

    Creative Ways to Enjoy Reese’s Peanut Butter Cookies

    Expanding the horizons of your cookie experience doesn’t stop at baking them. In this section, we’ll explore fun and inventive ways to incorporate Reese’s Peanut Butter Cookies into various desserts and treats, adding a twist to your sweet indulgences.

    Cookie Sandwiches

    Create decadent cookie sandwiches by spreading a layer of peanut butter or chocolate ganache between two Reese’s Peanut Butter Cookies. This not only doubles the flavor but also adds a creamy texture that complements the crunchy exterior of the cookies.

    Ice Cream Toppings

    Crumble the cookies over your favorite ice cream for a delightful crunch. Whether it’s vanilla, chocolate, or even a more exotic flavor like salted caramel, the addition of Reese’s Peanut Butter Cookies will transform your ice cream into a gourmet treat.

    S’mores Variation

    For a unique take on a classic s’more, replace the traditional graham cracker with Reese’s Peanut Butter Cookies. Layer with a piece of chocolate and a toasted marshmallow for a campfire treat that’s sure to impress.

    Gift Baskets

    Package your Reese’s Peanut Butter Cookies in decorative tins or boxes as part of a homemade gift basket. Pair them with jars of artisanal peanut butter, chocolate bars, and a personal note for a thoughtful and delicious gift.

    Dessert Base

    Use the cookies as a base for cheesecakes or pies by crushing them and mixing with melted butter. This creates a flavorful and unique crust that adds a peanut butter twist to any dessert.

    Each of these creative uses allows Reese’s Peanut Butter Cookies to shine in a new light, proving their versatility and appeal in a variety of sweet scenarios. Whether you’re looking to enhance another dessert or give a gift, these cookies offer boundless possibilities. Enjoy exploring these fun ideas and let your culinary creativity flow!

    Frequently Asked Questions

    To wrap up our comprehensive guide on Reese’s Peanut Butter Cookies, let’s address some common queries that might arise during the baking process. These FAQs aim to provide additional insights and tips to enhance your baking experience.

    Can I Freeze Reese’s Peanut Butter Cookie Dough?

    Absolutely! Freezing the dough is a great way to have fresh cookies on demand. Simply scoop the dough onto a baking sheet, freeze until solid, and then transfer the dough balls to a freezer bag. For up to three months, they can be kept in the freezer. When ready to bake, you don’t need to thaw them; just add a couple of extra minutes to the baking time.

    Do I Need to Chill the Dough Before Baking?

    While it’s not strictly necessary, chilling the dough for at least 30 minutes can help prevent the cookies from spreading too much in the oven. Chilling the dough solidifies the fat in the cookies, which takes longer to melt during baking, resulting in thicker, more textured cookies.

    Can I Add Other Types of Chips Besides Reese’s Pieces?

    Yes, you can customize your Reese’s Peanut Butter Cookies by adding different types of chips, such as white or dark chocolate chips, for a varied flavor profile. Mixing in other elements like butterscotch chips or toffee bits can also introduce new textures and tastes to your cookies.

    By addressing these FAQs, we hope to make your baking process as smooth and enjoyable as possible. Remember, baking is both an art and a science—don’t be afraid to experiment and tweak recipes to suit your taste preferences and dietary needs. Enjoy the process, and of course, the delicious results!

    This concludes our detailed guide to making perfect Reese’s Peanut Butter Cookies. From the key ingredients and detailed steps to troubleshooting and personalization tips, we’ve covered everything you need to know to bake these delightful treats. Whether for a special occasion or a cozy night in, these cookies are sure to impress. Happy baking!


  • 4 Ingredient Peanut Butter Cookies: Easy Recipe Tips

    4 Ingredient Peanut Butter Cookies: Easy Recipe Tips

    Introduction

    Delving into the world of baking doesn’t have to be daunting, especially when you start with something as simple and delightful as 4 ingredient peanut butter cookies. This guide will walk you through how to whip up these delicious treats with minimal fuss. Along the way, we’ll cover everything from essential ingredients and substitutions to expert tips for making your cookies just the way you like them. Whether you’re a seasoned baker or a novice, these cookies promise to be foolproof and flavorful!

    Overview of 4 Ingredient Peanut Butter Cookies

    What Makes 4 Ingredient Peanut Butter Cookies a Favorite?

    There’s something inherently comforting about peanut butter cookies, especially when they only require four simple ingredients. This simplicity is not just about ease but also about the rich, peanut-buttery flavor that shines through. The cookies are perfect for an impromptu dessert or a quick snack for the kids.

    The Appeal of Minimal Ingredient Recipes

    In today’s fast-paced world, simplicity in the kitchen is more appealing than ever. Recipes like easy peanut butter cookies offer a break from complicated cooking techniques and hard-to-find ingredients, making them a favorite for busy home cooks. Plus, minimal ingredient dishes often mean less cleanup and more time to enjoy with your family or guests.

    Ingredients and Substitutes

    Standard Ingredients for 4 Ingredient Peanut Butter Cookies

    When it comes to four ingredient peanut butter cookies, the list is delightfully short, making your trip to the grocery store or your pantry check quick and easy. The essentials include creamy peanut butter for that smooth, rich flavor, granulated sugar to sweeten, a single egg to bind everything together, and a splash of vanilla extract to improve the cookies’ overall flavor and scent. Simple, right?

    Substitutions for Dietary Restrictions

    If you’re catering to special dietary needs, don’t worry—making simple peanut butter cookies that everyone can enjoy is still within reach. For vegan bakers, swap out the egg for your favorite plant-based egg replacer. Those watching their sugar intake can opt for alternatives like Swerve or stevia. And if gluten poses a problem, ensure your peanut butter is certified gluten-free, as cross-contamination can be an issue. These substitutions allow everyone to enjoy a treat without compromise.

    Step-by-Step Recipe Instructions

    Mixing the Dough

    To start, gather all your ingredients in one place—it’s always easier when you’re not scrambling for the sugar halfway through! In a large bowl, combine your peanut butter and sugar first, ensuring they meld smoothly. Crack in the egg and add a teaspoon of vanilla extract, mixing until the dough is uniform and glossy. It should just take a few minutes to complete this stage. keeping your baking experience as simple and enjoyable as possible.

    Baking and Cooling

    Once your dough is ready, it’s time to shape and bake. Preheat your oven so it’s nice and warm by the time your cookies are ready to go in. Scoop out spoonfuls of dough, roll them into balls, and place them on a parchment-lined baking sheet. Gently press down with a fork to create that classic peanut butter cookie pattern. Then, into the oven they go! Keep an eye on them—baking for just about 10 to 12 minutes should do the trick. Once done, let them cool on the tray for a few minutes before transferring to a cooling rack. This little rest helps them firm up perfectly.

    Nutritional Information

    4 ingredient peanut butter cookies

    Caloric and Nutritional Content

    Understanding the nutritional impact of what we bake is as important as the baking process itself. Each 4 ingredient peanut butter cookie typically contains around 200 calories, with a significant portion coming from fats due to the peanut butter. They also provide some protein and carbohydrates. If you’re watching your sugar intake, remember that these cookies are quite high in sugars, although they do offer a small amount of dietary fiber and various vitamins and minerals present in peanut butter. It’s all about balance!

    Benefits of Homemade Cookies

    Choosing to make your own cookies, like these easy homemade cookies, means you control the ingredients. You can adjust the sugar, avoid preservatives, and use higher-quality peanut butter compared to many store-bought options. Plus, baking at home can be a fun activity to share with kids or a relaxing way to spend an afternoon, adding an extra layer of love to what you eat.

    Recipe Variations and Tips

    Creative Variations

    Who says you have to stick to the script? Feel free to jazz up your 4 ingredient peanut butter cookies by throwing in some chocolate chips or a handful of nuts for extra texture and flavor. If you’re feeling adventurous, a pinch of cinnamon or a sprinkle of sea salt can elevate the simple base into something extraordinary. These little tweaks not only add variety but can also tailor the cookies to suit different palates and occasions.

    Expert Baking Tips

    Achieving cookie perfection is all about mastering a few key techniques. First, ensure your peanut butter is at room temperature to mix evenly with the other ingredients. Overmixing the dough can lead to tough cookies, so mix just until the ingredients are combined. Always check your oven temperature with an oven thermometer, as accurate heat is crucial for the perfect bake. Lastly, let the cookies cool on the baking sheet for a few minutes before moving them to a cooling rack; this helps them set without breaking.

    Common Baking Challenges and Solutions

    Troubleshooting Guide

    Even the simplest recipes can sometimes stump us with unexpected challenges. If your easy peanut butter cookies are spreading too much, it could be due to overly warm dough. Try chilling it in the refrigerator for about 30 minutes before baking. If your cookies come out too dry, consider adding a bit more peanut butter or reducing the baking time. Peanut butter varies in consistency, so adjustments might be necessary depending on the brand or type you use. Check out these helpful tips here.

    Cookies that are too crumbly could indicate that the dough was mixed too vigorously or that it lacks moisture. If you’re using natural peanut butter, remember that it often contains less fat and more moisture, which can affect the final texture. Adjust by mixing the dough less or by chilling it thoroughly before baking.

    Ensuring Perfect Cookies Every Time

    For perfectly baked cookies, it’s essential to use accurate measuring tools like cups and spoons designated for baking. Oven thermometers help ensure your oven is properly calibrated, as incorrect temperatures can lead to underbaked or overbaked cookies. Additionally, baking cookies in the center of the oven promotes even cooking. Experiment with baking times within the suggested range to find what best suits your oven’s characteristics and your texture preferences.

    Hosting a Cookie Baking Party

    Planning Your Event

    Baking isn’t just a solo activity; it can also be a delightful social event. Why not host a cookie-baking party? Gather a group of friends or family members, and set up a kitchen station for each participant. Provide the basic ingredients for 4 ingredient peanut butter cookies and encourage guests to bring their favorite add-ins like sprinkles, chocolate chips, or various nuts.

    Setting Up for Success

    To ensure everything runs smoothly, pre-measure ingredients into separate bowls for each station to keep things organized and prevent bottlenecks. Have plenty of baking sheets and cooling racks available, and maybe even a few extra ovens if possible (a neighbor’s oven can come in handy!).

    Enjoy the Fruits of Your Labor

    Once the cookies are baked, set up a tasting station where everyone can enjoy their creations. Provide milk, coffee, or tea to complement the cookies. This not only makes for a fun afternoon but also allows everyone to share baking tips, enjoy a variety of cookie flavors, and create lovely memories together.

    Hosting a cookie-baking party is a fantastic way to turn the simplicity of a 4-ingredient recipe into an afternoon filled with fun, learning, and delicious treats.

    Sharing Your Cookies with the Community

    4 ingredient peanut butter cookies

    Why Share Your Baked Goods?

    Sharing your freshly baked 4 ingredient peanut butter cookies extends the joy of baking beyond your kitchen. It’s a heartfelt gesture that can brighten someone’s day, whether they are neighbors, local community helpers, or family members. Plus, it’s a fantastic way to get feedback on your baking skills!

    Tips for Packaging and Distribution

    When sharing cookies, presentation matters as much as taste. Use food-safe packaging like cellophane bags or small cardboard boxes. Adding a ribbon or a custom label with the cookie name and baking date adds a personal touch that recipients will appreciate.

    Making It a Regular Activity

    Consider making cookie sharing a regular activity. Organizing monthly baking sessions to create treats for a local charity or community center not only helps others but also builds a sense of community and connection. It’s a rewarding experience that gives more purpose to your baking endeavors.

    Sharing your baking creations is not just about the act of giving, but also about fostering connections and spreading a little homemade happiness. Whether it’s through a thoughtful gift or a community event, your cookies can bring smiles to many faces.

    Incorporating Cookie Baking into Holiday Traditions

    Celebrating with Cookies

    Holiday times offer a unique opportunity to blend baking into your celebrations. 4 ingredient peanut butter cookies can be easily adapted for any festivity. For instance, add red and green sprinkles for Christmas, use heart-shaped cutters for Valentine’s Day, or include pumpkin spice for a fall flavor during Thanksgiving.

    Creating a Baking Calendar

    To make the most of holiday baking, create a calendar that schedules when and what you’ll bake. This helps in planning and ensures you have all the necessary ingredients on hand. It also allows you to involve family and friends in the process, turning baking into a collaborative and festive activity.

    Sharing the Tradition

    Encourage children and other family members to get involved in the baking process. Teaching them how to make these simple cookies can be a fun and educational activity. It’s also a chance to pass down baking tips and family stories associated with holiday traditions. Over time, this can become a cherished part of your family’s holiday celebrations.

    Integrating cookie baking into your holiday traditions not only makes the festivities more special but also creates lasting memories associated with the joy of sharing and creativity.

    FAQs

    Frequently Asked Questions

    One of the best parts about baking is sharing the experience, and inevitably, questions come up. Here are some of the most common inquiries about making 4 ingredient peanut butter cookies, along with their answers.

    Q: Can I make these cookies without granulated sugar?
    A: Absolutely! For a healthier alternative, you can use coconut sugar or a sugar substitute like stevia. Remember that there may be a minor variation in the flavor and texture.

    Q: How long do these cookies last?
    A: When stored properly in an airtight container, these cookies can stay fresh for up to a week at room temperature. You can freeze them for up to three months to extend their shelf life.

    Q: Are these cookies gluten-free?
    A: The basic recipe is gluten-free, provided you ensure that the peanut butter used does not contain any gluten contaminants. In the event that you are gluten intolerant, always read the labels.

    Q: Can I add extra ingredients to the cookies?
    A: Yes, feel free to customize! Add-ins like chocolate chips, nuts, or dried fruit can be mixed into the dough to add texture and flavor. Just be mindful of the additional moisture and fat that extra ingredients might introduce.

    These FAQs aim to address common concerns and enhance your baking journey, making it as enjoyable and successful as possible.

    Conclusion

    Wrapping up our exploration into the world of 4 ingredient peanut butter cookies, it’s clear why these delightful treats have become so popular. They embody the simplicity and joy of baking, making them an excellent choice for both novice bakers and experienced chefs alike. The versatility and ease of this recipe allow for customization and adaptation, ensuring that anyone can make them their own.

    Remember, the key to perfect peanut butter cookies lies in the balance of ingredients and baking technique. Whether you stick to the basic recipe or venture into variations, each batch offers a chance to refine your skills and indulge in some homemade goodness. So, preheat your oven, gather your ingredients, and get ready to enjoy the delicious results of your labor. Happy baking!


  • Should Strawberries Be Cold Before Dipping in Chocolate? Best Practices

    Should Strawberries Be Cold Before Dipping in Chocolate? Best Practices

    Should strawberries be cold before dipping in chocolate?

    Are you eyeing those luscious strawberries and contemplating whether they should be chilled before diving into a pool of glossy chocolate? This article unfolds the layers of this conundrum, examining how the temperature of strawberries affects the end result when they are dipped in chocolate. From preparation tips to the actual dipping and creative decorating ideas, we will guide you through achieving the perfect chocolate-covered strawberries without any mishaps.

    Overview of Chocolate Dipping

    Importance of Strawberry Temperature

    Before you start melting that chocolate, let’s consider the strawberries themselves. The temperature of these berries plays a pivotal role in the success of your chocolate-covered treats. Room temperature strawberries are typically recommended because they help avoid the dreaded condensation which can result in chocolate that slips off or cracks after setting.

    This phenomenon occurs because cold strawberries, straight from the refrigerator, tend to develop a light moisture layer as they warm up to room temperature. This moisture creates a barrier between the fruit and the chocolate. On the other hand, room temperature strawberries ensure a dry surface, which is crucial as chocolate adheres best to dry and non-greasy surfaces.

    Furthermore, diving into the art of chocolate dipping without considering the temperature can lead to less-than-ideal results. A glossy and smooth chocolate coating is often achievable only when the strawberries are at room temperature, thus ensuring that the chocolate sticks well and sets evenly.

    In the next segment, we will delve deeper into the meticulous process of preparing strawberries for that perfect dip. Stay tuned to master the technique of preparing your strawberries for a flawless chocolate embrace.

    Preparing Strawberries for Dipping

    Cleaning and Drying

    To ensure your chocolate-covered strawberries are nothing short of perfect, start with the cleaning and drying process. Thoroughly wash your strawberries to remove any dirt or chemicals, but here’s the catch — they must be completely dry before you proceed. Any residual moisture is the nemesis of a smooth chocolate finish. Pat them gently with paper towels, and let them air dry on a clean kitchen towel until no moisture is visible.

    This meticulous drying process is vital because, as we’ve discussed, water causes the chocolate to seize up, becoming clumpy and unworkable. Additionally, moisture on the surface of the strawberries will prevent the chocolate from adhering correctly, leading to it sliding off or forming an uneven coat.

    Temperature Impact on Chocolate Adhesion

    Should strawberries be cold before dipping in chocolate
    Should strawberries be cold before dipping in chocolate?


    Now, let’s talk about the temperature of your strawberries. As highlighted, room temperature strawberries are ideal. This condition prevents the formation of condensation which interferes with the consistency of your chocolate layer. If you’ve just pulled your strawberries out of the fridge, give them about 30 minutes to an hour to reach room temperature.

    The key here is patience; rushing this step might lead to disappointing chocolate coverage, where the chocolate could crack or fail to form a satisfying shell. Remember, the goal is to achieve a seamless bond between your strawberry and its chocolate coating, which is best accomplished under the right temperature conditions.

    In our next part, we will dive into the techniques of melting chocolate to the perfect consistency for dipping. Ensuring your chocolate is just right is crucial for that decadent finish we all love.

    The Strawberries Be Cold Before Dipping Process

    Melting the Chocolate

    Melting your chocolate correctly is crucial for ensuring that it coats the strawberries beautifully. You can use a microwave, double boiler, or even an Instant Pot as a makeshift double boiler to achieve this. Here’s how to do it right:

    • Microwave: Heat your chocolate in short bursts of 20-30 seconds, stirring in between, until it’s completely smooth and just warm to the touch. This method is quick but requires attention to avoid overheating the chocolate.
    • Double Boiler: Place the chocolate in a heatproof bowl over a pot of simmering water. Make sure the water is not in contact with the bowl’s bottom. Stir continuously until the chocolate is just melted. This method provides more control and is great for keeping the chocolate at a gentle heat.
    • Instant Pot Method: Add water to the pot and set it on a low sauté setting. Place the chocolate in a bowl that fits snugly into the pot without touching the water. Stir until the chocolate melts. This method combines the benefits of indirect heat with the convenience of an Instant Pot.

    Ensuring Even Coating

    Dipping your strawberries in the melted chocolate requires a gentle hand. Hold each strawberry by the stem or use a skewer inserted at the top. Dip it into the chocolate, allowing it to coat evenly, and lift it out smoothly. Let the excess chocolate drip off by gently shaking the strawberry before placing it on a parchment-lined tray. This step is essential for achieving a smooth, even layer of chocolate.

    Decoration Tips

    While the chocolate is still wet, it’s the perfect time to add some creativity. Roll the dipped strawberries in toppings like crushed nuts, coconut flakes, or even colorful sprinkles. You can also drizzle them with a different type of melted chocolate for an attractive finish. This not only enhances the flavor but also adds a visually appealing touch to your chocolate-covered strawberries.

    The journey doesn’t end here. After mastering the dipping and decorating, the next step is setting the chocolate properly to ensure it remains crisp and adheres well. We’ll explore this in the next part, focusing on how to let your chocolate masterpieces set to perfection.

    Post-Dipping

    Setting the Chocolate

    Once your strawberries are beautifully coated and decorated, the setting stage is crucial for achieving that snap of well-tempered chocolate. Here’s how to ensure your chocolate sets just right:

    • Avoid the Refrigerator: It might be tempting to speed up the setting process by popping your dipped strawberries into the fridge. However, this can lead to moisture condensation, which we’ve established is not ideal. Instead, let them set at room temperature in a cool, dry place. This method ensures a glossy finish without the risk of the chocolate becoming too hard or developing a whitish coating known as ‘bloom’.
    • Proper Airflow: Arrange your strawberries on a parchment paper-lined tray with enough space between each to allow air to circulate. This not only prevents them from sticking together but also helps the chocolate set evenly and quickly.

    Storage Recommendations

    Once set, your chocolate-covered strawberries are ready to enjoy, but if you must store them, here are some tips to maintain their quality:

    • Short-Term Storage: If you need to store the strawberries for a few hours before serving, keep them in a cool, dark place in your kitchen. Avoid stacking them as they can stick together and ruin the finish.
    • Longer Storage: For storage up to 24 hours, place them in an airtight container lined with wax paper. This setup helps manage moisture and keeps the strawberries from becoming soggy. Remember, these delights are best enjoyed fresh, so plan accordingly.

    In the next section, we’ll explore various ways to expand your repertoire with alternative chocolates and vegan options, adding diversity and inclusivity to your dessert presentations.

    Variations and Creative Ideas

    Should strawberries be cold before dipping in chocolate
    Should strawberries be cold before dipping in chocolate?


    Alternative Chocolates and Vegan Options

    Exploring alternative chocolates can transform the traditional chocolate-dipped strawberry into an inclusive dessert that everyone can enjoy. Consider these delicious options:

    • Dark Chocolate: Ideal for those preferring less sweetness, dark chocolate also provides a robust flavor that contrasts beautifully with the natural sweetness of strawberries.
    • Milk Chocolate: A classic choice that offers a creamier, smoother taste. It’s a hit among all age groups due to its mild flavor and silky texture.
    • White Chocolate: Offers a sweet, creamy alternative that pairs wonderfully with the slight tartness of strawberries. It’s also perfect for adding color when dyed with oil-based food colorings.
    • Vegan Chocolate: For those following a vegan diet, several brands offer dairy-free chocolates that melt and coat just as beautifully as their traditional counterparts. These chocolates often utilize alternative milks like almond or coconut, providing a unique flavor profile.

    Creative Decorations and Flavors

    The versatility of chocolate-covered strawberries allows for endless creativity. Here are some innovative ideas to elevate your creations:

    • Flavored Chocolate: Infuse your melted chocolate with natural flavor extracts such as orange, mint, or raspberry for a burst of flavor that complements the fruity undertone of strawberries.
    • Luxurious Toppings: After dipping the strawberries in chocolate, roll them in gourmet toppings like crushed pistachios, edible gold leaf, or freeze-dried raspberry powder for a touch of elegance and extra flavor.
    • Theme-Based Decorations: Tailor your strawberries to specific events or holidays by choosing themed decorations, such as heart-shaped sprinkles for Valentine’s Day or red, white, and blue toppings for Independence Day celebrations.

    These variations not only cater to different dietary needs and preferences but also add a fun twist to this classic treat, making it suitable for any occasion or gathering.

    In our next section, we’ll address some of the most commonly asked questions about making chocolate-covered strawberries to help clear up any uncertainties and ensure your dessert is a success.

    Additional Tips and Tricks ( Should strawberries be cold before dipping in chocolate? )

    Experiment with Temperatures

    While room temperature is ideal for strawberries, you can experiment with different chocolate temperatures for dipping. Some prefer slightly warmer chocolate for a thinner coating, while others enjoy the contrast of colder chocolate against the juicy strawberries. Explore and find what works best for your taste preferences.

    Share the Joy

    Chocolate-covered strawberries make for delightful gifts or party favors. Consider packaging them in elegant boxes or arranging them on a platter for a stunning presentation. Sharing these homemade treats with loved ones adds an extra layer of joy to the experience.

    Get Creative with Shapes

    Don’t limit yourself to traditional dipped strawberries. Experiment with different shapes and sizes by slicing strawberries into halves, quarters, or even using strawberry hearts. Each shape offers a unique canvas for your chocolate creations.

    Embrace Imperfection

    Remember, perfection is subjective. Embrace the imperfections that arise during the dipping process—they add character and charm to your homemade treats. Whether a slight drizzle or a lopsided coating, each strawberry tells its own delicious story.

    Conclusion

    With these additional tips and tricks, you’re well-equipped to embark on your chocolate-covered strawberry journey with confidence and creativity. From mastering the dipping process to exploring new flavors and shapes, there’s no limit to the delicious delights you can create. So gather your ingredients, unleash your imagination, and let the chocolate-covered magic begin!

    FAQs

    Should strawberries be cold before dipping in chocolate?

    No, strawberries should be at room temperature before dipping. Cold strawberries can cause condensation when dipped in warm chocolate, leading to issues with the chocolate adhering properly and possibly causing the coating to crack as it sets.

    How to store chocolate covered strawberries?

    For optimal taste and texture, chocolate covered strawberries should be consumed soon after they are made. If you need to store them, place them in a cool, dark place for a few hours. For longer storage, up to 24 hours, keep them in an airtight container in the refrigerator, lined with paper towels to absorb any moisture.

    Can you freeze chocolate covered strawberries?

    Freezing is not recommended for chocolate covered strawberries as it can alter the texture and cause the chocolate to sweat and become mushy when thawed. However, if you prefer to enjoy them frozen, consume them directly from the freezer without thawing.

    What is the best chocolate for dipping?

    The best chocolate for dipping is one that suits your taste preferences and melts smoothly. Couverture chocolate, which contains a higher percentage of cocoa butter, is ideal for a smooth, glossy finish. However, good quality baking chocolate or chocolate chips can also produce excellent results when melted properly.

    How to prevent chocolate from cracking?

    To prevent chocolate from cracking, ensure the strawberries are at room temperature before dipping and allow the chocolate to set naturally at room temperature. Avoid drastic temperature changes, as these can cause the chocolate to contract quickly and crack.

    In the next part, we conclude our detailed guide on making perfect chocolate-covered strawberries, summarizing the key points and offering final thoughts on how to perfect this delightful treat.

    Conclusion of Should strawberries be cold before dipping in chocolate?

    As we wrap up our comprehensive guide to making the perfect chocolate-covered strawberries, let’s revisit the essential steps and tips that ensure success. Starting with strawberries at room temperature is crucial to avoid any moisture issues that can interfere with chocolate adhesion. Properly melting the chocolate whether using a microwave, double boiler, or an Instant Pot sets the stage for a smooth dipping process.

    Remember, the key to exquisite chocolate-covered strawberries lies in the details: the temperature of both the strawberries and the chocolate, thorough drying of the berries, and patient setting of the chocolate at room temperature. Embrace creativity with different types of chocolate and a variety of toppings to enhance both the appearance and taste of your strawberries.

    By following these guidelines, you’ll be equipped to create not just a delicious treat but also a visually stunning one that can be the centerpiece of your next gathering or a special gift for someone dear. Whether for a holiday, a party, or a quiet night in, chocolate-covered strawberries are a simple luxury that delights the senses and brings joy to any occasion.

    Thank you for joining us on this sweet journey. May your chocolate-covered strawberries turn out as delightful and delectable as you imagine!