Category: Dessert

  • Is Overnight Oats Actually Healthy? Uncovering the Truth

    Is Overnight Oats Actually Healthy? Uncovering the Truth

    Is overnight oats actually healthy?Is Overnight Oats Actually Healthy?

    Overnight oats have surged in popularity as a convenient, nutritious breakfast option, lauded for their potential health benefits. But is this trendy dish as healthy as it seems? This comprehensive article delves into the nutritional makeup of overnight oats, their health benefits, potential downsides, and ways to make them part of a balanced diet. Let’s unravel the truth behind overnight oats and discover whether they truly deserve a spot in your morning routine.

    Overview of Overnight Oats

    What are Overnight Oats?

    Overnight oats are oats soaked in liquid like water or milk overnight, creating a creamy, pudding-like breakfast.

    Popularity and Perceived Healthy Benefits

    Their ease of preparation and versatility make overnight oats popular. They are seen as a healthier alternative for breakfast, loaded with fiber, protein, and essential nutrients.

    To further explore the health credentials of overnight oats, we’ll look at their nutritional profile, health benefits, and any potential concerns that might arise from including them in your diet. This investigation aims to provide a balanced view, helping you to make informed dietary choices.

    In the next section, we will dive into the specific nutrients that overnight oats can provide and compare their benefits to those of traditional cooked oats.

    Nutritional Profile of Overnight Oats

    Is overnight oats actually healthy?

    Macronutrients in Overnight Oats

    Overnight oats are often celebrated for their balanced nutritional profile. A typical serving provides a hearty dose of macronutrients: carbohydrates for energy, proteins for muscle repair, and fats for long-lasting satiety. This combination can help keep you fueled throughout the morning without a mid-morning slump.

    Vitamins and Minerals

    These humble oats are more than just filling; they’re also rich in essential vitamins and minerals. They provide a good source of B-vitamins, essential for energy metabolism, and minerals like iron and magnesium, crucial for blood health and muscle function, respectively. This makes overnight oats not only a convenient but also a nutrient-dense breakfast option.

    Comparison with Traditional Cooked Oats

    While both overnight and cooked oats offer health benefits, the preparation method of overnight oats might edge them ahead slightly. Soaking oats overnight helps reduce phytate levels, which can inhibit the absorption of minerals. This means that overnight oats might allow your body to better absorb the nutrients available, compared to their cooked counterparts.

    Overnight oats might absorb nutrients better than cooked oats due to reduced phytate levels from soaking.

    Health Benefits of Overnight Oats

    Heart Health

    One of the standout features of overnight oats is their positive impact on heart health. Rich in beta-glucan, a type of soluble fiber, overnight oats help to lower total and LDL cholesterol, crucial factors in reducing heart disease risk. This fiber forms a gel-like solution in the gut, which binds to cholesterol and helps remove it from the body, thereby improving cardiovascular health.

    Digestive Health

    Overnight oats also offer significant benefits for digestive health. The high fiber content aids in regular bowel movements and helps maintain a healthy gut microbiome. Prebiotic fibers in oats promote good gut bacteria, supporting a healthy digestive system and overall well-being.

    Weight Management

    For those looking to manage their weight, overnight oats can be a valuable addition to the diet. The fiber in oats increases satiety, helping you feel fuller for longer, which can reduce overall calorie intake throughout the day. Additionally, the slow-digesting carbs in oats provide a steady source of energy, preventing spikes in blood sugar that can lead to cravings and overeating.

    Blood Sugar Regulation

    Finally, overnight oats can play a role in stabilizing blood sugar levels. Resistant starch in oats, especially when soaked overnight, slows digestion, leading to a gradual glucose release into the bloodstream. This can be particularly beneficial for individuals managing diabetes or those looking to prevent the onset of type 2 diabetes.

    Incorporate overnight oats into your morning for health benefits and a tasty, easy meal. Next, we’ll explore potential downsides to ensure they’re enjoyed healthily.

    Potential Downsides of Overnight Oats

    Caloric Content and Toppings

    While overnight oats themselves are a healthy option, the caloric content can quickly escalate with the addition of toppings. Ingredients like nuts, seeds, sweeteners, or dried fruits, while nutritious, are also high in calories. Be mindful of topping types and amounts to keep your healthy breakfast from becoming high-calorie.

    Anti-Nutrients in Oats

    Oats contain phytic acid, an anti-nutrient that can bind minerals and reduce their absorption. Although soaking oats overnight can help decrease phytic acid levels, it doesn’t eliminate them completely. People with mineral deficiencies or on plant-based diets should ensure their oats supply enough minerals.

    Allergens and Sensitivities

    Choose gluten-free oats if sensitive or allergic, and consider alternative milks for lactose intolerance.

    Choose certified gluten-free oats for those with celiac or gluten sensitivity, and use suitable liquids for other dietary needs.

    Seasonal and Festive Variations of Overnight Oats


    Customize overnight oats for dietary needs or to celebrate seasonal flavors and events. This section suggests ways to make each bowl festive.

    Spring and Summer Delights

    • Berry and Mint Mix: Utilize the abundance of fresh berries available in spring and summer. Mix strawberries, raspberries, and blueberries with a hint of fresh mint for a refreshing breakfast.
    • Tropical Twist: Incorporate mango, pineapple, and a splash of coconut milk to bring a taste of the tropics to your morning routine during the warmer months.

    Fall and Winter Warmth

    • Pumpkin Spice Oats: Embrace the flavors of fall by stirring in pumpkin puree and a sprinkle of pumpkin spice to your oats for a comforting autumn breakfast.
    • Gingerbread Oats: Infuse your oats with molasses, ginger, nutmeg, and cinnamon to capture the essence of winter holidays in a wholesome bowl.

    Festive Treats

    • Valentine’s Day Special: Add red fruits like cherries and raspberries to create a naturally sweet, red-hued dish perfect for starting Valentine’s Day on a loving note.
    • Christmas Morning Oats: Mix in cranberries, nutmeg, and a dash of vanilla to create a festive and hearty breakfast that’s perfect for Christmas morning.

    Add seasonal fruits, spices, and themes to your overnight oats to enjoy varied flavors and nutrients all year. This method enhances taste and boosts nutrient diversity.

    Incorporating Overnight Oats into Different Diets

    Overnight oats are not only a versatile breakfast choice but also remarkably adaptable to various dietary needs. This section shows how to adapt overnight oats to meet various dietary needs, ensuring everyone can enjoy this healthy meal.

    Adapting Overnight Oats for Different Dietary Needs

    • Low-Carb and Keto Diets: Although traditional overnight oats are high in carbs, they can be modified for low-carb diets by reducing the portion of oats and substituting part of them with chia seeds or flaxseeds. which are lower in carbs and higher in fats.
    • Paleo Diet: For those following a Paleo diet. oats can be replaced with ingredients like almond meal or coconut flakes, keeping the base concept but aligning it with Paleo guidelines.
    • Low-FODMAP Diet: For individuals sensitive to FODMAPs, making overnight oats with lactose-free milk or a gut-friendly plant-based milk like almond milk, and avoiding high-FODMAP fruits can make this dish suitable.

    Nutritional Enhancements for Specific Health Goals

    • Boosting Antioxidant Intake: Add a mix of berries—such as blueberries, strawberries, and blackberries—to enhance the antioxidant content, which can help combat oxidative stress and inflammation.
    • Increasing Protein Content: Incorporate a scoop of your favorite protein powder or Greek yogurt to increase the protein content, which is ideal for muscle repair and growth, especially beneficial for those engaged in regular physical activity.

    Cultural Variations of Overnight Oats

    • Tropical Flavors: Mix in mango, pineapple, and coconut milk for a tropical twist that brings a bit of island flavor to your morning routine.
    • Spiced Versions: For a warming breakfast, add spices such as cinnamon, nutmeg, and cardamom, which not only flavor your oats but also offer various health benefits, including improved blood sugar control.

    By customizing overnight oats according to different dietary needs and cultural preferences, this simple dish can be a global staple in any healthy diet. Explore these variations to keep your breakfast exciting and aligned with your nutritional goals.

    FAQs on Overnight Oats

    Are Overnight Oats Gluten-Free?

    Overnight oats are naturally gluten-free as long as they are made from oats that have not been contaminated with gluten during processing. Always ensure that the oats you purchase are labeled gluten-free, especially if you have celiac disease or gluten sensitivity.

    Can Overnight Oats Be Made Dairy-Free?

    Absolutely! Overnight oats are incredibly versatile and can easily be made dairy-free by using plant-based milks such as almond milk, soy milk, or oat milk. This makes them a great breakfast option for those who are lactose intolerant or following a vegan diet.

    How Long Can You Store Overnight Oats in the Refrigerator?

    You may keep overnight oats in the fridge for up to five days. These are ideal for preparing meals at the start of the week. Ensure they are kept in an airtight container to maintain freshness and prevent them from absorbing other flavors from the fridge.

    Are Overnight Oats Suitable for Weight Loss Diets?

    Yes, overnight oats are a great choice for a weight loss diet due to their high fiber content, which helps keep you full and reduces the likelihood of overeating. To make them even more suitable for weight loss, choose toppings and mix-ins that are nutritious but low in calories.

    These FAQs address common questions and concerns about overnight oats. Understanding these details can help you tailor overnight oats to fit your dietary needs and lifestyle.

    We’ll conclude by summarizing the health benefits of overnight oats and how to effectively incorporate them into a balanced diet.

    Conclusion

    Our review shows overnight oats are a healthy breakfast if prepared carefully. They’re rich in fiber, protein, vitamins, and minerals, enhancing heart health, digestion, weight management, and blood sugar levels.

    Overnight oats are also adaptable and convenient for busy mornings, allowing for countless customizations to fit various diets and tastes. Enhance them with fruits, nuts, seeds, or spices to align with your dietary preferences, ideal for meal planning.

    Be aware of potential issues like high calories from too many toppings and anti-nutrients like phytic acid. Manage these by preparing carefully and choosing ingredients wisely.

    Enjoy the simplicity and health benefits of overnight oats. Try various flavors and toppings to tailor your ideal breakfast bowl, ensuring it meets your nutritional needs and starts your day right.
     

  • Chocolate Birthday Cake: Tips and Recipes for the Perfect Celebration

    Chocolate Birthday Cake: Tips and Recipes for the Perfect Celebration

    Introduction to Chocolate Birthday Cakes

    Welcome to the ultimate guide for crafting the perfect chocolate birthday cake. Whether you are new to baking or an experienced baker, this post is full of helpful hints and mouthwatering recipes to help you celebrate in style. We have everything you need to produce a stunning chocolate cake that will be the talk of the party, from selecting the perfect ingredients to perfecting the art of decorating. Let’s dive into the art of creating a memorable chocolate birthday cake!

    The Popularity of Chocolate Cakes

    Oh, the universal appeal of a chocolate cake! It’s no surprise that this sweet treat tops the list of favorite birthday desserts. Across cultures and continents, chocolate birthday cakes symbolize joy and celebration. Why, you ask? Chocolate is more than a flavor; it’s a universal symbol of love and joy, uplifting every gathering with smiles.

    Why Choose Chocolate for Birthday Celebrations?

    Choosing chocolate for a birthday cake isn’t just about taste—it’s about creating moments. Chocolate is popular, adaptable, and can be dressed up or down to fit the whims of each birthday person. Chocolate cake suits any event, making birthdays memorable with its rich flavor and nostalgic sweetness.

    In crafting the perfect chocolate birthday cake, one must consider not just the taste but also the joy it will bring. Stay tuned as we delve deeper into the essential ingredients that make up this beloved treat in our next section. When the candles are blown out, let us prepare a cake that will have everyone talking for hours!

    Choosing the Right Ingredients

    chocolate birthday cake

    Essential Ingredients for a Chocolate Birthday Cake

    Creating a scrumptious chocolate birthday cake begins with selecting the right ingredients. Quality matters, so let’s start with the basics: flour, sugar, and, most importantly, the star of the show—cocoa powder. For the best results, opt for high-quality unsweetened cocoa to give your cake that rich, deep chocolate flavor. Another crucial ingredient is eggs, which add structure and moisture, ensuring your cake is both sturdy and soft.

    Best Chocolate for Baking

    Not all chocolates are created equal, especially when it comes to baking. Choosing the right type of chocolate can make or break your cake. For a truly luxurious texture and flavor, go for dark chocolate with a cocoa content of at least 70%. It provides a robust flavor that complements the sweetness of the cake. If you’re curious about what makes certain chocolates better for baking, check out this detailed guide on the varieties of chocolate for baking.

    Substitutes and Variations

    Flexibility is key in baking, and sometimes you need to swap ingredients based on dietary preferences or availability. For dairy-free options, almond milk or coconut milk can replace cow’s milk without losing moisture. For a gluten-free chocolate cake, a reputable gluten-free flour blend can be a game-changer. And if you’re out of eggs, fear not! Mashed bananas or applesauce can be used as a binder while adding a hint of extra sweetness.

    By paying attention to each ingredient’s quality and understanding how they interact within your recipe, you’re well on your way to creating a chocolate birthday cake that will dazzle and delight. Next, we’ll guide you through the mixing and baking process to ensure your cake comes out perfectly every time. Stay tuned for a step-by-step journey into the baking heartland!

    Step-by-Step Baking Guide

    Preparing Your Kitchen

    Before diving into the baking process, it’s crucial to set the stage for success. Start by preheating your oven—accuracy in temperature is vital for a perfectly baked chocolate cake. Next, line your cake pans with parchment paper and lightly grease the sides. This preparation helps ensure that your cakes release easily without breaking. Gather all your ingredients and measure them out beforehand to streamline the mixing process, making it smoother and more enjoyable.

    Mixing the Ingredients

    Mixing the right way can make all the difference. Begin by sifting together the dry ingredients—flour, cocoa powder, baking soda, and baking powder—to avoid any lumps and ensure an even distribution throughout the batter. In a separate bowl, whisk the wet ingredients—eggs, milk, and oil—until they are well combined. Mix dry ingredients into wet until smooth; avoid over-mixing to prevent a dense cake—gentle patience is crucial.

    Baking the Perfect Chocolate Cake

    Pour the batter into the prepared pans, smoothing the tops with a spatula to ensure an even layer. Place the pans in the center of your oven to promote uniform heating. Baking times may vary depending on the size and depth of your pans, so keep an eye on your cake and perform the toothpick test at the 30-minute mark. A toothpick inserted into the center should come out clean or with just a few moist crumbs attached. Once done, remove the cakes from the oven and let them cool in the pans for about 10 minutes before transferring them to a wire rack to cool completely.

    Achieving the perfect chocolate cake involves precision and care at every step, from preparation to the final moments in the oven. With these detailed instructions, you’re well-equipped to bake a cake that not only tastes wonderful but also looks professionally made. Next, we’ll explore the art of decorating your chocolate birthday cake to make it as visually appealing as it is delicious. Stay tuned for tips and tricks that will elevate your baking game to new heights!

    Decorating Your Chocolate Birthday Cake

    chocolate birthday cake

    Classic Chocolate Frosting Options

    Once your cakes are cooled, it’s time to turn them into a celebratory masterpiece with the perfect frosting. A classic choice is chocolate buttercream, beloved for its smooth texture and rich flavor. To make it, simply cream together butter, powdered sugar, and cocoa powder until light and fluffy. For a richer flavor, you can add a splash of vanilla extract or a pinch of salt to enhance the chocolatey notes. For those looking for something a bit different, a chocolate ganache can provide a glossy, decadent covering that’s sure to impress.

    Creative Decoration Ideas

    Now, let your creativity shine! Decoration is where you can truly personalize your chocolate birthday cake. Consider using chocolate shavings, sprinkles, or even edible gold leaf for a touch of elegance. Piping designs along the edges or across the top with a contrasting color (think white chocolate or a raspberry puree) can add a stunning visual element. If you’re celebrating a specific theme, tailor your decorations to match—be it with color-coordinated toppings or bespoke cake toppers.

    Tips for a Professional Finish

    For that immaculately polished look, here are a few tips: First, ensure your frosting is smooth and even by using an offset spatula. If the frosting becomes too soft to work with, chilling it for a few minutes can help regain consistency. To get a super-smooth finish on your buttercream, dip your spatula in hot water, dry it, and then smooth over the cake. This technique melts the buttercream slightly, creating a flawless surface. Lastly, remember to let your creativity lead the way and have fun with the process, because a cake made with joy always tastes better!

    With your cake beautifully baked and decorated, it’s ready to take center stage at any birthday celebration. But what’s next after the party’s over? Up next, we’ll dive into the best practices for serving and storing your chocolate birthday cake to ensure every slice is as delicious as the first. Stay tuned for more expert advice to keep your cake sensational from the first bite to the last!

    Variations of the Chocolate Birthday Cake

    Vegan and Gluten-Free Options

    Everyone deserves a slice of birthday joy, which means accommodating different dietary needs without compromising on taste. For a vegan chocolate birthday cake, swap out animal products for alternatives like almond milk, coconut oil, and flax eggs. These substitutions keep the cake moist and flavorful, ensuring no one misses out on the celebration. Gluten-free baking has also come a long way, with various flour blends available that mimic the texture and density of traditional flour. Remember, when choosing a gluten-free flour blend, look for one that offers a balance of rice flour, potato starch, and xanthan gum to achieve the best results.

    Adding Unique Flavors

    A chocolate birthday cake doesn’t have to be just about chocolate. Infusing additional flavors can elevate the basic recipe into something extraordinary. Consider adding a hint of espresso powder to deepen the chocolate flavor, or mix in some orange zest for a refreshing citrus note. For a richer, more complex profile, fold in some caramel or toasted nuts into the batter or frosting. These tweaks not only enhance the flavor but also introduce delightful textures to the cake, making every bite a new discovery.

    By exploring these variations, you can tailor your chocolate birthday cake to fit any preference or occasion, making it as unique as the person you’re celebrating. Next, we’ll discuss the best practices for serving and storing your masterpiece, ensuring it remains as stunning and delicious as the moment it was sliced. Stay tuned for practical tips to maximize the enjoyment of your chocolate birthday cake long after the candles have been blown out!

    Serving and Storage Tips

    Best Practices for Serving

    When it comes time to serve your chocolate birthday cake, a few tips can help enhance the experience. First, ensure the cake is at room temperature. A cold cake can taste denser and less flavorful, so pulling it out of the fridge an hour before serving is ideal. For clean, sharp cuts, use a thin-bladed knife and dip it in hot water between slices. This method ensures that each piece is beautifully presented without dragging crumbs or frosting across the top.

    How to Store Leftovers

    Proper storage is key to maintaining the freshness and texture of your chocolate birthday cake. If you have leftovers, they should be covered with plastic wrap or placed in an airtight container to prevent drying out. Refrigerate if the frosting is dairy-based or if you’re in a warm climate; otherwise, a cool, dark place can suffice. For longer storage, consider freezing slices on a baking sheet before wrapping them individually. This way, you can enjoy a piece of birthday bliss long after the event has passed.

    By following these serving and storage tips, you ensure that your chocolate birthday cake remains the centerpiece of the celebration, from the first slice to the last crumb. Next, we’ll address some common questions in our FAQs section, providing you with all the insider knowledge needed to bake and enjoy the perfect chocolate birthday cake. Stay tuned for answers to all your cake-related queries!

    FAQs (Frequently Asked Questions)

    What are the best tips for a moist chocolate cake?

    Achieving a moist chocolate birthday cake starts with the right balance of ingredients. Ensure you use enough wet ingredients like oil or buttermilk, which contribute to the tenderness of the cake. Avoid overbaking by checking the cake a few minutes before the suggested baking time ends. A simple trick is to add a spoonful of mayonnaise or sour cream to the batter; these ingredients contain fats that enhance moisture retention.

    Can I make a chocolate birthday cake in advance?

    Absolutely! Baking your chocolate cake in advance can be a great time-saver. Once cooled, wrap the cake layers tightly in plastic wrap and store them in the refrigerator for up to three days or freeze for up to a month. This not only helps in managing your time but also makes the cake easier to frost as chilled cakes crumb less during the frosting process.

    How do I make my chocolate cake fluffy and light?

    For a fluffy and light chocolate cake, ensure that your leavening agents (baking powder and baking soda) are fresh. Incorporate air into the cake batter by creaming the sugar and butter until pale and fluffy before adding other ingredients. Another tip is to use cake flour instead of all-purpose flour; it has less protein and creates a finer, lighter crumb.

    By addressing these FAQs, we hope to enhance your baking experience, making it easier and more enjoyable to create the perfect chocolate birthday cake. With these tips and techniques, you’re well-equipped to bake a cake that impresses in both taste and presentation, ensuring every birthday celebration is a delicious success. Happy baking and celebrating!

    Conclusion

    This concludes our comprehensive guide on creating the ultimate chocolate birthday cake. From choosing the right ingredients to baking and decorating with finesse, we’ve covered all the essentials to help you master the art of chocolate cake making. Whether it’s for a grand celebration or a cozy family gathering, your chocolate cake is sure to bring smiles and sweet memories.

    Remember, baking is not just about following recipes—it’s about creating joy and sharing love. Each step, from mixing the batter to applying the final touches of frosting, is an opportunity to infuse your personal touch and creativity. So, the next time a birthday rolls around, don your apron, preheat your oven, and prepare to bake a cake that will be the highlight of the party.

    Thank you for following along with this guide. We hope it inspires you to create many more delightful and delicious chocolate birthday cakes. Here’s to many happy returns and sweet celebrations!

  • Dog Birthday Cakes: Celebrate Your Pup’s Special Day

    Dog Birthday Cakes: Celebrate Your Pup’s Special Day

    Introduction to Dog Birthday Cakes

    Why Celebrate with a Dog Birthday Cake?

    Celebrating your dog’s birthday with a dog birthday cake is a fantastic way to show your love and appreciation. These celebrations can strengthen the bond between you and your pet, creating cherished memories. Plus, it’s just a blast to see your pup’s tail wag with joy over a special treat!

    Benefits of Celebrating Your Dog’s Birthday

    The main perk of whipping up a birthday cake for your dog is the joy and excitement it brings. Watching your dog enjoy their special treat is a heartwarming sight and reinforces the strong bond you share. It’s a day where your attention is fully focused on your pet, making them feel loved and cherished.

    Safety Considerations

    When planning your dog’s birthday cake, it’s crucial to prioritize safety. The internet is a treasure trove of recipes, but not all ingredients found in human cakes are safe for dogs. For instance, chocolate and xylitol are toxic to dogs and should always be avoided. Instead, opt for dog-safe ingredients like peanut butter, carrots, and apples. Learn more about dog nutrition to ensure your treats are not only delicious but also beneficial for your dog’s health.

    This first section of our celebration guide sets the stage for an unforgettable birthday bash for your canine companion, filled with fun, love, and plenty of tail-wagging. As we continue, we’ll dive into some popular and safe recipes that you can try at home to spoil your pup on their special day.

    Popular Recipes

    Classic Peanut Butter Carrot Cake

    One of the most beloved recipes for a dog birthday cake is the Classic Peanut Butter Carrot Cake. This cake is not only delicious but also packed with dog-friendly ingredients that offer health benefits.

    • Ingredients and Preparation Steps
      • Start by preheating your oven to 350°F (175°C). You’ll need one egg, a cup of shredded carrots, a quarter cup of peanut butter (make sure it’s xylitol-free), and a third of a cup of honey (optional). Mix these together with a cup of whole wheat flour and a teaspoon of baking soda for lift.
      • In a bowl, mix together all ingredients until well combined. Pour the batter into a greased cake pan and bake for about 40 minutes or until a toothpick comes out clean from the center. Let it cool before serving a slice to your birthday pup!
    • Nutritional Benefits of Each Ingredient
      • Carrots are a great source of vitamin A, which is beneficial for your dog’s vision, skin, and coat health. Peanut butter provides protein and healthy fats, making it an excellent energy source. Just remember, moderation is key!

    Grain-Free Apple and Cheddar Cake

    For pups with grain sensitivities, this Grain-Free Apple and Cheddar Cake is a perfect choice. It’s as tasty as it is nutritious, providing a safe way to indulge your dog on their special day.

    • Recipe Details
      • You will need one apple, peeled and finely chopped, a half cup of shredded cheddar cheese, two tablespoons of coconut oil, and three eggs. Combine these with a cup of coconut flour to keep it grain-free.
      • Mix all the ingredients until they form a consistent batter. Spoon into a greased baking dish and bake at 350°F (175°C) for 22-25 minutes. Let it cool completely before giving your dog a taste of this cheesy delight.
    • How to Serve and Store
      • Cut the cake into manageable pieces for your dog. If you’re not serving the cake immediately, store it in the refrigerator for up to five days. You can also freeze slices for future treats!

    These recipes not only celebrate your dog’s special day but also cater to their health and dietary needs. By choosing ingredients wisely and focusing on their benefits, you ensure a happy and healthy celebration. As we move on, get ready to explore some creative variations that can add a little extra flair to your dog’s party treats.

    Creative Variations

    Pupcakes and Mini-Cakes

    If you’re looking to add a dash of variety or need smaller servings for a puppy party, pupcakes and mini-cakes are perfect. These fun-sized treats are easy to serve and just as festive as a full-sized cake.

    • Smaller Alternatives for Small Dogs or Parties
      • To make pupcakes, simply adjust your favorite dog cake recipe by dividing the batter into a muffin tin. Bake for a shorter time, usually around 15-20 minutes, depending on the size. This makes the cakes ideal for individual servings and helps manage portion sizes, ensuring all the furry guests get a taste without overindulging.
    • Decorative Ideas to Make Them Festive
      • Get creative with dog-safe decorations! Top your pupcakes with a dollop of plain Greek yogurt or a small spoonful of peanut butter as frosting. For a touch of flair, add a tiny piece of dog-friendly fruit or a small treat on top. These decorations not only look great but are also safe for dogs to enjoy.

    Frozen and No-Bake Options

    For those hot summer birthdays or for dogs with sensitive teeth, frozen and no-bake cakes are a fantastic alternative. These treats can help cool down your pup while still providing a festive birthday treat.

    • Recipes for Summer Birthdays or Dogs with Dental Issues
      • Try a simple frozen cake by mixing plain yogurt with mashed banana and a spoonful of peanut butter. Pour the mixture into silicone molds or an ice cube tray and freeze Transfer the mixture into ice cube trays or silicone molds, then freeze until it solidifies. until solid. These frozen treats are refreshing and soft, perfect for dogs to easily chew.
    • Importance of Cooling Treats for Dogs
      • Besides being a delightful surprise, cooling treats like these can help regulate your dog’s temperature during warmer months and provide a gentle eating experience for pets with dental sensitivities or older dogs.

    Creating these creative variations not only caters to your dog’s preferences and needs but also adds an element of fun to their special day. As we continue, we’ll explore how to enhance these treats further with dog-friendly decorating tips and presentation ideas, making your pup’s birthday celebration both beautiful and unforgettable.

    Decorating and Presentation

    Dog-Friendly Decorating Tips

    When it comes to decorating your dog’s birthday cake or treats, it’s important to keep both safety and appeal in mind. Opt for simple, safe ingredients that will make your creations look festive and inviting.

    • Safe icings and toppings
      • For a dog-safe icing, blend together Greek yogurt with a bit of peanut butter. This mixture is easy to spread and safe for dogs to eat. Avoid any ingredients that are harmful to dogs, like chocolate or artificial sweeteners. As an alternative, mashed bananas or pureed pumpkin can also serve as tasty, healthy frostings.
    • Presentation ideas that excite dogs
      • Dogs may not care about aesthetics the way humans do, but they definitely get excited by the smells and colors of their treats. Use natural food colorings, like beet juice for a pink hue or turmeric for a golden color, to make the treats more visually appealing. Arrange the treats on a fun, colorful plate or in a pattern that might intrigue your dog.

    DIY Dog Party Decorations

    Creating a themed birthday party for your dog can enhance the festive atmosphere and make the day even more special. Here are some simple DIY ideas to decorate your space and celebrate your furry friend.

    • How to create a themed birthday party for dogs
      • Choose a theme based on your dog’s interests, such as a “Bark Park Party” or “Beach Ball Bash.” Use toys and accessories as decorations that align with the theme. For example, for a Bark Park Party, you could have plush squirrel toys and tennis balls scattered around.
      • Make banners or signs with paw prints or bones printed on them. You can easily create these at home with some craft paper and non-toxic paints.

    These decorating and presentation ideas are designed to not only please the eye but also to engage your dog’s senses and make them feel like the star of the show. By using safe ingredients and creative DIY decorations, you ensure a joyful and memorable celebration.

    As we move forward, we’ll delve into the FAQs about dog birthday cakes, addressing common concerns and providing useful tips to help you prepare the perfect treat for your pet’s special day.

    Advanced Tips for Dog Cake Baking and Safety

    Mastering the Art of Dog-Friendly Baking

    Baking a cake for your dog is a delightful way to show your love, but mastering the craft can take your celebrations to the next level. This section will delve into advanced baking tips and techniques that ensure your cakes are not only tasty but also perfectly suited to your dog’s dietary needs.

    • Experimenting with Flavors and Textures
      • Dogs have different taste preferences, just like humans. Don’t be afraid to experiment with various dog-safe ingredients to find what your pup loves best. Consider incorporating sweet potatoes, blueberries, or even lean meats like chicken or turkey for a savory twist. Each ingredient offers unique flavors and benefits, so mixing and matching can lead to your dog’s new favorite treat.
    • Techniques for Perfect Consistency
      • Achieving the right texture is crucial for making sure the cake is easy for your dog to eat and enjoy. For older dogs or those with dental issues, softer cakes might be necessary. You can adjust the moisture content with ingredients like applesauce or pumpkin puree to create a softer, more palatable texture.

    Ensuring Ultimate Safety in Dog Treats

    When it comes to your dog’s health, safety is paramount. This section covers additional precautions and checks to keep in mind when preparing dog-friendly cakes.

    • Regular Ingredient Checks
      • Always double-check the ingredients list on products like peanut butter or yogurt to ensure they do not contain xylitol or other harmful additives. Keeping up-to-date with FDA warnings about pet foods and treats can also help you avoid ingredients that may be under scrutiny for safety concerns.
    • Consulting with a Veterinarian
      • If you’re unsure about a recipe or an ingredient, especially if your dog has specific health issues like allergies or dietary restrictions, consulting with your vet can provide peace of mind. They can offer advice tailored to your dog’s health needs, ensuring that your culinary creations are both safe and beneficial.

    By incorporating these advanced baking tips and safety guidelines, you can enhance your dog’s birthday celebrations, ensuring they are not only fun and festive but also contribute positively to their health and well-being. This attention to detail will make your homemade treats even more special, reinforcing the loving bond between you and your pet.

    FAQs

    Frequently asked questions about dog birthday cakes offer valuable insights into common concerns and helpful tips for pet owners looking to celebrate their dog’s special day with a homemade treat. We answer some of the most frequently asked questions below.

    • What are the best ingredients to use in a dog birthday cake?

      • The best ingredients for dog cakes are ones that are safe and healthy for dogs. Good options include whole wheat flour (or coconut flour for grain-free recipes), eggs, apples, carrots, and peanut butter. Always ensure that the peanut butter is xylitol-free as xylitol is toxic to dogs.
    • How can I ensure the cake is safe for my dog to eat?

      • To ensure the cake is safe, avoid using any ingredients known to be harmful to dogs, such as chocolate, grapes, raisins, onions, and artificial sweeteners like xylitol. Stick to simple, wholesome ingredients and, when in doubt, consult your veterinarian.
    • Can I make a dog birthday cake without baking?
      • Absolutely! No-bake dog cakes can be a great alternative, especially for owners who are short on time or prefer not to use an oven. A simple recipe involves mixing natural peanut butter, plain yogurt, and mashed bananas together, then freezing the mixture in a cake mold until solid.
    • Are there any quick dog cake recipes for last-minute preparations?

      • For a quick and easy dog cake, mix one egg, a half cup of peanut butter, a quarter cup of cooking oil, and one cup of shredded carrots. Combine these with a cup of flour and a teaspoon of baking soda, then bake for 30 minutes at 350°F (175°C). This simple cake is both quick to prepare and delicious for dogs.

    These FAQs aim to ensure that every pet owner can feel confident and informed when preparing a birthday treat for their dog, emphasizing safety, simplicity, and enjoyment.

    In the next section, we’ll wrap up with a summary and final thoughts on creating memorable and safe celebrations for your beloved canine.

    Conclusion

    Summary and Final Thoughts

    As we wrap up our guide to celebrating your dog’s birthday with a delightful dog birthday cake, it’s important to reflect on the joy and bonding such an occasion brings. Creating a homemade treat for your pet is more than just a fun activity; it’s an expression of love and appreciation for your furry companion. By choosing safe, healthy ingredients and following the tips and recipes provided, you can ensure that your dog’s birthday is not only festive but also beneficial to their health.

    Encouragement to Try Making a Dog Birthday Cake

    Whether it’s your first time baking a cake for your dog or you’re looking to try new recipes and ideas, the process is sure to strengthen the bond between you and your pet. Remember, the key is to enjoy the moment and watch your dog’s excitement as they dig into a cake made just for them. Don’t hesitate to get creative with the recipes and decorations, tailoring them to your dog’s tastes and dietary needs.

    Celebrating your dog’s birthday with a homemade cake is a wonderful way to show your pet how much they are loved and cherished. Each bite of the cake represents the care and thought you’ve put into their well-being and happiness. So, grab your baking supplies, choose a recipe, and start planning a birthday bash that your dog will remember for years to come!

    This guide aims to provide everything you need to know to make your dog’s special day extraordinary. From safe and nutritious recipes to festive decorations and practical tips, you have the tools to create a celebration that is as enjoyable as it is memorable. Happy baking, and here’s to many more joyful birthdays with your beloved pup!


  • Birthday Cake Shot: Your Ultimate Guide to Festive Drinks

    Birthday Cake Shot: Your Ultimate Guide to Festive Drinks

    Introduction to Birthday Cake Shots

    Celebrating a special occasion or just want to jazz up your next gathering? The Birthday Cake Shot offers a splash of fun with every sip! This guide unveils everything you need to know about crafting this festive shot, ensuring your celebrations are memorable. From essential ingredients to expert tips, we’ll walk you through creating a delightful party highlight that everyone will talk about.

    Are you looking for a way to start your party with a bang? The Birthday Cake Shot is a perfect choice! This delightful concoction combines the joy of a birthday treat with the excitement of a party starter. Here’s why this shot has become a go-to for celebrations:

    Overview of Birthday Cake Shots
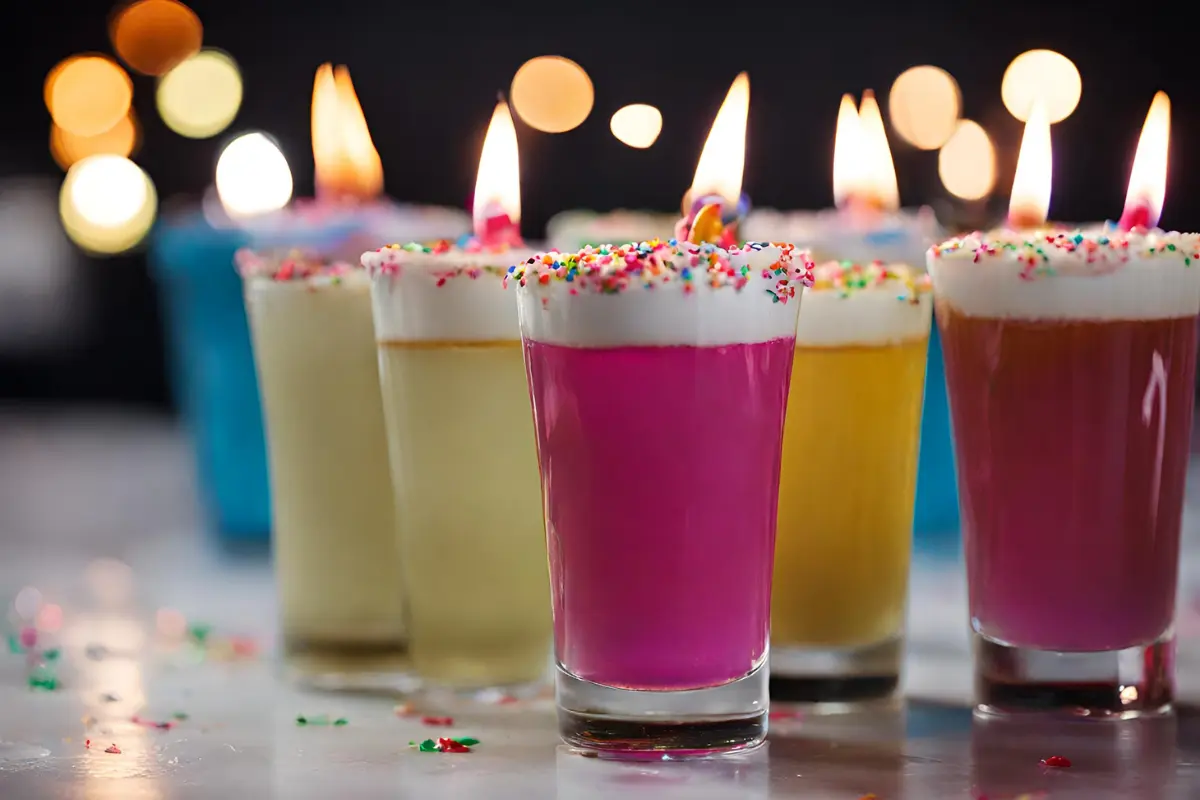
    What exactly is a Birthday Cake Shot? It’s a sweet, creamy shot that mimics the flavor of a decadent birthday cake. Packed with fun and designed to delight, it’s a favorite at any festive gathering. These shots are more than just a drink; they’re a celebration in a glass!

    Popularity in Celebrations
    Why do these shots resonate so well at parties? They embody the spirit of a celebration. Easy to make and even easier to enjoy, Birthday Cake Shots bring an element of surprise and nostalgia, reminding everyone of happy birthday memories. Their popularity is not just about taste but also about creating moments that bring people together.

    Stay tuned as we dive deeper into the ingredients and tools you’ll need to make these fantastic shots at home in the next section of our guide!

    Essential Ingredients and Tools for Birthday Cake Shots

    To whip up the perfect Birthday Cake Shot, you need a few key ingredients and some basic bar tools. Here’s a breakdown to ensure you have everything ready for your next party hit!

    Ingredients List
    The magic of a Birthday Cake Shot lies in its simplicity and the clever combination of flavors that taste just like a slice of cake. Here’s what you’ll typically need:

    • Creamy base (think non-alcoholic vanilla or nut-based creamers for a rich texture)
    • A hint of citrus or fruit essence for that tangy kick
    • Sweet syrups or natural sweeteners to mimic the icing on the cake
    • Colorful garnishes like sprinkles or edible glitter for that festive touch

    Required Tools
    You don’t need fancy equipment to create these delightful shots. Here’s what will come in handy:

    • Shot glasses to serve
    • A small shaker to mix your ingredients well
    • A fine strainer to ensure a smooth pour
    • Measuring spoons for accurate ingredient addition

    Preparing a Birthday Cake Shot is straightforward, but having the right ingredients and tools makes the process not only easier but also more fun. With everything in place, you’re all set to move on to mixing and mastering the art of the perfect party shot!

    Stay tuned for the next part, where we’ll provide a step-by-step guide on how to blend these ingredients into a memorable shot that’s sure to be a hit at any celebration.

    Step-by-Step Recipe Guide for Birthday Cake Shots

    birthday cake shot

    Creating the perfect Birthday Cake Shot is all about precision and fun. Follow these steps to ensure your shots are the highlight of the party.

    Preparation Steps

    1. Measure the Ingredients: Start by measuring your cream base, citrus or fruit essence, and sweetener accurately to ensure each shot is balanced and delicious.
    2. Mix and Shake: Combine the ingredients in your shaker with ice. Give it a good shake to mix everything well and chill the mixture.
    3. Strain: Use your strainer to pour the mixture into shot glasses, ensuring a smooth, creamy texture.
    4. Garnish: Top each shot with colorful sprinkles or a dash of edible glitter to capture the essence of a festive birthday cake.

    Variations
    To keep things interesting, you can try various twists on the classic Birthday Cake Shot:

    • Fruit Variations: Experiment with different fruit essences like strawberry or blueberry for a berry-cake flavor.
    • Cream Alternatives: For a lighter version, use almond or coconut cream instead of heavier cream bases.
    • Sweetener Swaps: Opt for natural sweeteners like honey or agave syrup if you prefer something less processed.

    These simple steps and variations allow you to tailor the Birthday Cake Shot to your taste preferences and dietary needs, making it a versatile choice for any celebration. Now that you know how to mix up these fun shots, let’s explore their role in modern celebrations in the next section of our guide.

    The Role of Birthday Cake Shots in Modern Celebrations

    Birthday Cake Shots are more than just a delightful concoction; they play a significant role in adding zest and uniqueness to modern celebrations. Let’s dive into how these shots have become a staple at festive events.

    Cultural Significance
    The idea of celebrating with a special drink is deeply embedded in many cultures, but the Birthday Cake Shot brings a unique twist by merging the concept of a celebratory toast with the universal appeal of birthday cake. This fusion creates a memorable experience that resonates with guests, making any occasion feel more festive and personalized.

    Trends in Party Drinks
    As trends evolve, party-goers are continually looking for innovative and Instagram-worthy drinks that not only taste great but also look appealing. Birthday Cake Shots, with their vibrant layers and playful garnishes, perfectly meet this demand. They are a creative way to celebrate milestones and express one’s personality through custom flavors and decorations.

    By understanding the cultural impact and trending status of Birthday Cake Shots, hosts can elevate their event’s atmosphere and provide guests with a unique and enjoyable experience. Next, we will explore expert tips and tricks to perfect these shots and make your celebration standout.


    Expert Tips and Tricks for Perfecting Birthday Cake Shots

    Mastering the art of the perfect Birthday Cake Shot requires a bit more than just following a recipe. Here are some professional insights and common pitfalls to avoid, ensuring every shot is a hit at your party.

    Professional Bartender Insights

    • Balance is Key: Achieving the right balance between sweetness and creaminess is crucial. Don’t overpower the delicate flavors with too much sweetener.
    • Chill Properly: Always shake the ingredients with plenty of ice before straining into shot glasses to ensure a refreshing, cool shot.
    • Experiment with Flavors: Don’t be afraid to experiment with different extracts or essences to find your perfect birthday cake flavor.

    Common Mistakes to Avoid

    • Overmixing: Shaking the mixture too long can dilute the flavors. Shake just enough to mix and chill the ingredients.
    • Using Low-Quality Ingredients: Quality matters, especially with simple recipes. Use the best available non-alcoholic vanilla or nut-based creamers and fresh essences to enhance the overall taste.
    • Skipping the Garnish: The garnish not only adds visual appeal but can also enhance the overall flavor profile. Never skip this finishing touch!

    Following these tips will help you create a Birthday Cake Shot that is as delightful to look at as it is to drink. Keep these pointers in mind, and your shots will surely be a centerpiece of the celebration.

    Next, we’ll move into pairing and serving suggestions to ensure that your Birthday Cake Shots complement every aspect of your festive gathering.

    Pairing and Serving Suggestions for Birthday Cake Shots

    birthday cake shot

    To truly make your Birthday Cake Shots a hit, consider how you pair and serve them. These suggestions will help enhance the overall experience of your celebration.

    Food Pairings

    • Sweet Treats: Complement the sweetness of your shots with mini desserts like cupcakes or macarons. The contrast in textures and flavors will delight your guests.
    • Savory Snacks: Balance the sweetness with savory snacks such as salted nuts or cheese platters. This creates a delightful palate experience that keeps guests coming back for more.

    Serving Ideas

    • Creative Presentation: Serve your shots in unique glasses or decorate the tray with thematic elements that match your party’s theme. This attention to detail makes the experience more engaging.
    • Interactive Serving Stations: Set up a DIY shot station where guests can customize their shots with various toppings and flavors. This not only adds a fun activity to your event but also allows guests to personalize their drinks.

    These pairing and serving ideas are designed to make your Birthday Cake Shots an integral part of your celebration, ensuring they are as memorable as the event itself.

    In the next section, we’ll address frequently asked questions to clear up any doubts and provide deeper insights into making perfect Birthday Cake Shots. Stay tuned!

    Design and Aesthetics: Elevating the Presentation of Birthday Cake Shots

    Making your drinks visually appealing is just as important as their taste, especially for festive occasions like birthdays. This section could delve into creative presentation techniques and styling tips to make your Birthday Cake Shots stand out.

    Visual Elements of Drink Presentation

    • Discuss the importance of visual appeal in drink presentation.
    • Explore color schemes, glassware choices, and layout designs that enhance the aesthetic of your shots.

    Creative Styling Tips for Shot Glasses

    • Offer ideas for customizing shot glasses, such as themed decorations, DIY embellishments, or personalized touches for special occasions.
    • Provide step-by-step guides on creative garnishing techniques that add a visual pop to the shots.

    Thematic Presentation Ideas

    • Suggest themes for birthday parties and how to align the presentation of Birthday Cake Shots with these themes.
    • Provide examples of how to set up a shot display that complements the overall party decor and theme.

    Adding this section would not only inspire readers to think creatively about serving drinks but also provide practical tips to ensure their party’s drink presentation is as memorable as the celebration itself.

    Global Traditions and Variations of Birthday Celebrations with Special Drinks

    Exploring the cultural diversity in birthday celebrations can provide readers with a broader understanding of how special drinks, like the Birthday Cake Shot, fit into global festivities.

    Cultural History of Celebratory Shots

    • Discuss the origins of using celebratory shots in birthday events.
    • Explore the significance of marking another year of life with a special toast or drink in various cultures.

    Global Variations of Birthday Drinks

    • Highlight different countries or regions where unique birthday drinks are a tradition.
    • Provide examples of specific drinks used in these celebrations and how they differ from the Birthday Cake Shot.

    Incorporating Global Influences into Your Celebrations

    • Offer ideas on how to adapt international drink recipes into birthday celebrations.
    • Encourage readers to create a global-themed birthday party featuring various celebratory shots from around the world.

    This section would not only enrich the article with a touch of cultural appreciation but also inspire readers to incorporate international elements into their own celebrations, making each event unique and memorable. explore creative event ideas here

    FAQs about Birthday Cake Shots

    To wrap up our comprehensive guide on Birthday Cake Shots, here’s a look at some frequently asked questions that might help clarify any lingering doubts and provide additional insights into creating these delightful party drinks.

    Q1: What are the best non-alcoholic alternatives for a Birthday Cake Shot?
    A1: For a non-alcoholic version, use a combination of non-alcoholic vanilla creamer, a splash of non-alcoholic fruit syrup, and a hint of citrus essence. This mix keeps the festive flavor without the alcohol.

    Q2: How can I make Birthday Cake Shots for a large party without compromising on quality?
    A2: Prepare your mix in a large batch, but avoid adding ice until you’re ready to serve. This way, you can shake individual servings with ice to chill them right before serving, maintaining both quality and flavor.

    Q3: Are there any specific themes that Birthday Cake Shots are particularly good for?
    A3: These shots are versatile and can be customized to fit almost any party theme, whether it’s a milestone birthday, anniversary, or even a casual get-together. Adjust the color and decorations of your shots to match your theme for an integrated look.

    Q4: Can Birthday Cake Shots be prepared in advance?
    A4: Yes, you can mix all the ingredients except the ice ahead of time and store them in the refrigerator. Shake with ice and serve as needed to keep them fresh and cool.

    Q5: What are some creative garnishes for Birthday Cake Shots?
    A5: Apart from traditional sprinkles, consider using edible glitter, tiny edible flowers, or a rim of crushed candy to make your shots visually stunning and even more delightful.

    This FAQ section aims to make your experience with Birthday Cake Shots as smooth and enjoyable as possible. Whether you’re a novice or an experienced party planner, these tips and tricks are designed to help you create a memorable celebration with a personal touch. Cheers to making your next event a spectacular one!


  • Birthday Cake Ice Cream: Varieties, Recipes, and Reviews

    Birthday Cake Ice Cream: Varieties, Recipes, and Reviews

    Introduction to Birthday Cake Ice Cream

    Welcome to the ultimate guide on Birthday Cake Ice Cream. In this comprehensive exploration, we’ll dive into the colorful world of this popular dessert. From unique brands and homemade recipes to its cultural impact, this treat isn’t just for birthdays anymore! Join us as we uncover the sweet secrets behind Birthday Cake Ice Cream, offering tips, tricks, and tantalizing insights. Whether you’re a seasoned ice cream lover or curious about this specific flavor, there’s something here for everyone.

    Introduction to Birthday Cake Ice Cream Ah, Birthday Cake Ice Cream—a delightful fusion of two of the most joyous treats known to humankind. But what exactly makes this ice cream so special? It’s the whimsical blend of classic birthday cake flavors with the creamy, comforting texture of icecream. Often packed with colorful sprinkles and chunks of sponge cake, it’s a party in every scoop.

    Overview of Birthday Cake Ice Cream

    Birthday cake ice cream is more than just a flavor; it’s an experience. Typically characterized by a sweet, creamy base flavored with vanilla or white cake, it’s swirled with vibrant frosting and dotted with sprinkles. This ice cream mirrors the joy and festivity of a birthday celebration, making it a hit at any gathering.

    Popularity and Cultural Significance

    The rise in popularity of birthday cake ice cream can be traced back to its ability to evoke nostalgic childhood memories. It’s not just popular among kids but also resonates with adults, bridging generations. Moreover, its cultural significance has expanded, appearing in everything from ice cream cakes to innovative dessert menus across the globe. This flavor celebrates more than just birthdays; it’s a tribute to joy and the simple pleasures in life.

    Exploring Varieties and Brands of Birthday Cake Ice Cream

    Popular Brands and Their Unique Takes on Birthday Cake Ice Cream Each brand of Birthday Cake Ice Cream offers its own twist on this classic treat, bringing something unique to the freezer aisle. Here, we delve into some of the top picks and what sets them apart.

    Descriptions of Brands Like Jenni’s, Tillamook, and Blue Bell

    • Jenni’s Splendid Ice Creams is renowned for its artisanal approach. Their version features a buttercream ice base interspersed with colorful sprinkles and real cake pieces, providing a rich and decadent experience.
    • Tillamook, a favorite for its dairy products, offers a birthday cake icecream that’s loaded with chunks of real cake and a swirl of blue frosting. It’s a creamy delight that promises every bite is as good as the last.
    • Blue Bell goes for nostalgia with their birthday cake ice cream, mixing in pieces of cake and a swirl of chocolate icing that feels like a celebration in every spoonful.

    Comparing Cake Pieces vs. Cake Flavoring

    When it comes to Birthday Cake Ice Cream, there’s a divide between those who prefer actual cake pieces in their ice cream and those who opt for cake-flavored ice cream. Ice cream with real cake pieces usually offers a satisfying texture, giving a chunky chew to the otherwise smooth ice cream. On the other hand, cake-flavored ice creams focus more on infusing the ice cream with the essence of birthday cake, which can be subtler and more uniformly mixed.

    Whether you gravitate towards the textural complexity of chunks or the smooth infusion of cake flavor, both styles celebrate the quintessential taste of birthday cheer.

    Coming up in Part 3, we’ll cover everything you need to know to make your own Birthday Cake IceCream at home, from the essential ingredients to a step-by-step recipe. Stay tuned!

    DIY Birthday Cake Ice Cream

    birthday cake ice cream

    Basic Ingredients Needed Creating your own Birthday Cake Ice Cream at home is simpler than you might think. With a few basic ingredients, you can whip up a batch that might even surpass your favorite store-bought brand.

    Listing and Explaining the Ingredients

    To start, you’ll need:

    • Heavy cream and whole milk: These form the rich, creamy base that is essential for any good ice cream.
    • Sugar: To sweeten the mixture to that perfect birthday cake sweetness.
    • Egg yolks: These help thicken the ice cream, giving it a luxurious texture.
    • Vanilla extract: Adds the classic flavor that underpins the birthday cake taste.
    • Cake mix: A scoop of dry cake mix infuses the ice cream with authentic cake flavor.
    • Frosting and sprinkles: For that true birthday cake character, swirl in some frosting and add sprinkles towards the end of churning.

    Step-by-Step Recipe

    Here’s how to make your Birthday Cake Ice Cream:

    1. Prepare the Base: Whisk together milk, cream, sugar, and egg yolks in a saucepan over medium heat. Cook until the mixture just begins to thicken and coats the back of a spoon.
    2. Infuse the Flavor: Stir in vanilla extract and dry cake mix, ensuring no lumps remain.
    3. Chill: Transfer the mixture to a bowl, cover it, and chill in the refrigerator for at least 4 hours, though overnight is best for flavor development.
    4. Churn: As directed by the manufacturer, pour the cold mixture into an ice cream machine and churn.
    5. Add Fun Elements: In the last few minutes of churning, add in the frosting and sprinkles.
    6. Freeze: Transfer the ice cream to a container and freeze until firm, usually about 2-4 hours.

    Voila! You’ve made your very own Birthday Cake IceCream. This homemade delight is perfect for any celebration or whenever you need a scoop of happiness.

    Nutritional Profile of Birthday Cake Ice Cream

    Understanding the nutritional content of your favorite treats is crucial, especially for something as tempting as Birthday Cake Ice Cream. Here’s a closer look at what comprises this festive dessert.

    Analysis of Calories, Sugar, and Dairy Content

    • Calories: Typically, a single serving of Birthday Cake IceCream can range from 200 to 250 calories, depending on the brand and the specific ingredients used. This is similar to other premium ice cream flavors.
    • Sugar: It’s no surprise that this flavor is on the sweeter side. You can expect about 20-25 grams of sugar per serving, which includes sugars from both the ice cream base and the mix-ins like frosting and sprinkles.
    • Dairy Content: The primary base of birthday cake ice cream is usually made from dairy products like cream and milk, which provide a good source of calcium but also add to the fat content. Some brands may offer dairy-free versions that substitute coconut milk or almond milk for traditional dairy.

    For those watching their sugar intake or managing dairy sensitivities, it’s worth checking out brands that cater to these dietary needs. Brands like So Delicious Dairy Free offer alternatives that allow you to enjoy this delightful flavor without straying from your health goals.

    Next up, in the next Part, we explore where to find Birthday Cake IceCream. Whether you prefer to buy it from a store or scoop it up at a local creamery, we’ve got the details for you. Stay tuned!

    Where to Find Birthday Cake Ice Cream

    birthday cake ice cream

    Whether you’re looking for a quick supermarket fix or a handcrafted treat from a boutique creamery, Birthday Cake IceCream is more accessible than ever. Here’s how to track down this festive flavor.

    Store Brands vs. Boutique Creameries

    • Store Brands: Major supermarkets and chains often stock Birthday Cake Ice Cream, especially around holiday seasons or during the summer. Brands like Blue Bell and Tillamook are commonly found in the frozen section and offer a reliable, delicious experience.
    • Boutique Creameries: For those seeking something a little more special, boutique creameries often feature their own take on Birthday Cake IceCream. These versions might include unique mix-ins like handmade cake pieces or exotic sprinkles. They’re a fantastic option if you’re looking for a gourmet twist on this classic flavor.

    Geographic Availability

    • Local Availability: In the United States, you’re likely to find birthday cake ice cream at most local grocery stores and ice cream parlors, especially in urban and suburban areas.
    • Seasonal Availability: While generally available year-round, some special editions or flavors from smaller creameries might only appear seasonally. It’s always a treat to see what new twists on Birthday Cake IceCream appear around actual birthday times and festive seasons.

    If you’re curious about tasting different brands and formulations, check out your nearest ice cream shop or specialty food store. For those who prefer shopping from home, many brands are also available online, where you can browse a broader range of options and even find reviews to help guide your choices.

    Pairing Birthday Cake Ice Cream with Other Desserts

    In this additional section, let’s explore the delightful possibilities of pairing Birthday Cake Ice Cream with other desserts to elevate your sweet experiences. Combining this fun flavor with other treats can create unforgettable dessert courses, perfect for any celebration or a cozy night in.

    Perfect Dessert Combinations with Birthday Cake IceCream

    • With Freshly Baked Cookies: Imagine a scoop of vibrant Birthday Cake IceCream sandwiched between two soft, warm cookies. The contrast between the cool, creamy ice cream and the chewy texture of the cookies creates a heavenly treat.
    • As Part of a Sundae: Layer Birthday Cake Ice Cream with hot fudge, whipped cream, and a cherry on top. Add a sprinkle of nuts or colorful candy pieces for an extra festive touch.
    • Alongside Fruit Pies: Pair a scoop with a slice of apple or cherry pie. The sweetness of the pie complements the creamy and fun flavors of the ice cream, making for a balanced and indulgent dessert.

    Tips for Creating Dessert Pairings

    • Consider Textures: Combining different textures, such as the crunchiness of cookies or the flakiness of pie crust, with the smoothness of ice cream makes each bite more interesting and satisfying.
    • Balance Flavors: When pairing desserts, think about flavors that complement or contrast well. The sweetness and festivity of Birthday Cake IceCream work well with both rich and subtle flavors.
    • Be Creative: Don’t be afraid to experiment with unconventional pairings. Sometimes the most unexpected combinations can turn out to be the most delicious.

    These pairing ideas are just the beginning! Let your creativity and personal taste guide you to discover even more ways to enjoy Birthday Cake IceCream with other desserts. Whether you’re planning a party or simply treating yourself, these ideas are sure to bring a little extra joy and indulgence to your dessert table.

    Frequently Asked Questions

    In this section, we address some common questions about Birthday Cake IceCream that ice cream enthusiasts frequently ponder. Whether you’re a curious newcomer or a seasoned fan, these FAQs will help deepen your understanding of this delightful treat.

    What makes birthday cake ice cream different from other flavors?

    Birthday Cake IceCream stands out due to its festive, fun elements like sprinkles, chunks of cake, and swirls of frosting. These ingredients not only add texture but also infuse the ice cream with the nostalgic flavor of a classic birthday cake.

    Can birthday cake ice cream be lactose-free?

    Absolutely! For those who are lactose intolerant or prefer dairy-free options, several brands offer lactose-free versions of Birthday Cake IceCream. These products typically use alternative milk bases such as almond, soy, or coconut milk, providing the same delicious flavor without the dairy.

    How can I make birthday cake ice cream if I don’t have an ice cream maker?

    No worries if you don’t own an ice cream maker! You can still make Birthday Cake IceCream using a simple no-churn method:

    1. Whip heavy cream until stiff peaks form.
    2. Fold in condensed milk, vanilla extract, a bit of dry cake mix, and any desired mix-ins like sprinkles or cake pieces.
    3. Freeze the mixture in a container for at least 6 hours or overnight until firm.

    This method is great for an easy, homemade version of the ice cream without needing specialized equipment.

    By answering these questions, we hope to make Birthday Cake IceCream more accessible and enjoyable for everyone. If you have more questions, don’t hesitate to reach out or check online forums where ice cream lovers gather to share tips and tricks.

    Stay tuned for the final part of our guide, where we’ll look at the evolving trends and future possibilities in the world of ice cream flavors, including innovative takes on Birthday Cake Ice Cream.

    Conclusion

    That concludes our comprehensive guide on Birthday Cake IceCream. From exploring different brands and varieties to diving into DIY recipes and understanding its nutritional aspects, we’ve covered everything you need to know about this festive and beloved flavor. As we’ve seen, Birthday Cake Ice Cream is more than just a treat for the taste buds; it’s a celebration of joy and creativity in every scoop.

    Whether you’re a fan of the classic versions with chunks of cake and swirls of frosting or prefer exploring dairy-free or low-sugar alternatives, there’s something for everyone in the world of Birthday Cake IceCream. And with the ongoing innovations in the ice cream industry, we can only anticipate even more exciting and delightful variations in the future.

    So next time you find yourself reaching for a scoop of this fun flavor, remember the rich history and the passionate creativity behind it. Celebrate life’s little moments with a bowl of Birthday Cake IceCream—because every day deserves a sprinkle of celebration.

    We appreciate you coming along on this lovely adventure. We hope you’re inspired to try making your own batch at home or perhaps venture out to discover new brands and flavors. Keep exploring, keep tasting, and most importantly, keep celebrating with every scoop!


  • Valentine’s Day Chocolate Covered Strawberries: Easy Recipes & Tips

    Valentine’s Day Chocolate Covered Strawberries: Easy Recipes & Tips

    Valentine’s Day Chocolate Covered Strawberries: A Sweet Gesture of Love

    Diving into the world of homemade Valentine’s Day Chocolate Covered Strawberries brings a touch of sweetness to this romantic occasion. Whether you’re aiming to impress that special someone or just indulge in a delicious treat, these delectable morsels combine the juicy allure of strawberries with the rich, velvety embrace of chocolate. In this comprehensive guide, we’ll walk you through selecting the best ingredients, preparing your strawberries, and mastering the art of chocolate dipping. So, grab your apron, and let’s make this Valentine’s Day unforgettable with your own handcrafted sweet delights!

    Choosing Your Ingredients

    Selecting the Best Strawberries

    Picking the right strawberries is crucial for creating perfect Valentine’s chocolate strawberries. Aim for fresh, plump, and brightly colored berries with a uniform size. They should be firm to the touch, with no bruises or blemishes, and the caps should be fresh and green. The best strawberries are often found at your local farmers’ market or a well-stocked grocery store.

    Types of Chocolate for Dipping

    The choice of chocolate is just as important as the strawberries themselves. For a glossy finish and smooth flavor, opt for high-quality chocolate. You might consider semisweet or dark chocolate for a classic taste, or white chocolate for a sweeter, more decorative option. Melting chocolates specifically designed for dipping are ideal because they melt smoothly and harden quickly without tempering. Remember, the better the quality of chocolate, the more delectable your February 14th chocolate treats will be.

    For those looking to explore different flavors, why not try a combination? Drizzling white chocolate over dark can create a visually appealing treat that tastes as good as it looks.

    Preparing Your Strawberries

    Washing and Drying

    Before you start the chocolate dipping process, it’s crucial to prepare your strawberries so that the chocolate adheres properly. Start by gently washing the strawberries under cold water to remove any dirt or residue. After washing, it’s imperative to dry them thoroughly. Any moisture left on the strawberries can cause the chocolate to seize, which affects the smoothness of your final product. Use paper towels to pat each strawberry dry, or let them air dry on a clean kitchen towel. Ensuring your strawberries are bone dry is a simple yet critical step in the success of your romantic chocolate-dipped strawberries.

    Melting the Chocolate

    valentines chocolate covered strawberries

    Microwave Method

    Microwave chocolate melting is an efficient and practical method. To avoid burning the chocolate, chop it into uniform pieces and place it in a microwave-safe bowl. Heat the chocolate at 50% power in 30-second intervals, stirring in between, until it’s completely melted and smooth. This method prevents the chocolate from overheating, maintaining a silky texture for dipping.

    Double Boiler Method

    For those who prefer a more traditional approach, melting chocolate using a double boiler allows for more control over the heat. Fill a pot with a few inches of water and bring it to a simmer. Then, place a heat-resistant bowl on top of the pot, ensuring the bottom doesn’t touch the water. Add the chopped chocolate to the bowl, stirring constantly until it melts. This method helps distribute the heat evenly, reducing the risk of scorching your chocolate.

    Using these techniques ensures that your chocolate melts perfectly, ready for creating those delectable February 14th chocolate treats. Whether you opt for the quick microwave method or the controlled double boiler technique, both will yield a smooth, glossy chocolate ready for strawberry dipping.

    Dipping and Decorating

    Dipping Strawberries in Chocolate

    Once your chocolate is silky and smooth, it’s time to dip! Hold a strawberry by the stem or leaves, dip it into the chocolate, swirling gently to ensure it’s beautifully coated. Lift and let the excess chocolate drip off for a clean finish. This technique helps achieve an even layer of chocolate, which is essential for perfect Valentine’s chocolate strawberries. For those without stems, use a skewer or fork to dip the strawberries, ensuring they are fully immersed and evenly coated.

    Decorative Options

    After dipping, set your strawberries on a baking sheet lined with parchment paper. This is your chance to get creative with decorations! While the chocolate is still wet, sprinkle with toppings like crushed nuts, mini chocolate chips, or festive sprinkles to add texture and flair to your treats. For a more elegant touch, drizzle a contrasting chocolate over the dipped strawberries using a small piping bag or a fork dipped in melted chocolate. This not only enhances the visual appeal but also adds a delightful flavor contrast.

    Setting and Serving

    After dipping and decorating your strawberries, they need to set. Place them on a baking sheet lined with parchment paper and allow the chocolate to harden. This can take place at room temperature or in the refrigerator, depending on your climate and the thickness of the chocolate coating. The setting is crucial for achieving that satisfying snap of chocolate when bitten into, a hallmark of well-made Valentine’s chocolate strawberries.

    Presentation Ideas

    Presentation can turn simple chocolate-covered strawberries into a heartfelt gift or an impressive dessert for your Valentine’s Day celebration. Arrange them beautifully on a serving platter, or place them in a decorative box if giving them as a gift. Pairing them with a homemade card or some flowers can add that extra touch of love and thoughtfulness to your February 14th chocolate treats.

    These steps not only ensure delicious results but also create a memorable experience for both the maker and the receiver of these delightful Valentine’s Day Chocolate Covered Strawberries.

    Storing and Making Ahead

    valentines chocolate covered strawberries

    Storage Tips

    To ensure your Valentine’s chocolate strawberries stay fresh and visually appealing, proper storage is key. If not serving immediately, place them in a single layer on a plate or in a container lined with parchment paper. This setup prevents the strawberries from sticking to each other. Cover them loosely with wax paper and refrigerate. It’s best to enjoy these treats within 24-48 hours to maintain optimal freshness and texture. Before serving, let them sit at room temperature for about 30 minutes to enhance their flavor and make the chocolate more luscious.

    Making Ahead of Time

    Preparing your romantic chocolate-dipped strawberries a day ahead can be a great time-saver for your Valentine’s celebration. Follow all the steps for washing, drying, dipping, and decorating your strawberries and then store them as recommended above. This approach not only helps spread out your preparation efforts but also allows the chocolate to set perfectly, ensuring each strawberry is ready to impress.

    Pairing and Serving Ideas

    Creative Pairings with Chocolate Covered Strawberries

    When presenting your Valentine’s Day Chocolate Covered Strawberries, think beyond the box! Pairing these treats with other items can elevate your Valentine’s Day celebration to an unforgettable experience. Consider serving them alongside a cup of gourmet hot chocolate for a double chocolate delight. For a non-alcoholic pairing, why not offer a selection of artisanal cheeses and fresh fruit to complement the sweet and rich flavors of the strawberries? This combination can create a sophisticated dessert platter that’s sure to impress.

    Serving Suggestions for Special Occasions

    Valentine’s chocolate strawberries are versatile and can be a standout at any gathering, not just on Valentine’s Day. They make a stunning addition to wedding dessert tables, anniversary celebrations, or even as a luxurious treat during a cozy night in. Presenting these strawberries on a tiered dessert stand or on a bed of rose petals can add a touch of elegance and romance to any setting.

    These creative ideas for pairing and serving your chocolate-covered strawberries will help make your culinary creation the centerpiece of any special occasion, ensuring they’re as joyous to present as they are to prepare and enjoy.

    Health and Dietary Considerations

    Catering to Dietary Restrictions

    When crafting Valentine’s Day Chocolate Covered Strawberries, consider the dietary needs of your audience. Offering variations can ensure everyone enjoys this sweet treat without compromise. For those with vegan preferences or dairy allergies, use dairy-free chocolate options available in most health food stores. Similarly, for gluten-sensitive guests, ensure that any added toppings or chocolate brands are certified gluten-free.

    Health Benefits of Ingredients

    While Valentine’s chocolate strawberries are a decadent treat, they also carry some health benefits, making them a guilt-free indulgence in moderation. Strawberries are a great source of vitamins, fiber, and particularly high in antioxidants, known for their heart health benefits. Dark chocolate, rich in minerals like iron, magnesium, and zinc, offers cardiovascular health benefits when consumed responsibly. Highlighting these aspects can make the treat more appealing to health-conscious individuals.

    Incorporating these thoughtful considerations will not only make your treats inclusive but also add an informative angle that shows care in preparation, making your Valentine’s Day celebration thoughtful and inclusive.

    Gifting and Packaging Tips

    Creative Gifting Ideas

    Valentine’s Day Chocolate Covered Strawberries make a heartfelt gift that can be even more special with thoughtful presentation. Consider custom packaging options like decorative boxes lined with silk or velvet, adding a luxurious touch. For a personal flair, include a handwritten note or a custom card expressing your sentiments. Packaging these treats in clear cellophane tied with a ribbon also allows the beauty of your handmade gift to shine through, making it irresistible at first glance.

    Sustainable Packaging Options

    In an effort to be environmentally conscious, consider using sustainable packaging materials. Biodegradable trays and wraps are available and provide a responsible way to present your chocolate-covered strawberries. Additionally, reusable tins or mason jars can serve as both an attractive and eco-friendly option, which recipients can repurpose later, extending the life and memory of your gift.

    By focusing on both the aesthetics and the environmental impact of your packaging, you can elevate your Valentine’s Day chocolate strawberries into a gift that not only delights the senses but also respects the planet.

    Part 7: FAQs

    Common Questions and Answers

    In this section, we’ll address some frequently asked questions to help you perfect your Valentine’s Day Chocolate Covered Strawberries:

    • How do I prevent the chocolate from seizing?
      Ensure the strawberries are completely dry and avoid getting water in the chocolate. Use a dry bowl and utensils when melting chocolate.
    • What’s the best chocolate for dipping?
      High-quality melting chocolate is ideal for a smooth, glossy finish. You can use semi-sweet, dark, or white chocolate depending on your taste preference.
    • Can I add flavors to the chocolate?
      Absolutely! Infuse the melted chocolate with a dash of vanilla extract or a sprinkle of sea salt to elevate the flavor. Experimenting with a hint of chili powder can also add a surprising kick.
    • How do I make the chocolate shiny?
      Adding a small amount of coconut oil or vegetable oil to the melting chocolate can give it a beautiful sheen, making your strawberries look even more enticing.

    These tips and tricks should help you create beautiful and delicious chocolate-covered strawberries that will add a special touch to your Valentine’s Day. Each step, from selecting the best ingredients to presenting them beautifully, contributes to making this treat unforgettable. Enjoy the process and the pleasure of sharing these sweet delights!

    Conclusion

    Wrapping up our guide to making Valentine’s Day Chocolate Covered Strawberries, we’ve explored every step to ensure you can create this classic romantic treat with confidence and creativity. From selecting the juiciest strawberries to mastering the art of chocolate melting and decorating, these treats are more than just confections—they’re a labor of love.

    Remember, the key to perfect Valentine’s chocolate strawberries lies in the details: choosing quality ingredients, ensuring the strawberries are dry, melting the chocolate correctly, and applying those personal touches that make your creations unique. Whether you’re setting a romantic mood or simply treating yourself, these chocolate-covered strawberries promise to be a delightful highlight.

    Embrace the opportunity to express your affection through this sweet endeavor. The act of making these treats can be as enjoyable as watching the joy they bring to others. So, dip, decorate, and deliver with love, knowing that every strawberry dipped in chocolate carries a message of care and sweetness.

    Thank you for following along in this delicious adventure. May your Valentine’s Day be filled with as much love and sweetness as the chocolate-covered strawberries you’ve prepared!


  • Frozen Chocolate Covered Strawberries: Easy & Nutritious Treats

    Frozen Chocolate Covered Strawberries: Easy & Nutritious Treats

    Introduction to Frozen Chocolate Covered Strawberries

    Frozen chocolate covered strawberries offer the perfect blend of sweet, succulent strawberries and rich, indulgent chocolate. This delectable treat is not only a fantastic way to satisfy your sweet tooth but also incorporates a host of health benefits, making it a guilt-free indulgence. Whether you’re a chocolate aficionado or a fruit lover, these frozen delights cater to everyone’s taste buds. In this comprehensive guide, we’ll explore everything from the nutritional benefits of these berries to various creative ways to serve them. Let’s dive into the delicious world of frozen chocolate covered strawberries!

    The Appeal of Frozen Chocolate Covered Strawberries

    Who can resist the charm of frozen chocolate covered strawberries? This treat combines the cool, refreshing taste of frozen strawberries with the creamy, rich flavor of dark chocolate. It’s a match made in heaven! Perfect for any occasion, from a summer gathering to a cozy winter evening, these treats are not just delicious but also incredibly simple to prepare.

    The allure of frozen strawberries chocolate lies in its simplicity and the delightful contrast between the cool berry and the melt-in-your-mouth chocolate coating. Whether you’re looking for a quick dessert option or a fun activity with kids, dipping strawberries in chocolate and then freezing them offers an engaging experience with a rewarding, tasty outcome.

    So, why choose frozen berries with chocolate? Apart from their irresistible taste, they offer a myriad of health benefits. Strawberries, when frozen, retain much of their nutritional value — packed with antioxidants and fiber. When paired with dark chocolate, preferably one that’s 70% cocoa or more, you get an added boost of antioxidants and healthy fats. These elements make frozen chocolate covered strawberries not only a delightful treat but also a nutritious snack option.

    Stay tuned as we delve deeper into the nutritional benefits of these delightful treats in the next section, ensuring you feel as good as you indulge. Plus, find out how easy they are to whip up with just a few simple ingredients!

    Nutritional Benefits of Frozen Chocolate Covered Strawberries

    frozen chocolate covered strawberries

    Antioxidants and Fiber in Strawberries

    Strawberries are a powerhouse of nutrients, particularly known for their high antioxidant content. These antioxidants help combat free radicals in your body, potentially reducing the risk of chronic diseases. Frozen strawberries, used in making frozen chocolate covered strawberries, maintain much of their nutritional integrity, providing a robust dose of vitamin C and other antioxidants.

    Moreover, strawberries are a great source of dietary fiber. Fiber is essential for digestive health, helping to regulate digestion and prevent constipation. Including these berries in your diet can contribute to your daily fiber intake, making frozen strawberries chocolate not only tasty but also beneficial for your gut health.

    Benefits of Dark Chocolate

    Dark chocolate is not just a guilty pleasure; it contains compounds that can actually benefit your health. Rich in iron, magnesium, and zinc, dark chocolate provides essential minerals that support bodily functions. The key here is to choose a chocolate that is at least 70% cocoa, which ensures a higher concentration of antioxidants and less sugar.

    The flavonoids in dark chocolate are known for their role in heart health. They help improve blood flow to the brain and heart and reduce the risk of blood clotting, which can lead to heart attacks and stroke. Thus, when frozen berries with chocolate are consumed in moderation, they contribute to cardiovascular health.

    Incorporating Healthy Fats

    The addition of a small amount of coconut oil in the chocolate mixture not only makes the chocolate silkier but also adds healthy fats to the dessert. Coconut oil contains medium-chain triglycerides (MCTs), which are metabolized differently than other types of fat, leading to potential benefits like improved metabolic health.

    Combining the nutritional benefits of strawberries, dark chocolate, and a hint of coconut oil makes frozen chocolate covered strawberries a snack that not only satisfies your sweet cravings but also supports your health. This treat is a perfect example of a dessert that not only tastes good but also provides numerous health advantages, ensuring you can indulge without any guilt!

    In the next section, we’ll explore how to prepare these nutritious and delicious treats step-by-step, making sure you can enjoy them anytime you wish!

    Preparation and Ingredients

    Required Ingredients

    To create your own frozen chocolate covered strawberries, you’ll need just a few simple ingredients. Here’s what you should gather:

    1. Frozen Strawberries: Choose unsweetened frozen strawberries to avoid extra sugars. Make sure they are firm and well-shaped for the best results when dipped.
    2. Dark Chocolate: Opt for high-quality dark chocolate with at least 70% cocoa content. This not only ensures you’re getting a dose of antioxidants but also keeps the sweetness balanced.
    3. Coconut Oil: A teaspoon of coconut oil helps thin out the chocolate, making it easier to coat the strawberries smoothly. It also adds a slight hint of coconut flavor, which complements the chocolate beautifully.

    These ingredients are not only accessible but also pack a punch in terms of health benefits, as discussed earlier.

    Step-by-Step Preparation Guide

    Creating frozen chocolate covered strawberries is surprisingly simple. Here’s how you can do it:

    1. Melt the Chocolate: Break the dark chocolate into small pieces and add it to a microwave-safe bowl along with the coconut oil. Microwave in short bursts of 20 seconds, stirring in between, until completely melted and smooth.
    2. Dip the Strawberries: Hold the strawberries by the stem, and dip each one into the melted chocolate, swirling slightly to ensure it’s well-coated.
    3. Set the Chocolate: Lay the dipped strawberries on a tray lined with wax paper. The cold of the frozen strawberries will help the chocolate set almost immediately.
    4. Freeze Again: Once all strawberries are dipped and the chocolate has set, place the tray back into the freezer for about 15 minutes to ensure everything is firm.

    And there you have it! Delicious frozen chocolate covered strawberries ready to be enjoyed. They can be served immediately as a refreshing treat or stored in an airtight container in the freezer for later indulgence.

    Stay tuned for the next part, where we’ll dive into various creative variations and serving suggestions to elevate your frozen chocolate covered strawberries experience!

    Variations and Serving Suggestions

    frozen chocolate covered strawberries

    Different Chocolate Varieties

    One of the joys of making frozen chocolate covered strawberries is experimenting with different types of chocolate. While dark chocolate is a popular choice for its health benefits, you can also try milk chocolate for a sweeter taste or white chocolate for a creamy, decadent twist. For an extra flavor kick, consider using chocolate infused with orange zest, mint, or even chili for a surprising spice.

    Additional Toppings and Flavors

    To make your frozen strawberries chocolate even more special, sprinkle them with a variety of toppings before the chocolate sets. Here are a few ideas:

    • Nuts: Finely chopped almonds, pecans, or walnuts add a crunchy texture and nutty flavor.
    • Seeds: Sesame seeds or chia seeds can offer a nutritious boost.
    • Spices: A light dusting of cinnamon, cardamom, or nutmeg can enhance the fruit’s sweetness.
    • Dried Fruit: Small pieces of dried apricots, figs, or coconut flakes can introduce a new layer of flavors.

    Each topping not only adds a unique twist but also increases the nutritional profile of your treat.

    Presentation Ideas

    Presentation matters, especially when you’re serving frozen berries with chocolate at a party or as a special treat. Consider these ideas:

    • Chocolate Drizzle: Use a fork to drizzle a contrasting chocolate (like white chocolate over dark) for an artistic finish.
    • Mini Skewers: Place several chocolate-covered strawberries on small skewers for easy eating and a fancy look.
    • Serving Platters: Arrange them beautifully on a chilled platter with mint leaves or edible flowers for a touch of elegance.

    These creative variations and serving suggestions are sure to impress your guests and make your frozen chocolate covered strawberries the highlight of any gathering.

    In the next section, we’ll answer some frequently asked questions about frozen chocolate covered strawberries, helping you to perfect your technique and enjoy these treats to the fullest!

    Frequently Asked Questions About Frozen Chocolate Covered Strawberries

    Can I use milk chocolate instead of dark?

    Absolutely! While dark chocolate is favored for its health benefits and rich flavor, milk chocolate is a perfectly fine substitute for those who prefer its creamier, sweeter taste. Milk chocolate can make your frozen chocolate covered strawberries more palatable to children or those with a sweet tooth. Just keep in mind that milk chocolate generally contains more sugar and fewer antioxidants than dark chocolate.

    How long do they last in the freezer?

    Frozen chocolate covered strawberries can be kept in the freezer for up to two months if stored properly. To ensure they maintain their best quality, store them in an airtight container or a tightly sealed freezer bag. This will help to prevent freezer burn and taste degradation over time. Always let them sit at room temperature for a few minutes before serving for the best texture and flavor experience.

    Best methods for melting chocolate

    To achieve smooth, perfectly melted chocolate, you can use either a microwave or a double boiler. If using a microwave, place the chocolate in a microwave-safe bowl, and heat it in intervals of 20-30 seconds, stirring in between until fully melted. For a double boiler method, place the chocolate in a heat-proof bowl over a pot of simmering water, ensuring the water does not touch the bottom of the bowl. Stir continuously until the chocolate has completely melted. This method allows for more control over the heat, reducing the risk of burning the chocolate.

    These FAQs aim to address common concerns and tips related to making frozen chocolate covered strawberries, ensuring you have all the information needed to make this delightful treat successfully.

    Next, we’ll explore other healthy frozen treats that can be enjoyed alongside your frozen chocolate covered strawberries or on their own, providing you with more delicious, nutritious dessert options.

    Exploring Other Healthy Frozen Treats

    Frozen Yogurt Bites

    If you’re looking for an alternative that’s equally refreshing and easy to prepare, frozen yogurt bites are an excellent choice. Simply spoon flavored or plain yogurt into silicone molds, add fresh fruits or a drizzle of honey, and freeze until solid. These bites are perfect for a quick, healthy snack or a light dessert, providing a good source of calcium and probiotics.

    Vegan Ice Cream Alternatives

    For those who follow a vegan diet or are lactose intolerant, there are numerous dairy-free ice creams available that make use of almond milk, coconut milk, or soy milk as a base. These alternatives offer the creamy texture and sweet flavor of traditional ice cream but are made from plant-based ingredients. You can easily make your own by blending frozen bananas with a splash of plant milk and adding your favorite mix-ins like nuts, berries, or cocoa powder.

    Fruit-Based Sorbets

    Sorbet is a delightful frozen treat made primarily from fruit and sugar, perfect for cleansing the palate or serving as a light dessert. It’s incredibly simple to make at home—puree your choice of fruits, strain them to remove any seeds or pulp, mix with a little sugar, and freeze. The result is a smooth, icy dessert that’s both refreshing and low in fat.

    These alternative healthy frozen treats provide delicious options for everyone, regardless of dietary preferences or restrictions. Like frozen chocolate covered strawberries, they offer a fantastic way to enjoy something sweet while still keeping health in mind.

    In our final part, we’ll wrap up with some concluding thoughts on why frozen chocolate covered strawberries and these other treats are a joy to make and eat, emphasizing the balance they bring between indulgence and health benefits.

    Wrapping Up: The Joy of Frozen Chocolate Covered Strawberries

    Encouraging Healthy Snacking

    Frozen chocolate covered strawberries represent a sublime balance between indulgence and health, making them a perfect treat for any occasion. Not only do they satisfy the sweet tooth with their rich, chocolaty coating, but they also provide essential nutrients thanks to the strawberries themselves and the dark chocolate. This treat is an excellent example of how dessert doesn’t have to be a guilty pleasure; it can also contribute positively to your diet.

    Moreover, the simplicity of preparing frozen chocolate covered strawberries makes them accessible to everyone, from cooking novices to seasoned chefs. They require minimal ingredients and effort but deliver maximum flavor and aesthetic appeal. Whether you’re hosting a party, looking for a fun cooking activity with children, or just want to treat yourself, these delights are sure to impress.

    Frozen chocolate covered strawberries are not just delicious and healthy; they are also versatile. As explored in the variations and FAQs, you can easily customize them to your taste preferences or dietary needs, making them a go-to dessert option for a diverse crowd.

    Ultimately, the joy of making and enjoying frozen chocolate covered strawberries lies in their ability to bring people together, offering a shared moment of pleasure that is both sweet and wholesome. They remind us that the best treats are those that not only taste good but also feel good to eat, aligning with a lifestyle that values joy and health in equal measure.

    Thank you for joining us on this delicious journey through the world of frozen chocolate covered strawberries. Here’s to many sweet moments ahead!


  • White Chocolate Covered Strawberries: A Sweet Delight

    White Chocolate Covered Strawberries: A Sweet Delight

    Introduction to White Chocolate Covered Strawberries

    Indulging in the sweetness of White Chocolate Covered Strawberries turns any moment into a celebration. This article unfolds the art of crafting these delightful treats, ensuring every bite is a luxurious experience. Whether for a special occasion or a simple treat-yourself day, mastering the combination of juicy strawberries with creamy white chocolate is a culinary joy. Let’s dive into the essential steps to create these tantalizing desserts, from selecting the right ingredients to perfecting the chocolate dip.

    What You Need to Make White Chocolate Covered Strawberries

    Ingredients

    White Chocolate Covered Strawberries begin with three key components: white chocolate, fresh strawberries, and a sprinkle of creativity. Choosing high-quality white chocolate is crucial for a smooth and rich finish. Look for chocolate that contains actual cocoa butter to ensure the best melting quality and flavor. The strawberries should be ripe, bright red, and firm, with no bruises or blemishes. Remember, the better the ingredients, the more delightful the results.

    Necessary Tools

    Before you start, gathering the right tools will make the process seamless and fun. You’ll need a double boiler for melting the chocolate, ensuring it heats gently without seizing. Parchment paper is another must-have, providing a non-stick surface for your dipped strawberries to set. Lastly, consider using a thermometer to monitor the chocolate’s temperature, which is helpful for achieving the perfect consistency without overheating.

    Stay tuned as we delve deeper into the preparation techniques in Part 2, ensuring your chocolate dipped strawberries are not only irresistible but also beautifully crafted.

    How to Prepare White Chocolate Covered Strawberries

    white chocolate covered strawberries

    Step-by-Step Preparation

    The magic of making White Chocolate Covered Strawberries lies in the simplicity of the process, coupled with a touch of finesse. Begin by melting your white chocolate in a double boiler. If you don’t have one, simply set a heatproof bowl over a pot of simmering water; the bowl should not touch the water. Stir continuously until the chocolate is silky smooth and free of lumps. Achieving the right temperature is crucial, so aim for about 110°F (43°C) — warm enough to melt but cool enough to prevent burning.

    Once melted, hold the strawberries by the stem and dip them one at a time into the chocolate, swirling gently to coat evenly. Allow the excess chocolate to drip off by gently shaking the strawberry, then lay it on the parchment paper. The technique is simple, but the result is utterly sophisticated.

    Common Mistakes and Tips

    Even the simplest recipes have their pitfalls, and chocolate dipped strawberries are no exception. A common mistake is not drying the strawberries thoroughly, which can cause the chocolate to seize or not stick properly. Ensure each strawberry is completely dry before dipping.

    Another tip is to avoid using strawberries straight from the refrigerator. Room temperature berries are ideal as they won’t cause the chocolate to harden too quickly, allowing for a smoother coating. Remember, patience is key to perfection in this delightful endeavor.

    In the next part , we’ll explore creative variations to elevate your White Chocolate Covered Strawberries to the next level, ensuring each berry is as unique as the occasion they’re made for. Stay tuned for more sweet inspirations!

    Creative Variations of Chocolate Covered Strawberries

    Toppings and Decorations

    Once you’ve mastered the basic dip, it’s time to jazz up your White Chocolate Covered Strawberries with a variety of toppings. Sprinkles add a playful touch and are perfect for themed parties or holidays. For a more elegant look, try drizzling with a contrasting dark or milk chocolate. You can also roll the freshly dipped strawberries in chopped nuts or toasted coconut for a crunchy texture that complements the creamy white chocolate beautifully.

    To make your treats truly stand out, consider using mini chocolate chips or colorful candy pearls before the chocolate sets. Each addition not only enhances the flavor but also the visual appeal, making your strawberries a centerpiece-worthy addition to any table.

    Flavor Combinations

    Experimenting with flavor combinations can transform your strawberries into a gourmet experience. Infuse your white chocolate with a touch of vanilla or almond extract to add depth to the sweetness. For those who adore a hint of zest, a light grating of orange or lemon zest mixed into the chocolate prior to dipping can offer a refreshing twist.

    Pairing different types of chocolate is another way to excite the palate. Try layering your dipped strawberries with swirls of dark and white chocolate for a sophisticated flavor profile. Each bite will deliver a delightful contrast of flavors that are sure to impress any chocolate connoisseur.

    Serving and Storing Chocolate Covered Strawberries

    white chocolate covered strawberries

    Best Practices for Serving

    When it comes to serving your White Chocolate Covered Strawberries, presentation is key. Arrange them elegantly on a platter, perhaps layered with parchment paper between tiers if you’re stacking them. For a romantic touch, a clear glass plate or a mirror tray can enhance their visual allure, making each strawberry shine. If you’re serving them at a party, consider using mini cupcake liners for individual servings, which adds a touch of class and makes them easy to handle.

    To really highlight the freshness, serve the strawberries the same day they are made. If they need to be prepared a few hours ahead of time, keep them in a cool, dry place rather than the refrigerator to prevent condensation from softening the chocolate.

    Storage Tips

    While White Chocolate Covered Strawberries are best enjoyed fresh, sometimes you need to store them. If you must refrigerate your strawberries, cover them loosely with wax paper and then with plastic wrap to minimize exposure to moisture. This setup helps prevent the strawberries from sweating and the chocolate from softening.

    For optimal freshness, enjoy the strawberries within 24 hours. Long-term storage is not recommended as the strawberries will begin to release moisture, which can lead to soggy chocolate. Remember, the key to the best chocolate-covered experience is in the freshness of the berries and the snap of the chocolate coating.

    Advanced Techniques and Professional Tips

    For those who want to elevate their White Chocolate Covered Strawberries to a professional level, this section delves into advanced techniques and expert tips that can enhance both the appearance and flavor of your creations.

    Tempering Chocolate for a Glossy Finish

    To achieve a glossy, crisp coating on your strawberries, tempering the white chocolate is key. Tempering involves carefully melting and cooling the chocolate to stabilize it for a shiny, firm finish. This process ensures that the chocolate sets perfectly at room temperature, making your strawberries look and feel professional.

    Infusing Flavors into Chocolate

    Enhance the flavor of your white chocolate by infusing it with natural oils and extracts. Consider adding a hint of orange or peppermint oil for a subtle burst of freshness, or vanilla bean paste for a rich, aromatic depth. These infusions can transform the simple act of eating a strawberry into a more complex and satisfying taste experience.

    Utilizing Professional Dipping Tools

    For more uniform and mess-free strawberries, professional dipping tools can be extremely helpful. These tools allow you to dip and lift the strawberries without damaging them, ensuring a perfect coat every time. They also help in achieving a cleaner presentation, as they minimize dripping and uneven chocolate layers.

    Creative Plating Techniques

    Presentation is crucial, especially if you are serving these strawberries at a formal event. Explore creative plating techniques such as drizzling contrasting chocolate on the plate, arranging the strawberries in an artistic pattern, or garnishing with edible gold leaf for an extra touch of luxury.

    Learning from the Experts

    Consider watching tutorial videos from seasoned chocolatiers or attending a workshop to refine your skills further. These resources can provide valuable insights into the finer points of chocolate handling and artistic presentation, helping you to produce confectionery-quality strawberries at home.

    By incorporating these advanced techniques and professional tips, your White Chocolate Covered Strawberries will not only taste delightful but also display a level of craftsmanship that truly stands out. Enjoy the process of mastering these skills, and take pride in the exquisite desserts you create!

    Frequently Asked Questions

    Can I Use Frozen Strawberries?

    No, frozen strawberries should not be used for making White Chocolate Covered Strawberries. As they thaw, frozen strawberries release a lot of moisture, which can make the chocolate soggy and prevent it from adhering properly. Always use fresh, firm strawberries for the best results.

    How Do I Prevent the Chocolate from Cracking?

    To prevent the chocolate from cracking once it sets on the strawberries, ensure that the chocolate is not too hot when you dip the strawberries. Additionally, allowing the strawberries to come to room temperature before dipping can help minimize temperature differences that cause the chocolate to contract and crack.

    What Can I Do If My Chocolate Becomes Too Thick?

    If your white chocolate becomes too thick or starts to seize, add a teaspoon of coconut oil or vegetable oil and stir gently. The oil helps thin the chocolate and restore a smooth consistency suitable for dipping. Be careful not to add too much, as it can affect the setting of the chocolate.

    How Long Should I Chill the Chocolate Covered Strawberries?

    After dipping the strawberries, chill them in the refrigerator for about 10 to 15 minutes to allow the chocolate to set properly. Avoid leaving them in the fridge for too long, as condensation can form on the chocolate when they are brought back to room temperature.

    Is It Necessary to Use a Double Boiler for Melting Chocolate?

    While a double boiler is ideal for melting chocolate because it provides gentle heat and prevents burning, you can also melt chocolate using a microwave. Heat the chocolate in short bursts of 20 to 30 seconds, stirring in between, to ensure it melts evenly without scorching.

    These FAQs aim to address common concerns and provide useful tips to enhance your experience making White Chocolate Covered Strawberries. By following this guidance, you can achieve delightful results that are both delicious and visually appealing.

    Additional Insights and Final Thoughts

    Experimenting with Different Types of Chocolate

    While white chocolate is a popular choice for White Chocolate Covered Strawberries, don’t hesitate to experiment with different types of chocolate. Dark chocolate offers a rich, intense flavor, while milk chocolate provides a sweeter, creamier alternative. You can even use flavored chocolates, such as orange or mint, to add an unexpected twist to your treats.

    Creating a Beautiful Gift Presentation

    Chocolate dipped strawberries make excellent gifts. To create an attractive gift presentation, consider arranging your finished strawberries in a decorative box lined with colored tissue paper or a silk cloth. Add a personal touch with a hand-tied ribbon or a custom label describing the flavors and ingredients. Such attention to detail can turn your delicious treats into a thoughtful and personalized gift.

    The Joy of Sharing

    One of the greatest pleasures of making White Chocolate Covered Strawberries is the opportunity to share them with friends and family. Whether it’s for a special occasion or just a casual gathering, presenting these handmade treats can bring joy and create lasting memories. They are perfect for celebrations, intimate gatherings, or as a sweet surprise for someone special.

    Embracing the Homemade Process

    Finally, embrace the process of making these delightful treats at home. While it might be easier to buy pre-made ones, taking the time to craft them yourself adds a special, personal touch that can’t be bought. Enjoy the process from selecting the best ingredients to the final decoration, and of course, the joy of tasting your creation.

    We hope this guide inspires you to create your own exquisite batch of White Chocolate Covered Strawberries. Whether you’re a seasoned chef or a beginner, the simplicity and elegance of this treat are sure to impress. Happy dipping, and may your strawberries be as sweet as the moments you share!

    Wrapping Up

    As we conclude our guide to creating White Chocolate Covered Strawberries, let’s recap the key points to ensure your success:

    Quality Ingredients Matter

    The foundation of delicious chocolate dipped strawberries is the quality of the ingredients. Opt for high-quality white chocolate and fresh, firm strawberries. This not only enhances the flavor but also ensures the best texture and coating experience.

    Attention to Detail

    From the melting of the chocolate to the dipping and setting of the strawberries, each step should be carried out with care. This ensures that each strawberry is beautifully coated and free of blemishes.

    Customization Is Key

    Personalize your strawberries with various toppings and chocolate types to suit your taste or the occasion. Whether it’s a sprinkle of sea salt for a sweet-salty experience or a mix of chocolates for depth of flavor, these small touches can make a big impact.

    Presentation Perfection

    How you present your White Chocolate Covered Strawberries can turn a simple dessert into an elegant treat. Consider creative plating techniques and decorative elements to enhance the visual appeal and make your creations stand out.

    Enjoy Every Moment

    Lastly, remember to enjoy the process and the final product. Making White Chocolate Covered Strawberries is not just about the end result but also about the joy and creativity that comes with preparing them. Share them with loved ones and take pride in your homemade masterpiece.

    Whether you’re making these for a special event or just as a delightful treat, White Chocolate Covered Strawberries are sure to bring smiles and satisfaction. Thank you for following along with this guide, and may your culinary creations be as enjoyable to make as they are to eat!


  • High Protein Overnight Oats: Nutrition and Easy Recipes

    High Protein Overnight Oats: Nutrition and Easy Recipes

    Introduction to High Protein Overnight Oats

    High Protein Overnight Oats are not just a trend; they’re a lifestyle change that packs a nutritious punch for your breakfast routine. Rich in protein, fiber, and customizable flavors, they serve as an effortless meal prep solution for bustling mornings. This guide delves into the essentials of making your overnight oats protein-rich, along with various dietary options, flavorful twists, and the immense health benefits they offer. Whether you’re looking to streamline your morning routine or simply inject a healthy dose of protein into your diet, this guide covers it all.

    Introduction to High Protein Overnight Oats

    Why Choose High Protein Overnight Oats?

    For those looking to improve their morning routine, high protein overnight oats provide a balanced start. High in protein and full of essential nutrients, these oats keep you full longer and support muscle repair and growth—ideal for those on the go!

    The Basics of Preparing Overnight Oats

    Making overnight oats is as simple as mixing a few key ingredients in a jar and letting them sit overnight. Here’s how to whip up a basic batch:

    1. Select Your Oats: Rolled oats are typically preferred for their texture and ability to soak up liquids.
    2. Add Protein: Incorporate a protein source like Greek yogurt or protein powder to boost your morning energy levels.
    3. Choose Your Liquid: Milk, whether dairy or plant-based like almond or soy, blends well with the oats and protein, creating a creamy texture.
    4. Mix and Store: Combine all ingredients in a jar and refrigerate overnight.

    This no-cook method not only saves time but also enhances the oats’ digestibility and allows the flavors to meld beautifully. Ready to dig deeper into customizing your oats with various ingredients and flavors? Stay tuned for the next sections where we’ll explore all the delicious possibilities!

    Dietary Variations for High Protein Overnight Oats

    high protein overnight oats

    Gluten-Free, Dairy-Free, and Vegan Options

    Accommodating dietary needs doesn’t mean compromising on taste or protein content with overnight oats. Here’s how you can tweak the basic recipe to suit various dietary requirements:

    • Gluten-Free: Opt for certified gluten-free oats if you’re sensitive to gluten or have celiac disease.
    • Dairy-Free: Use plant-based milks such as almond, soy, or oat milk, which are great for adding a creamy texture without the dairy.
    • Vegan: For a vegan version, choose non-dairy milk and yogurt alternatives, and ensure your protein powder is plant-based.

    These simple swaps ensure that everyone can enjoy the benefits of high protein overnight oats regardless of dietary restrictions.

    Adapting to Allergies and Sensitivities

    If you have specific food allergies or sensitivities, high protein overnight oats can still be on your menu. Replace nut butters with seed butters like sunflower for nut-free diets, or use coconut yogurt for a soy-free alternative. Personalizing your oats is not only fun but also ensures you can enjoy this nutritious meal without health concerns.

    Flavor Variations and Add-Ins

    Exploring Popular Flavors

    The variety of high protein overnight oats is what makes them so beautiful. Here are some popular flavor profiles that can transform your breakfast into a delightful experience:

    • Vanilla Berry: Combine vanilla protein powder with your oats and top with fresh strawberries or blueberries for a classic taste.
    • Chocolate Peanut Butter: Mix in chocolate protein powder and a tablespoon of peanut butter for a rich and satisfying treat.
    • Banana Peanut Butter: A dollop of peanut butter and slices of banana make this a hearty and nutritious option.

    Creative Add-Ins to Boost Flavor and Nutrition

    Enhancing your oats isn’t just about flavor; it’s also about packing in nutrition:

    • Seeds and Nuts: Add chia seeds, flaxseeds, or a sprinkle of almond slices to boost omega-3s and fiber.
    • Fruits: Mix in slices of apple, peach, or pineapple for a natural sweetness and a dash of vitamins.
    • Sweeteners and Spices: A hint of cinnamon, a splash of maple syrup, or a spoonful of coconut sugar can elevate the taste.

    Each addition not only brings its unique flavors but also enhances the nutritional profile of your breakfast, making high protein overnight oats a truly balanced meal.

    Nutritional Benefits of High Protein Overnight Oats

    The Power of Protein in Your Morning Meal

    Starting your day with a high protein breakfast like overnight oats can have a profound impact on your overall health and daily performance. Protein is essential for:

    • Muscle Repair and Growth: Especially beneficial after morning workouts, protein helps repair and build muscle tissue.
    • Satiety and Weight Management: High protein meals can help you feel full longer, reducing the urge to snack and aiding in weight management.

    Fiber and Essential Nutrients

    Overnight oats are a powerhouse of dietary fiber, which is crucial for:

    • Digestive Health: Fiber aids in digestion and helps maintain bowel health.
    • Cholesterol Management: Soluble fiber can help lower cholesterol levels, contributing to heart health.

    Adding ingredients like chia seeds or flaxseeds not only increases the protein content but also boosts your intake of omega-3 fatty acids, important for brain health and inflammation reduction.

    Customizing for Nutritional Goals

    Depending on your nutritional goals, high protein overnight oats can be adjusted by varying the ingredients:

    • Low-Calorie Options: Use water or a low-calorie milk alternative and sweeten with stevia or a small amount of honey.
    • High-Energy Versions: Add a scoop of nut butter or a handful of granola for extra calories and energy, perfect for those with high energy demands or athletes.

    Incorporating these nutritious meals into your diet is not just about enjoying a tasty breakfast; it’s about making a strategic choice to enhance your health and vitality.

    Seasonal and Festive Variations of High Protein Overnight Oats

    high protein overnight oats

    Embracing the Seasons

    Adjust your high protein overnight oats recipes to celebrate the flavors of each season, making your breakfast both festive and delicious:

    • Spring: Incorporate fresh berries, lemon zest, and a hint of mint for a refreshing start to the day.
    • Summer: Try tropical flavors like mango, pineapple, and coconut to bring some sunshine to your morning.
    • Fall: Mix in pumpkin puree, cinnamon, nutmeg, and a drizzle of maple syrup for a cozy autumn breakfast.
    • Winter: Add warming spices like ginger, cloves, and dried fruits for a hearty and warming bowl.

    Special Occasion Recipes

    Turn your overnight oats into a special treat for holidays and celebrations:

    • Valentine’s Day: Blend in some cocoa powder and top with strawberries and a sprinkle of chocolate chips for a romantic breakfast.
    • Halloween: Add a layer of carrot cake mix or pumpkin spice mix to match the festive spirit.
    • Christmas: Mix in some peppermint extract and top with crushed candy canes for a festive and protein-packed start to your holiday mornings.

    This part of the guide encourages you to play with different ingredients that align with the time of year or specific holidays, making your high protein overnight oats not only a healthy choice but also a fun and festive part of your daily routine. Experiment with these seasonal tweaks to keep your mornings exciting all year round!

    Integrating High Protein Overnight Oats into Various Diet Plans

    Tailoring Overnight Oats for Different Dietary Needs

    High protein overnight oats can be customized to fit into many specific diet plans, enhancing their versatility and appeal across a broad spectrum of dietary preferences:

    • Ketogenic Diet: Modify the base by reducing the carbs. Use hemp seeds or flaxseeds instead of oats and increase the amount of high-fat toppings like nuts and full-fat Greek yogurt.
    • Paleo Diet: Focus on eliminating grains. Substitute oats with a combination of chia seeds and unsweetened shredded coconut, soaking them in almond or coconut milk and adding nuts or berries for flavor.
    • Low FODMAP Diet: Prepare the oats with lactose-free yogurt or a suitable plant-based alternative, and use low FODMAP fruits like strawberries or oranges to avoid digestive discomfort.

    Benefits for Athletic Performance and Recovery

    For athletes or anyone engaged in regular physical activity, high protein overnight oats can be a game-changer in terms of nutritional support:

    • Pre-Workout Boost: Enjoy your oats a couple of hours before exercising to fuel your body with a balanced mix of proteins, carbs, and minimal fats for sustained energy.
    • Post-Workout Recovery: The high protein content helps repair muscle fibers, while the carbs replenish energy stores, making it an ideal post-exercise meal.

    Incorporating Superfoods for Enhanced Health Benefits

    Superfoods can add an extra nutrient boost to your overnight oats:

    • Spirulina or Chlorella Powder: For a boost in antioxidants and vitamins, mix in a teaspoon of these powerful green superfoods.
    • Maca Powder: Known for increasing stamina and energy, a little maca can energize your mornings in a natural way.
    • Acai or Goji Berries: For a burst of antioxidants and a unique flavor, sprinkle some dried acai or goji berries into your oats.

    This section encourages the reader to think of high protein overnight oats not just as a breakfast item but as a versatile component of a healthy diet plan. By adapting the basic recipe to meet various dietary restrictions and goals, overnight oats can be enjoyed by virtually anyone looking to maintain a balanced and nutritious diet.

    FAQs about High Protein Overnight Oats

    How Long Do Overnight Oats Last?

    High protein overnight oats are not only convenient but also have a good shelf life. They can be stored in the refrigerator for up to five days, making them a perfect option for weekly meal prep. To preserve freshness, make sure they are stored in an airtight container.

    Are Overnight Oats Good for Muscle Building?

    Absolutely! The high protein content in these oats makes them ideal for muscle recovery and growth. Eating them post-workout can provide the necessary nutrients to help repair muscle tissues effectively.

    Can You Eat Overnight Oats Warm?

    While traditionally eaten cold, there’s no rule against warming them up. If you prefer a warm breakfast, simply heat your overnight oats in the microwave for a short period. This makes them versatile for all seasons and personal tastes.

    Is There a Vegan High-Protein Option for Overnight Oats?

    Yes, making vegan high protein overnight oats is easy with the substitution of plant-based protein powders and dairy alternatives like almond milk or soy yogurt. This ensures that everyone can enjoy a high-protein, nutritious breakfast regardless of dietary preferences.

    These FAQs aim to address the most common questions, helping you better understand how versatile and beneficial high protein overnight oats can be for your diet. Whether you’re looking to build muscle, lose weight, or simply need a quick and nutritious meal option, these oats have got you covered.

    Advanced Tips and Tricks for Perfecting High Protein Overnight Oats

    Achieving the Best Texture

    The texture of your overnight oats can make or break your breakfast experience. Here are a few tips to get it just right:

    • Oats to Liquid Ratio: Aim for a 1:2 ratio of oats to liquid for creamy, well-soaked oats. Adjust based on your preference for thicker or more fluid oats.
    • Soaking Time: While “overnight” suggests a long soak, even just a few hours can be sufficient if you’re in a rush. However, for optimal texture, letting them sit for the full 8 hours or more is ideal.

    Flavor Enhancement Techniques

    Maximizing flavor is crucial for enjoyable high protein overnight oats. Consider these ideas:

    • Layer Flavors: Start with a base flavor from your protein powder or yogurt, then build with spices, extracts, or zest for depth.
    • Toast Add-Ins: Lightly toasting nuts or coconut flakes before adding them to your oats can unlock more flavor and add a pleasant crunch.

    Storage Insights for Freshness

    Proper storage is key to maintaining the freshness and safety of your overnight oats:

    • Airtight Containers: Always use airtight containers to prevent odors from permeating your oats and to keep them fresh longer.
    • Refrigeration: Keep your oats refrigerated at all times to prevent spoilage, especially when using dairy or plant-based milk products.

    Employing these advanced techniques will help you master the art of making delicious and nutritious high protein overnight oats. Whether you’re a seasoned oats enthusiast or new to this healthy breakfast, these tips will enhance your prep and eating experience, ensuring every bowl is just as satisfying as the last.

    Additional Recipes and Resources

    Exploring More High-Protein Breakfast Options

    While high protein overnight oats are a fantastic start, there are plenty of other high-protein breakfast ideas to keep your mornings interesting:

    • Protein Pancakes: Made with almond flour and whey protein, these pancakes are a satisfying, low-carb option.
    • Egg Muffins: Packed with vegetables and lean meats, egg muffins are portable and customizable.
    • Greek Yogurt Parfaits: Layer Greek yogurt with nuts, seeds, and berries for a delicious and nutritious breakfast.

    Each of these options provides a high-protein boost to your morning, ensuring you have the energy to tackle your day.

    Resources for Continued Learning

    To expand your culinary horizons and explore more about nutritious eating:

    • Cookbooks: Look for cookbooks that focus on high-protein meals or specifically on healthy breakfasts.
    • Online Courses: Many cooking schools and wellness websites offer courses on meal prepping and healthy eating.

    That concludes our comprehensive guide on high protein overnight oats. We’ve covered everything from the basic preparation to dietary variations, flavorful add-ins, and the significant nutritional benefits. We’ve also tackled common FAQs and shared advanced tips to perfect your oats, alongside suggesting more high-protein breakfast ideas to diversify your morning routine.

    Whether you’re a fitness enthusiast looking for muscle-building meals, someone on a special diet seeking delicious options, or just someone wanting to spice up your breakfast routine, high protein overnight oats offer a versatile, nutritious, and convenient choice. Remember, the key to a fulfilling breakfast is customization—adjust flavors, textures, and ingredients to suit your tastes and nutritional needs. Keep experimenting with different combinations to find your perfect bowl of overnight oats.

    Thank you for following along with this guide. Here’s to starting your days off right with a quick, healthy, and protein-packed breakfast!


  • Overnight Oats Recipes: Easy & Delicious Variations

    Overnight Oats Recipes: Easy & Delicious Variations

    Introduction to Overnight Oats Recipes

    Overnight oats recipes have revolutionized breakfast, offering a no-cook, nutritious, and versatile meal that’s ready when you are. This guide explores how to master the art of making overnight oats, from basic recipes to exciting flavor twists. Perfect for busy mornings, these oats not only save time but also provide a wholesome start to your day. Dive into the world of overnight oats and discover how simple ingredients like rolled oats and milk can transform into a delightful breakfast.

    What are Overnight Oats?

    Overnight oats are a convenient breakfast option where rolled oats are soaked in a liquid such as milk or a milk alternative overnight. By morning, the oats absorb the liquid, softening into a creamy, pudding-like texture that’s both satisfying and digestible. Ideal for those on-the-go, overnight oats can be customized with a variety of toppings and flavors, making them a popular choice for meal preppers and busy professionals alike.

    Benefits of Choosing Overnight Oats for Breakfast

    Choosing overnight oats for breakfast comes with several benefits:

    • Time Efficiency: Prepare your breakfast the night before in just minutes, and wake up to a ready-to-eat meal.
    • Health Benefits: Packed with fiber, protein, and essential nutrients, overnight oats are a powerhouse meal that keeps you full and energized.
    • Versatility: The basic oat mixture can be flavored in countless ways, catering to any palate or dietary need.
    • Digestibility: Soaking oats overnight helps in breaking down starches and reducing the natural phytic acid, which can hinder nutrient absorption.

    This delightful breakfast option not only caters to your health but also adapts to your busy schedule, making it a perfect choice for anyone looking to enhance their morning routine. Next, we’ll dive into the essential ingredients and the secret to the perfect oats-to-liquid ratio that sets the foundation for your overnight oatmeal ideas. Stay tuned for more creative and easy oatmeal recipes to spice up your mornings!

    Base Ingredients and Ratios

    Essential Ingredients for Overnight Oats

    To kickstart your overnight oats recipes adventure, you’ll need just a few key ingredients:

    • Rolled Oats: Old-fashioned rolled oats are ideal as they absorb liquids well and maintain a pleasant texture. Do not use quick oats because they can get overly soft.
    • Liquid: Milk is the traditional choice, but for a dairy-free version, almond milk, oat milk, or coconut milk are excellent alternatives.
    • Sweeteners and Spices: Enhance your oats with natural sweeteners like maple syrup or honey and spices such as cinnamon or vanilla extract.

    These ingredients form the backbone of any overnight oatmeal recipe, providing a neutral base that’s ready for any flavor additions you fancy.

    The Perfect Oats to Liquid Ratio

    overnight oats recipes

    The ratio of oats to liquid is crucial for achieving the perfect consistency of your overnight oats recipes. A good starting point is a 1:1 ratio of oats to liquid. For every half cup of oats, use half a cup of liquid. This ratio ensures that the oats are neither too dry nor too soggy. If you prefer a creamier texture, adding a tablespoon of chia seeds can help thicken the mixture while boosting the fiber content.

    Adjusting the base recipe according to your preferences is simple and allows for flexibility in texture and flavor. Whether you’re a fan of thick and hearty or light and creamy oats, tweaking the ratio will help you find your perfect bowl.

    In the next section, we will explore various flavor variations and creative add-ins that can transform your basic overnight oats recipes into a delectable morning treat. Get ready to infuse your oats with vibrant flavors and exciting textures!

    Customization with Flavors and Add-Ins

    Flavor Variations

    The adaptability of overnight oats recipes is what makes them so beautiful. Here are a couple of classic and creative flavor combinations to spark your culinary creativity:

    • Peanut Butter: Stir in a tablespoon of peanut butter for a rich and creamy texture. Top with sliced bananas or a sprinkle of granola for crunch.
    • Berry Delicious: Mix in fresh or frozen berries like strawberries or blueberries. A dollop of yogurt and a swirl of honey can elevate this fruity delight.
    • Chocolate Chip: For a sweet start, add dark chocolate chips and a dash of cocoa powder. Combine with almond butter for an extra indulgent breakfast.

    Each of these variations not only enhances the taste but also increases the nutritional value of your breakfast, providing an enjoyable and healthy start to your day.

    Creative Add-Ins and Toppings

    To further personalize your overnight oats, consider these add-ins and toppings:

    • Nuts and Seeds: Almonds, walnuts, or pumpkin seeds add a delightful crunch and a boost of healthy fats.
    • Superfoods: Sprinkle chia seeds or flaxseeds for a fiber-rich addition or goji berries for a burst of antioxidants.
    • Protein Boost: A scoop of your favorite protein powder can make your oats a more filling meal, perfect for post-workout recovery.

    The possibilities are endless, allowing you to tailor your breakfast to your dietary needs and flavor preferences. Experiment with different combinations to keep your morning routine exciting and delicious.

    Coming up, we will delve into advanced tips for preparing overnight oats, ensuring you achieve the best texture and flavor every time. Stay tuned to elevate your oat game to the next level!

    Advanced Tips for Overnight Oats

    Advanced Preparation Techniques

    To elevate your overnight oats to gourmet levels, here are some expert tips to ensure optimal texture and flavor:

    • Layering Flavors: Start with the milder flavors like your base liquid and oats, then add your chosen spices or sweeteners. Layering these elements gradually allows each flavor to meld beautifully without overpowering others.
    • Soaking Time: While overnight is standard, even a few hours can suffice if you’re in a rush. However, for the best results, a full 8-hour soak will maximize flavor absorption and achieve the perfect softness.
    • Mixing Ingredients: To prevent certain ingredients from becoming too soggy, add nuts, seeds, or fruits shortly before serving instead of soaking them overnight. This maintains their texture and ensures a pleasant contrast to the creamy oats.

    These techniques will help you perfect your dish, making your breakfast both a nutritious and gourmet start to the day.

    Common Mistakes and How to Avoid Them

    Even the simplest recipes can go awry without careful attention. These are some typical dangers and tips for avoiding them:

    • Oversoaking: Oats may get unduly mushy if they soak for an extended period or if the liquid-to-grain ratio is too high. Stick to the recommended ratios and adjust based on your oats’ absorption.
    • Under-flavoring: Remember, oats are naturally bland. Be generous with spices, sweeteners, and toppings to bring your bowl to life.
    • Neglecting Texture: For those who enjoy a bit of crunch, adding fresh toppings in the morning provides a textural variety that enhances the overall eating experience.

    By keeping these tips in mind, you’ll ensure your overnight oats are always a delight to wake up to.

    Moving forward, we will discuss the nutritional benefits of incorporating overnight oats into your diet and how they can be a powerful component of a healthy lifestyle. Stay tuned to discover how this simple meal can support your overall well-being!

    Nutritional Information

    Health Benefits of Overnight Oats

    overnight oats recipes

    Overnight oats are not just convenient; they are also packed with numerous health benefits that make them a stellar breakfast choice:

    • High in Fiber: Oats are a fantastic source of soluble fiber, particularly beta-glucan, which helps to lower cholesterol levels and promotes a healthy digestive system.
    • Rich in Protein: When paired with milk or yogurt, overnight oats become a high-protein meal, supporting muscle repair and growth.
    • Provides Essential Nutrients: Oats are rich in important vitamins and minerals, including magnesium, potassium, and iron, essential for overall health and wellness.

    Integrating overnight oats into your daily routine can contribute significantly to a balanced diet, providing sustained energy and essential nutrients to kickstart your day.

    How Overnight Oats Can Fit into Various Dietary Needs

    Overnight oats are incredibly adaptable, making them suitable for various dietary preferences and restrictions:

    • Gluten-Free Needs: By choosing certified gluten-free oats, individuals with celiac disease or gluten sensitivity can enjoy this meal without concern.
    • Vegan Options: Utilize non-dairy milk alternatives like almond milk or coconut milk and vegan yogurts to cater to vegan dietary requirements.
    • Low-Sugar Diets: Control the sweetness by opting for natural sweeteners like fruits or a small amount of honey or maple syrup, which are lower in sugars and healthier than processed sugars.

    This versatility ensures that almost anyone can enjoy overnight oats regardless of their dietary restrictions, making it a universally beloved breakfast.

    Storing and Serving Overnight Oats

    Optimal Storage Solutions

    Proper storage is key to maintaining the freshness and flavor of your overnight oats. Here are some tips to ensure your oats stay delicious throughout the week:

    • Refrigeration: Always store your overnight oats in the refrigerator. A tight-seal container or a mason jar is ideal for keeping them fresh and preventing any odors from permeating your oats.
    • Shelf Life: Properly stored, overnight oats can last in the refrigerator for up to five days. After this period, they may start to lose their texture and flavor.

    These storage tips will help you enjoy your breakfast at its best, whether you’re eating at home or taking it on the go.

    Recommended Containers for Storage and Serving

    Choosing the right container for your overnight oats can enhance both their preservation and their ease of use:

    • Mason Jars: These are perfect for overnight oats because they not only seal tightly but also allow you to see the beautiful layers of your breakfast.
    • Glass Containers: If you prefer a wider opening for easier mixing and eating, glass containers with snap-on lids offer a practical and stylish option.

    Each type of container has its benefits, so select the one that best suits your lifestyle and aesthetic preferences.

    By following these guidelines, your overnight oats will be ready to grab and go, making your mornings smooth and your breakfasts enjoyable. Next, we will address some frequently asked questions about overnight oats to help clear up any common queries and ensure you get the most out of your oat experience.

    FAQs

    Frequently Asked Questions

    Let’s tackle some of the most common questions about overnight oats</em> to help you perfect your recipes and enjoy them even more.

    • How long can you keep overnight oats? Overnight oats are best consumed within 4-5 days of preparation. Store them in the refrigerator in an airtight container to maintain freshness.
    • Can you warm up overnight oats? Absolutely! While traditionally eaten cold, overnight oats can be warmed up in the microwave for those who prefer a warm breakfast. Just heat them in short intervals, stirring in between, to ensure even warming.
    • Are overnight oats gluten-free? Oats naturally do not contain gluten but are often processed in facilities that handle gluten-containing grains. Make sure your oats are gluten-free by certification if you want a gluten-free option.

    These FAQs aim to enhance your understanding and enjoyment of making and consuming overnight oats, ensuring every bowl is delicious and suited to your preferences.

    Conclusion

    We hope this guide has inspired you to embrace the versatility and convenience of overnight oats. With endless customization options, they’re not only a practical choice for busy mornings but also a delightful way to start your day on a nutritious note. Experiment with the flavors and toppings suggested, and don’t hesitate to share your favorite combinations or ask more questions as you explore the world of overnight oats. Happy eating!

    Overnight oats offer a perfect blend of convenience, taste, and nutrition, making them an ideal choice for anyone looking to enrich their breakfast routine. Whether you’re a busy professional seeking a quick morning solution or a health enthusiast aiming for a balanced diet, overnight oats provide the flexibility and flavor to meet your needs.

    Remember, the key to delicious overnight oats lies in the personal touches you add. From the base recipe to the creative variations and toppings, each element allows you to tailor your breakfast to your unique taste preferences and nutritional requirements. Don’t be afraid to experiment with different ingredients and find the combinations that delight you the most.

    As you continue to explore the possibilities of overnight oats, keep in mind the practical tips shared in this guide—from choosing the right oats and maintaining the ideal liquid-to-oats ratio to storing your oats properly for maximum freshness. These insights will help ensure that your oats are not only tasty but also a nourishing component of your daily diet.

    We invite you to embrace the simplicity and creativity of preparing overnight oats. Share your favorite recipes and experiences, and encourage others to discover the joy and benefits of this wonderful breakfast option. Here’s to many delightful mornings filled with tasty, nutritious overnight oats!