Category: Dinner

  • What Goes Good with Buffalo Chicken Dip? Best Pairings and Ideas

    What Goes Good with Buffalo Chicken Dip? Best Pairings and Ideas

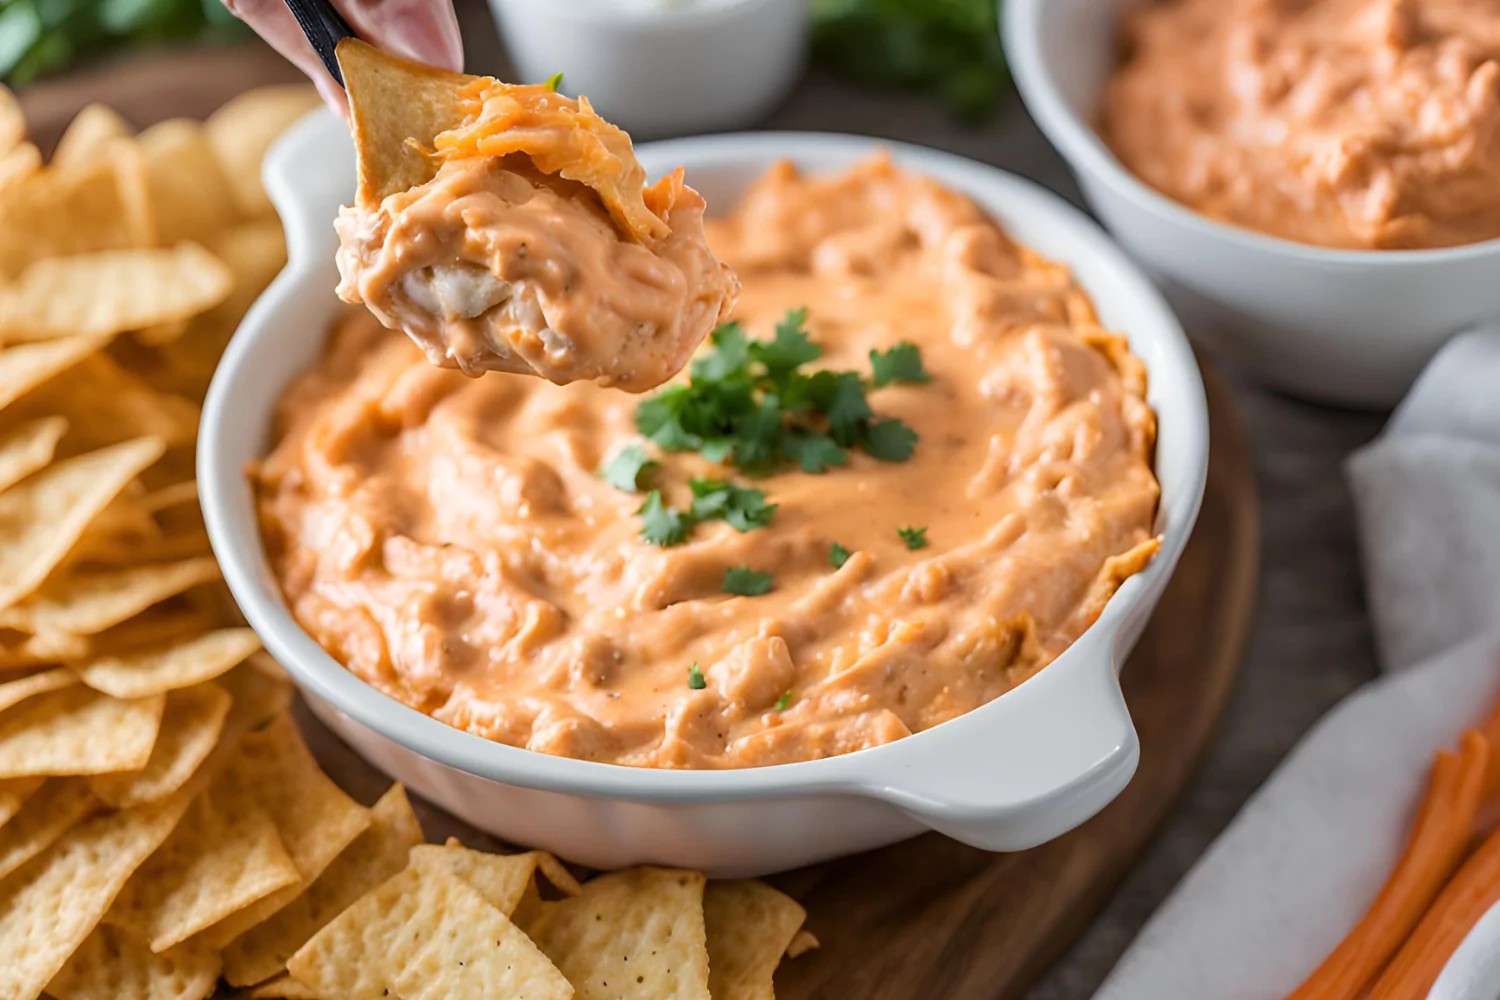
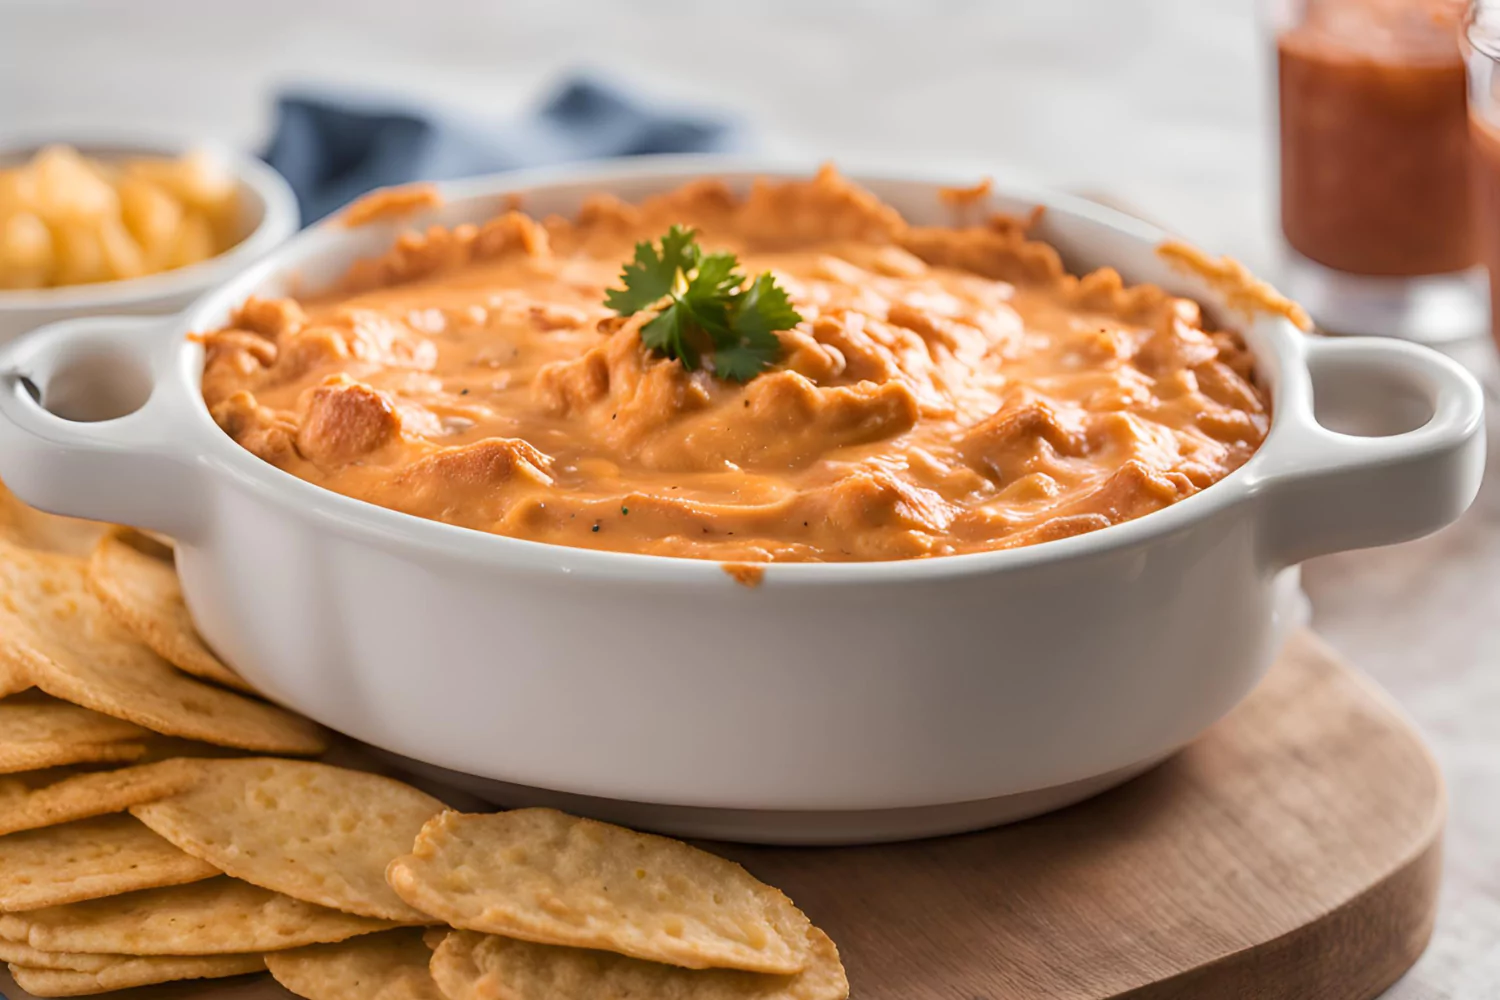
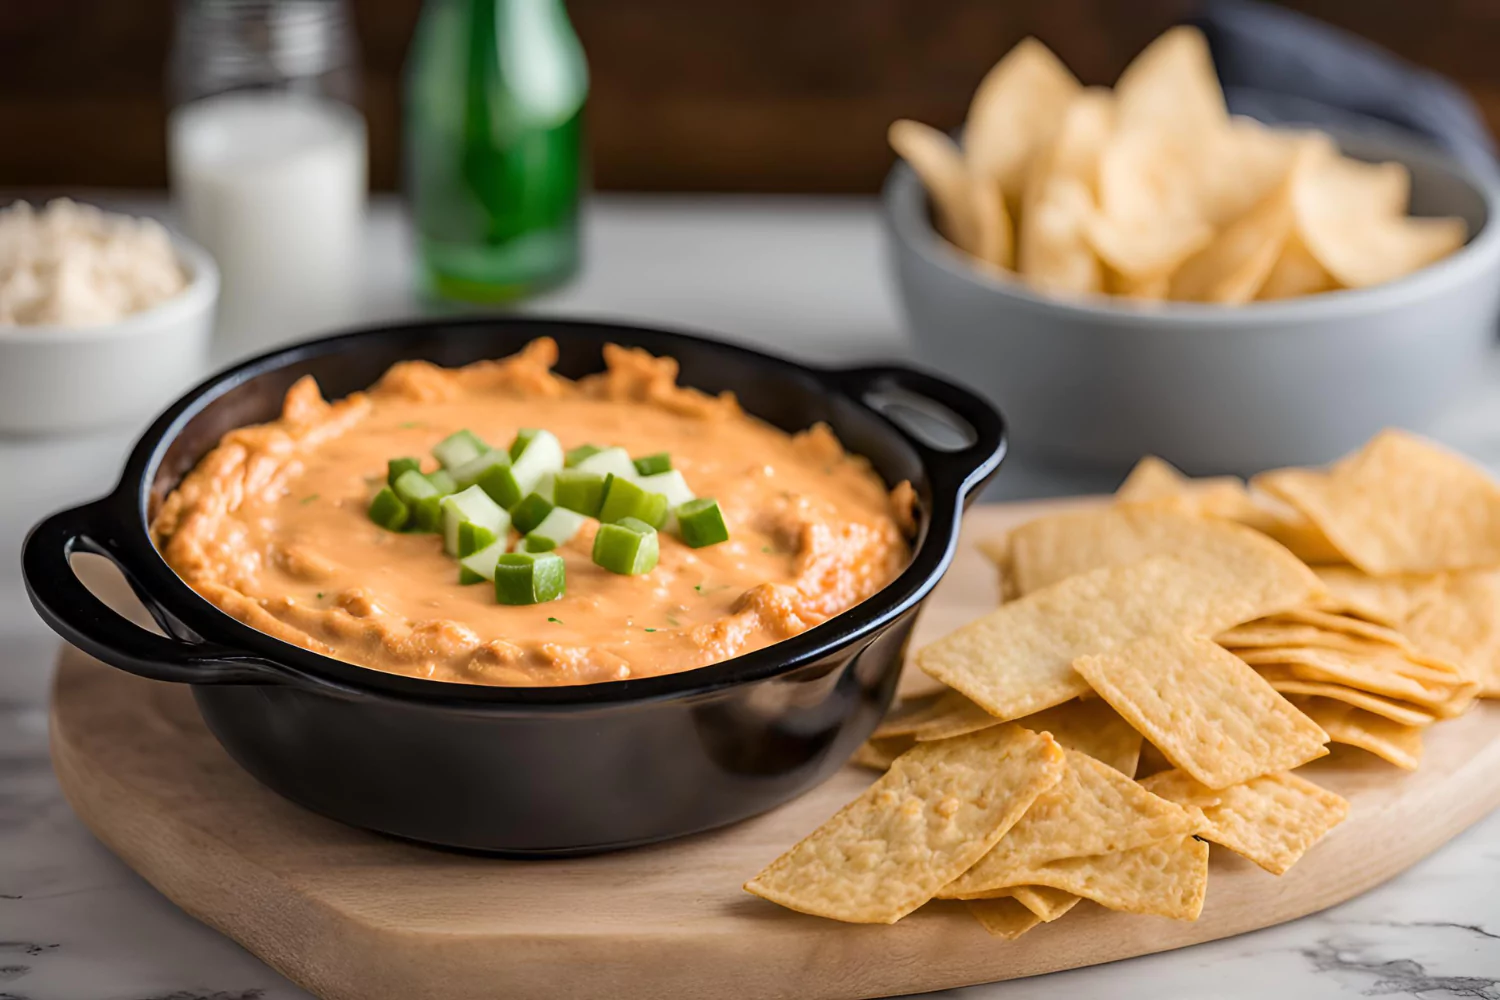
    When it comes to party appetizers, buffalo chicken dip stands out as a crowd favorite. This spicy, creamy dip is perfect for any occasion, from game nights to family gatherings. But have you ever wondered what goes good with buffalo chicken dip? The right sides and pairings can elevate this dish to a whole new level. In this article, we’ll explore a variety of sides, main course ideas, and beverages that perfectly complement. So, whether you’re hosting a party or just indulging in a snack, you’ll have plenty of delicious options to choose from.

    Introduction to Buffalo Chicken Dip

    Thanks to its rich, tangy flavor and versatility, it has become a staple at many gatherings. This popular appetizer combines shredded chicken, hot sauce, cream cheese, and a blend of cheeses to create a dish that’s hard to resist. But while the dip itself is delicious, the right pairings can make it even better. From crunchy vegetables to savory chips, there are countless options to enhance your buffalo chicken dip experience.

    Buffalo chicken dip pairs beautifully with a variety of sides, making it an incredibly versatile dish. Whether you’re looking for classic accompaniments or creative twists, knowing what goes well with this dip can help you impress your guests and satisfy every palate. So, let’s dive into the best sides and pairings, starting with some traditional favorites.

    Traditional Pairings

    Classic Sides for Buffalo Chicken Dip

    Vegetables

    Pairing buffalo chicken dip with fresh vegetables not only adds a healthy touch but also provides a refreshing contrast to the rich, creamy dip. Classic veggie pairings include:

    • Celery sticks: Their crisp texture and mild flavor complement the spicy dip perfectly.
    • Carrot sticks: Sweet and crunchy, they balance the heat of the dip.
    • Bell pepper slices: Colorful and slightly sweet, they add a fun twist.

    Vegetables are not only a healthy option but also add a satisfying crunch that contrasts nicely with the creamy dip. Moreover, they are easy to prepare and serve, making them a convenient choice for any event.

    Chips and Crackers

    Another classic pairing for buffalo chicken dip is chips and crackers. They offer a satisfying crunch and can hold up well to the thick dip. Popular options include:

    • Tortilla chips: Their sturdy texture makes them perfect for dipping.
    • Pita chips: These provide a slightly different flavor and texture.
    • Crackers: Simple and versatile, crackers are a great choice for any occasion.

    These crunchy sides not only enhance the dip’s flavors but also add a delightful texture contrast. Moreover, they are easily available and can be served without much preparation.

    Bread Options

    Bread is another excellent side, offering a soft and chewy texture that complements the dip’s creaminess. Consider these options:

    • Sliced baguette: Toasted or fresh, it adds a delightful chewiness.
    • Breadsticks: Their long shape makes them perfect for dipping.

    Bread provides a satisfying base for the dip and can help balance out its spicy kick. Whether you prefer something crunchy or soft, bread is a versatile and delicious option.

    These traditional pairings are tried and true, offering a variety of flavors and textures to enhance your experience. But the possibilities don’t end here. In the next part, we’ll explore some creative pairings that will take your dip to the next level.

    Creative Pairings
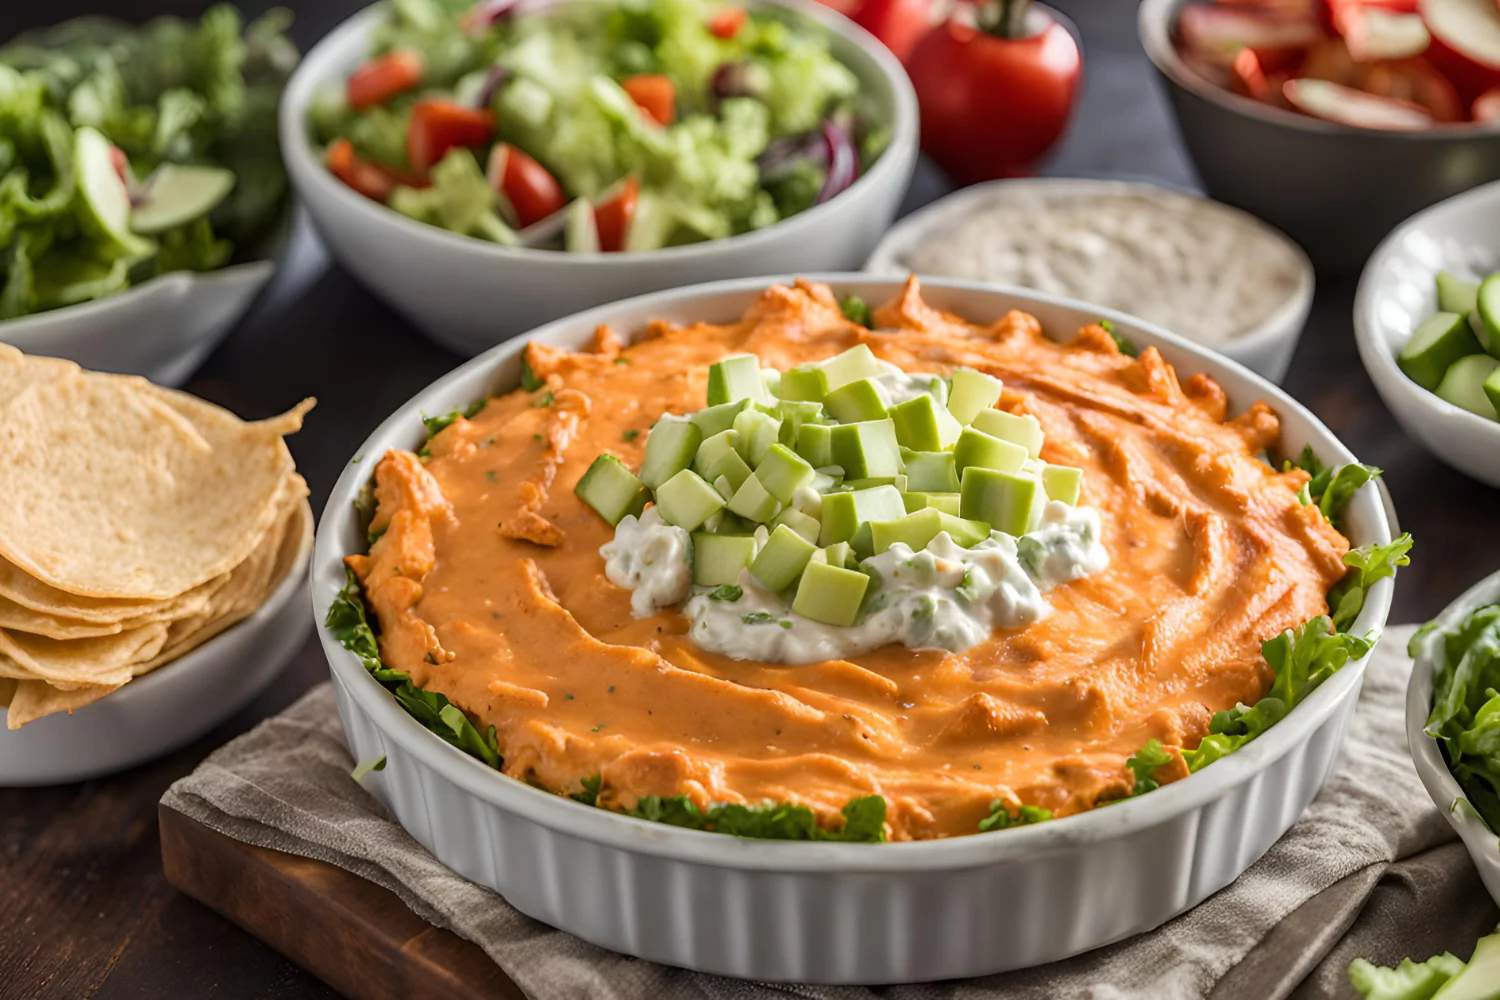
    What goes good with buffalo chicken dip?

    Unique Sides to Pair with Buffalo Chicken Dip

    Proteins

    While buffalo chicken dip is already packed with protein, adding more can create a heartier and more satisfying snack or meal. Here are some unique protein pairings:

    • Chicken wings: Double down on the chicken with some crispy wings on the side. They complement the dip’s flavor perfectly.
    • Coconut shrimp: The sweetness of coconut shrimp pairs wonderfully with the spicy dip, creating a delightful contrast.

    These protein options not only enhance the dip but also provide additional substance, making your spread more filling and enjoyable.

    Alternative Chips

    If you’re looking for a twist on traditional chips, consider these alternative options. They bring different flavors and textures to the table:

    • Sweet potato chips: Their natural sweetness balances the heat of the dip and adds a unique flavor.
    • Plantain chips: Slightly sweet and crunchy, these chips offer a tropical touch to your experience.

    Alternative chips provide a refreshing change from regular tortilla or pita chips, adding new and exciting elements to your appetizer spread.

    Fruits

    Fruits might not be the first thing that comes to mind when thinking about what goes good with buffalo chicken dip, but they can add a refreshing and sweet contrast:

    • Apple slices: Crisp and sweet, they complement the spicy dip surprisingly well.

    Including fruits as a side can balance out the heat and richness of the dip, offering a lighter, refreshing option for guests.

    Main Course Ideas

    Turning Buffalo Chicken Dip into a Meal

    Sandwiches and Wraps

    Transforming into a main course is easier than you might think. Here are some delicious ideas:

    • Buffalo chicken dip wraps: Spread the dip on a tortilla, add some lettuce and veggies, and roll it up for a quick and tasty meal.
    • Buffalo chicken dip sliders: Use slider buns and top them with the dip, shredded lettuce, and a drizzle of ranch dressing.

    These handheld options are perfect for a quick lunch or a more substantial snack, making them the star of your meal.

    Salads

    If you’re looking for a lighter option, incorporating buffalo chicken dip into a salad is a great choice:

    • Buffalo chicken salad: Mix the dip with fresh greens, cherry tomatoes, cucumbers, and a light vinaigrette for a flavorful and satisfying salad.

    This salad is not only delicious but also a healthier way to enjoy the bold flavors.

    Casseroles

    For a comforting and hearty meal, consider turning your dip into a casserole:

    • Buffalo chicken dip casserole: Layer the dip with cooked pasta or rice, top with cheese, and bake until bubbly.

    This casserole is perfect for feeding a crowd or enjoying as a cozy dinner on a cold night.

    To explore more about the nutritional aspects, you can visit the Food Facts: Buffalo Chicken Dip page.

    Beverage Pairings
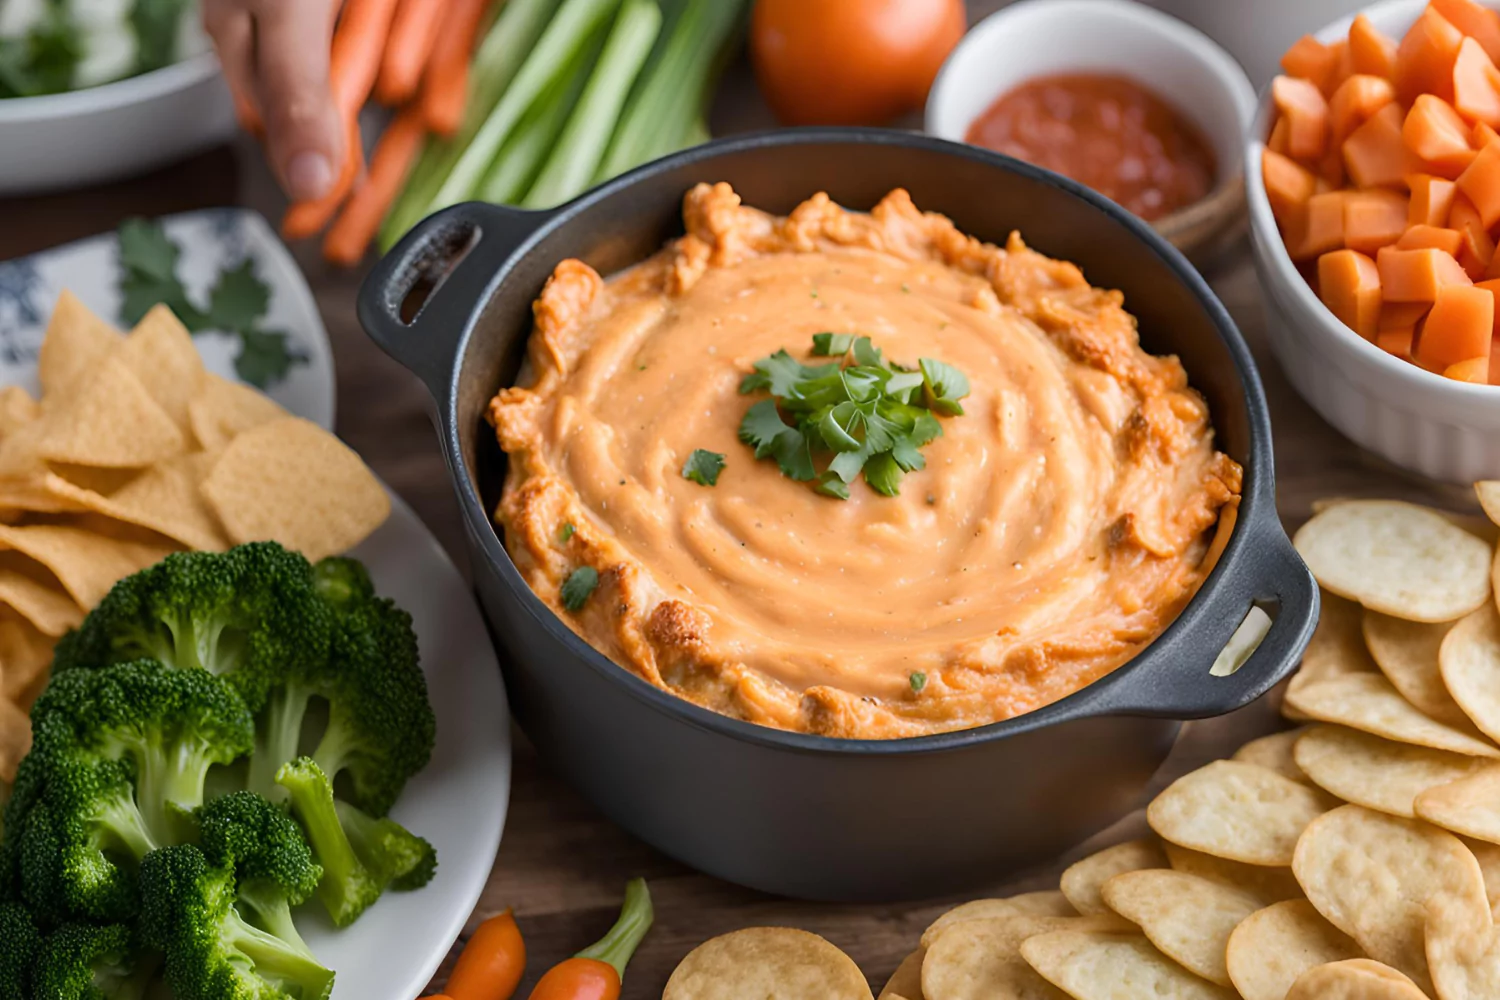
    What goes good with buffalo chicken dip?

    Best Drinks to Pair with Buffalo Chicken Dip

    Non-Alcoholic Beverages

    While alcoholic beverages like beers are often paired with buffalo chicken dip, non-alcoholic options can be just as refreshing:

    • Lemonade: Its tartness helps cut through the richness of the dip.
    • Iced tea: A classic choice that pairs well with almost any meal.

    These drinks not only complement the flavors of the dip but also provide a refreshing counterpoint to its spiciness.

    Recipes and How-Tos

    Popular Buffalo Chicken Dip Recipes

    Traditional Recipe

    For those who love the classic taste, here’s a traditional recipe:

    • Ingredients: Shredded chicken, hot sauce, cream cheese, ranch dressing, shredded cheese.
    • Instructions: Mix all ingredients, bake until bubbly.

    This straightforward recipe delivers the creamy, spicy flavor that has made buffalo chicken dip a favorite.

    Crockpot Recipe

    If you prefer a hands-off approach, a crockpot version is perfect:

    • Ingredients: Same as traditional recipe.
    • Instructions: Combine all ingredients in a crockpot, cook on low for several hours.

    The crockpot method is convenient and ensures the dip is always ready to serve.

    Healthy Recipe

    For a lighter version, try this healthy buffalo chicken dip recipe:

    • Ingredients: Shredded chicken, Greek yogurt, hot sauce, low-fat cream cheese, light ranch dressing.
    • Instructions: Mix all ingredients, bake until bubbly.

    This healthier take retains all the flavor while reducing the calorie content.

    Dipping Techniques and Serving Tips

    How to Serve and Enjoy Buffalo Chicken Dip

    Dipping Techniques

    While enjoying buffalo chicken dip, the way you dip can enhance the experience. Here are some tips:

    • Scoop and Twirl: For chunky ingredients, use a sturdy chip or vegetable stick to scoop a generous portion, then twirl slightly to secure the dip.
    • Double Dip: When using long vegetables like celery or carrot sticks, consider double dipping by flipping the stick to use the clean end.
    • Layered Dips: If serving with bread or sliders, layer the dip with other ingredients like lettuce or tomatoes for added flavor and texture.

    These techniques ensure that each bite is flavorful and satisfying, making the most out of your dip.

    Presentation Tips

    Presentation matters, especially when serving buffalo chicken dip at gatherings. Here are some ways to make it look as good as it tastes:

    • Serve in a Bread Bowl: Hollow out a round loaf of bread and fill it with the dip for an eye-catching presentation.
    • Garnish with Herbs: Sprinkle chopped green onions or parsley on top for a pop of color and freshness.
    • Use Decorative Platters: Arrange your dipping sides around the dip on a large, colorful platter to make it visually appealing.

    These presentation tips will make your buffalo chicken dip the star of the table, impressing guests with both flavor and appearance.

    Temperature Tips

    Serving the dip at the right temperature is crucial for maintaining its texture and flavor:

    • Keep It Warm: Use a small slow cooker or chafing dish to keep the dip warm throughout the event.
    • Reheat Gently: If the dip cools down, reheat it gently in the oven or microwave, stirring occasionally to maintain its creamy consistency.

    Ensuring the dip is served warm will keep it deliciously creamy and inviting, enhancing the overall experience.

    Additional Serving Ideas
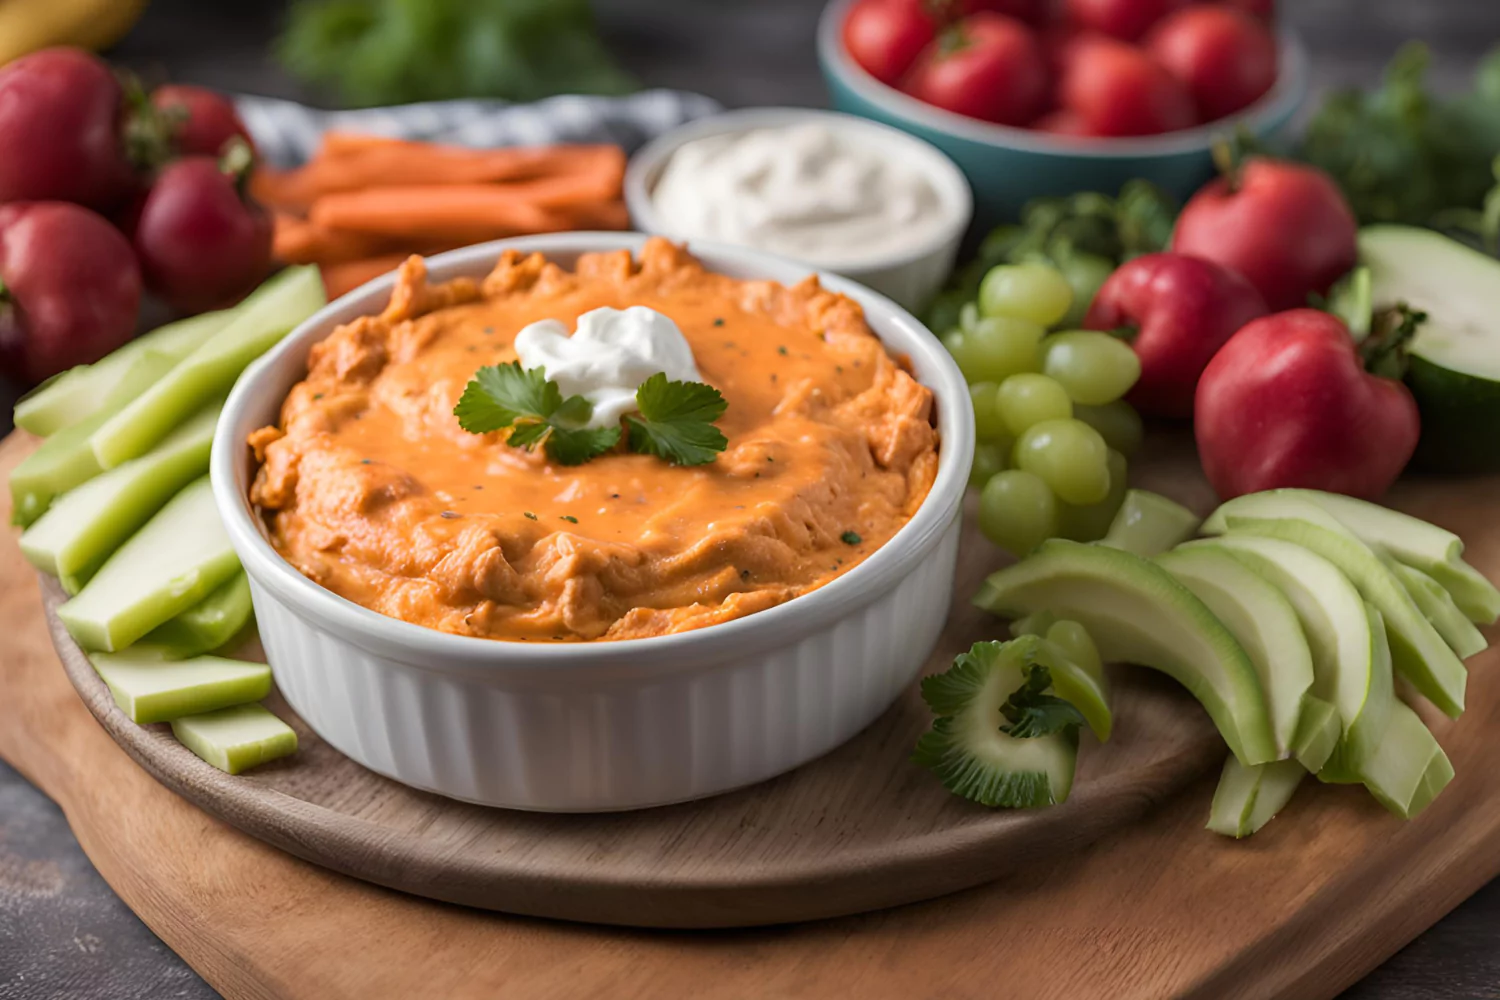
    What goes good with buffalo chicken dip?

    Creative Ways to Use Leftover Buffalo Chicken Dip

    If you have leftover buffalo chicken dip, don’t let it go to waste. Here are some creative ideas to repurpose it:

    Buffalo Chicken Pizza

    Transform your leftover dip into a tasty pizza topping:

    • Spread the Dip: Use the dip as the sauce base on your pizza dough.
    • Add Toppings: Sprinkle with shredded cheese, chopped onions, and bell peppers.
    • Bake: Cook until the crust is golden and the cheese is melted.
    Subheading: Buffalo Chicken Stuffed Peppers

    Use the dip to make a delicious stuffed pepper dish:

    • Prepare Peppers: Hollow out bell peppers and fill them with the dip.
    • Bake: Cook until the peppers are tender and the dip is heated through.
    Buffalo Chicken Quesadillas

    Turn your dip into a flavorful quesadilla filling:

    • Spread on Tortillas: Layer the dip between two tortillas.
    • Add Cheese: Sprinkle with extra cheese if desired.
    • Cook: Grill or cook in a skillet until crispy and golden.

    These ideas not only reduce food waste but also give you delicious new ways to enjoy buffalo chicken dip.

    FAQs

    Frequently Asked Questions

    • What can you serve with buffalo chicken dip instead of chips?
      • Vegetables like celery sticks, carrot sticks, and bell pepper slices.
    • Is it possible to prepare buffalo chicken dip in advance?
      • Sure, you can make it ahead of time and reheat it right before serving.
    • How do you store leftovers?
      • For up to three days, keep in the refrigerator in an airtight container.
    • What are some good dipping vegetables?
      • Celery, carrots, and bell peppers are excellent choices.
    • How can you make buffalo chicken dip less spicy?
      • Use less hot sauce or add more cream cheese to mellow the heat.

    Elevate Your Buffalo Chicken Dip Experience

    Buffalo chicken dip is more than just a party appetizer; it’s a versatile dish that can be enjoyed in countless ways. Whether you’re hosting a game night, a family gathering, or simply indulging in a delicious snack, knowing what goes good with buffalo chicken dip can make all the difference. This article has explored a wide range of sides, from traditional pairings like vegetables, chips, and bread to creative options such as proteins, alternative chips, and even fruits.

    Vegetables like celery, carrots, and bell peppers provide a refreshing crunch that complements the dip’s creamy texture and spicy kick. Chips and crackers, including tortilla chips, pita chips, and various types of bread, offer a sturdy vehicle for scooping up generous portions of dip. These classic sides are convenient, widely loved, and enhance the overall dip experience.

    For those looking to experiment, proteins like chicken wings and coconut shrimp add a hearty element to your spread, while alternative chips such as sweet potato and plantain chips introduce new flavors and textures. Surprisingly, even fruits like apple slices can be a delightful accompaniment, offering a sweet contrast to the spicy dip.

    Beyond sides, this dip can be transformed into main course meals. wraps, sliders, and salads provide quick and tasty meal options, while a casserole makes for a comforting, crowd-pleasing dish. These ideas ensure that they can be enjoyed in more substantial and varied ways.
  • Is Buffalo Chicken Dip Gluten-Free? Delicious and Safe Recipe

    Is Buffalo Chicken Dip Gluten-Free? Delicious and Safe Recipe

    Is Buffalo Chicken Dip Gluten-Free? Delicious and Safe Recipe

    Buffalo chicken dip is a beloved appetizer, renowned for its creamy, spicy, and cheesy goodness. However, for those with gluten intolerance or celiac disease, enjoying this dip can be tricky. In this article, we’ll explore whether buffalo chicken dip is gluten-free, provide recipes and tips for making a safe version, and answer common questions about this popular dish. So, let’s dive in!

    Introduction to Buffalo Chicken Dip

    Buffalo chicken dip is a crowd-pleaser, often featured at parties and game days. It’s a delightful mix of shredded chicken, hot sauce, cream cheese, and more, creating a perfect blend of flavors. Is it safe for people on a gluten-free diet, though? We’ll uncover the answer and show you how to make sure your dip is both delicious and gluten-free.

    What is Gluten?

    Gluten is a protein found in wheat, barley, and rye. It aids in the dough’s rising and provides it its flexibility. However, for individuals with gluten intolerance or celiac disease, consuming gluten can lead to serious health issues. Symptoms range from digestive problems to more severe complications like nutrient deficiencies and intestinal damage.

    Common Gluten-Containing Ingredients

    To ensure your buffalo chicken dip is gluten-free, it’s essential to know which ingredients might contain gluten. Common culprits include:

    • Wheat-based thickeners: Often found in sauces and dressings.
    • Modified food starch: Can sometimes contain gluten.
    • Malt vinegar: Made from barley, which contains gluten.
    • Soy sauce: Unless labeled gluten-free, it usually contains wheat.

    Understanding these ingredients will help you avoid gluten and keep your dip safe for everyone to enjoy.

    What Makes Buffalo Chicken Dip Gluten-Free?

    The key to making a gluten-free buffalo chicken dip lies in selecting the right ingredients. Here’s what to watch for:

    • Chicken: Fresh or canned, as long as it doesn’t contain any gluten-based additives.
    • Hot sauce: Most are gluten-free, but always check the label.
    • Cream cheese: Typically gluten-free, but verify there are no added gluten ingredients.
    • Ranch dressing: Not all are gluten-free, so choose a certified gluten-free brand.
    • Cheese: Generally gluten-free, but again, check the labels for any added gluten.

    By carefully choosing your ingredients, you can ensure your buffalo chicken dip is both safe and scrumptious.

    Stay tuned for the next part, where we’ll delve into recipes and variations of gluten-free buffalo chicken dip.

    Recipes and Variations

    Is Buffalo Chicken Dip Gluten-Free? Delicious and Safe Recipe

    Traditional Buffalo Chicken Dip Recipe

    Creating a gluten-free buffalo chicken dip is simple. Here’s a recipe that ensures safety without compromising on flavor.

    Ingredients:

    • 2 cups shredded chicken (ensure it’s gluten-free)
    • 8 oz cream cheese (gluten-free)
    • 1 cup gluten-free ranch dressing
    • 1/2 cup hot sauce (check for gluten-free certification)
    • 1 cup shredded cheddar cheese

    Instructions:

    1. Preheat your oven to 350°F (175°C).
    2. In a medium bowl, combine the shredded chicken, cream cheese, ranch dressing, hot sauce, and cheddar cheese.
    3. Mix until well blended.
    4. Spread the mixture into a 9×9-inch baking dish.
    5. Bake in the preheated oven until the dip is hot and bubbly, about 20-25 minutes.
    6. Serve with gluten-free tortilla chips or fresh vegetables.

    Enjoy a delicious dip that’s gluten-free and perfect for any gathering!

    Variations of Gluten-Free Buffalo Chicken Dip

    Dairy-Free Option: For those who are also dairy-free, replace the cream cheese with a dairy-free alternative and use a dairy-free ranch dressing. This ensures the dip is safe for both gluten and dairy sensitivities​.

    Slow Cooker Method: To make your dip in a slow cooker, combine all the ingredients and cook on low for 2-3 hours. Stir occasionally to ensure even cooking. This method is great for keeping the dip warm throughout your event​​.

    Oven-Baked Method: Preheat your oven to 350°F (175°C). Combine all the ingredients in a baking dish and bake for 20-25 minutes. The dip should be hot and bubbly. This method gives the dip a delicious, slightly crispy top layer​​.

    Using Store-Bought Ingredients

    While making everything from scratch is ideal, using store-bought ingredients can save time. Ensure that any pre-made buffalo sauce, ranch dressing, or shredded chicken you buy is certified gluten-free. Brands like Frank’s RedHot and Hidden Valley offer gluten-free options. To make sure there are no gluten-containing products, always read labels.

    Tips and Tricks

    How to Shred Chicken Efficiently

    Shredding chicken can be a chore, but here are some tips to make it easier:

    • Use a Stand Mixer: Place cooked chicken breasts in the mixer and use the paddle attachment on low speed. In a few minutes, you’ll have perfectly shredded chicken​.
    • Two Forks Method: Hold a piece of chicken with one fork and use the other fork to pull it apart.
    • Hand Shredding: If you prefer a more hands-on approach, let the chicken cool slightly and then use your hands to pull it apart.

    Adjusting Spice Levels

    Everyone’s spice tolerance varies. If you prefer a milder dip, use less hot sauce or choose a milder brand. For those who love a kick, add extra hot sauce or even some chopped jalapeños. Taste as you go to ensure the perfect spice level​.

    Preventing a Greasy Dip

    Sometimes, buffalo chicken dip can turn out greasy. To avoid this, ensure you’re using full-fat cream cheese and well-mixed ingredients. If your dip still appears greasy, stir it thoroughly before serving. This helps blend the oils back into the dip for a smoother texture​​.

    Serving and Storage

    Is Buffalo Chicken Dip Gluten-Free? Delicious and Safe Recipe

    Best Dippers for Buffalo Chicken Dip

    Choosing the right dippers is crucial for enjoying your gluten-free buffalo chicken dip. Here are some options:

    • Gluten-Free Tortilla Chips: These are a classic choice and provide a satisfying crunch.
    • Fresh Vegetables: Carrots, celery, and bell pepper strips are healthy, gluten-free options.
    • Gluten-Free Crackers: Look for certified gluten-free crackers for a crunchy alternative.

    Storing and Reheating Buffalo Chicken Dip

    If you have leftovers, here’s how to store and reheat them:

    • Storage: Place the dip in an airtight container and refrigerate for up to 3 days.
    • Reheating: Warm the dip in the microwave in 30-second increments, stirring in between. Alternatively, you can reheat it in the oven at 350°F (175°C) until hot and bubbly​​.

    Making Ahead and Freezing

    To make your dip ahead of time, prepare the mixture and store it in the fridge until you’re ready to bake. If you want to freeze the dip, place it in a freezer-safe container. Thaw in the refrigerator overnight before reheating. This ensures your dip is fresh and delicious whenever you need it​​.

    Summary and Final Thoughts

    Summary and Final Thoughts

    Making a gluten-free buffalo chicken dip is not only possible but also straightforward with the right ingredients and techniques. By understanding what to look for in your ingredients and following our detailed recipes and tips, you can enjoy this delicious appetizer without worrying about gluten. Next time you’re planning a party or a casual get-together, whip up a batch of gluten-free buffalo chicken dip and watch it disappear!

    This concludes our in-depth look at gluten-free buffalo chicken dip. We hope you found it helpful and inspiring. Happy cooking!

    Stay tuned for Part 7, where we’ll address frequently asked questions about making and serving gluten-free buffalo chicken dip.

    Additional Tips and Considerations

    Avoiding Cross-Contamination

    Ensuring that your gluten-free buffalo chicken dip remains truly gluten-free involves more than just choosing the right ingredients. Cross-contamination can occur if gluten-free foods come into contact with gluten-containing foods. Here are some tips to prevent this:

    • Separate Utensils and Cookware: Use dedicated utensils, cutting boards, and cookware for preparing gluten-free foods.
    • Clean Surfaces Thoroughly: Wash countertops and any surfaces that may have come into contact with gluten before preparing your dip.
    • Storage: Store gluten-free ingredients and prepared foods separately from gluten-containing items to avoid accidental contamination.

    Label Reading Tips

    Reading labels is crucial to ensure your ingredients are truly gluten-free. Here’s what to look for:

    • Gluten-Free Certification: Look for products labeled as “gluten-free” or those with a gluten-free certification mark.
    • Ingredient Lists: Avoid products with ingredients like wheat, barley, rye, malt, or brewer’s yeast unless they are specifically labeled as gluten-free.
    • Hidden Gluten: Be aware of ingredients that can sometimes contain gluten, such as modified food starch, dextrin, and some flavorings.

    Gluten-Free Substitutions

    If you need to make substitutions, here are some gluten-free alternatives to common ingredients:

    • Breadcrumbs: Use gluten-free breadcrumbs or crushed gluten-free crackers.
    • Soy Sauce: Use gluten-free tamari instead of conventional soy sauce.
    • Flour: Use gluten-free flour blends for any recipes requiring flour.

    Incorporating Vegetables and Fruits

    To make your dip healthier and add variety, consider incorporating vegetables and fruits:

    • Vegetables: Add finely chopped bell peppers, onions, or jalapeños to the dip for extra flavor and crunch.
    • Fruits: A touch of sweetness from fruits like pineapple or mango can complement the spiciness of the buffalo sauce.

    Serving Suggestions

    Here are some creative ways to serve your gluten-free buffalo chicken dip:

    • Stuffed Peppers: Fill mini bell peppers with the dip for a fun and colorful appetizer.
    • Lettuce Wraps: Use lettuce leaves as a gluten-free wrap for the dip, adding a refreshing crunch.
    • Topped Baked Potatoes: Spread the dip over baked potatoes and top with green onions for a hearty snack.

    By following these tips and considerations, you can ensure your gluten-free buffalo chicken dip is safe, delicious, and enjoyed by everyone. For more information on gluten-free living, check out resources like and the​.

    Addressing Common Myths About Gluten-Free Diets

    Is Buffalo Chicken Dip Gluten-Free? Delicious and Safe Recipe

    Common Myths About Gluten-Free Diets

    There are several misconceptions about gluten-free diets that can cause confusion and misinformation. Let’s address some of these myths and provide accurate information to help you navigate a gluten-free lifestyle more confidently.

    Myth 1: Gluten-Free Diets Are Healthier for Everyone

    Many people believe that going gluten-free is a healthier choice for everyone. However, this isn’t necessarily true. A gluten-free diet is essential for individuals with celiac disease or gluten intolerance, but it isn’t inherently healthier for those without these conditions. Some gluten-free products can be high in sugar, fat, and calories and may lack essential nutrients found in gluten-containing grains.

    Myth 2: Gluten-Free Means Carb-Free

    Another common myth is that gluten-free diets are the same as low-carb or carb-free diets. In reality, gluten-free diets can still include plenty of carbohydrates from gluten-free grains such as rice, quinoa, and potatoes. It’s important to distinguish between gluten, a protein, and carbohydrates, a macronutrient.

    For further reading, check out the Celiac Disease Foundation’s explanation of gluten-free foods.

    Myth 3: All Gluten-Free Foods Are Nutrient-Dense

    While it’s true that many naturally gluten-free foods like fruits, vegetables, and lean proteins are nutrient-dense, processed gluten-free products can sometimes lack important nutrients. These products may be low in fiber and other vitamins and minerals that are often found in whole grains.

    To understand more about the nutritional content of gluten-free foods, refer to the Cleveland Clinic’s guide on gluten-free diets.

    Tips for a Balanced Gluten-Free Diet

    Maintaining a balanced gluten-free diet involves careful planning and consideration of nutrient intake. Here are some tips to help you stay healthy and balanced while following a gluten-free diet:

    • Incorporate Whole Foods: Focus on whole, naturally gluten-free foods like fruits, vegetables, lean meats, and gluten-free grains.
    • Read Labels Carefully: Always read food labels to check for hidden sources of gluten and to understand the nutritional content.
    • Consult a Dietitian: If you’re unsure about how to maintain a balanced diet, consider consulting a registered dietitian who specializes in gluten-free nutrition.

    For detailed dietary advice, visit the American College of Gastroenterology’s page on celiac disease and gluten-free diets.

    By dispelling common myths and providing practical tips, you can make informed decisions about your gluten-free diet and ensure it meets your nutritional needs. For more resources, check out the links provided throughout this section.

    FAQs

    Can I use store-bought buffalo sauce for gluten-free buffalo chicken dip?

    Yes, many store-bought buffalo sauces are gluten-free. However, always read the label or look for a gluten-free certification to ensure its safety​.

    What type of cream cheese should I use?

    Plain cream cheese is typically gluten-free. Check the brand you’re using to make sure there are no added ingredients that contain gluten. Choose a reputable brand with clear gluten-free labeling​​.

    Are all ranch dressings gluten-free?

    Not all ranch dressings are gluten-free. Some brands may add ingredients that contain gluten. Carefully read the labels or choose a brand that specifically labels its ranch dressing as gluten-free​.

    Can I use a dairy-free cream cheese alternative?

    Yes, you can substitute regular cream cheese with a dairy-free alternative if you have dietary restrictions or lactose intolerance. Many dairy-free cream cheese options are also gluten-free, but always check the packaging to ensure its gluten-free status​.

    Which chips are gluten-free for dipping?

    Corn tortilla chips, potato chips, and gluten-free crackers are just a few of the many gluten-free chip choices that are available. Always make sure the chips you select are gluten-free by looking at the box.

    Can I prepare the buffalo chicken dip in advance?

    Yes, buffalo chicken dip can be made in advance. Prepare the dip, cover it tightly, and store it in the refrigerator. When you’re ready to serve, reheat it in the oven or microwave until warmed through​​.

    Can buffalo chicken dip be frozen?

    Yes, buffalo chicken dip can be frozen. Make sure the dip cools completely before putting it in a freezer bag or airtight container. When you want to enjoy it, thaw it in the refrigerator and then reheat as desired​.

    Is it possible to make the buffalo chicken dip recipe gluten-free?

    Absolutely! It’s easy to modify the recipe to be gluten-free by carefully selecting gluten-free ingredients. Consider using gluten-free hot sauce, cream cheese, and ranch dressing, and serve with gluten-free chips or vegetables​.

    Can I offer guests who have celiac illness buffalo chicken dip?

    Yes, if you prepare buffalo chicken dip using verified gluten-free ingredients and take precautions to avoid cross-contamination during preparation, you can serve it to guests with celiac disease. To make sure everyone can safely enjoy the dip, it is a good idea to let your visitors know about the ingredients and inquire about any specific sensitivities or allergies.

    Conclusion

    Summary and Final Thoughts

    Making a gluten-free buffalo chicken dip is not only possible but also simple with the right ingredients and techniques. By understanding what to look for in your ingredients and following our detailed recipes and tips, you

  • How Long to Air Fry Boneless Chicken Thighs? Perfect Results Every Time

    How Long to Air Fry Boneless Chicken Thighs? Perfect Results Every Time

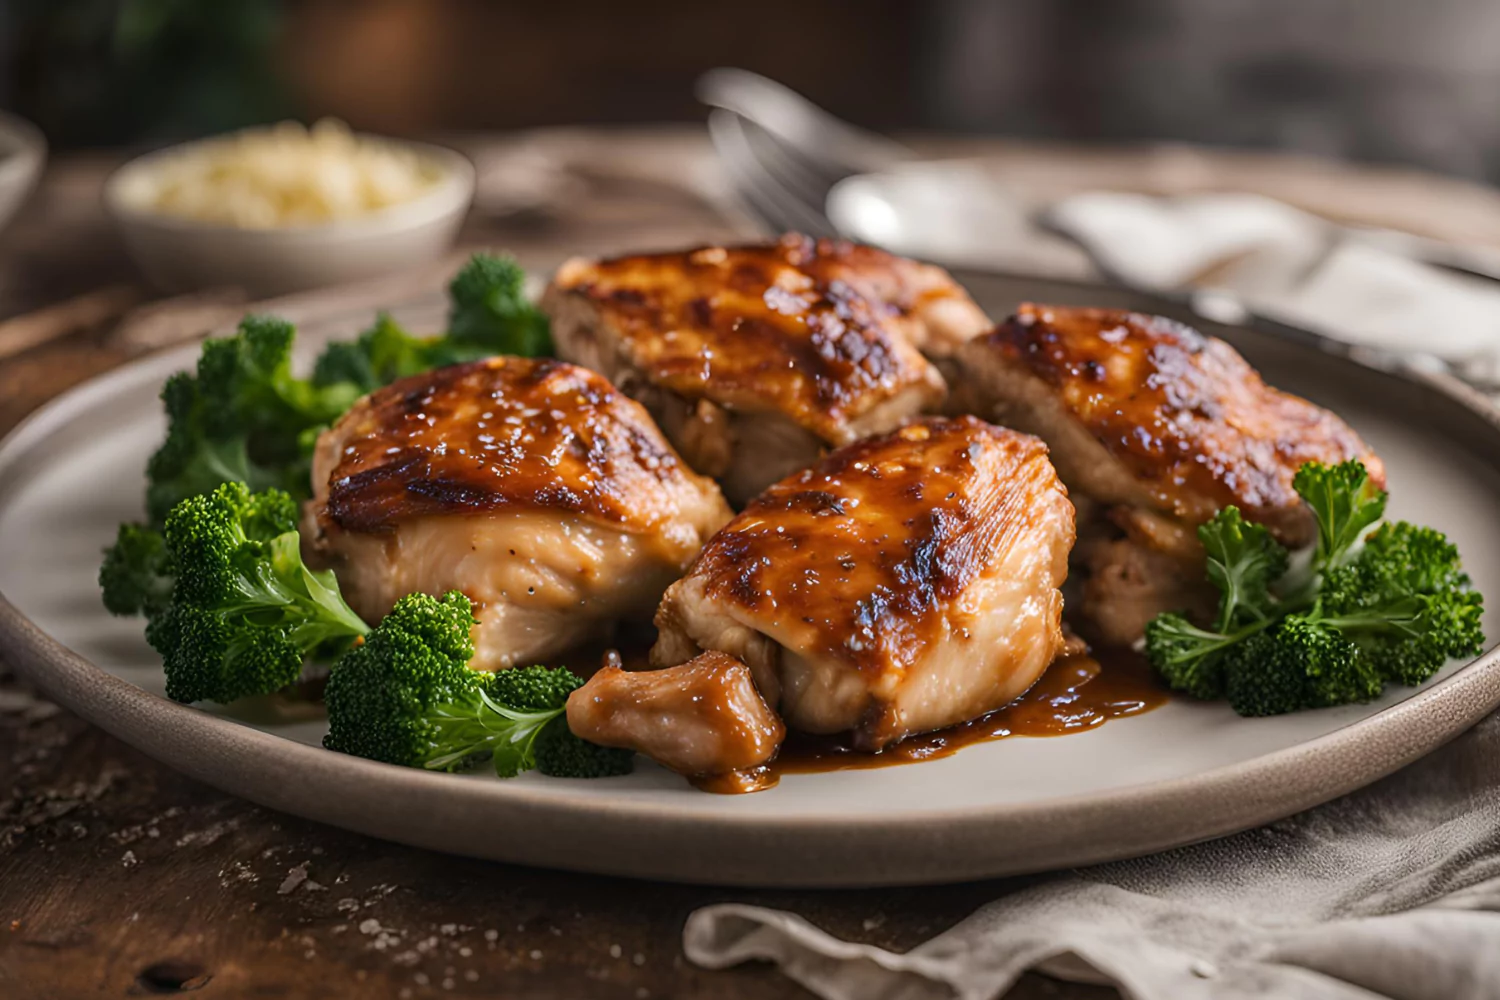
    Wondering how long to air fry boneless chicken thighs? Air frying is a quick and efficient way to achieve crispy, juicy results without the mess of traditional frying. This article will guide you through every step of the process, from preparation to serving. We’ll cover the optimal cooking times, temperatures, and techniques to ensure your chicken thighs come out perfectly every time. Whether you’re a seasoned cook or a beginner, this comprehensive guide will help you master the art of air-frying boneless chicken thighs.

    Why Choose Boneless Chicken Thighs?

    Boneless chicken thighs are incredibly versatile and cook faster than their bone-in counterparts. They are also more flavorful than chicken breasts and remain juicy even after cooking. Air frying boneless chicken thighs gives you a delicious, crispy exterior without the extra oil and calories.

    Benefits of Air Frying

    Air frying is not only healthier but also faster than traditional frying. It requires less oil, reducing the overall calorie content of your meals. Additionally, air fryers are easy to use and clean, making them a convenient option for busy households.

    What to Expect

    In this guide, we’ll cover:

    • How to prepare your chicken thighs
    • Optimal air fryer settings
    • Step-by-step cooking instructions
    • Tips for achieving the perfect texture and flavor
    • Storing and reheating leftovers

    By the end of this article, you’ll be equipped with all the knowledge you need to make perfect air fryer boneless chicken thighs.

    Preparation

    How long to air fry boneless chicken thighs

    Choosing Your Chicken Thighs

    When preparing to learn how long to air fry boneless chicken thighs, selecting the right chicken thighs is crucial. Consider whether you prefer boneless or bone-in, and skinless or skin-on. Boneless, skinless thighs cook faster and are easier to eat, while bone-in or skin-on thighs may offer additional flavor.

    Best Cuts for Air Frying

    For air frying, boneless and skinless chicken thighs are ideal. They cook evenly and quickly, resulting in a tender and juicy outcome. If you prefer crispy skin, opt for skin-on thighs, but remember to adjust the cooking time accordingly.

    Marinades and Seasonings

    Understanding how long to air fry boneless chicken thighs also involves proper marination. Marinating your chicken thighs adds flavor and helps keep them moist during cooking. Garlic, rosemary, and olive oil can be combined to make a basic marinade. Alternatively, you can use a store-bought marinade or seasoning mix.

    Seasoning Ideas for Enhanced Flavor

    Consider using a variety of seasonings to suit your taste. Popular options include Italian seasoning, smoked paprika, garlic powder, and cayenne pepper. For a sweet and spicy kick, try adding a teaspoon of sweet chili sauce to your marinade.

    By selecting the right cuts and enhancing them with marinades and seasonings, you set the foundation for perfectly cooked chicken thighs. Following these steps ensures you achieve the best results every time you air fry.

    Setting Up Your Air Fryer

    Preheating your air fryer is a crucial step to ensure even cooking. Set your air fryer to 400°F and let it preheat for about 3 minutes. This helps to create a consistent cooking environment.

    Optimal Temperature Settings

    The optimal temperature for cooking boneless chicken thighs in an air fryer is 400°F. This high heat ensures a crispy exterior while keeping the inside juicy and tender.

    Placement of Chicken Thighs

    Proper placement of chicken thighs in the air fryer basket is key to achieving even cooking. Arrange the thighs in a single layer, making sure they do not overlap. If you have more chicken thighs than can fit in a single layer, cook them in batches.

    Single Layer Importance

    Cooking the chicken in a single layer ensures that the hot air circulates evenly around each piece, resulting in a crispy, golden-brown exterior. Overlapping pieces can lead to uneven cooking and less crispy results.

    Cooking Times and Temperatures

    The cooking time for boneless chicken thighs in an air fryer can vary depending on the size of the thighs and the specific air fryer model. Generally, it takes about 15 minutes to cook at 400°F, flipping halfway through the cooking time.

    Internal Temperature Guidelines

    To ensure your chicken thighs are fully cooked, use a meat thermometer to check that the internal temperature has reached 165°F. The USDA recommends this as the minimum safe internal temperature.

    Cooking Techniques for Best Results

    Flipping the chicken thighs halfway through the cooking process helps to ensure even cooking on both sides. Additionally, using a meat thermometer can prevent overcooking and dryness.

    Flipping Halfway Through

    Flipping the chicken thighs halfway through cooking helps achieve a uniform crispiness. It’s also a good time to check the progress and ensure the thighs are cooking evenly.

    Avoiding Dryness

    To avoid dry chicken thighs, do not overcook them. Using a meat thermometer is the best way to ensure they are cooked just right. Also, consider marinating or brining the chicken thighs before cooking to retain moisture.

    Resting and Serving

    After the chicken thighs are cooked, let them rest for about 5 minutes before serving. By doing this, the liquids can redistribute throughout the meat, giving the meal more taste and juice.

    Serving Suggestions

    Boneless chicken thighs are incredibly versatile and can be served with a variety of side dishes. Consider pairing them with roasted vegetables, a fresh salad, or your favorite grains.

    Side Dishes to Pair with Air-Fried Chicken Thighs

    Popular side dishes include roasted potatoes, steamed broccoli, or a light quinoa salad. These sides complement the rich flavor of the chicken and make for a well-rounded meal.

    Storing and Reheating Leftovers

    Should you have any leftovers, keep them refrigerated for up to four days in an airtight container. When reheating, use the air fryer to maintain the crispy texture.

    Proper Storage Methods

    Properly storing your leftover chicken thighs ensures they stay fresh and safe to eat. Airtight containers prevent moisture loss and contamination, keeping your leftovers delicious for several days.

    Reheating Tips for Maintaining Quality

    To reheat, place the chicken thighs in the air fryer at 375°F for a few minutes until warmed through. This method helps to maintain the crispy texture that makes air-fried chicken thighs so enjoyable.

    Popular Recipes and Variations

    How long to air fry boneless chicken thighs
    How long to air fry boneless chicken thighs


    Air fryer boneless chicken thighs can be customized with different marinades and seasonings to suit your taste. Here are some popular variations:

    Sweet and Spicy Chicken Thighs

    For a sweet and spicy flavor, marinate the chicken thighs in a mixture of honey, soy sauce, garlic, and a touch of sriracha. Air fry as usual for a delicious, flavorful meal.

    Garlic Herb Chicken Thighs

    Combine olive oil, minced garlic, chopped fresh herbs (such as rosemary and thyme), salt, and pepper. Coat the chicken thighs with this mixture before air frying for a fragrant and savory dish.

    Asian-Inspired Flavors

    Marinate the chicken thighs in a blend of soy sauce, ginger, garlic, and sesame oil. Add a sprinkle of sesame seeds before air frying for an Asian-inspired twist.

    Nutritional Information

    Understanding the nutritional profile of your air-fried boneless chicken thighs can help you make healthier choices. This section will break down the calories, protein, fat, and other nutrients found in a typical serving of air-fried boneless chicken thighs.

    Calories and Macronutrients

    A standard serving of air-fried boneless chicken thighs (about 4 ounces) typically contains around 200-250 calories. This serving provides approximately:

    • Protein: 24-30 grams
    • Fat: 10-15 grams
    • Carbohydrates: 0-2 grams

    Health Benefits

    Air frying chicken thighs offers several health benefits compared to traditional frying methods. Here are a few reasons why air-fried boneless chicken thighs can be a healthier choice:

    Lower in Calories and Fat

    Deep-frying consumes a lot more oil than air-frying, which means that the overall calorie and fat content is lower. This makes air-fried chicken thighs a great option for those looking to reduce their fat intake without sacrificing flavor or texture.

    High in Protein

    Chicken thighs are an excellent source of high-quality protein, which is essential for muscle growth and repair. Including protein-rich foods like chicken thighs in your diet can help you meet your daily protein needs and support overall health.

    Rich in Vitamins and Minerals

    Chicken thighs provide important vitamins and minerals, including B vitamins (such as niacin and B6), which support energy metabolism and brain function. They also contain minerals like phosphorus, which is important for bone health, and selenium, which has antioxidant properties.

    Reduced Risk of Harmful Compounds

    Air frying reduces the formation of harmful compounds, such as acrylamide, which can occur during high-heat cooking methods like deep frying. This makes air-fried foods a safer option in terms of potential carcinogens.

    Versatile and Adaptable

    Air-fried chicken thighs can be seasoned and marinated in various ways, allowing you to enjoy a wide range of flavors and cuisines. This versatility makes it easier to incorporate them into a balanced and varied diet.

    Tips for Healthier Air Frying

    For even healthier air-fried chicken thighs, consider these tips:

    • Use Heart-Healthy Oils: Opt for oils high in unsaturated fats, such as olive oil or avocado oil.
    • Limit Added Salt: Use herbs and spices to enhance flavor instead of relying on salt.
    • Incorporate Vegetables: Pair your chicken thighs with air-fried or roasted vegetables for a balanced meal.
    • Monitor Portion Sizes: Stick to recommended serving sizes to avoid overeating.

    By understanding the nutritional benefits and following these tips, you can enjoy delicious and healthy air-fried boneless chicken thighs as part of a balanced diet.

    Common Problems and Solutions

    Air frying boneless chicken thighs can sometimes result in unexpected issues. Here, we’ll address some common problems and provide solutions to help you achieve the best results.

    1. Chicken Thighs Are Undercooked

    If your chicken thighs are undercooked, it may be due to insufficient cooking time or temperature. To resolve this, ensure that your air fryer is preheated to the correct temperature (400°F) and that you are cooking the chicken for the recommended time. Use a meat thermometer to check that the internal temperature reaches 165°F.

    2. Chicken Thighs Are Overcooked

    Overcooked chicken thighs can become dry and tough. To avoid this, monitor the cooking time closely and check the internal temperature with a meat thermometer. Additionally, marinating the chicken beforehand can help retain moisture.

    3. Uneven Cooking

    Uneven cooking often occurs when the chicken thighs are not placed in a single layer in the air fryer basket. To ensure even cooking, arrange the thighs in a single layer with space between them, allowing hot air to circulate evenly.

    4. Chicken Thighs Not Crispy Enough

    If your chicken thighs lack crispiness, try increasing the cooking temperature slightly or extending the cooking time by a few minutes. Also, make sure to pat the chicken dry with paper towels before air frying, and avoid overcrowding the basket.

    5. Excess Smoke from the Air Fryer

    Excess smoke can be caused by fatty foods or leftover grease in the air fryer. To minimize smoke, clean the air fryer thoroughly after each use and remove any excess fat from the chicken thighs. Using a small amount of oil can also help reduce smoke.

    Tips for Avoiding Common Problems

    How long to air fry boneless chicken thighs
    correct cooking temperature. This promotes uniform cooking and a crispy outside.

    Use a Meat Thermometer

    A meat thermometer is an essential tool for air frying. It ensures that your chicken thighs are cooked to the safe internal temperature of 165°F, preventing undercooking or overcooking.

    Avoid Overcrowding

    Aim to keep the air fryer basket as empty as possible for optimal results. Cook the chicken thighs in batches if necessary to ensure even cooking and a crispy texture.

    Marinate for Moisture

    Marinating the chicken thighs before cooking can help retain moisture and enhance flavor. Choose marinades that complement your preferred seasonings and flavors.

    Adjust Cooking Time and Temperature

    If your air fryer model cooks hotter or cooler than average, adjust the cooking time and temperature accordingly. Experiment with different settings to find the perfect balance for your specific air fryer.

    By following these troubleshooting tips and solutions, you can overcome common issues and enjoy perfectly cooked, delicious air-fried boneless chicken thighs every time.

    Frequently Asked Questions (FAQs)

    For how long is boneless chicken thigh cooking time in an air fryer?

    Cook your boneless, skinless chicken thighs in the air fryer at 400°F for 7 minutes on one side, then 8-12 minutes on the other side until they are cooked through and crispy.

    Can uncooked chicken be cooked in an air fryer?

    Yes, you can put raw chicken in an air fryer. Just ensure it is cooked through to an internal temperature of 165°F to be safe.

    In an air fryer, what temperature is used to cook chicken thighs?

    Cook your chicken thighs at 400°F for about 15 minutes total, flipping halfway through the cooking time.

    How can you prevent the drying out of chicken thighs?

    To keep chicken thighs from drying out, avoid overcooking and use a marinade or brine to retain moisture. Monitoring the cooking time closely with a meat thermometer also helps.

    Should skinless chicken thighs be baked at 350 degrees or 400 degrees?

    Baking at 400°F is generally better for a juicier outcome, as the higher temperature helps to crisp up the exterior while keeping the inside moist.

    Do boneless thighs take less time to cook?

    Yes, boneless thighs generally take less time to cook compared to bone-in thighs because there is no bone to absorb heat.

    How do you tell when skinless, boneless chicken thighs are cooked through?

    The best way to know is to check that the internal temperature has reached 165°F using a meat thermometer.

    Conclusion

    Mastering how long to air fry boneless chicken thighs can transform your meal prep routine. Cooking boneless chicken thighs in an air fryer is an easy and efficient way to enjoy a delicious, healthy meal. By following the steps outlined in this article, you can achieve perfectly cooked chicken thighs every time. Whether you’re a seasoned cook or new to air frying, this guide will help you make the most of your air fryer and enjoy flavorful, crispy chicken thighs.

  • How Hot Should Oil Be to Fry Chicken? Optimal Temperatures Explained

    How Hot Should Oil Be to Fry Chicken? Optimal Temperatures Explained

    How Hot Should Oil Be to Fry Chicken? Optimal Temperatures Explained

    How hot should oil be to fry chicken? Frying chicken to perfection involves more than just tossing it in hot oil. The ideal oil temperature, the type of oil, and even the frying techniques play a crucial role in achieving that crispy, delicious result we all crave. This article will guide you through the optimal temperatures, best practices, and common pitfalls, ensuring your fried chicken is always a hit. Let’s dive in!

    Introduction

    Introduction to Frying Chicken

    Frying chicken can be a bit of an art. It’s not just about submerging chicken in hot oil; it’s about getting the temperature just right. If the oil’s too hot, the outside burns while the inside stays raw. Too cool, and your chicken ends up greasy and unappetizing. Understanding the ideal frying temperature is key to achieving the perfect balance of crispy exterior and juicy interior.

    Historical Context

    Historically, fried chicken has been a staple in various cultures. From Southern fried chicken in the U.S. to different international versions, each tradition brings unique techniques and flavors. But one thing remains consistent: getting the oil temperature right is crucial.

    Different and smaller slices of chicken could require a slight adjustment in temperature. Smaller pieces, like wings, cook faster and might need a slightly higher temperature, while larger pieces, like breasts, may benefit from a lower temperature to ensure thorough cooking without burning the outside.

    Optimal Oil Temperature

    Why Oil Temperature Matters

    When frying chicken, the oil temperature matters immensely. If the oil is too cool, the chicken absorbs too much oil, becoming greasy and heavy. Conversely, if the oil is too hot, the exterior may burn before the interior cooks thoroughly. This balance is essential to achieving that perfect crispy texture without compromising the juicy interior.

    Effects of Incorrect Oil Temperature

    Frying chicken at the wrong temperature can lead to various issues. Too low, and the chicken ends up soggy and greasy. Too high, and it burns on the outside while remaining undercooked inside. Maintaining the right temperature ensures a golden, crispy crust and fully cooked meat.

    Ideal Temperature Range

    Recommended Temperatures

    For the best results, maintain an oil temperature between 350°F and 375°F (175°C to 190°C). This range ensures the chicken cooks evenly, developing a crispy exterior and juicy interior. To check the oil’s temperature and make any required modifications, use a thermometer.

    Temperature Variations

    Different chicken cuts and sizes might require slight temperature adjustments. Smaller pieces, like wings, cook faster and might need a slightly higher temperature, while larger pieces, like breasts, may benefit from a lower temperature to ensure thorough cooking without burning the outside.

    Choosing the Right Oil

    How hot should oil be to fry chicken

    Best Oils for Frying Chicken

    The type of oil you use is crucial for achieving perfect fried chicken. Oils with a high smoke point are ideal as they can withstand the high temperatures needed for frying. Some of the best options include:

    • Peanut Oil: Known for its high smoke point (around 450°F) and neutral flavor, peanut oil is a favorite for frying chicken. It doesn’t impart any unwanted flavors to the chicken and can be reused multiple times.
    • Canola Oil: Another excellent choice, canola oil has a high smoke point (around 400°F) and is relatively low in saturated fats, making it a healthier option.
    • Vegetable Oil: Versatile and widely available, vegetable oil has a high smoke point (around 400°F) and a neutral flavor, making it a good choice for frying chicken.

    Oil Flavor and Health Considerations

    When choosing an oil, consider both the flavor and health benefits. While some oils like olive oil have lower smoke points and strong flavors, oils like peanut, canola, and vegetable oil are more neutral and can withstand higher temperatures. Additionally, oils with higher levels of unsaturated fats are generally healthier choices for frying.

    Preparing the Chicken

    Marinating the Chicken

    Marinating your chicken before frying can significantly enhance its flavor and moisture. A common marinade includes buttermilk, which helps tenderize the meat and adds a subtle tangy flavor. To marinate:

    1. Combine Ingredients: Mix buttermilk with hot sauce, salt, and pepper in a large bowl.
    2. Add Chicken: Submerge the chicken pieces in the marinade, ensuring they are fully coated.
    3. Refrigerate: Cover the bowl with plastic wrap and refrigerate for at least 3-4 hours, or overnight for best results.

    Breading and Coating Techniques

    Proper breading and coating are crucial for that crispy exterior. Here’s a simple method:

    1. Prepare Dredging Mix: Combine flour, cornstarch, garlic powder, paprika, salt, and pepper in a bowl.
    2. Coat Chicken: Remove the chicken from the marinade, letting excess drip off. Dredge each piece in the flour mixture, pressing it into the chicken to ensure an even coat.
    3. Let it Rest: Place the coated chicken on a wire rack and let it rest for about 15 minutes before frying. This helps the coating adhere better.

    The Frying Process

    Heating the Oil

    Getting the oil to the right temperature is critical. Here’s how to do it:

    1. Preheat Your Oil: Place your chosen oil in a deep fryer or heavy-bottomed pot. Heat it over medium-high heat until it reaches 350°F to 375°F. To precisely keep an eye on the temperature, use a kitchen thermometer.
    2. Test the Temperature: If you don’t have a thermometer, you can drop a small piece of bread into the oil. If it turns golden brown in 50-60 seconds, the oil is ready.

    Maintaining Temperature During Frying

    Keeping the oil temperature steady is just as important as getting it there. Here are some tips:

    1. Fry in Batches: Avoid overcrowding the pot. Frying too many pieces at once lowers the oil temperature, leading to greasy chicken. Fry a few pieces at a time to maintain the ideal temperature.
    2. Adjust the Heat: Monitor the oil temperature continuously. If it drops, increase the heat slightly. If it gets too hot, reduce the heat.
    3. Use a Thermometer: A clip-on deep-fry thermometer can help you keep a constant watch on the oil’s temperature, ensuring it stays within the 350°F to 375°F range.

    Frying Time and Doneness

    Knowing how long to fry chicken is crucial for both safety and taste:

    1. Average Frying Times: Generally, fry chicken pieces for about 12-15 minutes, turning them occasionally. Wings may take around 8-10 minutes, while larger pieces like thighs and breasts might need 15-20 minutes.
    2. Check for Doneness: The internal temperature of the chicken should reach 165°F. Use an instant-read thermometer to check this. Insert it into the thickest part of the chicken, avoiding the bone.

    Post-Frying Steps

    Draining and Resting the Chicken

    Once your chicken is fried to perfection, proper draining and resting ensure it stays crispy and delicious:

    1. Drain Excess Oil: Use a slotted spoon to remove the chicken from the oil. Place it on a wire rack set over a baking sheet. This prevents the chicken from becoming mushy by letting extra oil drop off.
    2. Let it Rest: Allow the chicken to rest for about 10 minutes. This helps the juices redistribute, keeping the meat moist while the coating stays crispy.

    Reusing and Storing Oil

    Used oil can be reused if handled correctly. Here’s how to manage it:

    1. Strain the Oil: Once the oil has cooled, strain it through a fine mesh sieve or cheesecloth to remove any food particles.
    2. Store Properly: Store the strained oil in a clean, airtight container. To keep it in good condition, store it somewhere cold and dark. Label the container with the type of oil and the date it was used.

    Common Mistakes and How to Avoid Them

    Top Mistakes in Frying Chicken

    Avoid these common pitfalls to ensure your fried chicken is always top-notch:

    1. Using the Wrong Oil: Not all oils are suitable for frying. Use oils with high smoke points, like peanut, canola, or vegetable oil, to avoid smoking and burning.
    2. Overcrowding the Pot: Frying too many pieces at once lowers the oil temperature, resulting in greasy, unevenly cooked chicken. Fry in small batches to maintain consistent heat.
    3. Incorrect Oil Temperature: Frying at too low or too high a temperature leads to greasy or burnt chicken. Use a thermometer to keep the oil within the 350°F to 375°F range.

    Troubleshooting Tips

    Here’s how to fix common frying issues on the fly:

    1. Oil Too Cool: If your oil temperature drops, remove some chicken pieces and let the oil heat back up before adding more.
    2. Oil Too Hot: If the oil gets too hot, turn down the heat and remove the pot from the burner for a minute to cool slightly.
    3. Soggy Chicken: Ensure the chicken is fully coated in the breading mixture and let it rest before frying to achieve a crispy crust.

    Advanced Techniques for Perfect Fried Chicken

    How hot should oil be to fry chicken

    Using a Double Fry Method

    For an extra-crispy crust, consider using the double fry method. This technique involves frying the chicken twice: first at a lower temperature to cook it through, then at a higher temperature to crisp up the exterior. So, how hot should oil be to fry chicken using this method?

    1. First Fry: Heat the oil to 325°F. Fry the chicken pieces for about 8-10 minutes, depending on their size, until they are cooked through but not overly browned.
    2. Rest: Remove the chicken from the oil and let it rest on a wire rack for about 10 minutes.
    3. Second Fry: Increase the oil temperature to 375°F. Fry the chicken again for 2-3 minutes until it achieves a golden-brown, crispy crust.

    Brining for Extra Juiciness

    Brining your chicken before frying can help ensure it stays juicy on the inside while developing a crispy crust on the outside. Here’s a simple brine recipe:

    1. Ingredients: Combine 1 gallon of water, 1 cup of salt, 1 cup of sugar, and your choice of spices (such as bay leaves, garlic, and peppercorns).
    2. Brining Process: Submerge the chicken in the brine solution and refrigerate for 4-6 hours.
    3. Rinse and Dry: Rinse the chicken thoroughly to remove excess salt and pat it dry before proceeding with marination and breading.

    Utilizing Different Coatings

    Experimenting with different coatings can add variety to your fried chicken. Here are a few options:

    1. Cornstarch: Adding cornstarch to your flour mixture can make the crust lighter and crispier.
    2. Breadcrumbs or Panko: These can provide a crunchier texture compared to flour alone.
    3. Crushed Cereal or Crackers: For a unique twist, try using crushed cornflakes or crackers as part of the breading mix.

    Frying Without a Thermometer

    If you don’t have a thermometer, there are still ways to gauge the oil temperature. Knowing how hot should oil be to fry chicken is crucial even without precise tools:

    1. Bread Test: Drop a 1-inch cube of bread into the oil. If it browns in 60 seconds, the oil is around 365°F to 375°F.
    2. Water Droplet Test: Flick a small amount of water into the oil. If it sizzles and evaporates immediately, the oil is hot enough.

    Wrapping Up

    By mastering these advanced techniques and understanding how hot should oil be to fry chicken, you can achieve professional-quality results at home. Whether you’re using a double fry method for extra crispiness, brining for juiciness, or experimenting with different coatings, these tips will help you create the perfect fried chicken every time.

    FAQs

    1. How can I determine whether the oil temperature is sufficient?
      • When determining how hot should oil be to fry chicken, a thermometer is your best tool. Aim for an oil temperature of 350°F to 375°F. To test the oil without a thermometer, immerse a tiny piece of bread in it. If it browns in 50-60 seconds, the oil is ready.
    2. Can I reuse the oil for frying chicken?
      • Yes, you can reuse the oil. After frying, let the oil cool, strain it to remove any food particles, and store it in a cool, dark place. However, reuse it no more than 2-3 times to maintain quality.
    3. What type of oil is best for frying chicken?
      • Oils with high smoke points, such as peanut, canola, and vegetable oil, are best for frying chicken. These oils can withstand the high temperatures required without breaking down.
    4. What happens if the oil is too hot or not hot enough?
      • If the oil is too hot, the chicken will cook too quickly on the outside and remain undercooked inside. If the oil is not hot enough, the chicken will absorb too much oil, becoming greasy and soggy. Maintaining the correct temperature is key to perfect frying.
    5. How can I tell if the chicken is done frying?
      • The internal temperature of the chicken should reach 165°F. Use an instant-read thermometer to check the thickest part of the chicken, avoiding bones. This ensures the meat is cooked through.

    By understanding how hot should oil be to fry chicken and following these tips, you can achieve perfectly fried, crispy, and delicious chicken every time.

    Conclusion

    Frying chicken to perfection is a combination of art and science. From selecting the right oil to maintaining the optimal temperature, each step plays a critical role in achieving that coveted crispy, golden-brown exterior and juicy interior. By understanding and implementing the tips and techniques outlined in this article, you can elevate your fried chicken game and enjoy consistently delicious results every time. So, grab your thermometer, choose your oil wisely, and get ready to fry up some mouthwatering chicken that will impress family and friends alike. Happy frying!

  • Can You Fry Chicken Without Flour? Discover Alternatives and Tips

    Can You Fry Chicken Without Flour? Discover Alternatives and Tips

    Can You Fry Chicken Without Flour? Discover Alternatives and Tips

    Fried chicken is a beloved dish worldwide, known for its crispy, golden exterior and juicy interior. However, not everyone can or wants to use flour in their frying process. Whether due to gluten allergies, dietary restrictions, or simply running out of flour, many seek alternative methods to achieve that perfect crunch. This comprehensive guide explores various techniques and ingredients to fry chicken without flour, ensuring delicious results every time.

    Introduction to the Topic

    Fried chicken without flour might sound like a culinary challenge, but it’s entirely feasible with the right know-how. From using cornstarch to breadcrumbs, ground nuts, and other flour substitutes, we’ll cover multiple methods to suit various dietary needs and preferences. Let’s dive into the world of flourless fried chicken and discover how to make this classic dish without compromising on taste or texture.

    Health Considerations

    Gluten-Free Diets

    For those on a gluten-free diet, traditional flour-coated fried chicken isn’t an option. Flour alternatives like cornstarch and potato starch come to the rescue, providing that desired crispy texture without gluten. Cornstarch, for example, creates a delightful crunch and is a fantastic choice for anyone avoiding gluten.

    Reducing Carbohydrates

    Another reason to skip the flour is to reduce carbohydrate intake. By opting for alternative coatings like nuts or gluten-free flour, you can enjoy fried chicken without the extra carbs that come with regular flour. Additionally, these alternatives often add unique flavors and textures to the dish, making your fried chicken not only healthier but also more interesting to the palate.

    Using cornstarch instead of flour, for instance, yields an extra crispy coating, while breadcrumbs provide a classic crunch without the gluten. Each alternative brings its own benefits and flavors to the table, allowing for a personalized and healthier fried chicken experience.

    Next, we’ll explore various methods and ingredients to make flourless fried chicken, ensuring you achieve that perfect crunch every time.

    In the following parts, we’ll delve into different techniques and ingredients for frying chicken without flour, covering everything from cornstarch and breadcrumbs to ground nuts and other substitutes. We’ll also discuss various cooking techniques, including deep frying, shallow frying, air frying, and baking, to help you find the best method for your needs.

    Stay tuned for more detailed instructions, tips, and tricks to master the art of flourless fried chicken!

    Methods and Ingredients for Flourless Fried Chicken

    Now, let’s delve into the different methods and ingredients you can use to fry chicken without flour. These alternatives will not only help you achieve a crispy and delicious crust but also cater to various dietary needs and preferences.

    Cornstarch Method

    Cornstarch is a fantastic substitute for flour, providing a crispy texture that’s often even crunchier than traditional flour coatings. It is a great choice for people who are sensitive to gluten because it is likewise devoid of gluten.

    How Cornstarch Works Cornstarch forms a dry, crisp coating that absorbs less oil than flour, resulting in a less greasy end product. It browns slowly, allowing the chicken to cook through without burning.

    Benefits of Using Cornstarch Using cornstarch instead of flour creates a light, crispy crust. It’s also lower in fat and calories, which is great for those watching their intake. Plus, cornstarch’s neutral flavor lets your seasonings shine through.

    How to Use Cornstarch To fry chicken with cornstarch, season your chicken pieces, then coat them in a thin layer of cornstarch. You can combine cornstarch with spices like paprika or garlic powder for extra flavor. Heat your oil to 350°F and fry until golden brown and crispy.

    Breadcrumbs Method

    Can You Fry Chicken Without Flour?

    Breadcrumbs offer another excellent alternative to flour. They create a classic crunchy coating and can be easily made gluten-free.

    Types of Breadcrumbs You can use regular breadcrumbs or panko, which are Japanese-style breadcrumbs that provide an extra-crispy texture. For a gluten-free option, use gluten-free breadcrumbs or make your own from gluten-free bread​.

    Making Your Own Breadcrumbs To make breadcrumbs, toast or bake slices of bread until dry. Then, grind them in a food processor to your desired texture. You can add spices like garlic powder, onion powder, or Parmesan cheese to enhance the flavor.

    Coating Process Start by dipping your seasoned chicken pieces into a beaten egg mixture, then roll them in the breadcrumbs until well-coated. Let the coated chicken rest for about 10-15 minutes before frying to ensure the breadcrumbs adhere properly​.

    Nut-Based Coatings

    Using ground nuts like almonds, pecans, or peanuts can add a unique flavor and a crunchy texture to your fried chicken.

    Using Ground Nuts To use ground nuts, pulse them in a food processor until finely ground. Season your chicken, dip it in an egg wash, and coat it with the ground nuts. This method not only provides a delightful crunch but also adds healthy fats and protein to your meal​​.

    Flavor and Texture Benefits Nuts offer a rich, nutty flavor that pairs wonderfully with chicken. They create a thick, crunchy crust that’s both satisfying and nutritious. Plus, they are naturally gluten-free and low in carbs, making them an ideal choice for various diets.

    Other Flour Substitutes

    Several other flour substitutes can be used to fry chicken, each offering unique benefits.

    Potato Starch Potato starch creates an extra-crispy crust and is another gluten-free option. It works similarly to cornstarch and can be used in the same way.

    Rice Flour Rice flour is another great alternative that provides a delicate, crispy coating. It’s perfect for those looking for a light, airy crust​.

    Chickpea Flour Chickpea flour offers a high-protein, gluten-free option that adds a slightly nutty flavor to your fried chicken. It’s an excellent choice for a more substantial crust.

    In the next section, we will discuss various cooking techniques, including deep frying, shallow frying, air frying, and baking, to help you find the best method for your needs. Stay tuned for more detailed instructions and tips on achieving perfect flourless fried chicken every time!

    Cooking Techniques

    Having discussed various ingredients for flourless fried chicken, it’s time to explore the different cooking techniques. Each method offers unique benefits and can be tailored to suit your preferences and available kitchen equipment.

    Deep Frying

    Deep frying is a classic method that results in an incredibly crispy and golden-brown crust. This technique involves submerging the chicken pieces in hot oil, cooking them evenly on all sides.

    Preparing the Chicken To prepare your chicken for deep frying, start by seasoning it and coating it with your chosen flour substitute, such as cornstarch or breadcrumbs. Ensure the coating is even and covers the chicken pieces completely​.

    Deep Frying Process

    1. Heat the oil in a deep fryer or a large pot to 350°F (175°C). Use a thermometer to maintain a consistent temperature.
    2. Carefully lower the chicken pieces into the hot oil, ensuring not to overcrowd the pot. Overcrowding lowers the oil temperature and results in soggy chicken.
    3. Fry the chicken until it is golden brown and cooked through, typically about 6-8 minutes per side, depending on the size of the pieces.
    4. Verify that the interior temperature reaches 165°F (74°C) with a meat thermometer.
    5. Once cooked, remove the chicken and place it on a wire rack or paper towels to drain excess oil​.

    Shallow Frying

    Shallow frying uses less oil than deep frying and can be done in a skillet or frying pan. This method is perfect for smaller batches or if you want to save on oil.

    Advantages of Shallow Frying Shallow frying is a bit healthier than deep frying as it uses less oil. It’s also easier to control the cooking process and monitor the chicken’s progress​.

    Step-by-Step Guide

    1. Heat a few tablespoons of oil in a large skillet over medium-high heat.
    2. Once the oil is hot, add the coated chicken pieces. Ensure they are spaced apart to cook evenly.
    3. Fry until golden brown on both sides, about 5 to 7 minutes. Adjust the heat as needed to avoid burning the coating.
    4. Check the internal temperature to ensure the chicken is fully cooked.
    5. Remove the chicken and place it on a wire rack or paper towels to drain excess oil​​.

    Air Frying

    Can You Fry Chicken Without Flour?

    Air frying is a healthier alternative to traditional frying methods, using hot air circulation to cook the chicken. This technique can achieve similar crispy results with significantly less oil.

    Health Benefits Air frying reduces the amount of oil needed, making it a lower-fat option. It’s ideal for those looking to enjoy fried chicken without the guilt.

    Air Frying Method

    1. Preheat your air fryer to 360°F (182°C).
    2. Lightly spray the coated chicken pieces with oil to help achieve a crispy texture.
    3. Place the chicken in the air fryer basket, ensuring they are not touching.
    4. Cook for 10 minutes, then flip the pieces and cook for an additional 10 minutes or until the chicken is crispy and the internal temperature reaches 165°F.
    5. Remove the chicken and let it rest for a few minutes before serving​​.

    Baking

    Baking is another healthier method that can still provide a crispy exterior. It’s convenient and requires minimal hands-on time.

    Health and Convenience Baking uses less oil and is easier to manage, as you can cook multiple pieces at once in the oven. For people who like to cook without getting their hands dirty, it is a fantastic option.

    Baking Instructions

    1. Preheat your oven to 400°F (200°C).
    2. Place the coated chicken pieces on a baking sheet lined with parchment paper or a wire rack.
    3. Lightly spray the chicken with oil to promote browning.
    4. Bake for 20-25 minutes, flipping halfway through, until the chicken is crispy and the internal temperature reaches 165°F.
    5. Before serving, take the chicken out of the oven and allow it to rest for a few minutes.

    In the next section, we will provide detailed recipes for making flourless fried chicken using these techniques. Stay tuned for mouth-watering recipes that will make your next fried chicken meal a hit!

    Recipes

    Now that we’ve covered the various methods and ingredients, let’s dive into some detailed recipes for making flourless fried chicken. These recipes will guide you through the process, ensuring you achieve that perfect crispy and delicious chicken every time.

    Classic Flourless Fried Chicken

    This recipe uses cornstarch to create a crispy, golden crust that rivals traditional flour-coated fried chicken.

    Ingredients and Preparation

    • 8 boneless chicken thighs
    • 1 teaspoon salt
    • 1 teaspoon black pepper
    • 1-2 cups cornstarch
    • 1-2 cups vegetable oil (for frying)
    • Optional spices: garlic powder, paprika, chili powder

    Cooking Instructions

    1. Prepare the Chicken: Clean and dry the chicken pieces. Season generously with salt, pepper, and optional spices.
    2. Coat the Chicken: Dredge the chicken pieces in cornstarch, ensuring an even, thin layer.
    3. Heat the Oil: Heat oil in a deep fryer or large pot to 350°F (175°C). Use a thermometer to monitor the temperature.
    4. Fry the Chicken: Gently drop the pieces of chicken into the heated oil. Fry until golden brown and crispy, turning halfway through, about 10-15 minutes.
    5. Drain and Serve: Remove the chicken and place on a wire rack or paper towels to drain excess oil. Serve hot.

    Buttermilk Fried Chicken

    Marinating chicken in buttermilk ensures it stays juicy and flavorful. This method pairs well with breadcrumbs or other coatings.

    Ingredients and Preparation

    • 8 chicken drumsticks
    • 2 cups buttermilk
    • 1 teaspoon salt
    • 1 teaspoon black pepper
    • 2 cups breadcrumbs or ground nuts
    • 1-2 cups vegetable oil (for frying)

    Cooking Instructions

    1. Marinate the Chicken: Place the chicken in a bowl and cover with buttermilk. Add salt and pepper. Marinate for at least 2 hours or overnight.
    2. Coat the Chicken: Remove chicken from buttermilk, letting excess drip off. Roll in breadcrumbs or ground nuts until well-coated.
    3. Heat the Oil: Heat oil in a deep fryer or skillet to 350°F (175°C).
    4. Fry the Chicken: Fry the chicken until golden and crispy, about 10 minutes per side.
    5. Drain and Serve: Drain on paper towels and serve hot.

    Tempura-Style Chicken

    This light and crispy tempura-style recipe is perfect for those who want a less greasy option.

    Ingredients and Preparation

    • 8 chicken tenders
    • 1 cup cornstarch
    • 1 cup cold water
    • 1 egg, beaten
    • 1 teaspoon salt
    • 1 teaspoon pepper
    • Vegetable oil for frying

    Cooking Instructions

    1. Prepare the Batter: In a bowl, mix cornstarch, cold water, and beaten egg until smooth. Season with salt and pepper.
    2. Heat the Oil: Heat oil in a deep fryer or pot to 350°F (175°C).
    3. Dip and Fry: Dip chicken tenders into the batter, letting excess drip off. Fry until golden and crispy, about 6-8 minutes.
    4. Drain and Serve: Remove and drain on paper towels. Serve immediately​.

    Tips and Tricks

    Ensuring your fried chicken is crispy and flavorful involves a few essential tips and tricks. These pointers will help you achieve the best results every time you fry chicken without flour.

    Ensuring Crispy Coating

    Proper Coating Techniques

    1. Even Coating: Make sure to evenly coat the chicken with your chosen substitute. Shake off any excess to avoid a thick, gummy layer.
    2. Resting Time: After coating, let the chicken rest for 10-15 minutes. This improves the coating’s adhesion and keeps it from flaking off when frying.

    Maintaining Oil Temperature

    1. Consistent Heat: Use a thermometer to keep the oil at a steady temperature. Fluctuations can result in uneven cooking.
    2. Avoid Overcrowding: Fry chicken in small batches to maintain the oil temperature and ensure even cooking​.

    Flavor Enhancements

    Seasoning Ideas

    1. Spice Mixes: Experiment with spices like paprika, garlic powder, onion powder, and cayenne pepper to add extra flavor to your coating.
    2. Herbs and Cheese: Mix dried herbs or grated Parmesan cheese into your coating for an added flavor boost​​.

    Marinades and Brines

    1. Buttermilk Marinade: Soak chicken in buttermilk with salt, pepper, and spices for at least 2 hours to add moisture and flavor.
    2. Simple Brine: A saltwater brine with a bit of sugar can help keep the chicken juicy and flavorful during frying​​.

    FAQs

    To wrap up our comprehensive guide on frying chicken without flour, let’s address some frequently asked questions. These FAQs will help clarify common concerns and provide additional tips for perfecting your flourless fried chicken.

    Can You Fry Chicken Without Flour?

    Absolutely! There are numerous alternatives like cornstarch, breadcrumbs, and ground nuts that can create a crispy and delicious coating​​.

    What Can I Use Instead of Flour to Fry Chicken?

    You can use cornstarch, potato starch, rice flour, chickpea flour, and even ground nuts or breadcrumbs as substitutes for flour​​.

    How Can I Ensure Crispiness in My Chicken?

    Ensure an even coating, let the chicken rest before frying, maintain the oil temperature, and avoid overcrowding the pan​​.

    Can I Use the Same Method for Other Meats?

    Yes, these methods work well for other meats like pork or fish, providing a crispy and delicious coating without flour​.

    Conclusion

    In this guide, we’ve explored various methods and ingredients to fry chicken without flour, including cornstarch, breadcrumbs, and ground nuts. We’ve also covered different cooking techniques like deep frying, shallow frying, air frying, and baking. By following these tips and recipes, you can achieve perfectly crispy and delicious fried chicken without the use of flour. Whether you’re gluten-free, reducing carbs, or just out of flour, these alternatives will ensure your fried chicken is always a hit.

    Enjoy experimenting with these methods and flavors to find your favorite way to make flourless fried chicken. Happy cooking!

  • What Goes with Fried Chicken? Best Sides and Pairings Guide

    What Goes with Fried Chicken? Best Sides and Pairings Guide

    What Goes with Fried Chicken? Best Sides and Pairings Guide

    Fried chicken is a beloved dish worldwide, celebrated for its crispy coating and juicy interior. However, to elevate your fried chicken meal, choosing the right side dishes is essential. This guide will explore the best accompaniments, from classic Southern sides to lighter, healthier options, ensuring you have a delectable dining experience. Let’s dive into the world of perfect pairings for your fried chicken feast.

    Introduction

    Fried chicken, a staple in many households, brings comfort and joy with every bite. But what goes with fried chicken to make the meal truly memorable? This article explores a variety of side dishes that complement perfectly. From creamy mac and cheese to refreshing salads, we have got it all covered. Let’s start with some classic Southern sides that are sure to delight your taste buds.

    Classic Southern Sides

    When it comes to fried chicken, the classics never disappoint. These traditional Southern sides have been cherished for generations and continue to be favorites at any gathering.

    Macaroni and Cheese

    Macaroni and cheese is a creamy, cheesy delight that pairs wonderfully with fried chicken. The rich, smooth texture of the cheese sauce perfectly complements the crispy chicken skin.

    1. Recipe Details and Variations
      • Classic baked mac and cheese
      • Spicy jalapeno mac and cheese
      • Lobster mac and cheese for a gourmet twist
    2. Why It Pairs Well
      • The creamy, cheesy goodness balances the savory, crunchy chicken.
      • Comfort food at its finest, offering a delightful contrast in textures​.
    Coleslaw

    Coleslaw is a versatile side that brings a refreshing crunch to your meal. Whether you prefer the classic mayo-based version or a tangy vinegar-based alternative, coleslaw is a must-have.

    1. Mayo-Based vs. Vinegar-Based Coleslaw
      • Mayo-based coleslaw is creamy and rich.
      • Vinegar-based coleslaw is lighter and tangier.
    2. Recipe Suggestions
      • Classic creamy coleslaw
      • Vinegar coleslaw with a hint of mustard
      • Adding apple or pineapple for a sweet twist

    Coleslaw adds a crisp, refreshing element that cuts through the richness of fried chicken, making it an ideal accompaniment​​.

    Biscuits

    Southern biscuits are fluffy, buttery, and a quintessential part of any fried chicken meal. They are perfect for sopping up any delicious juices left on your plate.

    1. Traditional Southern Biscuits
      • Light and fluffy texture
      • Buttery flavor that melts in your mouth
    2. Recipe Ideas and Variations
      • Classic buttermilk biscuits
      • Cheddar and chive biscuits
      • Sweet honey butter biscuits

    These biscuits provide a delightful, soft contrast to the crispy chicken, making every bite a joyous experience​​.

    Stay tuned as we delve into more delicious sides in the next part. Whether you’re hosting a gathering or enjoying a quiet meal at home, these side dishes will make your fried chicken feast unforgettable.

    Potato-Based Sides

    What goes with fried chicken

    Potato-based sides are a perfect match for fried chicken, offering a variety of textures and flavors that complement the crispy, savory goodness of the chicken.

    Mashed Potatoes

    Mashed potatoes are a beloved comfort food, known for their creamy texture and rich flavor. They are a staple at many fried chicken dinners.

    1. Classic Mashed Potatoes
      • Smooth, buttery mashed potatoes made with cream and butter.
      • Perfectly seasoned with salt, pepper, and a hint of garlic.
    2. Variations like Horseradish Mashed Potatoes
      • Adding horseradish for a spicy kick.
      • Using Greek yogurt for a tangy twist​​.

    Mashed potatoes provide a creamy contrast to the crispy texture of fried chicken, creating a harmonious balance in every bite.

    Potato Salad

    Potato salad is another classic side dish that pairs beautifully with fried chicken. Whether you prefer it creamy or tangy, potato salad is always a hit.

    1. Classic Potato Salad Recipe
      • Made with boiled potatoes, mayonnaise, mustard, and celery.
      • Garnished with chopped herbs like parsley and dill.
    2. Variations like Ranch Potato Salad and German Potato Salad
      • Ranch potato salad with fresh herbs and a tangy dressing​​.
      • German potato salad dressed with vinegar and bacon.

    Potato salad adds a flavorful and refreshing element to the meal, balancing the richness of fried chicken.

    French Fries and Potato Wedges

    French fries and potato wedges are the ultimate comfort food, offering a crispy exterior and a fluffy interior. They are a perfect match for fried chicken.

    1. Different Ways to Prepare
      • Oven-baked for a healthier option.
      • Air-fried for extra crispiness without the extra oil.
      • Deep-fried for that classic, indulgent taste​.
    2. Recipe Examples
      • Traditional French fries seasoned with sea salt.
      • Seasoned potato wedges with herbs and spices.

    These potato sides offer a delightful crunch that complements the tenderness of fried chicken, making them a crowd-pleaser at any meal.

    Vegetable Sides

    What goes with fried chicken

    Adding vegetable sides to your fried chicken meal not only brings a burst of color but also balances the richness of the chicken with fresh, vibrant flavors.

    Green Beans

    1. Southern-Style Green Beans with Bacon
      • Cooked with onions and bacon for a savory flavor.
      • Slow-cooked until tender and flavorful​​.
    2. Cheesy Green Beans
      • Green beans baked with a creamy cheese sauce.
      • Topped with breadcrumbs for a crunchy finish​​.

    Green beans add a fresh and nutritious element to your meal, balancing the richness of fried chicken.

    Corn on the Cob

    Corn on the cob is a simple yet delicious side that pairs well with fried chicken. It can be prepared in several ways to enhance its natural sweetness.

    1. Grilled vs. Boiled Corn
      • Grilled corn with a smoky flavor and charred kernels.
      • Boiled corn for a tender and juicy bite.
    2. Recipe Tips
      • Adding butter and herbs for extra flavor.
      • Sprinkling with Parmesan cheese and chili powder for a spicy twist​​.

    Corn on the cob provides a sweet and crunchy contrast to the savory fried chicken, making it a delightful addition to your meal.

    Collard Greens

    1. Slow-Cooked Collard Greens with Bacon
      • Cooked with garlic, onions, and bacon for a rich, savory flavor.
      • Seasoned with apple cider vinegar and red pepper flakes for a tangy kick​​.

    Collard greens are not only delicious but also packed with vitamins and minerals, making them a healthy side option that complements fried chicken perfectly.

    Stay tuned for more delicious sides in the next part. Whether you’re aiming for a traditional Southern feast or looking for lighter, healthier options, these side dishes will enhance your fried chicken meal.

    Salads and Lighter Sides

    What goes with fried chicken

    Salads and lighter sides bring a refreshing balance to the rich and savory flavors of fried chicken. They add color, texture, and a nutritional boost to your meal.

    Tomato and Cucumber Salad

    Tomato and cucumber salad is a light and refreshing side dish that complements the hearty nature of fried chicken.

    1. Light and Refreshing Options
      • Combining juicy tomatoes and crisp cucumbers with a tangy vinaigrette.
      • Adding fresh herbs like basil or dill for extra flavor.
    2. Recipe Ideas
      • Classic tomato and cucumber salad with a lemon dressing.
      • Adding avocado for a creamy texture​.

    This salad is quick to prepare and provides a burst of freshness that pairs perfectly with fried chicken.

    Fruit Salads

    Fruit salads offer a sweet and juicy contrast to the savory flavors of fried chicken. They are versatile and can be customized with your favorite fruits.

    1. Examples like Watermelon Salad
      • Combining watermelon, feta cheese, and mint for a refreshing bite.
      • Drizzling with a balsamic glaze for added flavor​​.
    2. Why They Complement Fried Chicken
      • The sweetness of the fruit balances the savory, crispy chicken.
      • Adds a vibrant and colorful element to the meal.

    Fruit salads are a delightful way to incorporate more fresh produce into your meal while complementing the flavors of fried chicken.

    Other Salads

    Other salads, such as broccoli salad and kale salad, offer a variety of textures and flavors that enhance your fried chicken meal.

    1. Broccoli Salad
      • Combining broccoli florets, bacon, and sunflower seeds with a creamy dressing.
      • Adding dried cranberries for a touch of sweetness​​.
    2. Kale Salad
      • Massaging kale leaves with olive oil and lemon juice to soften them.
      • Adding mango, quinoa, and a light vinaigrette for a unique twist​.

    These salads not only add nutritional value to your meal but also bring a refreshing and crunchy element that balances the richness of fried chicken.

    Unique and Creative Sides

    For those looking to add a bit of creativity and uniqueness to their meal, these sides offer exciting flavors and textures that will surprise and delight your guests.

    Fried Green Tomatoes

    Fried green tomatoes are a Southern classic that adds a crispy, tangy element to your meal. They are easy to make and pair wonderfully.

    1. Recipe and Preparation
      • Slicing green tomatoes and coating them in cornmeal batter.
      • Frying until golden brown for a crispy exterior​​.
    2. How It Pairs with Fried Chicken
      • The tanginess of the tomatoes complements the savory chicken.
      • Adds an extra layer of crunch to your meal.

    Fried green tomatoes are a fantastic way to incorporate more fried elements into your meal while adding a unique flavor profile.

    Pickles

    Pickles are a simple yet effective side that adds a tangy crunch to your fried chicken meal. Homemade pickles are particularly delightful and easy to prepare.

    1. Homemade Pickles Recipe
      • Combining cucumbers, vinegar, dill, and garlic in a jar.
      • Letting them sit in the fridge for a few days to develop flavor​​.
    2. Benefits of Serving Pickles with Fried Chicken
      • The acidity of the pickles cuts through the richness of the chicken.
      • gives your food a crisp, refreshing touch.

    Pickles are a classic accompaniment to fried chicken, offering a burst of tangy flavor that enhances every bite.

    Stay tuned as we explore the final parts of this delicious guide. From unique and creative sides to classic Southern desserts, we’ve got everything you need to make your fried chicken meal unforgettable.

    Desserts

    After enjoying a savory and crispy fried chicken meal, a sweet ending is a must. Classic Southern desserts provide the perfect finale, balancing the flavors and satisfying your sweet tooth.

    Classic Southern Desserts

    Southern desserts are renowned for their comforting, homey flavors. Here are some classic options that pair beautifully:

    1. Peach Cobbler
      • A warm, gooey dessert with sweet peaches and a buttery crust.
      • Excellent when paired with a dollop of vanilla ice cream.
    2. Banana Pudding
      • Layers of creamy pudding, bananas, and vanilla wafers.
      • Topped with whipped cream or meringue for a light, fluffy finish​.

    These desserts offer a sweet, indulgent end to your meal, leaving your guests with a memorable dining experience.

    Pairing Tips and Tricks

    Pairing the right sides with fried chicken can elevate your meal to new heights. Here are some tips and tricks to help you create a harmonious and satisfying dining experience.

    Balance Flavors

    Balancing flavors is crucial when pairing sides with fried chicken. The rich, savory taste of the chicken needs complementary sides that either contrast or enhance its flavors.

    1. Contrast with Freshness
      • Pair fried chicken with fresh, crisp salads like tomato and cucumber salad or coleslaw to cut through the richness.
      • Use tangy or acidic dressings to add a refreshing element​.
    2. Enhance with Creaminess
      • Creamy sides like macaroni and cheese or mashed potatoes provide a comforting balance to the crunchy chicken.
      • Incorporate cheese, cream, or butter for added richness​​.

    Texture Matters

    Texture plays a significant role in creating a satisfying meal. Combine different textures to keep the meal interesting and enjoyable.

    1. Crunchy vs. Soft
      • Pair crunchy sides like fried green tomatoes or onion rings with softer sides like creamy mashed potatoes or buttery biscuits.
      • The overall dining experience is improved by this difference in textures.
    2. Juicy and Tender
      • Include juicy sides like grilled corn on the cob or marinated vegetable salads to complement the tender meat of the fried chicken.
      • These sides add moisture and freshness to the meal​.

    Seasonal Sides

    Incorporating seasonal sides not only ensures freshness but also adds variety to your meal.

    1. Summer Sides
      • Fresh fruits, salads, and grilled vegetables are perfect for summer. Think watermelon salad, tomato cucumber salad, and grilled corn​.
    2. Winter Comforts
      • During colder months, opt for hearty sides like collard greens, baked mac and cheese, and roasted vegetables.
      • These sides provide warmth and comfort, making your meal more satisfying​​.

    FAQs

    To wrap up this comprehensive guide, let’s address some frequently asked questions about the best sides for fried chicken. These FAQs will help you perfect your meal and answer any lingering doubts.

    Common Questions about Fried Chicken Sides

    1. What are the best sides for fried chicken?
      • The best sides include classic Southern dishes like macaroni and cheese, coleslaw, and biscuits, as well as potato-based sides like mashed potatoes and potato salad.
    2. Can I serve fried chicken with healthy sides?
      • Absolutely! Consider options like tomato and cucumber salad, steamed green beans, or a light fruit salad for a healthier balance.
    3. What are some quick side dishes for fried chicken?
      • Quick options include coleslaw, steamed vegetables, and simple salads. These can be prepared in advance or made quickly while the chicken is cooking​.

    Conclusion

    Pairing with the right sides transforms a simple meal into a culinary delight. By balancing flavors, textures, and seasonal ingredients, you can create a memorable dining experience for your guests. Whether you’re hosting a family gathering or a casual dinner, these tips and side dish ideas will ensure your meal is a hit. Enjoy the process of cooking and sharing these delicious dishes with your loved ones!


  • How Long to Air Fry Frozen Chicken Wings: Complete Guide

    How Long to Air Fry Frozen Chicken Wings: Complete Guide

    Introduction to Air Frying Frozen Chicken Wings

    Understanding how long to air fry frozen chicken wings is essential for achieving perfectly crispy and delicious results. Air frying offers a healthier and quicker alternative to traditional frying methods, making it easier to enjoy this popular snack. In this article, we’ll cover everything from selecting the best wings to mastering cooking techniques and flavoring options. Get ready to transform frozen wings into a mouth-watering treat with minimal effort and maximum flavor.

    Preparing Your Frozen Chicken Wings for Air Frying

    Selection of Wings

    When preparing frozen chicken wings for air frying, it’s crucial to select high-quality wings to achieve the best results. Choosing the right type can significantly impact the texture and flavor. Look for wings that are known for retaining moisture and crispiness when cooked. Popular brands often provide wings that are perfect for air frying.

    Pre-air Frying Preparation

    Cooking frozen chicken wings in an air fryer requires minimal preparation. First, decide whether to defrost the wings. While it’s safe to cook them directly from frozen, ensure they’re not stuck together to guarantee even cooking. If necessary, you can defrost them slightly in the microwave.

    For seasoning, a simple approach works best. A sprinkle of salt and pepper can enhance the natural flavor of the wings. If time allows, marinating the wings can add depth to their flavor. A quick marinade with garlic, herbs, and a bit of oil can work wonders.

    Once seasoned, preheat your air fryer to 400°F. Preheating is essential, as it helps achieve a crispy exterior while keeping the inside juicy. Arrange the wings in a single layer to ensure proper air circulation. Cooking in batches may be necessary to avoid overcrowding, which can lead to uneven cooking.

    Stay tuned as we delve into the air frying techniques in Part 2. We’ll ensure your frozen chicken wings come out perfectly crispy every time. For more insights on safe food handling practices, check out the CDC Food Safety Tips.

    Air Frying Techniques for Frozen Chicken Wings

    Optimal Air Fryer Settings

    Finding the perfect air fryer settings is crucial for achieving the best results with frozen chicken wings. Typically, setting your air fryer to 400°F strikes the right balance between crispy skin and a juicy interior. The cooking time can vary slightly based on the air fryer model and the size of the wings, but generally, 20-25 minutes should do the trick. It’s important to preheat the air fryer for about three to five minutes before adding the wings, as this helps to kick-start the cooking process effectively.

    During the Cook

    To ensure even cooking, avoid overcrowding the basket. Cooking the wings in a single layer allows the hot air to circulate freely, ensuring each wing gets evenly crisped. If you’re cooking a large batch, consider doing multiple smaller batches instead of stacking them.

    Flipping the wings halfway through the cooking time is another tip that can lead to optimal results. This simple step can make a significant difference in achieving an evenly crispy exterior. Also, shaking the basket gently a few times during cooking can prevent the wings from sticking and help expose all sides to the heat.

    By mastering these air frying techniques, you can ensure your frozen chicken wings are cooked to perfection every time. Stay tuned as we move into the realm of adding flavors and sauces in Part 3, where creativity meets culinary skills to elevate your wing experience.

    Next, we’ll dive into how to enhance your wings with flavorful sauces and rubs, ensuring every bite is as delicious as the last. Whether you’re looking for a hint of spice or a sweet glaze, the right sauce can make all the difference.

    Enhancing Your Wings with Flavors and Sauces

    how long to air fry frozen chicken wings?


    DIY Sauces and Seasonings

    The beauty of cooking frozen chicken wings in an air fryer is the versatility in flavoring options you can explore. Making your own sauces and seasonings allows for customization to your taste preferences. Start with basic ingredients like butter, garlic, and herbs to create a classic garlic herb sauce, or mix honey and soy sauce for a sweet and savory Asian-inspired glaze.

    For those who love a bit of heat, a simple homemade buffalo sauce—butter mixed with cayenne pepper sauce—can be whipped up in minutes. Applying these sauces after the wings are cooked ensures they coat well and the flavors meld beautifully without burning.

    Store-bought Options

    If time is of the essence, there are numerous high-quality pre-made sauces available that can save time and still deliver on flavor. Options range from tangy barbecue to spicy jerk seasonings. Adding these sauces during the last few minutes of cooking can prevent them from drying out or burning, keeping the wings moist and flavorful.

    Experimenting with both homemade and store-bought sauces can make your air-fried wings a hit at any gathering or meal. With the right combination of seasoning and technique, your wings will not only taste great but also become a conversation starter about your culinary skills.

    Moving forward, Part 4 will focus on how best to serve and present your crispy, flavorful chicken wings, ensuring they look as good as they taste. Keep in mind that presentation can enhance the eating experience, making your carefully prepared wings the highlight of the dining table.

    Serving and Presentation Tips

    Accompaniments

    When serving frozen chicken wings, the sides you choose can elevate your dish to a whole new level. Classic options like celery sticks and carrot sticks bring a refreshing crunch that complements the savory richness of the wings. Dipping sauces such as blue cheese or ranch are not only traditional but provide a creamy contrast to the spicy or sweet coatings on your wings.

    For a more filling meal, consider pairing your wings with side dishes like coleslaw, potato salad, or a simple baked potato. These sides help balance the meal, making it satisfying and complete.

    Serving Temperature

    It’s crucial to serve chicken wings hot to maximize their crispy texture and warm, comforting flavors. A common tip is to place them on a wire rack after cooking and before serving. This setup prevents the wings from sitting in any excess oil and becoming soggy.

    As you prepare to present your wings, remember that a little garnish can go a long way. A sprinkle of chopped fresh herbs or a drizzle of extra sauce can make your dish visually appealing and even more delicious.

    In Part 5, we’ll explore common questions and troubleshooting tips that will help you master the art of air frying frozen chicken wings, ensuring you’re prepared for any hiccups along the way. Stay tuned to learn more about how to handle common issues and enhance your cooking techniques further.

    Pro Tips for Perfect Air Fried Chicken Wings

    how long to air fry frozen chicken wings?
    how long to air fry frozen chicken wings?


    Expert Advice

    Gleaning insights from chefs and seasoned air fryer users can dramatically improve your air frying skills. Here are a few expert tips for making your frozen chicken wings come out perfectly every time:

    • Preheat Your Air Fryer: Just like an oven, preheating your air fryer ensures that your cooking starts at the right temperature, which is essential for crispy results.
    • Don’t Overcrowd the Basket: This can’t be stressed enough. Giving your wings enough space allows for optimal air circulation, which is key to getting that desired crispiness.
    • Use Baking Powder: A little baking powder mixed with your dry rub can help to dry out the skin of the wings, making them extra crispy when cooked.

    Safety and Maintenance

    Maintaining your air fryer not only ensures its longevity but also the quality of the food you cook in it. Here are some safety and maintenance tips:

    • Regular Cleaning: Always clean your air fryer after use. Food particles left in the basket can burn and affect the taste and safety of your dishes.
    • Check for Wear: Regularly inspect your air fryer for any signs of wear and tear. Replace any damaged parts promptly to keep it functioning safely.
    • Be Mindful of Placement: When using your air fryer, make sure it’s on a stable, heat-resistant surface and not too close to any walls or objects that could be affected by heat.

    Employing these professional tips will help you master the art of air frying and ensure that your chicken wings are always a crowd-pleaser. For further details on how to maintain your appliance and ensure food safety, refer to the comprehensive guidelines available on the CDC Food Safety Tips page.

    In Part 7, we’ll wrap up our comprehensive guide to air frying frozen chicken wings, ensuring you have all the knowledge needed to succeed in this culinary endeavor. Stay tuned for the final insights and a recap of what we’ve covered to help you become an air fry master.

    Recap and Final Insights

    In this comprehensive guide, we’ve explored every aspect of cooking frozen chicken wings in an air fryer. From selecting the right wings and preparing them for cooking to mastering the air frying process and adding delicious flavors, we’ve covered all the bases to ensure you can achieve perfect results every time.

    Review of Key Points

    • Selection and Preparation: Choose high-quality frozen wings and prepare them with the right seasonings or marinades to enhance flavor.
    • Air Frying Techniques: Preheat your air fryer, avoid overcrowding, and flip the wings halfway through cooking to ensure even crispiness.
    • Flavor Enhancements: Experiment with both homemade and store-bought sauces to find your perfect match. Apply sauces after cooking to prevent burning.
    • Presentation and Serving: Serve the wings hot with complementary sides and dips for a complete and satisfying meal.

    Final Insights

    Air frying frozen chicken wings offers a healthier alternative to traditional frying without sacrificing flavor or texture. With the tips and tricks you’ve learned here, you’re well-equipped to use your air fryer to its fullest potential, ensuring delicious outcomes every time. Whether for a family dinner, a social gathering, or a snack during game night, your air-fried chicken wings are sure to impress.

    We hope this guide helps you on your journey to becoming an air fry expert, capable of crafting restaurant-quality wings in the comfort of your own kitchen. Remember, the key to perfect air-fried wings is a combination of proper preparation, the right cooking settings, and creative flavoring. Enjoy the process and the delicious rewards it brings!

    With these skills in your culinary toolkit, you’re ready to explore even more dishes and techniques that can benefit from the magic of air frying. Happy cooking!

    Exploring Creative Wing Flavors and Combinations

    Curious about how long to air fry frozen chicken wings and want to add some creative twists to your recipes? This section will help you explore a variety of flavors and combinations to keep your wings exciting and delicious. We’ll dive into global influences, fusion recipes, and unique seasoning blends that will elevate your air-fried wings to new culinary heights.

    World of Flavors

    • Asian-Inspired Wings: Use soy sauce, ginger, and sesame oil for a savory and aromatic touch. Try a sticky honey-garlic sauce for a sweet and savory combination.
    • Latin Flavors: Add a kick with chipotle powder, lime zest, and cilantro. Pair these wings with an avocado and sour cream dip for a refreshing balance.
    • Indian Spice Wings: Season your wings with garam masala, turmeric, and cumin for a bold, spicy flavor. Serve with a cooling cucumber raita.

    Fusion Twists

    • BBQ and Apple Butter Wings: Combine smoky BBQ sauce with sweet apple butter for a unique American twist.
    • Teriyaki Buffalo Wings: Merge the classic heat of buffalo sauce with the sweet and savory notes of teriyaki.
    • Moroccan Lemon and Herb: Infuse your wings with preserved lemon, mint, and a hint of harissa for a North African-inspired flavor profile.

    Seasoning and Marinade DIY

    • Homemade Dry Rubs: Create your own dry rubs with combinations of dried herbs and spices to keep things interesting every time you cook.
    • Marinades for Depth: Explore marinades that tenderize and infuse the wings with layers of flavor, such as yogurt-based or citrus-based marinades.

    Knowing how long to air fry frozen chicken wings is essential, but adding these creative flavor twists will make your wings stand out. Experimenting with global flavors, fusion recipes, and unique seasonings will keep your meals exciting and delicious. Enjoy crafting a variety of tasty experiences with your air fryer and impress your guests with your culinary skills.

    FAQs and Troubleshooting

    Frequently Asked Questions

    • How long to air fry frozen chicken wings? The typical cooking time is 20-25 minutes at 400°F. Adjustments might be needed based on your air fryer model and the size of the wings.
    • Can you stack wings in an air fryer? No, avoid stacking. Cooking wings in a single layer allows for optimal air flow and ensures they become crispy.
    • What is the best way to season wings for air frying? Dry seasonings and rubs are ideal as they help create a crispy texture. Use wet marinades sparingly and add them toward the end of cooking if necessary.

    Troubleshooting Common Issues

    Even well-planned cooking sessions can hit snags, especially with appliances like air fryers. Here are solutions to common issues when air frying frozen chicken wings:

    • Uneven Cooking: To ensure even cooking, avoid overloading the basket. Cook wings in batches for better air flow and consistency.
    • Lack of Crispiness: If wings aren’t crispy enough, ensure your air fryer is properly preheated. Consider extending the cooking time slightly. Avoid using too much marinade or sauce before cooking as it can cause steaming rather than crisping.
    • Wings Sticking to the Basket: To prevent sticking, lightly brush the basket with oil or use a non-stick spray. This helps keep your wings intact and makes cleanup easier.

    By addressing these common questions and troubleshooting tips, you can ensure a smooth and successful air frying experience.

  • Can Dogs Eat Fried Chicken? Risks and Safe Alternatives

    Can Dogs Eat Fried Chicken? Risks and Safe Alternatives

    Introduction to Can Dogs Eat Fried Chicken

    As dog owners, we often find ourselves sharing snippets of our meals with our furry friends. But when it comes to fried chicken, a favorite in many households, the question arises: can dogs eat fried chicken? This article dives into the safety, risks, and healthier alternatives to sharing this popular dish with dogs. We’ll explore nutritional considerations, health risks associated with fried foods, and provide expert-backed alternatives to keep your pet healthy and happy.

    Understanding Dog Nutrition and Common Human Foods

    When it comes to feeding our dogs, the line between what is safe and what could be harmful can sometimes be blurry. Fried chicken, with its appealing aroma and taste, might seem like a tempting treat to share with your pup. However, understanding the basics of dog nutrition and the effects of human foods like fried chicken is crucial for maintaining your dog’s health.

    Chicken is a staple in many dog foods due to its high protein content and palatability. In its plain, cooked form, chicken can be a healthy part of a dog’s diet. However, when chicken is fried, it undergoes a transformation that can pose several risks to canine health.

    The allure of fried chicken is not just in its taste but also in its crispy texture, which is achieved by adding greasy oils and fats. These additives, while delicious to humans, can be problematic for dogs. Consuming high amounts of fats not only disrupts a dog’s diet but also increases their risk of developing conditions like obesity and pancreatitis.

    It’s also important to consider the seasonings used in fried chicken. Common ingredients such as garlic and onion are toxic to dogs and can lead to severe health issues. Even small amounts of these seasonings can cause gastrointestinal distress and potentially lead to more serious complications.

    By understanding these dietary nuances, dog owners can make informed decisions about what to feed their pets and what to keep on their own plates. In the following sections, we’ll delve deeper into the specific risks and safe alternatives to fried chicken for dogs, ensuring your canine companion remains healthy and well-nourished.

    Is Fried Chicken Safe for Dogs?

    Analyzing Nutritional Content

    Can dogs eat fried chicken? The answer, while nuanced, leans towards caution due to several nutritional concerns that arise from the typical preparation of fried chicken.

    Firstly, the high fat content in fried chicken is a major concern. Dogs that consume excessive fat can develop pancreatitis, a painful and potentially life-threatening condition. Pancreatitis involves inflammation of the pancreas, leading to symptoms such as vomiting, lethargy, and abdominal pain. It’s crucial to recognize that while dogs need fats in their diet, the type and amount must be carefully managed to prevent health issues.

    Another risk factor is the seasoning used in fried chicken. Ingredients like garlic and onion powder, which are common in fried chicken recipes, are highly toxic to dogs. These seasonings contain compounds that can damage red blood cells, leading to anemia. The effects of these toxic ingredients are compounded in the concentrated forms used in seasonings, making them even more hazardous than their natural plant counterparts.

    Moreover, the method of cooking chicken by frying increases the risk of other health complications. Fried foods are generally heavier and harder to digest for dogs, which can lead to gastrointestinal upset or more severe digestive issues.

    Considering these factors, it’s clear that fried chicken is not a suitable or safe treat for dogs. The potential health risks far outweigh the momentary pleasure your dog might enjoy from a taste of your meal. Instead, dog owners should look to safer, healthier alternatives that satisfy their dog’s taste buds without compromising their health. In the next section, we will explore what you can feed your dog instead of fried chicken to ensure they receive a balanced diet that supports their overall well-being.

    Potential Health Risks of Fried Chicken for Dogs

    can dogs eat fried chicken?
    can dogs eat fried chicken?


    Fats, Grease, and Seasonings

    In-depth analysis of the fats, grease, and hazardous seasonings in fried chicken underscores the dangers they pose to canine health. The immediate allure of fried chicken for dogs is overshadowed by significant health risks that can arise from its consumption.

    The consumption of greasy, fatty foods like fried chicken can lead to an acute bout of pancreatitis in dogs. This condition is not only painful but can be life-threatening if not addressed promptly. The signs of pancreatitis include extreme lethargy, vomiting, diarrhea, and a decreased appetite. This severe reaction is due to the overloaded pancreas struggling to cope with the high-fat content, leading to inflammation and dysfunction.

    In addition to fats and grease, the seasonings typically used on fried chicken present their own risks. Garlic and onion powders, often found in the breading, are particularly harmful. These seasonings belong to the Allium family and are toxic to dogs. The toxicity is attributed to a compound called N-propyl disulfide, which causes oxidative damage to red blood cells, leading to anemia. The symptoms of Allium toxicity may not appear immediately but can have lasting impacts on a dog’s health.

    Bone Hazards and Other Physical Risks

    Another critical concern with feeding dogs fried chicken is the danger posed by bones. Cooked chicken bones can splinter easily when chewed. These sharp fragments can cause serious injuries, such as punctures or obstructions in the digestive tract, which sometimes necessitate emergency surgery.

    Given these risks, it is advisable for pet owners to avoid offering any part of fried chicken to their dogs. The combination of unhealthy fats, harmful seasonings, and the physical dangers of bones makes fried chicken a poor choice for a dog treat.

    Continuing with our exploration of dog nutrition, the next section will highlight healthier alternatives that can be offered in place of fried chicken, focusing on maintaining a balanced and safe diet for your dog.

    Healthier Alternatives to Fried Chicken

    Safe Dietary Options

    For dog owners seeking safer, healthier treats for their pets, many alternatives to fried chicken are available. These not only meet nutritional needs but also cater to canine palates. By choosing appropriate snacks, you ensure your dog enjoys treats without risking their health.

    One of the best options is plain, cooked chicken. Ensure it has no added fats, seasonings, or bones. This simple version of chicken provides protein dogs crave without the harmful effects of frying or dangerous additives.

    Additionally, several commercially available dog treats are both delicious and nutritious. These treats often come fortified with vitamins and minerals that support overall health. Choose treats that are low in fat and free of complex seasonings and preservatives.

    If you’re interested in supplementing your dog’s diet with non-meat items, consider vegetables like carrots, green beans, or pumpkin. These provide essential nutrients and fiber, aiding digestion. Introduce any new foods slowly and in moderation to see how your dog handles them.

    Lastly, consult with a veterinarian about adding specific vitamins or supplements. Dogs on an AAFCO-certified diet might benefit from tailored supplements. These can address individual health concerns like joint support or digestive aids.

    By prioritizing your dog’s dietary needs and avoiding risky foods like fried chicken, you help maintain their health and vitality. The next section will discuss the impact of obesity on dogs, emphasizing the importance of a healthy diet and regular exercise.

    The Impact of Obesity on Dogs

    Consequences of Poor Diet Choices

    Obesity is a growing concern in the canine world, much like it is among humans. This condition not only compromises a dog’s quality of life but can also lead to a range of health issues, from joint problems to chronic diseases like diabetes. Understanding the impact of obesity and how dietary choices contribute to it is vital for every dog owner.

    A diet high in fats, such as regularly consuming fried chicken, can quickly lead to weight gain in dogs. Obesity puts significant stress on a dog’s body, especially on their skeletal system, exacerbating conditions like arthritis and hip dysplasia. These issues can significantly reduce a dog’s mobility, leading to a less active lifestyle that only perpetuates the cycle of weight gain.

    Furthermore, overweight dogs often suffer from decreased energy levels and may develop insulin resistance, which can evolve into diabetes. Managing these conditions requires veterinary intervention and can lead to lifelong management challenges.

    The relationship between diet and obesity highlights the importance of portion control and the selection of appropriate foods. It’s crucial to feed your dog a balanced diet that meets their specific nutritional needs without excess calories that contribute to weight gain. Regular check-ups with a veterinarian can help monitor your dog’s weight and adjust their diet as necessary.

    Preventing Obesity Through Diet and Exercise

    can dogs eat fried chicken?
    can dogs eat fried chicken?


    Preventing obesity involves more than just avoiding high-fat treats like fried chicken; it requires a comprehensive approach that includes regular exercise. Engaging your dog in daily physical activities, whether it’s walks, runs, or play sessions, can help burn off excess calories and strengthen their muscles and joints.

    Integrating healthy eating habits with active living is key to preventing obesity and maintaining your dog’s health. Consider using interactive toys that encourage physical activity and mental stimulation, which can also help manage weight.

    By focusing on a holistic approach to your dog’s health through diet and exercise, you can ensure that they lead a happy, active, and healthy life. In the concluding section, we’ll summarize the risks associated with feeding dogs fried chicken and reinforce the best practices for canine nutrition and health.

    Concluding Thoughts on Feeding Dogs Fried Chicken

    As we’ve explored throughout this article, fried chicken is not a suitable treat for dogs due to its high fat content, dangerous seasonings, and potential bone hazards. While it’s tempting to share our favorite foods with our canine companions, it’s crucial to prioritize their health and dietary needs over the fleeting joy of indulging them with human food.

    Summary of Risks and Safe Practices

    Fried chicken poses several risks to dogs, including:

    • Increased likelihood of pancreatitis due to high fat levels.
    • Potential toxicity from seasonings like garlic and onion powder.
    • Risk of injury from bone fragments that can splinter and cause internal damage.

    To ensure the well-being of your dog, stick to safer, more appropriate treat options such as plain, cooked chicken, dog-specific treats, and certain safe vegetables. Always consult your veterinarian before introducing new foods into your dog’s diet, especially if they have existing health conditions.

    Final Advice for Dog Owners Considering Sharing Their Meals

    It’s best to avoid feeding your dog any human food that is high in fats, salt, or seasonings. Instead, focus on providing a balanced diet that supports their health. Remember, what is tasty to us can be harmful to them, and keeping their diet clean and tailored to their needs is the best way to show your love and care.

    By understanding the specific dietary needs and limitations of your dog, you can prevent health issues and ensure they enjoy a long, healthy life filled with joy and vitality. Thank you for taking the time to educate yourself on this important topic, and for committing to the health and happiness.

    Frequently Asked Questions

    In this final section, we’ll address some common questions that dog owners often have about feeding their dogs fried chicken and related topics. This FAQ aims to clarify any lingering doubts and provide quick, authoritative answers to support responsible pet care.

    Can dogs eat fried chicken without the skin?

    Even without the skin, fried chicken is not recommended for dogs. The meat itself may still contain oils and fats that are harmful in large quantities. Additionally, any seasoning used in the preparation could pose health risks.

    What should I do if my dog eats fried chicken with garlic?

    If your dog consumes fried chicken with garlic or any other toxic seasoning, it is important to monitor them closely for any signs of distress such as vomiting or lethargy. Contact your veterinarian as they might recommend immediate treatment to prevent complications from garlic toxicity.

    How often can dogs safely eat chicken?

    Dogs can eat plain, cooked chicken as a part of their regular diet or as an occasional treat. However, it should not replace a complete and balanced dog food. Always ensure the chicken is cooked without harmful fats, oils, or seasonings and is bone-free.

    This FAQ section serves as a quick reference to help you make safer dietary choices for your dog. By staying informed and cautious about what you feed your pet, you contribute significantly to their overall health and well-being. Remember, when in doubt, it’s always best to consult with a veterinarian who can provide guidance based on your dog’s specific health needs and dietary requirements.

  • How Long to Deep Fry Chicken Legs: Complete Guide

    How Long to Deep Fry Chicken Legs: Complete Guide

    Deep Frying Chicken Legs: Mastering the Basics

    Before we dive into the intricacies of deep frying chicken legs, let’s set the stage for what promises to be a flavorful journey. This guide will explore the nuances of achieving perfectly crispy and succulently juicy chicken legs, focusing on the precise timings, temperatures, and techniques. Whether you’re a novice looking to fry up your first batch or a seasoned cook aiming to perfect your method, this article will provide all the insights you need.

    Introduction to Deep Frying Chicken Legs

    Choosing the Right Chicken Legs

    When it comes to deep frying, not all chicken legs are created equal. Opting for fresh chicken legs can make a significant difference in the final outcome. Frozen legs need to be thoroughly thawed and dried to prevent oil splatter and achieve a crisp coating. To start, ensure your chicken legs are room temperature to ensure even cooking.

    Necessary Ingredients and Tools

    To embark on your frying adventure, gather the following:

    • Ingredients: Start with high-quality chicken legs, and don’t skimp on the seasonings. A dash of salt, pepper, and paprika can elevate the natural flavors. For an extra kick, garlic powder and onion powder are splendid additions.
    • Tools: A reliable deep fryer or a sturdy pot, a candy or deep-fry thermometer, and tongs are essential. These tools help maintain the right temperature and ensure safety while cooking.

    Pre-frying Preparations

    Cleaning and Drying: Begin by rinsing your chicken under cold water and pat it dry thoroughly. This step is crucial for removing any impurities and moisture that could interfere with the frying process.

    Marinating or Seasoning: If time allows, marinating your chicken in buttermilk or a spice mix can add depth to the flavor. Ensure every leg is evenly coated and allow them to marinate for at least an hour. This not only seasons the chicken but also tenderizes it, enhancing the texture.

    By adhering to these initial steps, you set the stage for frying success. In the next part, we’ll delve into the frying process itself, ensuring you achieve that irresistible crunch and juicy interior that make fried chicken a perennial favorite.

    Deep Frying Techniques

    Oil Temperature and Type

    Choosing the right oil is critical for frying chicken legs to perfection. Oils with a high smoke point, such as vegetable oil, peanut oil, or canola oil, are ideal for maintaining the necessary heat without burning. Aim to heat your oil to a steady 350-375°F, as this range allows the chicken to cook thoroughly without absorbing too much oil.

    Step-by-Step Frying Guide

    1. Heating the Oil: Pour the oil into your deep fryer or pot, ensuring there’s enough to completely submerge the chicken legs. Use your deep-fry thermometer to monitor the temperature accurately.
    2. Seasoning the Drumsticks: While the oil heats, season your chicken legs liberally with your chosen spices. For an even more flavorful crust, consider dredging the seasoned chicken in a light coat of flour or cornstarch.
    3. Frying the Chicken: Once the oil reaches the correct temperature, carefully lower the chicken legs into the fryer using tongs. It’s crucial to fry in batches to avoid overcrowding, which can lower the oil’s temperature and lead to soggy chicken.
    4. Monitoring the Fry: Fry each batch for about 12-15 minutes, or until golden brown and an internal temperature of 165°F is reached, indicating they are safely cooked through.

    Safety Tips While Frying

    Frying can be dangerous due to the hot oil involved. Always keep a lid nearby to cover the pot in case of splatter or flare-ups. Never leave the fryer unattended, and use long-handled tongs to manage the chicken safely. By following these precautions, you can prevent most accidents and ensure a safe cooking environment.

    In this part of our guide, we’ve covered the technical aspects of frying chicken legs, ensuring they come out perfectly crispy each time. As we move forward, we’ll discuss how to determine the right cooking times and temperatures for your specific setup, guaranteeing every piece is just as delightful as the last.

    Perfecting the Timing and Temperature

    how long to deep fry chicken legs?
    how long to deep fry chicken legs?


    How Long to Deep Fry Chicken Legs

    The key to succulent fried chicken lies in the frying time. Typically, chicken legs should be fried for about 12-15 minutes. However, these times can vary slightly based on the size of the chicken legs and the exact temperature of your oil. It’s essential to maintain a consistent oil temperature throughout the cooking process to ensure each leg cooks evenly and ends up deliciously crispy.

    Checking for Doneness

    Ensuring your chicken is fully cooked is crucial for both safety and quality. Using a meat thermometer is the most dependable technique:

    • Internal Temperature: The internal temperature of the chicken should reach at least 165°F. Insert the thermometer into the thickest part of the leg without touching the bone to get an accurate reading.
    • Visual Cues: The crust should be golden brown and crisp, and the juices should run clear when the meat is pierced with a knife.

    Using these indicators will help you achieve perfectly fried chicken legs every time, avoiding the common pitfalls of undercooking or overcooking.

    Now that you know how to manage the frying time and check for doneness, the next section will focus on what to do once your chicken legs are out of the oil. Proper draining and resting are crucial steps to retain that perfect crunch and juicy interior.

    What to Do After Frying

    Draining and Resting

    Once your chicken legs are golden and cooked through, the next steps are crucial for maintaining that crisp perfection:

    1. Draining the Oil: Immediately after removing the chicken from the fryer, use a slotted spoon or tongs to transfer them to a wire rack set over a baking sheet. This setup allows excess oil to drain away without making the chicken soggy, which can happen if they’re placed directly on paper towels.
    2. Resting: Let the chicken rest for a few minutes before serving. This brief period helps the juices redistribute throughout the meat, ensuring that each bite is moist and flavorful.

    Serving Suggestions

    Fried chicken is versatile and can be paired with a variety of sides. Here are a few ideas to make your meal complete:

    • Classic Pairings: Serve your crispy chicken legs with mashed potatoes, coleslaw, or a fresh biscuit for a traditional Southern dinner.
    • Lighter Options: For a healthier twist, opt for a side of steamed vegetables or a crisp green salad.

    Now that your chicken legs are perfectly fried and ready to be enjoyed, let’s enhance the experience with some final touches and flavor enhancements in the next part of our guide. These tips will help you elevate your dish from good to great, ensuring a memorable meal every time.

    Enhancing Your Fried Chicken Legs

    Flavor Enhancements

    To elevate the taste of your fried chicken legs beyond the basics, consider these flavorful additions:

    1. Marinades and Brines: Soaking chicken legs in a seasoned marinade or brine for several hours before frying can infuse them with extra flavors and moisture. Common ingredients include buttermilk, garlic, herbs, and spices.
    2. Spice Mixes: Experiment with different combinations of spices to create a unique flavor profile. Adding a bit of cayenne pepper or smoked paprika can give your chicken a nice kick.

    Crispy Coating Techniques

    Achieving a crispy exterior while keeping the inside juicy is the hallmark of perfect fried chicken. Here are some tips to enhance the crispiness:

    • Dredging: Before frying, coat the chicken legs thoroughly in a mixture of flour and cornstarch. The cornstarch helps to create a lighter, crisper crust.
    • Double Frying: For an extra-crispy texture, you can fry the chicken legs twice. Fry them once at a lower temperature to cook through, then increase the heat and fry again quickly to crisp up the exterior.

    By incorporating these flavor enhancements and crispy coating techniques, you’ll ensure that your fried chicken legs are a hit, packed with flavor and boasting an irresistible crunch. Next, we’ll look at some common mistakes to avoid in the frying process to help you achieve consistent results every time.

    Pitfalls in Frying Chicken Legs

    how long to deep fry chicken legs?
    how long to deep fry chicken legs?


    Overcrowding the Fryer

    One of the most common mistakes when deep frying is overcrowding the fryer. Here’s why it’s important to avoid this:

    • Consistent Cooking: Overcrowding can lower the oil’s temperature, leading to longer cooking times and unevenly cooked chicken.
    • Crispiness: More chicken in the pot can cause the pieces to stick together, preventing the crust from becoming evenly crisp.

    Underestimating Preparation

    Preparation is key to successful deep frying. Here are some prep steps you shouldn’t skip:

    • Thorough Drying: After marinating or rinsing your chicken, make sure to pat it completely dry. Excess moisture can cause the oil to splatter, which is dangerous and can make your chicken soggy.
    • Proper Heating of Oil: Use a thermometer to ensure your oil is at the right temperature before you start frying. This helps achieve a crispy finish and properly cooked interior.

    By steering clear of these common pitfalls, you can ensure that your fried chicken legs are cooked to perfection every time. This careful attention to detail will make all the difference in achieving the ideal texture and flavor in your fried chicken. Next, we’ll address some frequently asked questions to help clarify any remaining aspects of frying chicken legs.

    Advanced Frying Techniques for Perfect Chicken Legs

    After mastering the basics of frying chicken legs, it’s worth exploring some advanced techniques to elevate your cooking even further. This section will delve into methods that can help you achieve exceptional results every time you fry.

    Adjusting Oil Temperatures for Different Textures

    • Layered Frying: This technique involves frying the chicken legs at two different temperatures. Start at a lower temperature (about 325°F) to cook the inside thoroughly without burning the outside. Then increase the temperature to 375°F for the last few minutes to crisp up the exterior. This method ensures the chicken is cooked through and ends with a satisfyingly crunchy crust.

    Experimenting with Batter Variations

    • Beer Batter: While avoiding alcohol in recipes, you can substitute non-alcoholic versions to create a light, airy batter that provides a unique texture to the chicken coating.
    • Tempura Style: Inspired by Japanese cooking, using a tempura batter can give your chicken legs a lighter, crispier crust. This requires mixing cold water with flour and sometimes a bit of baking soda to create a thin, smooth batter.

    Utilizing Frying Aids

    • Baking Powder: A small addition of baking powder to your seasoning mix or flour dredge can help to create an extra crispy and bubbly skin due to the creation of tiny air pockets when it reacts with heat.
    • Cornstarch: Incorporating cornstarch into your flour mix is another secret to achieving a crunchier and less greasy exterior. The cornstarch absorbs moisture and forms a crisp shell around the chicken as it fries.

    These advanced techniques can help refine your frying skills and introduce new textures and flavors to your chicken legs. Whether you’re cooking for a special occasion or just spicing up your dinner routine, these methods are sure to impress. Enjoy experimenting with these tips to find your perfect frying method!

    Frequently Asked Questions

    How long should I fry frozen chicken legs?

    If you’re starting with frozen chicken legs, it’s essential to thaw them completely before frying to ensure even cooking. Once thawed, follow the usual frying time of about 12-15 minutes at 350-375°F. Remember, always check that the internal temperature has reached 165°F with a meat thermometer.

    Can I reuse frying oil, and if so, how?

    Yes, you can reuse frying oil a few times if it’s strained and stored properly. Allow the oil to cool completely, then strain it through a fine-mesh sieve or cheesecloth to remove any food particles. Store the clean oil in a sealed container in a cool, dark place. Reuse it within a month and check for any off smells or excessive smoke before using it again.

    What are the signs that the chicken legs are undercooked?

    Undercooked chicken legs can pose serious health risks. Signs of undercooked chicken include:

    • Internal Temperature: If the meat hasn’t reached 165°F, it’s not safe to eat.
    • Visual Cues: Pink coloring near the bone or translucent, rubbery meat texture indicates it’s not fully cooked.
    • Juices: If the juices aren’t clear and are still pink or red, the chicken needs more cooking time.

    Employing these best practices ensures that your fried chicken legs are not only delicious but also safe to eat. By understanding these nuances, you can fine-tune your frying process and enjoy perfectly crispy chicken every time. This wraps up our guide, leaving you well-equipped to master the art of frying chicken legs. Enjoy your cooking adventure!

    Conclusion

    Congratulations! You are now equipped with all the essential knowledge to deep fry chicken legs like a pro. From selecting the right type of chicken and oil to mastering the cooking times and temperatures, you’ve learned the key steps to achieving crispy, flavorful fried chicken legs. Remember to experiment with different spices and marinades to personalize your dishes and find your family’s favorite flavors.

    We hope this guide inspires you to create delightful meals that bring joy and satisfaction to your dining table. Whether you’re cooking for a special occasion or a casual weeknight dinner, perfectly fried chicken legs can make any meal a bit more special.

    Enjoy the process and the delicious results of your new culinary skills—happy frying!

  • Can You Fry Chicken in Olive Oil? Ultimate Guide & Tips

    Can You Fry Chicken in Olive Oil? Ultimate Guide & Tips

    Introduction to Frying Chicken in Olive Oil

    Are you pondering whether olive oil is a suitable choice for frying chicken? This article will delve into the perks and methods of using olive oil to fry chicken, transforming your culinary experience with healthier and tastier outcomes. We’ll explore the nuances of olive oil, from its smoke point to its flavor contributions, ensuring your fried chicken is not just cooked but exquisitely crafted.

    What is Olive Oil?

    Olive oil, a staple in kitchens worldwide, is renowned for its versatility and health benefits. Extracted from the fruit of olive trees, it comes in various grades, each suitable for different cooking methods. The most commonly used types in cooking are extra virgin olive oil (EVOO) and regular olive oil, known for their rich flavors and health-promoting properties.

    Historical Use of Olive Oil in Cooking

    Historically, olive oil has been a central element in Mediterranean cuisine, not just as a cooking oil but as a cultural emblem of health and wellness. Its use in cooking dates back thousands of years, signifying its enduring appeal and reliability.

    Overview of Frying Techniques

    Frying with olive oil is an art as much as it is a science. Understanding the right frying techniques can make all the difference in achieving perfectly crispy and golden chicken. Whether you’re shallow frying or deep frying, the type of olive oil you choose can impact both the taste and texture of the final dish.

    Stay tuned for the next sections where we will dive deeper into the specifics of frying with olive oil, including the best types to use and detailed methods to ensure your chicken is fried to perfection.

    Can You Fry Chicken in Olive Oil?

    Properties of Olive Oil

    Olive oil is praised for its high content of monounsaturated fats, making it one of the heart-healthier options for frying. The smoke point of olive oil, ranging from 390°F for regular olive oil to 470°F for extra virgin, ensures it can handle the moderate temperatures needed for frying chicken without burning. This aspect is crucial as it retains the oil’s nutritional value and flavor.

    Comparing Olive Oil with Other Fats for Frying

    It is true that not all frying oils are made equal. Olive oil stands out for its ability to enhance the flavor of foods without overpowering them. Compared to vegetable oil or butter, olive oil adds a subtle, earthy aroma to dishes, enriching the overall taste experience. Moreover, unlike other oils that can leave a greasy texture, olive oil ensures the chicken remains crispy on the outside and juicy on the inside.

    Stay tuned as we continue to uncover the health benefits of frying chicken in olive oil, further emphasizing why it’s a superior choice for your culinary needs.

    Benefits of Frying Chicken in Olive Oil

    can you fry chicken in olive oil?

    Nutritional Benefits

    Frying chicken in olive oil not only enhances its taste but also boosts its nutritional profile. Olive oil is loaded with antioxidants and healthy fats, which can help reduce bad cholesterol levels and increase good cholesterol. This makes it a heart-friendly option compared to other fats. It also contains anti-inflammatory properties, supporting overall health and well-being.

    Flavor and Texture Enhancements

    One of the key reasons chefs and home cooks alike favor olive oil for frying is its ability to impart a distinct richness and depth to food. It helps achieve a perfectly crispy crust while keeping the inside of the chicken moist and tender. This dual-texture phenomenon is a culinary delight, often hard to achieve with other oils.

    In the next section, we’ll explore the practical side of using olive oil in your kitchen, including step-by-step instructions on how to fry chicken to achieve that ideal crispiness and flavor. Stay tuned to learn more about mastering the art of frying with olive oil.

    How to Fry Chicken in Olive Oil

    Preparation of Chicken

    Before you start frying, it’s essential to properly prepare your chicken. Opt for uniform pieces to ensure even cooking. Marinating the chicken not only infuses it with flavors but also tenderizes it, enhancing the overall texture once fried. Dry the chicken thoroughly to avoid oil splatter and achieve a crisper surface when it hits the hot oil.

    Frying Techniques

    Shallow Frying

    Shallow frying in olive oil is a great way to use less oil while still obtaining a crispy and golden exterior. Fill your pan with enough oil to come halfway up the sides of the chicken pieces. This method allows the meat to cook evenly and gain a delicious crust.

    Deep Frying

    For those who prefer an even crispier texture, deep frying in olive oil is the way to go. Use a pot with high sides to prevent oil splatter and maintain a consistent temperature throughout the cooking process. The oil should be hot enough to sizzle without smoking, typically between 325°F and 365°F.

    Safety Tips and Techniques

    Always use a thermometer to check the oil’s temperature to avoid under or overheating. Gradually add the chicken to the oil to prevent drops in temperature and ensure it cooks evenly. Moreover, avoid crowding the pan to allow each piece to fry properly without sticking to others.

    By following these tips, you can master the art of frying chicken in olive oil, making it a healthier and tastier alternative to traditional frying methods. In the next section, we’ll discuss some common mistakes to avoid and offer expert tips to perfect your frying technique.

    Common Mistakes and Tips

    Avoiding Common Pitfalls

    Frying chicken might seem straightforward, but several common errors can compromise the dish’s quality. One frequent mistake is not heating the olive oil to the right temperature, leading to soggy or overly greasy chicken. Another error is overcrowding the pan, which results in uneven cooking and reduced crispiness.

    Expert Tips for Perfect Frying

    To elevate your fried chicken, consider these expert tips:

    • Use the Right Oil: Choose high-quality olive oil for its flavor stability and health benefits.
    • Temperature Control: Maintain a consistent oil temperature during frying to ensure perfect crispiness. A kitchen thermometer can be invaluable here.
    • Batch Frying: Fry in small batches to avoid temperature drops and ensure each piece cooks evenly.
    • Resting: Let the fried chicken rest on a rack rather than paper towels to prevent steam from making the crust soggy.

    By sidestepping these pitfalls and adhering to these tips, you’ll enhance your frying technique and enjoy delicious results every time.

    In our next section, we’ll address some frequently asked questions about frying chicken in olive oil, helping to clarify any doubts and ensure you’re equipped with all the information needed to succeed.

    Advanced Techniques and Variations

    In this additional section, we delve into advanced techniques and creative variations to enhance your olive oil frying adventures. These tips will help you refine your skills further and add exciting twists to your fried chicken recipes.

    Advanced Frying Techniques

    • Low and Slow Approach: To achieve an even more tender interior and a perfectly crispy exterior, try the low and slow frying method. Heat your olive oil to a lower temperature than usual and extend the frying time. This method allows the chicken to cook thoroughly without burning the crust.
    • Double Frying Method: For an extra crispy texture, consider double frying your chicken. Fry once at a lower temperature to cook through, then increase the heat and fry a second time to crisp up the exterior. This technique is popular in many Asian cuisines and works beautifully with olive oil.

    Creative Variations

    • Seasoned Flour Mixes: Experiment with different seasoned flour mixes for dredging your chicken. Incorporate herbs like rosemary or thyme, spices such as paprika and garlic powder, or even a touch of parmesan to create a unique flavor profile.
    • Marinades and Brines: Enhance the juiciness and flavor of your chicken by marinating or brining it before frying. Use olive oil-based marinades with lemon, herbs, and spices, or create a simple brine with water, salt, and seasonings.
    • Global Flavors: Incorporate flavors from around the world into your fried chicken. Add a Mediterranean twist with lemon zest and oregano, go for a Middle Eastern flavor with cumin and coriander, or spice it up with a Latin American-inspired chili and lime rub.

    By mastering these advanced techniques and playing with creative variations, you can take your fried chicken to the next level, making each meal a new discovery in flavor and texture. Enjoy the process and the delicious outcomes!

    Pairing and Serving Suggestions

    can you fry chicken in olive oil?

    In this section, we explore various ways to complement your fried chicken made with olive oil, enhancing your dining experience with perfect pairings and creative serving ideas.

    Side Dishes to Complement Fried Chicken

    • Fresh Salads: Balance the richness of fried chicken with a light, vibrant salad. A simple green salad or a Mediterranean-style salad with olives, feta, and tomatoes can refresh the palate between bites.
    • Roasted Vegetables: Pair your chicken with vegetables roasted in olive oil. Options like asparagus, bell peppers, or sweet potatoes offer a healthy, flavorful complement.
    • Rustic Breads: Serve your chicken with slices of crusty bread or focaccia to soak up the delicious olive oil-infused juices.

    Creative Sauces and Dips

    • Aioli Variations: Whip up a garlic aioli or an herbed aioli using olive oil as the base. This creamy sauce pairs wonderfully with crispy chicken.
    • Homemade Salsas: Create a range of salsas, from a classic tomato salsa to a bold mango salsa, to add a fresh, zesty twist to your fried chicken.
    • Spicy Dips: Offer a spicy dip, like a sriracha mayo or a hot honey glaze, for those who enjoy a kick of heat with their chicken.

    Serving Tips

    • Plating Techniques: Present your fried chicken on a wooden platter with lemon wedges and fresh herbs for a rustic, appetizing look.
    • Family-Style Serving: Encourage family or group dining by serving the fried chicken in a communal setting. Place all the side dishes, sauces, and the chicken on the table, allowing everyone to build their own plate according to their taste preferences.
    • Seasonal Themes: Adapt your serving suggestions based on the season. Include lighter sides and dips in the summer and warmer, more substantial accompaniments during colder months.

    By thoughtfully pairing and serving your fried chicken fried in olive oil, you elevate the meal from simple to spectacular, ensuring every bite is as enjoyable as it is memorable. Experiment with these suggestions to find your favorite combinations!

    FAQs

    Can I reuse olive oil after frying?

    Yes, you can reuse olive oil after frying, but it’s important to strain it to remove any food particles that could spoil its flavor or cause it to burn in future uses. However, be cautious not to reuse oil too many times as it can degrade and become unhealthy.

    Is frying with olive oil healthy?

    Frying with olive oil is considered healthier than frying with many other oils due to its high content of monounsaturated fats and antioxidants. These compounds help protect the heart and reduce inflammation. While frying is still a higher-calorie cooking method, using olive oil can offer health benefits in comparison to other fats.

    What is the best olive oil for frying?

    The best olive oil for frying is typically a pure or light olive oil due to its higher smoke point, making it more stable at the heat required for frying. Extra virgin olive oil can also be used, especially for dishes where a robust flavor is desired.

    In our final section, we will wrap up the discussion, summarizing the benefits of using olive oil for frying chicken and encouraging you to try this method in your own kitchen for healthier and tastier results.

    Conclusion

    Frying chicken in olive oil not only satisfies your taste buds but also offers a host of health benefits, making it a superior choice for those seeking a healthier alternative to traditional frying fats. With its ability to enhance the flavor while maintaining a perfect texture, olive oil proves to be an indispensable ingredient in the kitchen.

    Whether you’re a seasoned chef or a home cooking enthusiast, incorporating olive oil into your frying techniques can elevate your dishes to new culinary heights. Remember the tips and techniques discussed throughout this guide, and don’t hesitate to experiment with different types of olive oil to find the one that best suits your taste and cooking style.

    We encourage you to embrace the art of frying with olive oil and discover how this simple change can make a significant impact on your cooking. So why not give it a try? Your kitchen adventures with olive oil are sure to yield delicious and healthful rewards.